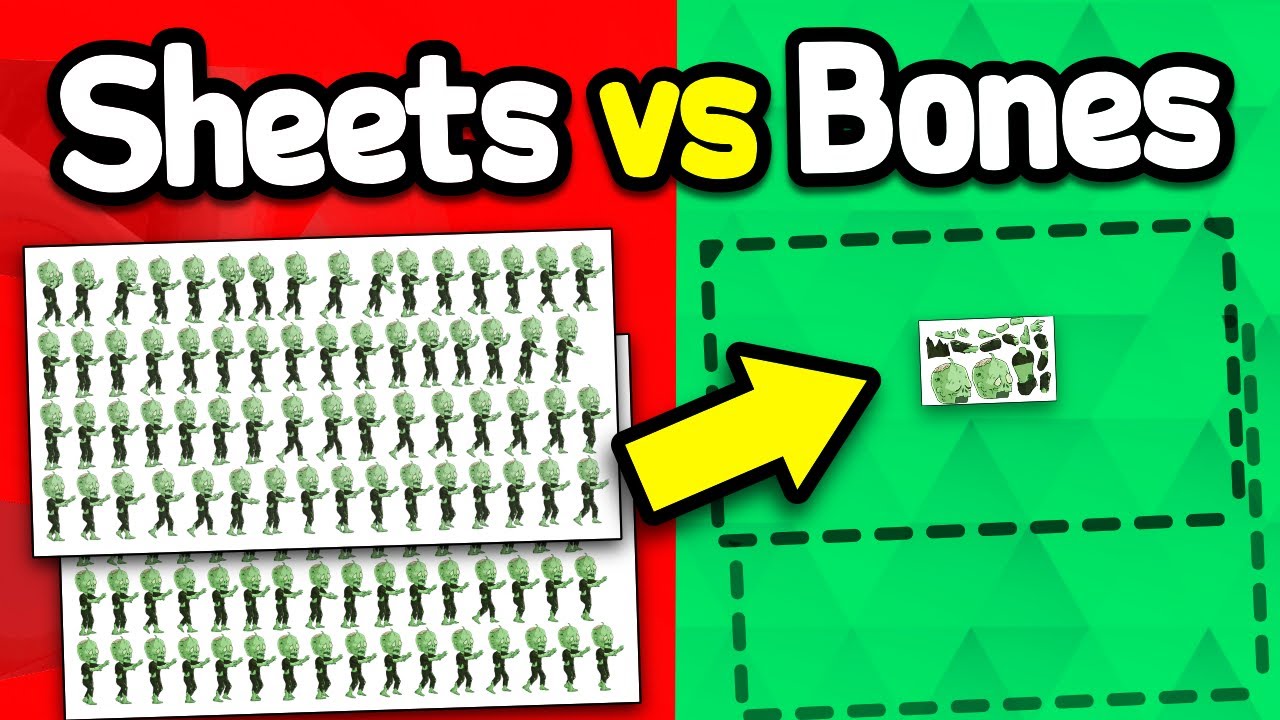
in the previous lessons we learned how to animate a simple character this technique is great for simple animations but it also has drawbacks it's not very comfortable to control the character's pose every time we have to select a particular part and only then can it be moved moreover we have to think about creating correct group structure if our character is just a little bit more complex then we'll have to create many nesting groups and it gets hard to manipulate them for animations of characters and other complex structures you can use bones with bones it's very
easy to create a skeleton like this and control a character now I'm going to show you how to create such a structure from scratch open the character 2 folder here we have an image of a whole character and all its parts separated first let's import the whole image that will be our reference next add the separate parts now group everything together and scale to fit the working area now it's time to clean up the mess let's separate all the parts for our convenience let's make the image of the whole character semi-transparent layer transparency is defined
by the amount parameter let's set its value to 0.5 now let's put all the parts into place here goes the body the head next to legs the hip the thigh and the foot the second leg appeared to be above the body but it's easy to fix just send it to the back all the remaining parts are assembled in the same way it's kind of fun like a puzzle and don't forget to save your work regularly done we don't need the reference layer anymore so it's better to hide it now we can add a skeleton layer
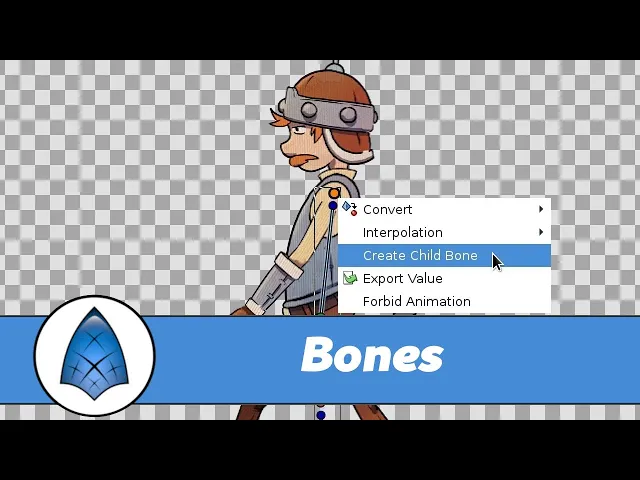
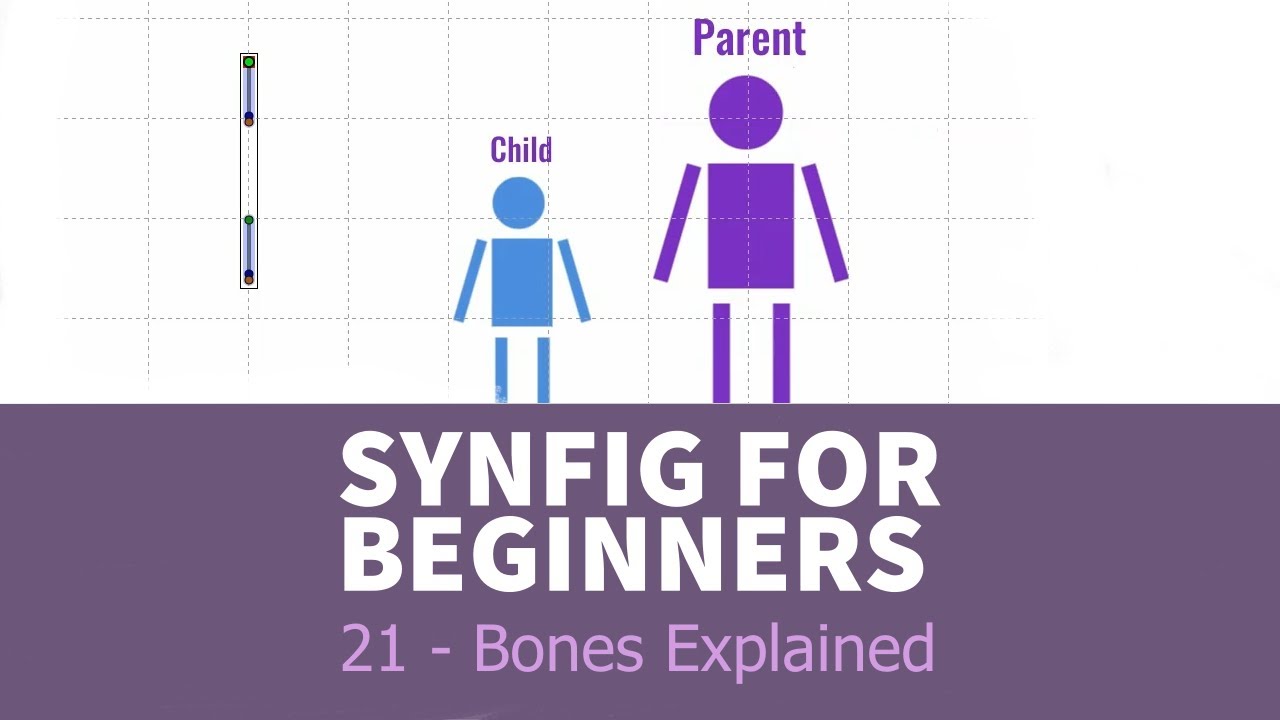
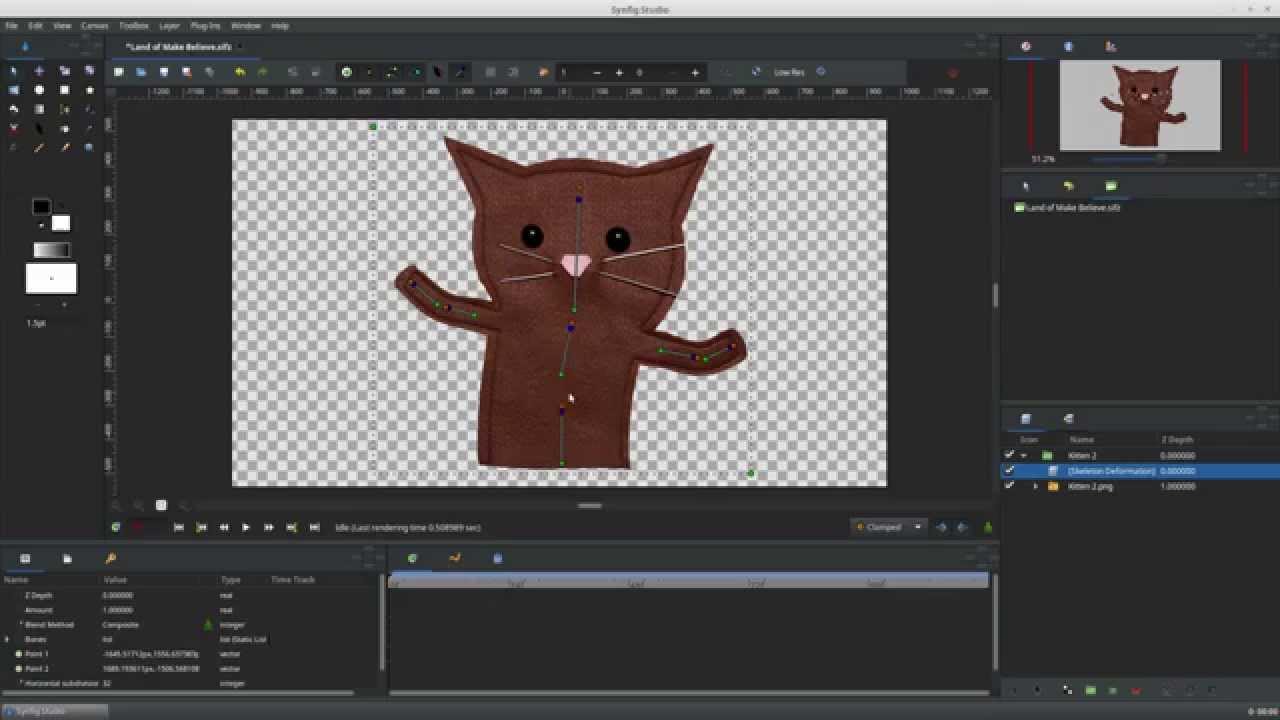
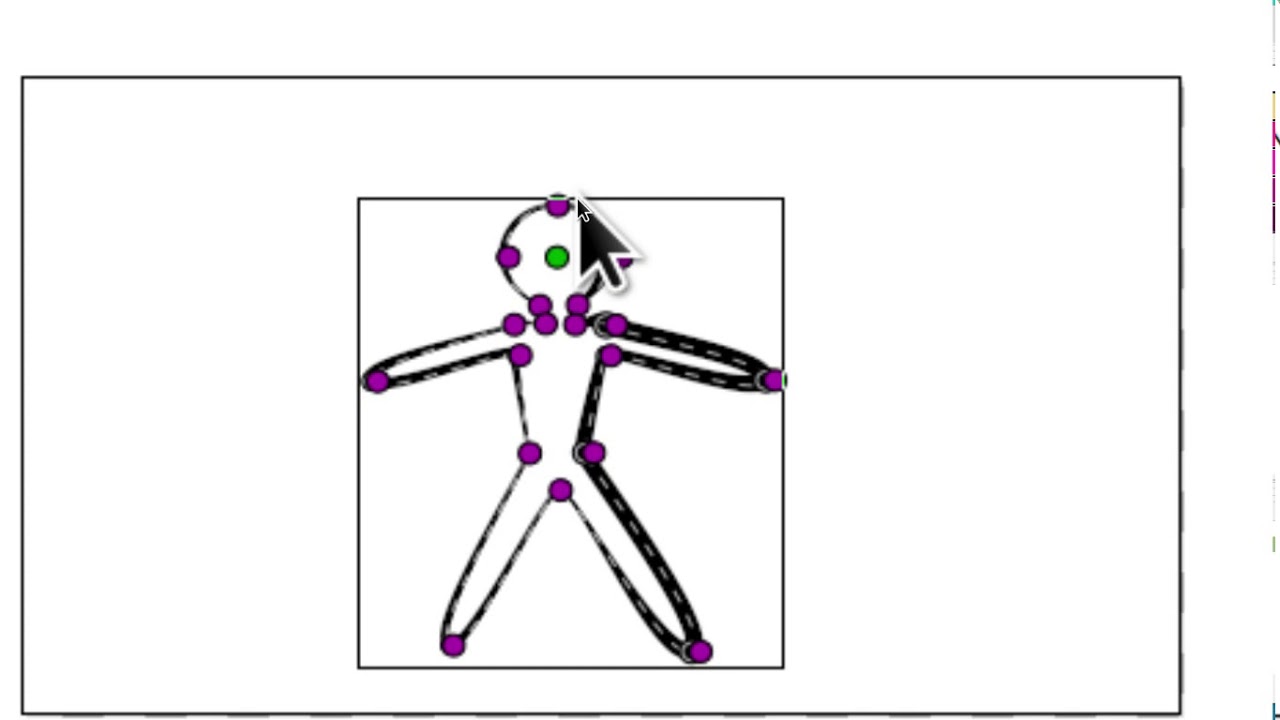
let's put it inside of the group above all the image layers expand the group select its first layer right click it and choose new layer other skeleton so we have a skeleton layer created with one bone here it is the Green Point is the bone origin the brown one determines its angle and length let's create one more bone right click at any point of the existing bone and choose create child bone and there the second bone appears it's subordinate to the first bone look when I move the first one the second one moves as well
but the second bone can move on its own that's how the bone hierarchy works so let's put the first bone into the right location it will be responsible for the position of the whole character the second bone is for the body we put it here since arms and head should be subordinate to the body we'll create their bones from the body bone right click it and choose create child bone now we create a bone for the lower part of the arm and from that bone create a child bone for the hand the legs should stay
still if the body bends so make them belong to the first bone next create a bone for the ankle and for the foot in the same way create bones of the second leg now the skeleton is ready although just now it doesn't affect any character part and it moves on its own what we need now is to link all the parts to the skeleton to connect the body select both the body layer and the skeleton click the body press Ctrl and click the skeleton in the layers list next left-click the green point of the body
layer that way we indicate what exactly should be connected then right click at any handle of the bone and choose link to bone done the body is linked now let's connect all the remaining parts in the same way if you have linked some part with the wrong bone just link it to another one it will reconnect automatically the character is ready let's try to move him note that when I'm dragging the tip of a bone the bone is automatically stretching the image that helps a lot in most cases but sometimes the effect is not desirable
the head is an example we might want to bend it but not to stretch no problem for this very case each bone has a blue point here it allows us to change a bone angle without affecting its length like this if a layer is linked to a bone that doesn't mean it should be controlled using the bone only nothing of the kind we can still move it by itself the only difference is that now it moves relatively to the bone that has been linked to so transformations of the bone and layer are composed together finally
one more important remark all parts of our character are located inside the group we scaled down in the beginning and the skeleton layer was placed inside of this group it's crucial to do this since both the skeleton and the parts we are linking to it must share the same coordinate system if we create a skeleton outside the group the bones will have different coordinates compared to the objects you might not notice this while linking but when you try to change a bone position nasty things are sure to happen let's save and close this file and
I'll show you an example of this let's assemble a part of our character just a body head and arm suppose we decided to assemble the arm like this placed it here then grouped moved and also turned as you understand all the arm parts would be in the other coordinate system because we have transformed their parent group let's try to attach everything to a skeleton the body head and arm all connected now let's try to change the pose as you can see the head and body are fine but the arms just go wild that's because of
the transformed group if the group hadn't been transformed and everything would be fine it wouldn't cause any troubles to fix the issue we can get parts out of the group and realign them to the skeleton but now we'll go another way let's suppose we don't need our character to bend his wrist and elbow joints so one bone for the whole arm would be enough when we can connect the whole group to it yes you've got it right the groups also could be connected to a skeleton in the same way as image layers but I guess
you already figured out that an image layer actually is also a group or to be more precise a switch group and the real image layer is located inside but I digress first we have to disconnect the parts inside of this group from the skeleton select the part you need find the transformation parameter right click it and choose disconnect yes this is the same way as we deleted parameter animation don't be surprised now let's link the group done well that's it in the next lesson we'll try to create a walk cycle for our character foreign