hello everyone welcome back on today's episode we're going to be working on our comments so on the previous episode we created this show post page and it's working just fine so the only thing remaining for us to do on the user side is our comments so let's get started now this is going to be relatively easy somewhat similar to our like button so if you need to create we need to create a library component for managing this because I do not want the page to reload when we post a new comment I also would like
to have some sort of pagination because obviously we are going to have quite a bit of a large number of comments on certain posts so it's going to be quite useful to use liver over here so let's go ahead and get started so the first step is I'm actually going to go ahead and create our library component first so let's go ahead and do that let's do PHP arts and Live Wire make and you can name this whatever you guys like now obviously in this application we're only going to have three Library components that's this
is basically the last Library component we're making so I'm not really worried about the names organizing these too much but as your projects get larger you may need to spend more time organizing these into kind of separate domains depending on where they belong but in this case all of them are going to be inside our default a live wire folder but for me generally I divide these into separate folders depending on what they do on larger scale applications so in this case I'm just going to go ahead and name it a post comments hit enter
so this will go ahead and create our PHP and blade file next up we need to actually move our blade content over to the component so let's go ahead and do that I'm going to open up our post show page all right so the HTML for this specific page and our comments should be somewhere at the bottom let's see if we can find it it's over here actually is called a comments box so I'll cut the entire thing and I'll move it inside I will post comments now do make sure that you always have a
one root element on your blade components on your library components in this case so for now we don't need to worry about it already has one but if it didn't always make sure you wrap it around by one kind of parent div so now that we have done this I'll save this let's go back and now we can go ahead and say Live Wire post comments and now that we have this let's do reload hopefully everything looks exactly identical so now we have our library components next step is before we actually Implement anything I think
it's best we actually go ahead and create our database setup okay so right now what we need to do is we basically need to create a comments table and then this comments table is basically going to store all our user comments and it has a relationship with our users as well as ever post model so let's go ahead and create our comment model so we can go ahead and say PHP artisan make model and I'm going to name it comment now we could also go for example name it post comment but I think comment is
more than enough and probably you want to use some sort of polymorphic relationship if you on a larger scale application and then let's do Dash M as well so we get the migrations as well for this all right let's hit enter this will go ahead and create both our model as well as our migrations for us so this migration is going to be super simple so let's go ahead and do it this is going to be exactly kind of similar to ever like button that we created so we are going to have a 4N ID
for our user so which is going to be the author or person posting this comment so this is going to be the first one next up we are going to have in order for an ID obviously for the post that this comment belongs to and then last but not least I'll go ahead and use a string maybe you can use a text as well I don't want the comments to be too long so I'll limit it to basically maybe 200 characters something like that so in this case you can name this content you can name
it a comment I think people use different names I'm gonna go ahead and use comment over here and that's all we need if you guys would like you can go ahead and maybe add some extra columns here but I think that's the bare minimum we need and should be more than enough so now that we have done this I'll save this and let's migrate our database by typing in PHP Artisan migrate and we are now good to go so let me close this extra file that I created but now that we have our migration we
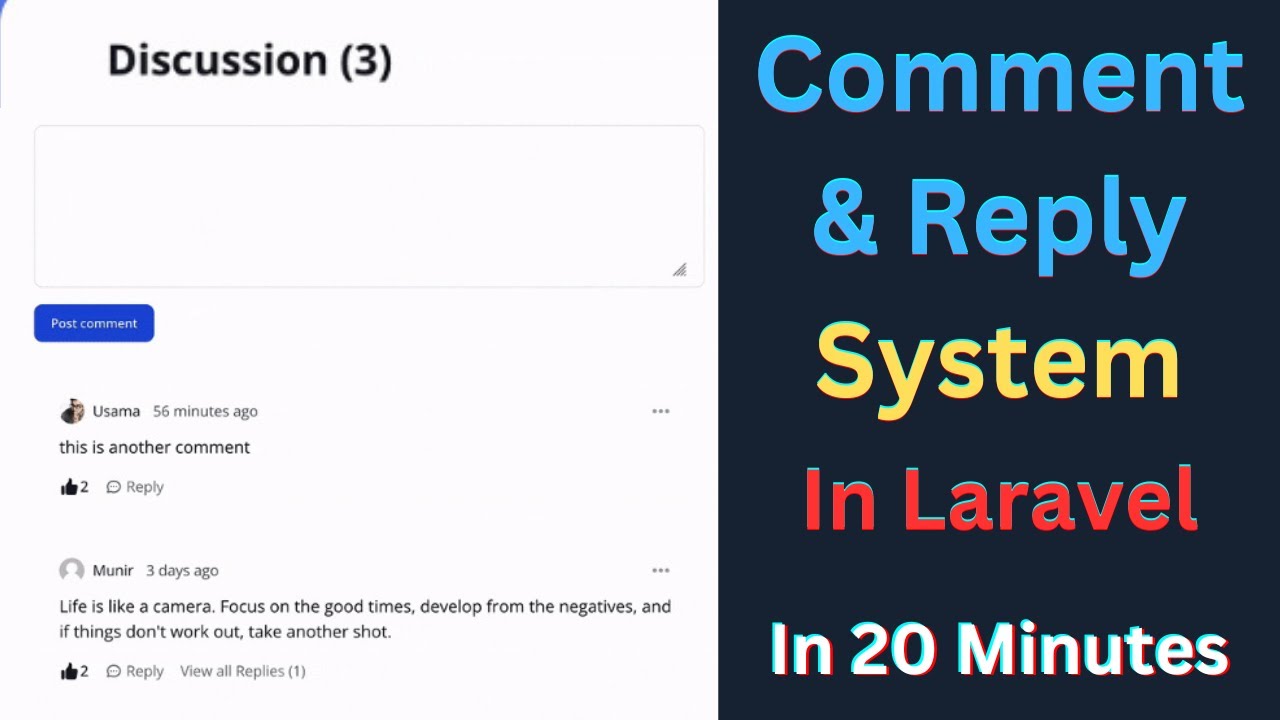
can actually go ahead and start implementing this comments box or comments so let's go ahead and take a look at our blade file I'm going to actually close our show post page so first thing we have is if it guys take a look over here we have some comments and sections so these are for kind of the edge cases so the first one is when we are not logged in we need to go ahead and show this login to post comments and then over here we have no comments posted so let's go ahead and first
actually get these done before we actually Implement anything so the first one is we only show this kind of a text box I guess text input text area as well as the button when we are logged in so in this case I'm not logged in so we shouldn't actually be seeing it we should see this link over here okay so let's go ahead we can go ahead and do a simple kind of a use the art directive over here and then you can also use guess but in this case I'm just going to go ahead
and say else you can also go ahead and do that with alt directive so if you're logged in go ahead and show our text area at the button else show this you know basically log into post comments and this seems to be an HTML comment so let me uncomment it all right so this is going to be the first one so let's go back to a quick reload and as you guys can see it is now working so in this case when we are not logged in this should show up and if we click on
it it should obviously send us to the login page so let's go ahead and also set the route over here so it's going to be route login and of course as always we need to go ahead and add in voyeur navigate over here all right very nice although now that I'm thinking about it we probably wanna later on if we have the time refactor to start the some sort of like Universal link because it's kind of getting annoying having to add where you navigate every every time and you may forget to add it sometimes so
this is something new with Library 3 obviously so I might do that actually before we end the course create kind of a link a blade component so we don't have to do it every single time all right so now that I think we have done this let's go ahead and open up our PHP part so first thing we need to do guys is similar to have a like button we need to know which post we are commenting on so we need to somewhat store that on our component so for that we can go ahead and
create or use a public property of type post so we're going to type Hint it so you know we don't accidentally add some random type and then well obviously I'm going to name it post so this is very similar to basically what we did for our like button right so on the like button we also had the exact same thing so if we are basically storing the post VR commenting on and then once we have done that we obviously need to load all the comments for that specific post now there are a couple of ways
you can do this so obviously one way is you can pass it to your through your render method or alternatively we can use a computed property now since I have already gone ahead and used uh computed properties on our post list I'm actually going to go ahead and use the exact same method I like them quite a bit so let's go ahead and do it I'm going to come over here and say a public function comments and as always for computer properties we need to go ahead and add this computed annotation so right over here
that's all we have to do and then we can go ahead and say this dot post so we get our post and then we're gonna get all the comments okay now we don't obviously have this Commerce relationship yet we'll go ahead and add that I'm also going to go ahead and add this question mark in case ever post is null for some reason uh it just basically returns note right so let's go ahead and actually Define our relationships on our post model so I'm going to go ahead open up our posts scroll a little bit
down this is where we are defining all our relationships so I'm going to go ahead and put it under categories over here so it's going to be super simple actually somewhat similar to the ones we already have so I'm going to say public function comments so basically each post has many comments right so this is going to be exactly the same way we're going to say return this dot has Mini comment class and that's all we have to do so obviously our table name we use Dash M so a lot of will generated the table
name so obviously it's going to be following the larva convention we don't need to pass in anything extra so this should be enough and while we're at it let's go ahead and do the exact same thing on our user model as well in case we need to get all the comments for a specific user so I'll just copy this exact same thing and move it over here so we also have access to the comments on our user and last but not least since we're adding all the relationships let's go ahead and also add it on
our comment as well so on our comment a model we need two relationships one for our user and then one for the post and this one is going to be this dot belongs to basically comment belongs to the user and then we need the exact same thing for our post as well all right and that's basically all our relationships defined so we don't need to worry about it anymore so in this case basically we are going to get our post then get all the relationships on it and then once we have it I'm actually not
going to get all the posts I'm going to get the post sorry the comments relationship and then in this case I'm going to order them by basically the creation date so I'm going to say latest and then also go ahead and paginate them so let's say five items per page so this is very similar to what we did on our post list if you guys remember we do the kind of a similar thing we got all the posts and then we you know paginated them and we also ordered them so I'm doing the exact same
thing for the comments obviously I don't want to show too many comments on one page so now that we have this we can go ahead and display that now we won't see anything at the moment because we don't have any comments but it's okay so over here if you guys take a look at the HTML that we have there is actually a div with the class of comments so this is going to be a singular comment so we can have a four else Loop over here for this Dot comments so for computer properties we have
to add this beforehand and then here I'm gonna say a comment so and then over here our empty State basically when we don't have any items so this is basically four else it's an alternative to four each where it gives you an empty state for when you don't have any elements in those case we can go ahead and show this one which is no comments and this one is also an HTML comment so I should go ahead and do this all right so basically if you have elements we'll show all the comments else we use
no comments posted all right now this won't do anything let's see all right so now that we are doing this it's giving us an error message now the reason this is happening is telling us post is not actually defined right and that does make sense we haven't actually passed in this post 12 comments box so let's open up our show post page over here when we are basically including our library component we also need to go ahead and pass the post itself right now we did this exact same thing for our like button if you
guys remember over here I'm actually going to do the exact same thing right so we're going to pass in the post as well as give it a unique key just to be safe so let's go ahead and do it and the key is going to be obviously actually I like the key to be a little bit different in this case these two are going to have the exact same key so what I'm going to do is I'm going to go ahead and add a little prefix for them so in this case I'm going to say
like button and Then followed by the post ID and for our comments I'll do the exact same thing but I'm going to say comments dot followed by the post ID now the reason I'm adding this single quote guys is when you add this double colon over here whatever you have inside your double uh colons are so that our quotes are interpreted as PHP code right so I can't just go ahead and say comment start you know post ID this is not this is seen as PHP code so this isn't a valid syntax so I'm gonna
I need to go ahead and add these single quotes same forever like button so now that we have this should hopefully fix the issue as you can see the error is gone now let's go ahead and log in while we're at it so I'm going to click on login and as you can see things are working so now next up we need to go ahead and actually and as you can see it's telling us no comments posted so next up we need to go ahead and implement this discussions page so let's go ahead and do
that all right so this section is going to be relatively easy to make so let's go ahead and do it so first thing first we need to find where you're actually displaying it so it's going to be over here we have this text area and our button so for this one we need some sort of public property to store the value of this text area so for this one I'm going to go ahead and create a public property I'm going to say public string and I'm going to name it comment so let's go ahead and
actually model this so let's do wire model comment so that's the first step and then next up we need to also do add a click action over here on our button so in this case I'm going to say here wire click post comment we can name this method whatever you guys like I'm just going to go with post comments so it's very descriptive easy to understand especially for the video so now we can go ahead we should go ahead and actually create this on our component so let's do public function post comment and now we
have everything done so just to make sure it is working I'm just going to go ahead and do DD High to double check everything so let's go back do a quick reload I'll type something in and as you can see we are receiving the event so and the process is going to be relatively simple first we need to actually validate what the user has typed in so let's go ahead and add our validation rules I'm going to use The annotation syntax whatever validation rule so we need to go ahead and add an annotation php8 same
as computed that we used here use the role attribute I'm actually not sure if these are called attributes or annotations what's the exact term is or maybe they're called both I'm not sure but I've been referring to them as annotations for like a couple of years now I'm not sure so basically over here we are going to first make sure it is required obviously should all this be required then I'll set it to be minimum of three characters I think is okay and then a maximum of 200 characters I don't want it to be overly
uh long and I think that's all we need Okay so let's go ahead and validate this so I'm going to say this dot validate now because we don't have a validation rule on our post obviously Library will not be validating it so we don't need to worry about you know live we're also trying to validate the post but if you happen to have some other properties Maybe I'm just making something up maybe uh feedback okay if we do validate it will also go ahead and also perform the validation on feedback right but in this case
this action only needs comments so in those cases you can go ahead and do validate only comment okay so this is something to be aware of if your component performs multiple actions so in our case you don't need to worry about it but I'm just going to go ahead and add this here in case later on we want to kind of expand its functionality so now that we have performed the validation we can go ahead Also let's do a disk start reset comment to also empty the value once we have posted a comment so in
this case we can go ahead and get the logged in user or we can maybe do it on the post so let's do Post comments so we are getting the Commerce relationship then call the create method on it and then over here we can just do Mass assignment basically pass in an array so on our comment model we need to pass in the comment itself which is going to be this dot comment and then we also need to pass in the user ID right so who is the author which in this case is going to
be we're going to say art dot ID all right so this is an easy way of getting the login user's ID using the author so now that we have this also should be this dot post so I believe that's all we have to do to actually create a new comment now this will give us an error in a second I'll fix that because of the fillable but let's go ahead and see if it's working or not so I'll type something in click post and yeah so it's basically telling us it is getting to over here
but it's telling us Mass assignment is not allowed so let's go ahead and open up our comment model so basically in this case there are a couple of ways of fixing it obviously we could go ahead and do kind of guarded equals to an empty array that's the quick and easiest way of doing it but since we have already done added fillable for all our models I like to be reasonably consistent over it obviously for some models if you don't care or it's not very critical you can go ahead and set guard to false but
I'll still go ahead and set the fillable it's just like super easy to do so we are going to have user ID post ID as well as comment okay that's all we have to do so let's go ahead and try again I'll click on post and as you can see it created a comment we are seeing the the comment show over here as well as it cleared the input box so we have also implemented the creation Now so now that we have we are showing it we are showing some random data let's go ahead and
fix this one over here we need to show the actual common content as well as the user details so over here we need to have a comment comment for the date we can do the exact same thing we did for our post so I'm gonna use a div for humans so let's do comment dot created at diff or human so this is a carbon method for getting the difference basically the days since this created at and then it will kind of make it be humanized okay so like 50 seconds ago that's the format it uses
now for every author we can actually go ahead and reuse our post author we created right so let's go ahead and do it so I'll delete this and do X post dot author right this is a library blade component we created on the previous episode over here we can go ahead and actually reuse this instead of adding it again so in this case instead of post author it is going to be comment user right so let's do a quick reload see what the issue is seems to be working as you guys can see now for
the size I think instead of MD I'm going to use a small and yeah now I think it looks pretty good let's go ahead and add a few more comments let's try one more time so it seems to be working quite well I'm trying to get it to the pagination limit so okay so now it's limited to five and the reason we're not seeing more is because we have this paginate on these comments over here right so we need to also add our pagination links I'll do it under this user comments section so let's go
ahead and create a new div and to show the pagination guys we already done this a couple of times so I'll just say comment insert this dot comments and then links okay so it's going to be exact same as how we showed the pagination links for our post link and also I'm going to go ahead and add some margin of two margin y of two so it's basically like margin top and bottom of two and if we do a Reload as you guys can see we can't see our pagination link now working now but I'm
clicking on it it's actually reloading the page right we don't want that so in order to make this work we need to go ahead and add on our post comments with pagination now previously used to give you an error I think on the latest version of Y War 3 it's no longer giving an error so that's nice what you may forget to actually add the trade so let's do a use a vit pagination and let's try again and now it is actually changing the page without actually reloading very nice I think we have done the
main core implementation now you could also go ahead and add a delete button if you guys would like that's also nice to have so it's up to you I'll leave it to you guys go ahead and Implement that now one last thing I do like to do before we actually end this is I do want to make sure the user is logged in before they post a comment just to be safe so let's go ahead and add a quick check here I'm just going to say if Alt guest then go ahead and just return the
user or we can maybe send them to the login page it's up to you in this case I'm just going to go ahead and return now once we have later on we'll Implement our rules and permissions I'll show you guys how we can change this a little bit more but I think for now this gets the job done so that's it guys for our comments box now there are some other things you can do you can also go ahead and remove this render method so in library 3 if you're using just a default convention you
can actually remove this so it makes your files a little bit smaller and if I reload it still works so I'll go ahead you could also go ahead and do that I prefer to have it here just to avoid any confusion for new people to Livewire I feel like they may get a little bit confused on okay where is this view file so I'll still keep it on the videos so that's it guys hope you enjoyed this episode if you have any questions you can ask me in the comment section below as always make sure
you like the video and subscribe to the channel if you're new and I see you guys on the next episode have a great day bye