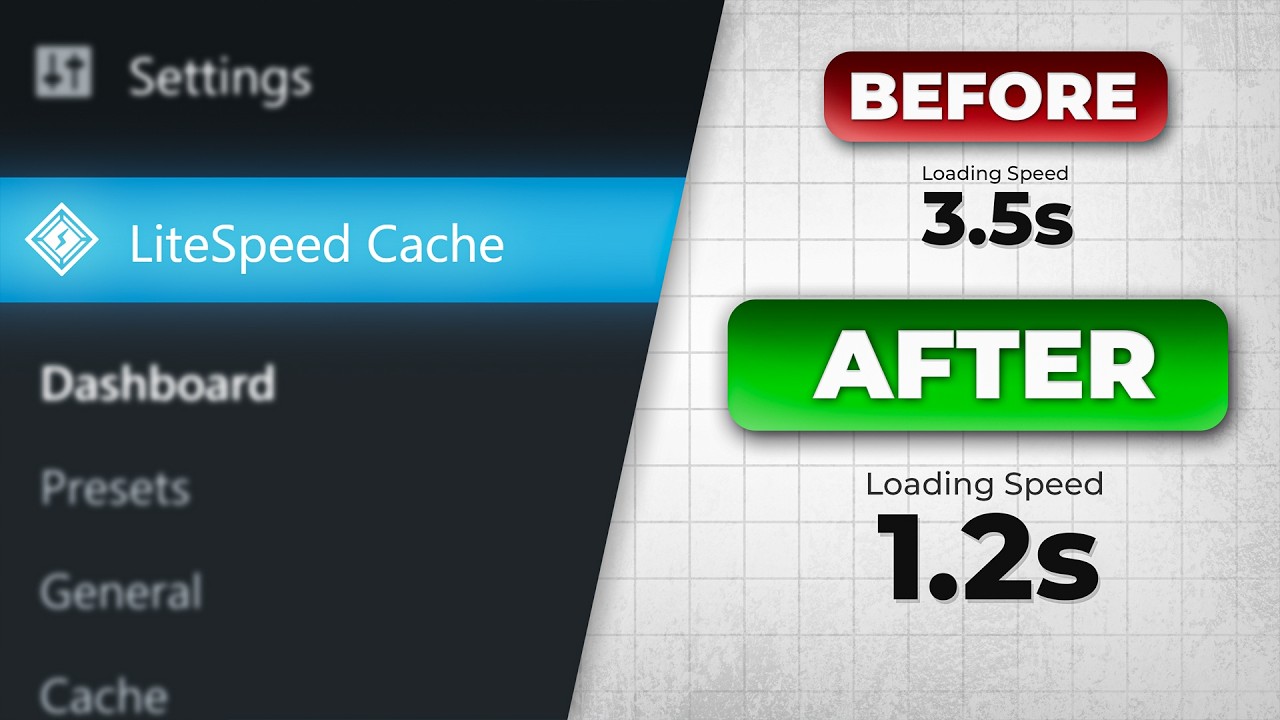
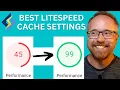
In this video, I'm going to cover the best settings for light-speed cash plug-in. It's going to speed up your website significantly if you follow these steps. And this video is in-depth.
It's long. It's broken up into chapters and everything's done step-by-step. So you're going to want to come back to this video whenever you setup this plug-in because it's got everything you need.
Hi, my name is Bjorn from WPLearningLab, now let's get started. We'll test the page speed of our site right now. So let's copy the URL paste it into Google PageSpeed Insights.
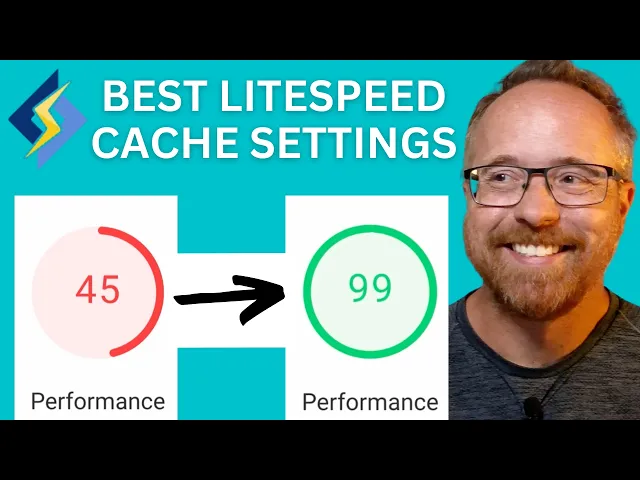
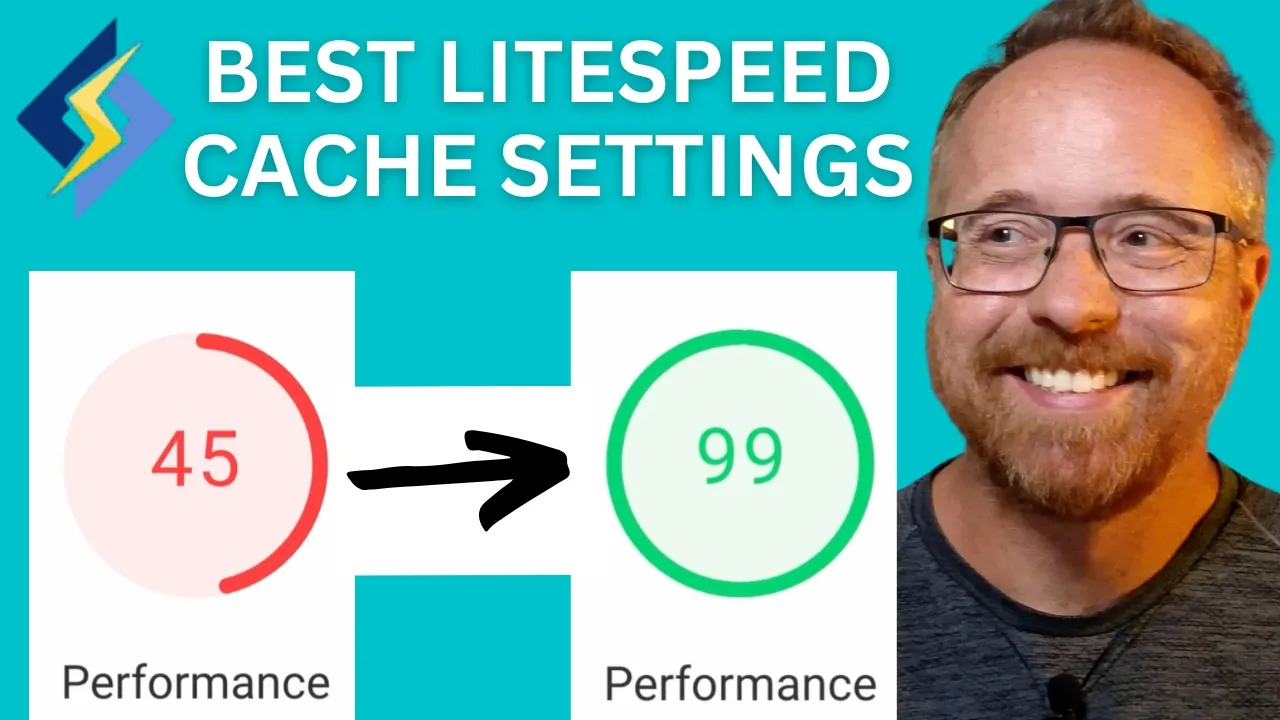
Hit go. This will provide us a baseline so we can see how the work we've done through out this video has improved our page speed. So on mobile for performance we have a 45 and a desktop we have a 90.
That's pretty solid the 90. But the mobile, not so solid even though it's better than some sites I've seen out of the box. But we're going to see if we can improve this even further with Lightspeed Cache.
So we're going to go into the dashboard of our website. Then we'll go to plugins and Add New Plugin. Look up Lite Speed cache.
This is the one we want right over here. It's got five million plus active installs. Looks like pretty much five out of five stars and it was updated 23 hours ago, compatible with the current version.
You always want to check these stats down here because you want to make sure the plugin that you're installing is not going to break your website. And you might also want to back up your website before you install it. If you need help backing up your site and then restoring it if you need to.
There's a link in the description to help you do that and I'll also put it in the card up of above. Click on "Install Now" when you're ready and then "Activate". And now we have under settings.
We have a LightSpeed Cache option right here and we also have a LightSpeed Cache option in the main menu area. This one is where you're going to set up all the settings. This one is just a smaller subset of the settings.
I don't exactly know why they have these two different areas. We're just going to work in the main one down here. So in the dashboard, it shows us some stats.
Currently, there's none because we just installed it. And something that keep in mind is Lite Speed Cache is made to work best with LiteSpeed servers. Hostinger is a well-known host that has light speed servers.
And if you have a Hostinger account and you use LightSpeed on your Hostinger account, your website will be super super fast. If you're not using a Hostinger account or a LiteSpeed server and you're using Apache server or an NGINX server, it still works. And you can still get really good results with LiteSpeed cache.
That's why I'm making this video. So you can use it on pretty much any WordPress setup that you have. So the first thing we're going to do is just check out what we're working on.
So we have all these areas that we can go through on the left-hand side here. We're going to go through all of them in this video. So we can see how they all work and what the best settings are for your website.
Let's click on Presets. We're going to go one by one alphabetical order, not alphabetical, chronological, uhh table of contents order, top to bottom. Let's put it that way, top to bottom.
And here you can actually skip this whole video if you just click one of these buttons. For the essentials presets, basic advanced, aggressive, or extreme. Just go ping right on this button right here.
It does all the presets for you. Go out to the front and your website. see if it's broken, if it's not broken, you're good to go.
So you could just skip this whole video, just by doing that if you want. But we're going to go through a lot of the settings because, if you just click on Extreme and it breaks your website, you're not going to know what broke your website. Ideally, you would go to these settings and as you can see, you can turn them on and off just like that, super easily.
And when you do that, you should, ideally, turn it on, come down here. "Save Changes" Go to the front of your website, see how it looks. You can also go to here in "Purge All".
Purge is everything you've done so far and it will all the optimizations that have happened so far. So it reloads the site from not the cache, but from the server, and you can see if something breaks. And that's what you want to do, ideally.
I'm not going to do that in this video because it's going to slow us down like crazy, but you're only setting us up once. So it's best to take the time to turn something on, save it, go see what happens. Turn the next thing on, save it, go see what happens.
What you could also do instead of going one by one is just go through, turn everything on on the page or we're going to turn on, save it, and then go see if something breaks. If nothing is broken, move on to the next section. If something breaks then you have to go back and one by one see what broke and keep the thing that broke your site off.
Simple as that. So in here, "Update Automatically". I usually turn this off because I don't like automatic updates.
If you recall recently, the Crowd Strike incident, I'm pretty sure that was an automatic update that just got pushed out to everybody and it took down the whole planet's internet. Or not the whole planet, but a huge chunk of the planet's internet and systems running on Windows and Crowd Strike. So I don't like automatic updates.
How long is it going to be until there's some update pushed by a super popular plug-in like SEO-Yoast and it breaks everything. It breaks every website that auto updates and I just prefer not to. It takes a bit more time for me to go in and update things.
I use MainWP to manage all my sites, which is way easier. But there's other options too, like there's WP Remote as well that helps you manage websites. I just prefer not to do the automatic updates.
So I'm going to keep that off, it's up to you. We need to click on "Request Domain Key" right here. This will get us a Domain Key.
Waiting for approval. With this Domain Key , we can set up our Quic Cloud account, which is going to help us get the most out of the Lite Speed plugin and the Quic Cloud account is also free. Here it says request submitted.
Please wait. Then refresh the page to see approval notification. Let's just refresh the page.
31 seconds ago is still don't have the key. This is taking forever. It's not that bad actually.
36 seconds, 43 seconds, 48 seconds, 56 seconds,1 minute, 4 seconds. 1 minute 14 seconds, 1 minute 24 seconds. Why is this taking so long?
1 minute, 34 seconds. And we got it. Key is in there.
So that super. Now we can click on this button right here: "Link to Quic Cloud". If you want to check out Quic Cloud and get more information, click this link right here: "Benefits of linking to a Quic Cloud account and it'll go over all the benefits.
In fact, let's do that right now. So it took us to an FAQ, I was hoping for just the list of benefits point form. Looks like we get a CDN.
It's really hard to find the benefits here. Caching. CDN.
That's a good benefit. What's it say about LiteSpeed Cache here. The crawler included in LiteSpeed Cache will populate cache of the origin server bladdy bladdy bladdy blah.
Not the best benefit list here. Anti-DDOS features. That's nice.
We'll be using the free plan. with unlimited bandwidth. That's pretty solid.
Okay, so that feature list wasn't great. Either way, we're going to click on link to Quic Cloud or Quic. cloud to link our account and it's a free account.
And you don't have to do this. This is optional, but it's going to help your site go faster. So, it's up to you.
Email address and password is all we need. Then we register. And then we got an email with an activation link.
This is the email right here. Click on activate count and Congrats! Your account has been activated!
Let's go to the dashboard. See what that's about. It just shows which domains have been activated.
It'll show CDN usage. I assume that'll be a gigabyte value or megabyte value. Image optimization, Page optimization, LQIPs and the date we added it.
That's about it. DNS Zones, not much going on there. All right.
Let's close that and then go back to our website and save these changes and refresh. Because we should be linked. I think how do we link them?
Still has our warnings to link. If I click on link to Quic Cloud, it give this way more information than a moment ago. But it is linked.
Clearly. Let's ignore those warnings for now. Let's assume it's linked.
And let's get back to the settings. "Guest Mode" we're going to turn on. This provides an always cacheable landing page for an automated guest's first-time visit.
Automated guest sounds like a crawler or a bot, which is also important because Google crawlers take into account page speed. And they might be landing on you page for the first time and you want it to load quickly. So having that in there may help with that and it helps your SEO as well.
Guest optimization I'm going to turn this on. And here you have a bunch of warnings. The first one.
Guest mode must be turned on for this to work. And it's on. We need to turn on "Cache Mobile" to get best results.
We'll turn that on later in this video. We need to turn on "Image WebP Replacement", which we will later on this video as well. And for the server IP, we can go look it up or just click on this button right here and the server IP is populated right there.
Copy it, paste it. I'll try and drag and drop it, but it's not working right now. It's copy that and paste that.
Turn notifications on or off. I'm going to turned mine off. Save changes.
I get enough notifications as it is. I don't need more from my caching plugin. Here we have guest mode user agents.
So we're right in assuming that the guest mode is for automated visitors and not humans. So Google. And a lot of these are page speed type software which means that they'll be getting or receiving an optimized page when they come for the first time.
So the test results would be more accurate. And guest mode IPs, these are all pre-populated. So I guess these are all IPs for different crawlers and page speed testers.
So we'll just leave that as it is. We'll move on to the "Cache". Which is the next step in the list.
We've got a lot of options across the top and a lot of options up and down. As I was saying earlier, you can turn them all on. Save it.
Check if your site's broken. If it still works fine. Great.
If it's broken, come back in here, turn these off or on. One by one. Save it.
Reload the page. To see if your page is back to normal. And then that option you would not turn on.
Just keep that one off. So we have "Enable Cache". Obviously, that's why we have this plugin.
It's a caching plugin. So turn that on. Cache the logged in users.
Yes. So people who are subscribers and things or editors or writers, we want them to have cached pages as well. We are going to later on.
Is that on this page, no, on a different settings page, we're going to turn off the cached for administrators. So you as the administrator might be developing new pages on the website. And you don't want to see cached versions while you're developing because that's super annoying.
So we're going to turn the off for administrators. You can cache the comments from commenters. You can cache the rest API.
You can cache the login page. You can cache PHP resources. Cache Mobile is that setting we were warned about a minute ago to make the guest caching work.
We're going to turn that on. List of mobile user agents. I'm just going to keep these as is, but you can add any ones you want here.
Here are options to cache individual you URIs or individual pages. These can be for this one for example private pages. So maybe you have membership pages that you want to have cached but you don't want them to be public facing.
So you put those URLs in here and these will not be cached as public. You can force cache pages. So even though some settings we set might exclude certain pages from caching, you can force caching.
By adding those URLs here, force public cache same idea. You get the idea. Drp query string.
This is things that we ignore when a page is being cached. So if someone comes from Facebook, the URL often has this in the URL as a query string. And then that could be cached as a separate page.
So every time someone new comes from Facebook, they get a new FB CLID and they get a new cached page. Essentially, you can have thousands of cached pages all for one page. So by dropping this from the cached pages, you just have one.
So that's great. Save changes. Time To Live.
The first thing we see here is a warning. LightSpeed Caching functions in this page are currently unavailable because of the LightSpeed server, like Hostinger or a Quic cloud CDN. And this video is not sponsored by anybody, including Hostinger or not by LightSpeed.
I just mention the Hostinger hosting because they have LightSpeed servers. Just letting you know. So we have to turn on the Quic Cloud CDN because that's what we're using for this video.
And to solve this issue, we're going to jump ahead in our list here and go to CDN. We'll come back to those settings in a minute. So here we have Quic Cloud CDN.
We can turn that on. Save changes. Now if we go back to the cache, that warning is gone.
And we'll go back to the CDN of course in a minute as we progress chronologically or logically or top to bottom through this list. So Time To Live. These settings are basically how long a cache stays cached.
Here we have one week for the default public time to live for the cache, which means if a page is cached today, it's going to stay cached for one week and then the cache will automatically purge for that page and it's going to be cached again. This is useful for if a page is frequently updated. If certain pages get lots of comments, you're going to want those to refresh regularly.
And you might even want to set this little lower because if you do get lots of comments, you want those to show up quickly. And this has a direct effect on your server load. So the shorter this time is, the more you're going to be purging and caching, the more load is going to be on your server.
For most websites that default is fine for all these settings, so it's going to keep all those as default for this site. But if you find there's some issues and you need to cache a little sooner, or purge the cache and recache a little sooner, I mean, you can change these settings here. And these are all in seconds, as denoted by seconds right there.
On purge, we purge all on upgrade. That's on. So that means when the LightSpeed Cache plugin is upgraded, or there's an update available when you install the update, it purges everything and then recaches everything.
And here's the list of what will be purged automatically on upgrade. This has selected most everything except for yearly and daily archives. If you have custom post types, those should appear in here as well.
You can choose to have those purged or not. You can uncheck or recheck any of these. "Serve Stale", when this is on.
You might have older content showing, but it's going to low quickly. Having it off is going to have newer content showing, possibly if your page is changed, but it's going to load more slowly for your visitor until the new page is cache. So it's up to you whether you turn that on or off.
I'm going to keep mine off. The Scheduled Purge URLs. These are pages that you want to purge on a regular basis.
And I believe it's daily that you can do it. So you can pick a time say 11:46 AM every day and that's what time these URLs will be purged. So maybe you have a page where you publish a report every day.
And you want that report to of course be the latest report and not an old cached one. You can put that URL in here. You can set it to what time a day that you publish it.
So maybe you publish at 10 and you want to make sure you get the new one on there so that's maybe redo this cache at 10:01. It doesn't leave much room for error. But you could do that.
One minute later, Purge this URL and get the new one on there. Purge all hooks. These are WordPress hooks that can be purged and you can just leave that as it is.
If you're a developer, you'll know what to do with this and in this box here. If not, don't worry about it. Click on to save changes if you made any changes.
This would be great time to go to the front of your site. See if something broke. Excludes allows you to exclude URLs, query strings, categories, tags, cookies, user agents, and cache rolls.
So whatever settings we've set up until now, it applies to whatever it applies to. And then here we can explicitly exclude those things I just listed. For the URIs, you can also think of URL, so page URL.
You might want to put the cart page of your WooCommerce site and the checkout page. Because those, you don't want to have cached. You want those to always be new.
So whatever you put in here is never going to be cached. And those two options I said, the cart page and the checkout page are great things to have in here. Down at the bottom, all these others I just keep keep them blank, as it is.
That's what works for most cases. And down here, we have user roles that we want to have not cached. I'm going to check administrator so that when, I as the a administrator am making changes on the website, those changes are not constantly being cached.
And then when I make a change, I go to see the change is the cached change. And it doesn't look like it's changed, but it has changed. It's super confusing and complicated and not a lot of fun.
So I'm going to make sure when I'm logged in, as the admin, nothing's ever cached. And if you wanted to, you could turn this on. And then view your site In Cognito and you'll see it as a guest user sees it.
Yes, I settings. This is Edge Side Includes, which helps your site load faster. That's why it's on here.
So you want to turn most of these things on. So I'm going to choose to turn it on. I'm going to cache the admin bar; keep that on.
I'm going to keep the comment form cached on. The vary group section allows you to set separate caching for different user roles on your site, assuming they see different things. So the example they give here is the administrator, vary group allows there to be separately public cached tailored administrators pages with edit links and things like that other people wouldn't see.
If you don't know what this is about or what you would need to set this to, just skip it. It's not that big of a deal and caching will still work just fine. And I'm going to click on save changes and keep vary group at it's default.
For the object cache settings, we want to turn as many of these on as we can because object cache is super fast. So to turn it on, I'll just click on. But we have to make sure we have, whether the Memcache extension or the Redis extension installed.
And in my case, my server has the Redis extension. It's going to click on Redis. For my server, I just have to keep the host as localhost.
And the port, we have to change to 6379, paste that in there. And all the other settings here, we just keep as default. Click on save changes.
Next up, we're on to browser caching. I'm going to turn this on and save changes. I'm going to keep the time to live as it is.
Actually, it's at 52 weeks. That's over a year. I'm going to reduce this to one week.
Two, one week is in seconds. There it is. That means seconds equals one week.
So this reduced that to one week. Save changes. Double that if you want two weeks.
Let's go to Advanced. We're almost through the cache settings we're on to the CDN. It says here, these settings are for advanced users only.
And I would agree except for the very last two, improve HTTP and HTTPS compatibility. Keep that as off. You should have everything is HTTPS these days.
I don't even have to worry about this compatibility. Instant click, I turned to on. This will cause more server load for pages.
But what it does is when a user a visitor to your site hovers over a link, it preloads the page they're hovering over, assuming they might click on it. So if they're scrolling through like your menu system, like up here, they're scrolling through this. Every time they hover on a page, that would be preloaded.
So you can see how that could add up for your server resources. But it makes the page load a whole lot faster. So what I would say is turn this on.
If you find your server slowing down or you get messages from your hosts and you're using too many resources, this might be the culprit right here. Click on Save Changes to apply those changes or that change. For WooCommerce, since we have WooCommerce installed on this website, we have WooCommerce options in a WooCommerce tab.
So here we have a warning as well. After very friendly cash works in general, please test the cart because you always want to make sure your cart is not caching. By default, the my account checkout and cart pages are automatically excluded from caching.
Misconfiguration and pages associations in WooCommerce settings may cause some pages to be erroneously excluded. So you got to check things as what it's saying, essentially. And for the caching for products, here are options we can choose.
We can choose to purge products when you change the quantity or stock status, purge categories only when stock status changes. I know you know how to read, not going to read through all of these, but you can pick what purging rate you want. I'm going to say this one, always purge both product and categories on changes to quantity and stock status because you want to have the most update information possible.
Vary for mini cart I'm going to turn off or keep off look on save changes and now we're done with the cache settings. Under CDN we saw one setting earlier that we did which was turn on the Quic Cloud CDN. Use CDN mapping.
This is for when you're not using Quic Cloud or CloudFlare because they did not use CDN mapping. If you are using Quic Cloud or Cloudflare leave this off so we're going to leave that off since we're using Quic Cloud. CDN URL keep that as default include images, include CSS, include JavaScript so keep all that on.
Don't worry about these file extensions scroll down. Don't worry about any of this stuff. Don't have to worry about this or this or this Cloudflare API let's turn this on but we need some information from Cloudflare we need the global API key, email address and the domain name.
I'm logged into my free Cloudflare account this website right here is currently not added to it so we have to add this website. It's going to copy this URL the root domain name and then go to add existing domain name. Paste it in there.
Click on continue. Invalid domain name. Let's follow instructions and format it like they have in the brackets here.
Click on continue and here it says pay as a whole bunch of money or go with free. Let's go with free. We got continue.
Scanning DNS records. We will have to change some DNS records to route our traffic through Cloudflare. Here are the results of the DNS scan.
Click on continue. Here it says that's not active because we have not changed the nameservers. Changing the name servers.
One of the big things to look out for is it can affect your email receiving and sending. So if you're concerned about that you might not want to make this change and you can just skip over the Cloudflare API. You don't need to have it for optimal LiteSpeed settings.
It's just a nice extra level of speed and security having Cloudflare installed. But I'm going to show you how to install it and you can decide if you want to or not. So we have these nameservers right here in our domain registrar.
This is website devxyz. com. We have our nameservers down here.
This is in NameCheap. So I'm going to copy this one and I'm going to delete all of these. Paste in that new one.
Copy this one, paste that in. Click on the checkmark to save. And now when we come back to Cloudflare, it says it can take up the 24 hours.
Click on check nameservers. And then it will check the nameservers periodically to see if they're setup. Once they're setup we can pull our API token and enter the email address of the account and enter the domain name, which is the one we're currently on.
And then that should be all setup and tickity-boo. So I'll just pause this video and wait until the nameservers have been changed so that we can fill this in and then carry on with LiteSpeed cache settings. That took about 15 minutes.
And now the nameservers have been updated and we're good to rock-and-roll. If we go back into our account where we're setting up LiteSpeed. Click on this Cloudflare link right here.
That's going to take us back into a Cloudflare account to a specific page where we can create a token. Click on create token, choose WordPress as the template. Keep all this as it is.
Click on continue to summary. Click on create token. Click on the token to copy.
Go back in your website and just paste it in there. Enter the email address. That's associated with your Cloudflare account.
And then grab the URL of your website or the domain name. Going to get rid of the HTTPS and all the slashes and colons and things. Click on save changes and our Cloudflare API should be integrated.
Go back down to the bottom. Everything looks good. This was outlined in orange a moment ago and now it's in green.
So I think that's all good and we actually don't have to do anything else in the CDN to setup. There are more options here as you can see. We're not going to do those.
The Quic Cloud CDN setup. This required us to change our nameservers again, but we just change them. I don't know what that conflict is going to cause.
So we're just not going to do this step. And then manage just gives us more information about our Cloudflare setup. In here, however, if you do end up doing this, if you click on begin CDN setup and go to the process and you stop, you don't want to do it.
There are buttons that appear that I like to delete all the work you've done just as it applies to this CDN setup. So you can go through it and try it and see what happens and then you can just delete it if it doesn't work. Let's go to image optimization.
If you haven't noticed yet, LiteSpeed is kind of an all in one speed optimization plugin because it does caching. It does CDNs. It does image optimization.
It does page optimization, database optimization. It does a lot of stuff. So here we can click this button to send optimization request.
But we should first look at the settings. Let's go to step two first. Let's go through and see which ones will turn on and off.
These first two I'll turn on. This third one, I'm going to turn off because I want to keep my original images or original. I don't want to have them optimized.
I don't want to have them removed to turn this off as well because I want to keep my original images. And then WordPress and this plugin can create derivatives that it shows on the website. So it keeps those off.
Optimize Losslessly I will turn off. If you are a photographer or you sell pictures and you want super high-quality images, but you still want some compression. You would turn this on.
If you turn it off, you compress a little more. The quality isn't as great as it would be if you turn this on, but it's still good. I'm going to turn off Preserve EXIF/XMP data.
This is basically data that is associated with the picture when it's taken. So that includes copyright information, GPS information, comments, keywords, colors, all kinds of stuff that your phone or your camera adds to the image that you can analyze later. We can delete all that and save a little bit of space.
It's not a lot of space that we're saving per image, but if you look at a hundred or a thousand images on a website, it can really add up. Image WebP replacement, we're going to turn this on. This was requested for guest optimization as you recall from earlier probably.
So we'll turn that on. We will keep all this as it is. WebP for extra source set turn that on.
Save changes. And now we can go back to the image optimization summary and click on send optimization request. Currently we have one group with six images ready to request and one group with one image requested.
And so this is going to compress those images and they will load faster as a result under page optimization, which is the next area of the plugin. We have a whole ton of options as well. So this is one where we're going to turn on everything and then see if our site's broken and then if it's broken we come back turn them off one-by-one and see which one fixed the site.
So I'm going to turn all of these on. Minify CSS. Combine CSS.
Generate UCSS. UCSS Inline. Combine external and inline.
Load asynchronously. All of them on. Font display.
I'll swap those as well. Save changes. So now if you turn them all on, check your site.
Make sure it's loading properly. JavaScript settings. I'm going to turn all of them on and deferred.
HTML settings. Turn that on. Turn that on.
Remove query strings on. Load Google fonts asynchronously on. Remove Google fonts.
If you don't want Google fonts on pages, you turn this on. If you do, keep it off. Remove WordPress emoji's.
You just remove Noscript tags. Those both on and then save changes. Media settings.
We want lazy load on. We can have a place holder image. But it's super tiny one.
It would be like just a gray image that just loads in place of existing images. You can also have responsive placeholders. You need this on for a certain qualifying request for guest optimization.
Here we have a responsive placeholder SVG and a responsive placeholder color and we can LQIP Cloud generate an image. So we turn that on and here's the quality setting. So if we have those on, these ones right here, we don't technically need to have a placeholder image up here.
So that should all be fine. This is basically allowing your site to show information, show something happening, not just a blank page while the stuff is loading in the background. Not many people use iframes, but the ones that do, we're going to lazy load them.
Add missing sizes, turn that on. What that means is images that are loaded on your site, need to have a defined height and width. If they don't, the browser has to calculate the height and width, which makes it slower.
If you define the height and width, it will be a whole lot faster. The WordPress image quality control, this is where you can set the quality of an image. So if you have 100, which is 100%, as high as you can go.
That's the highest quality image you can have. 80 is a pretty good number for optimizing and click on save changes. You can change that later on to change the optimization level.
It'll take some time to re-optimize your images, but they will be set at the whatever level you set here eventually. Viewport images we'll turn this on. This means that lazy load does not apply to images that are above the fold because you want those loaded right away.
So we'll turn that on. Viewport Images Cro. I'm not sure why that's on cron job but I'll turn that on.
Media excludes allows you to exclude certain images from lazy loading. Maybe the header image, which is above the fold in our case if we go up to our website. We have this header image that's above the fold, but header images are sometimes set to background as background images and those can be difficult for plugins to detect and load properly, so maybe we want to add that image URL to here.
And here we can lazy load all kinds of things. If you don't know what's going on here, don't worry too much about it. The only one I would really use is this top one here.
We didn't make any changes, so I'll skip the saving. Localization. Do we want to cache Gravatar images?
Yes. Gravatar cache Cron. Turn it on.
Once a week. Localized resources. This means external resources that are brought in from elsewhere are localized on your server, which can break stuff.
We have warnings here in red. So I'm just going to keep this off and let the server pull those things in as needed. Under Tuning, we have the ability to fine tune certain settings.
I'm going to leave this to you if you're an expert. If you're not an expert, don't worry about it. Tuning for CSS.
Same idea. If you don't know what's going on here, don't worry about it. The blank box is here just fine for most setups.
Under the database, here we have the ability to optimize our database. We can clean all just by clicking here. We have 20 post revisions that'll be cleaned.
Six orphaned post metadata, which are posts that were deleted, but there is still data in the database about it. Auto-drafts of one. We have no trashed posts, no spam comments, no trashed comments.
No track-backs or ping-backs. We have expired transients, which are plug-ins settings that are still in the database but the plug-ins aren't on the site anymore. Then we have all transients.
Actually, expired ones could be from plug-ins are still there. The all transients would include ones from plug-ins that are gone. I'm going to click on Clean All and I'm going to clean all of them.
The only one you might want to avoid is maybe post revisions. I don't really use them, but if you find yourself going back to older posts, then maybe you want to keep post revisions. So you can click them individually, like I just clicked all transient.
So it will clean those individual ones, even though the all transients is having some trouble here, I keep clicking, but number keeps changing, maybe it's finding more, I'm not sure what's going on there. Anyway, leave that as it is. The transients aren't a huge deal, but if you have thousands in here, it's a huge deal, but 34, is not going to break anything.
Database optimizations. You can set your revisions. Every time you make a change to a post, it's saved as a revision in the database.
So if you want to save just 5, the 5 most recent changes, you make that 5, and then every other one will be deleted, which will help you automatically keep the post revisions a little cleaner. And you can also have a max age. So say, if it's 100 days old, you're probably not going to go back to it.
So you can set it up that way for your revisions and the cleaning of the revisions. Click on save changes. Then the Crawler.
The crawler is basically a scanner that scans your website to find out what the status is of all the pages on your site, whether they're cached or not or blocked from caching or whatnot. You don't really need this because you have all the settings we is went through in this video. You have all those setup which will keep your site running smoothly.
You don't need to have this running, but if you do want to have it running and add an extra layer of, I'm going to say almost real-time information and caching just to make sure everything is exactly perfect. Because here you can see the runtime is every 10 minutes. That is hard on your server.
You have to have a pretty good hosting account to sustain a big website being crawled this often just to make sure pages are cached. It's helpful for big sites but it's not really important for you and me. I don't think.
Under tool box we have this warning up here, cloud, uh, Quic Cloud CDN even though we have that turned on. Some reason it's off again. We turned that on earlier and then it turned off again.
So it's turned on again and now this error is gone. So the toolbox is a lot more options that aren't specific to certain categories of speed optimization like caching or CDN or image optimization or database. It's just a catch-all toolbox for more stuff.
So here we can purge all these various different things if we need to or purge everything. We also have those options here as well. If we go to import export, we can actually export all the settings we've set on the site.
If we find our settings are perfect and we use the same theme and same plugins and same server regularly, we can just export the settings, import them to a new site and save a whole whack load of time. Here we can view the . htaccess file.
A lot of caching plugins, edit the . htaccess file. You can see it added a lot of code in here.
And so this is stuff you don't usually edit. This would be more for developers who need to see an information. The heartbeat is a function inside WordPress that allows real-time communication between your WordPress dashboard and the browser.
So for example, if you're creating a post and your post auto saved, that was WordPress heartbeat. If you have something on the front end that auto-updates on your website, that's WordPress heartbeat. So the WordPress heartbeat is running all the time and that's causing load on your server.
If we turn this on we can control the heartbeat a little bit. So we could have it run every 60 seconds instead of all the time. And for the back end, we can turn it on as well.
But this means that those updates that we're just talking about, like the autosaving or updating something on the front end of your website, that's going to happen every 60 seconds now and not as soon as possible after a change is made. So you got to keep that in mind. The Editor Heartbeat on.
So this would be the auto saving right here. So that's set to 15 seconds. It's going to click on save changes after we turned all those on.
That's going to reduce the load on our server a little bit. Under report. We can generate reports about LiteSpeed.
This is more for troubleshooting and having the LiteSpeed dev team come in here and see if there's any problems. I assume that's a paid service. But they can come in here and find out what's going on on your site.
Debug settings allow you to see errors and stuff that's going wrong. This is the domain of developers. You don't have to worry about that in most cases.
The log view shows you information that's happening with the plugin currently. Not very much is going on. We just installed that we haven't done a whole lot.
Oh, we've done a whole lot of settings. But it hasn't run for a long time and had people visiting our site so there haven't been any problems that have come up that need to be noted in here. For beta testing, we actually switch to the github version which gives you the latest version of the plugin and you can have the newest features.
You can also downgrade. If you upgrade to a new one, it breaks your site and you can downgrade to an older one, just by clicking these buttons. That's pretty slick.
And that takes us to the end of all the settings. And it was a lot. That was kind of a marathon.
But now that we have all the settings set, why don't we go over to page speed insights and try loading our site again. So we started with this 45 for mobile 90 for desktop. And now we're going to have something better.
I hope. And now we have 99 on mobile for performance and 99 desktop. So that's pretty crazy.
Even though this was a marathon of a video, if you set up all those settings and you get these great results, you'll never have to do it once. And then it's set up for a long, long time and you don't have to worry about it anymore. So it's worth investing the time to make it, to make your site fast.
And this has definitely helped our site go super fast. If you come to the website in the future and run this test on it, it's not going to get the same results because I'm constantly doing stuff on this website domain, just because I'm making these videos. And now I'm showing you how to set these plugins.
And so after this video, I'm going to delete LiteSpeed. I'm going to install another one and start over again. So, the results I'm seeing here aren't going to be the results you see here tomorrow or next week or next year on this website.
Just keep that in mind. The stuff works, but it doesn't mean it's going to be working on this exact website all the time because I'm using it to make these videos. If you have value from this video consider liking and subscribing to let me know and then check on this playlist over here which is all about speeding up your WordPress site to make a lightning fast.
Make sure you check that out. My name is Bjorn from WP Learning Lab and until next time, keep crushing it and I will see you in the next video.