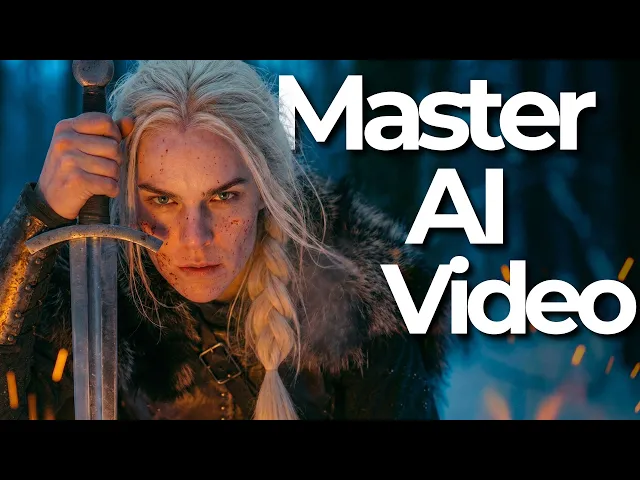
AI video is changing. The cinematography, the audio, >> you knew I would come. >> And you did.
>> And the action, >> have all taken huge leaps forward. So, why do your AI image and video generations still look like they're stuck in 2024 with warped animations and plastic looking skin? Well, that's because you have no system and you have no framework that you apply to AI content creation.
And because of that, it's essentially a giant lottery. You have no idea what sort of outcome you're going to get, even though these models have gotten very powerful. And until you're able to get some level of control and consistency with your AI generations, you're just going to be wasting your time and your money.
But luckily for you, in this video, I'm going to be giving you my five-step framework for consistently creating highquality AI video and image generations. We're going to cover everything from ideiation and storyboarding all the way to editing and assembly, as well as touching on every single prompt you need along the way. So, if you're someone who is looking to get out of the AI generation casino, you're in the right place.
So, step one is storyboarding. This is where we lay the foundation for every single thing moving forward. So, it's important we get this right.
Now, what we're going to do is we're going to head to our AI of choice. I prefer Claude. You can use Chad GPT.
It doesn't really matter. And we're going to give them this prompt template. And I'll tell you where to get this template in a minute.
And by combining this prompt template with AI, we're going to get an output that includes five things. And those five things are a the concept. What is the overarching narrative we're trying to create?
Two, the visual references and tones. For me, it was The Revenant meets the Northmen. Again, there's probably some film somewhere that you want to emulate, at least visually, and it's important we speak to that.
Number three is the setting. And there could be multiple settings, but obviously it's important to tell AI where this is all taking place. Number four, we need to define the characters.
Like, who are these main recurring people that are going to show up in every single scene? And lastly, the shot list or the scene breakdown. Right?
We have this overarching narrative like we talked about before, but we need to divide that into not only individ individual scenes, but individual shots because these individual shots are what we are going to actually create as videos using AI. So, we're going to head to AI, give it this prompt, and it's going to ask us a few questions. And primarily what we're going to do is we're just going to describe in plain language what it is we're trying to create.
This is going to be back and forth with AI, right? Chances are you don't know exactly what you want yet, but this template will help get you there. Now, as for where you can get all the prompts you see today, as well as a full written guide that covers everything we touch on in this video, you can find all that inside of my school community.
There's a link to that down in the comments. Now, before we move on to step two, which is where we start creating our images, I want to talk a little bit about the visual reference and tone because I think this is so important and such an easy way to sort of supercharge what it is you end up creating. Because I think the hardest thing for the vast vast majority of us who do not come from a film background is, you know, figuring out a way to take this fuzzy idea of what we're trying to create in our mind and actually explain it to AI and articulate it.
And the best way to do that often times is to just give it references like visual references to actual films we like. And instead of going to Google and like just trying to like find it there, a great resource is this place, Shot Deck. Now, this video isn't sponsored by Shot Deck in any way, shape, or form.
You can sign up for free for two weeks, but it's essentially a giant repository that gives you like all this technical information about different shots from different films. And let me sort of give you an example. So, let's say I was searching for The Revenant.
I just put the Revenant in there. And then right away, you can see I have all these different still images from the movie itself. And beyond that, if I click on any of these, obviously we get the full color palette here.
But what's really cool is you see all of this information, specifically information relating to things like the shot type, the lens type, the lighting, the camera, right? These are all sorts of things that you would have no idea even exists, right? Like does the average person know what an RE Alexa 65 camera is?
I don't even know if I even pronounce that right, you know? Yet, if we use language like that when we're creating things in Nano Banana Pro, for example, or just copy and paste this and give it to our AI of choice and storyboarding, it's going to be able to use that sort of cinematic language to create our AI generations both on the video and still image side. And that's huge, right?
Instead of saying, "Oh, I want a, you know, nighttime cinematic scene with fire in the background. " Instead, I just copy and paste this image and copy and paste all this stuff and say, "Hey, I want to use that exact type of camera, that type of lens. This is what I'm going for.
" Furthermore, hey, I like the scene in Revenant. If I scroll down, you can see other similar type scenes from other movies and really just get inspiration. So, now we move on to step two, which is creating our foundation image.
Now, to do this, we're going to be relying on Nano Banana Pro. I use Nano Banana Pro inside of Higsfield, and that's what you see right here. Higfield is basically just a one-stop shop for any AI content creation tool you can think of.
So, when we dive into the video generation, we will also be doing it inside the Higsfield ecosystem. I'll have a link to Higsfield down below, as well as a discount code. So, definitely check it out.
I'm pretty sure they're running free trials as well as some discounts. So, if I just go to image and I head to Nano Banana Pro, this is where we're going to do our work. So the foundation image step is the most important step for having a consistent visual outcome both in terms of the setting and the style and also in terms of the characters because this is the step where we create our main characters and in every step moving forward.
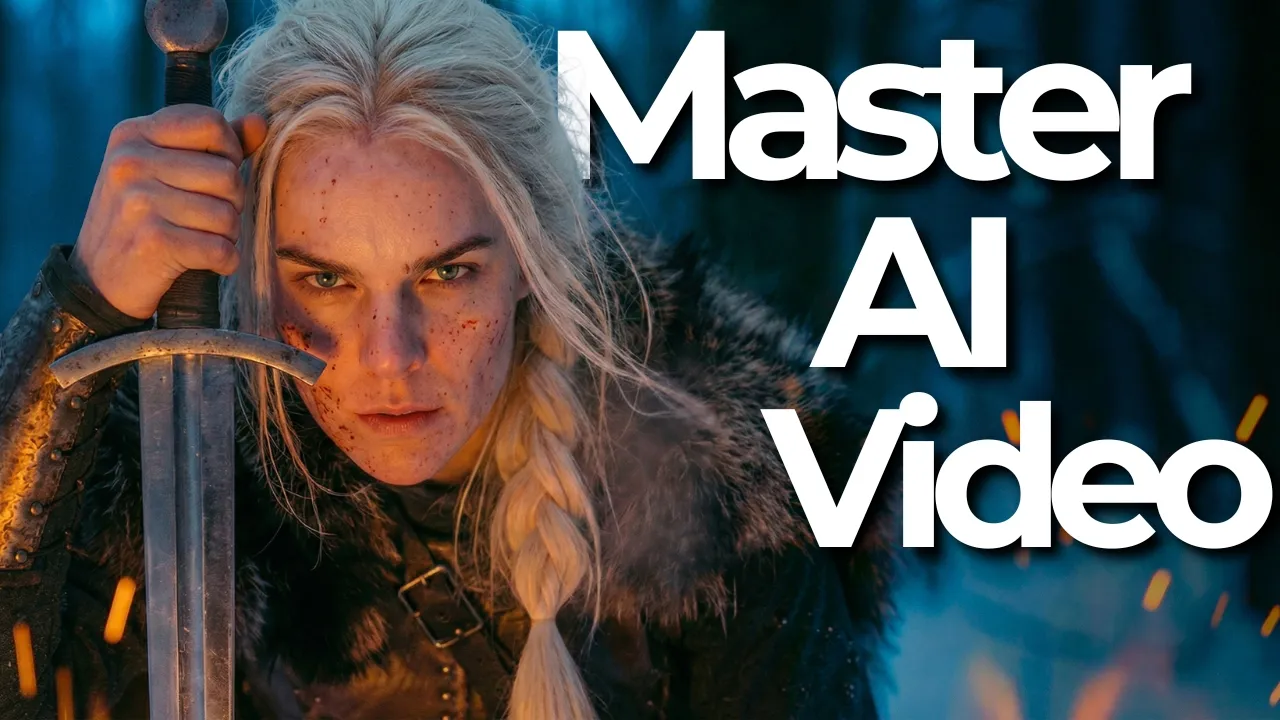
Anytime we create a new scene and a new key frame, we're going to use this reference image we create here to make sure the characters actually look the same. And so you can see here I went through a bunch of iterations trying to find the version of the main character I liked. And if you remember at the beginning, we had both a blonde female warrior and a blackhaired female warrior.
And so for our blonde character, I decided using this image right here. Now, let's talk about this for a second. First of all, what type of image did we do?
What type of shot did we take? This is like a medium shot, right? It's not a super close-in shot of her face.
Also, it's not a full body shot because even though AI imagery has gotten really, really good, the further we zoom out, like by the time you're looking at a full body shot of the character, you start to lose some detail in the face. At the same time, I don't want my reference image to be a macro shot of her face, like super zoomed in, because again, I can't use that as a reference image moving forward when I do different scenes because it's not going to know what her general like body shape is, what what sort of clothing she has. So, this is like a great middle ground moving forward to use as a reference image.
Secondly, let's talk about the prompt. And you can see all that over here on the right. Now, it's a little hard to read, so let's just copy this over.
And here's the full prompt inside of a Google doc. Now, obviously, it's very detailed, but there's two things I want you to pay attention to. First thing is the camera and the lens and sort of this like technical cinematic detail we're putting into the prompt, right?
I want that Alexa 65. I want that ultra vista lens. I want this shallow depth of field, right?
Where did we get that stuff? Well, that's something we actually got earlier from shot deck, right? That's where I got that inspiration from.
Secondly, at the end, we have a sentence that calls back to the Revenant, right? We want this to look like it was pulled from the Revenant. We even name a specific type of natural light cinematography.
And you'll also notice some stuff related to realism, right? Visible pores, fine facial hair, hair hair, natural skin imperfections, ultra realistic, no retouching, no skin smoothing. All right, we want to move away from that plastic look.
And to get that sort of prompt, I just feed this template into AI. And then I explain to AI, hey, here's the visual reference we have. Here's what I'm sort of looking at.
Here's what I have as a vision for my character. And then you simply go into Nano Banana Pro with the prompt that AI gave you and you start generating. And by doing this, you're now going to be able to have consistent, highquality characters that match the visual aesthetic you're going for.
So, every time we need to generate an image or generate a scene moving forward and it involves that character, well, I'm just going to take this image. I'm going to dump it into the prompt inside of Nano Banana Pro and I'll reference it. I'll say, "Hey, character one in image one.
" And I'll show you how to do that in a second. She does A, B, and C. Right?
That's how you get character consistency. Now, we move on to step three, which is key frame generation. This is where we're now going to combine our foundation image that we just generated with the shot list with the scene list to create the starting frames for each and every scene.
For example, we had the blondhaired warrior. For our very first scene, we wanted her sort of in the dark sitting by a campfire alone. And you can see that reflected in the shot list, right?
What was shot one? The fire. We want to zoom into the flames.
We have a general idea of what's going on. So what we need to do now is we need to take this shot and we want to turn it into a image prompt because the way AI video is going to work is to get the best outputs using AI video whether it's VO3 or cling 3. 0 like I'm going to show you.
We always want to start with a starting frame. We want to be able to say, "Hey, create the video of this woman by the fire. By the way, here's the exact frame you should start with.
" That's how you can actually control what the scene looks like. And so to get all the prompts for all the key frames for all your scenes, you're going to feed AI this prompt. And what it's going to do is it's going to go through your entire storyboard and it's going to generate those prompts for the starting frames.
Furthermore, based on your scene, because it's going to be able to intelligently look at what you created in this shot list, there are some scenes where we might also need an end frame, right, to give us even more control. And the AI will actually flag that and give you an ending frame prompt if need be. Now this phase, the key frame generation is another spot where shot deck will do wonders for you in terms of like finding cinematic outputs because again look at this image.
This looks pretty solid I think at least. Right? We kind of have this blue hour going on, right?
We have a bunch of like cool like colors bouncing off one another. The angle is low. Like this is a pretty good scene I think.
But how did we do this? It's more than just the prompt because you can see the prompt over here on the right. Like it has all the stuff you would expect right on the camera it was shot on.
We tell it like, hey, we want a ground level cinematic shot. But what you'll notice is two things. One, we have our foundation image, right?
Remember this one we created last step. But we also have this reference image for the AI to go off of. Now, what is this reference image?
Where did I get this? Well, I got it from shot deck. And remember, I was trying to create something that was sort of imitating in many ways the Revenant.
So, what did I do? I went in to shot deck and I searched up campfire scene or fire lighting scene and I found this one. I then simply copied this image and used it as a reference image in the prompt.
Again, you probably aren't a film student. You're not a director. You're not a cinematographer.
So, why are we trying to reinvent the wheel and being surprised when our outputs suck? Why don't we instead rely on the people that actually know what they're doing and get inspiration from them? Right?
We're not copying the scene exactly, but we're certainly drawing from it, right? It's certainly an homage in certain ways. That's totally okay to do.
And so, you're going to repeat this process for each and every scene in your storyboard. AI will generate the prompt for you. You will bring that prompt and the appropriate reference image to Nano Banana Pro.
You will insert the prompt and the reference image in there. And if you want, just like I showed you, you will bring additional reference images in there from things like ShotDeck. You can also take these things from shot deck and also give it to AI and be like, hey, like incorporate this into the prompt somehow, right?
There's a lot of creative space here. And the end goal for this step, step three, key frame generation, is to have a key frame, have a starting image for each and every scene you set out to create. So now we're on step four, which is video generation.
And if you've done everything right up until this point, this is actually one of the easier steps because we've already laid the foundation. We've already laid the groundwork for what we want to build. So, we're going to head to video.
And for today, we're going to be using Cling 3. 0. Ultimately, you just need to pick a video model that allows you to do first frame, last frames, which all the modern ones do these days.
Now, let's talk about the prompting basics. First of all, again, we should be leaning on AI to generate our prompts for us. As for the template, this is the template I use for my video generation.
Also, I have a second template that goes into how to create multi-cene, multi-shot video generation. We'll talk about that in a second. The idea is you're simply going to bring AI this template.
You're going to include the reference image for that scene and then it's going to create the prompt for you. That being said, prompting video is actually a lot easier than the image prompts. And in many cases, the prompts are very, very simple.
Think about it. When we're creating an image, we're doing it from scratch. Even if we have reference images, we want to include the camera, the lens, the setting, the tone, all these things.
Yet, when we create an image like this one, or video like this one, I should say. All that's pretty much done for us because, as you can see here, I've included a starting frame. By including a starting frame, the video already knows what the character is going to be, what the aesthetic should feel like, what the tone should be, what the camera angle is, what the lens is, right?
So much is already baked into the video itself by nature of putting a starting frame. Secondly, if we take it a step further, like in this video, I also added an ending frame. Sur knows where it's beginning and where it's ending.
Alls I need to do is tell it in relatively simple terms what I want to happen in between. Like look at this prompt. Static camera.
Woman sitting by the fire. She looks up as a new character slowly walks into the frame and plants their sword. Of note, we'll talk about this in a little bit.
Always have an hands off. You don't want AI to touch your prompts. But that prompt, that relatively simple prompt, because our starting frame and end frame are on point, we get something like this.
Right? And for our video, that's enough. Remember, you can make these videos 5 seconds, 10 seconds, 15 seconds, but what's going to happen, and we'll talk about this in the editing phase, you're probably going to use two to three seconds of any scene you create, right?
And just due to the nature of AI video generation, sometimes it'll be wonky in certain places. So remember, when I'm watching something like this, what I'm looking for is like, all right, is there like 2 to 3 seconds here that fits what I'm trying to create? If so, that's a win.
Move on to the next scene. Now, that scene, like most of the scenes you will produce as well, was relatively simple. But what happens when we need to up the ante a little bit and we need to create something more dynamic, like we want some action going on.
Well, that can be kind of tricky. For example, take a look at this scene I'm about to show you. Now, the intent of this video was to have a fight scene between our two main characters, and let's see how that actually turned out.
So obviously that was kind of a mess. Yet you will notice we did take some stuff out of this and put it into the video you saw at the beginning. So like this sequence from about 3 seconds to 5 seconds right here, we were actually able to use that.
But the rest of this, right, like who is this person who shows up on the scene? Like that that's not our blackhaired main character part two, was it? And the rest of this, like on one hand, it is impressive how it is able to do the physics here, but the characters are just kind of all wrong, right?
And it makes it kind of wonky. Again, you couldn't even do scenes like this at all with any characters a few months ago, but it's lacking that control. Although honestly, I still wouldn't say that was a failure, right?
I was able to grab a two, three second scene out of there that I did end up using. But let's talk about the control side of this. So, let's zoom in on the left and sort of break down how this works.
So, again, we're inside of Clink 3. 0. Clink 3.
0 gives us the option to do multi-shot. What's multi-shot? That means it's not one continuous shot.
Instead, we can get those sort of like quick cuts all within one scene. And the one you just saw had, in fact, several shots, five in fact. Right?
So, it had a it was a 15-second video broken up into five 3-se secondond chunks and each chunk had its own prompt, right? We gave it the exact type of shot we wanted. We gave it the action.
We gave it the general tone. Now, we also included in this elements. So, what Cling 3.
0 will tell you is that you can start with the starting frame like we did here, but ISO can also include elements. Think of them as almost reference images for characters and people that will show up midcene. So, if I hit elements here, you'll see we have a bunch of different ones, including, you know, our warrior A over here.
So, if I click on this, you will see I added different images of her to this element. The idea being like, all right, so you're going to want to reference this warrior multiple times in this multi-shot scene. Well, you can dump a bunch of different angles and images of that character that Clling will then reference later, right?
The idea is you're sort of trading it on this character. The problem is what you just saw, right? If you try to do complicated multi-shot scenes that have a lot of dynamic action and you're trying to reference multiple characters, you're going to run into trouble.
Now, you will inevitably see demos, videos of cleaning 3. 0 doing multi-shot really well with a lot of dynamic action. The truth is though, when people do that, very rarely are they using an actual starting frame or are they referencing a bunch of characters via elements in that scene.
Instead, they don't use any references. They just use plain text for all of it. And so, it creates a random warrior A, a random warrior B, and a random setting.
And it flows real well. But that's because you've kind of given up all control to cling. So, what does all of that mean for you?
Well, it means if you are trying to create dynamic action scenes that probably have a lot of cuts and involve multiple characters that have to stay consistent, I suggest staying away from doing this complicated multi-shot sequencing. Instead, I highly suggest with the way the AI models are set up right now, you instead break up all those individual scenes, even if they're quick one two second cuts, into individual generations. It's just going to work better.
You're going to have more control, and you're going to get a more consistent output. Because if you expect AI video models, no matter how good they are, to take what you give it and actually stay consistent, you're going to have a tough time. So, I think that's where a lot of people get tripped up and where a lot of like the consternation comes because they see demos where it's not the same environment as you're as you're going to be working in, right, with a reference images and a reference character.
You see him do these great multi-shots, then you try it and it just doesn't work. That's why. So, for example, right, if I wanted to start a fight scene where warrior B is charging at warrior A, right?
the girl with the black hair is charging at the blonde. I'm not going to do a multi-shot sequence with that. I'll just do one scene like this, right, where she's charging at her.
And again, I just need like one or two seconds of that and then I'll flow into the next scene and the next scene. Now, does it add a little more work on your end in terms of like creating the key frames for each and every one of those? Yes.
But that is the price you pay for control and consistency and ultimately quality, right? We don't just want to pray to the AI video gods that our generation comes out looking good. So that's how we do it.
So that's my diet tribe on these multi-shot highly complex dynamic scenes. Break it down to individual scenes. Try to keep each prompt as simple as possible.
AI will do a better job. We can always stitch them to make it look like a multi-shot in post-production. And so that brings us to step five, which is the editing phase.
Now, I've kind of hit on the biggest part of this already, and that's the idea that every scene you create, you don't need to use the whole thing. And in fact, you will usually use only the first couple seconds. So, what you see right here is I'm inside of Cap Cut.
And down here at the bottom is that initial scene you already saw in this video. Here's the scene, the very first one of her at the campfire. And you will notice this is like a whole 1 second, right?
And I'm not doing any fancy editing here. I've literally just all the editing has already been done by the video itself. I'm just chopping it up so it makes more sense in terms of narrative piece.
Now, this is not a full-blown video editing course. There are people infinitely more qualified to teach you how to do that than I am. That the whole idea of just using small parts of the clip is the biggest thing I can tell you.
The second thing is in terms of audio. Now, obviously, since this was a YouTube video, I had my own voice in the background. If you really wanted to step your game up, you would have some sort of audio track, have sort of the scene switch to the specific beat.
And you'd also look at using more specific sound effects, right? If there's a specific sound effect I wanted that I just couldn't recreate inside of Cling 3. 0 for example, go to somewhere like 11 Labs, go to somewhere, I believe like Gemini is now starting to do this thing too where it can create the music and the sound effects via prompting thing.
So again, very very basic overview of the editing cuz that's not my forte. But just the biggest thing you need to think about is like which part of the scene do I actually want to keep? So that's my five-step framework for creating cinematic AI video every single time.
It gives you control. It gives you consistency because so much of the work is done on the front end where we define the narrative, we define the visual style. And by generating these foundation frames and these key frames for each and every scene, we make sure what's going to be generated actually fits our vision.
So I hope you were able to take something out of this video. All the prompts as well as a full written guide can be found inside of the Chase AI community. There's a link to that down below.