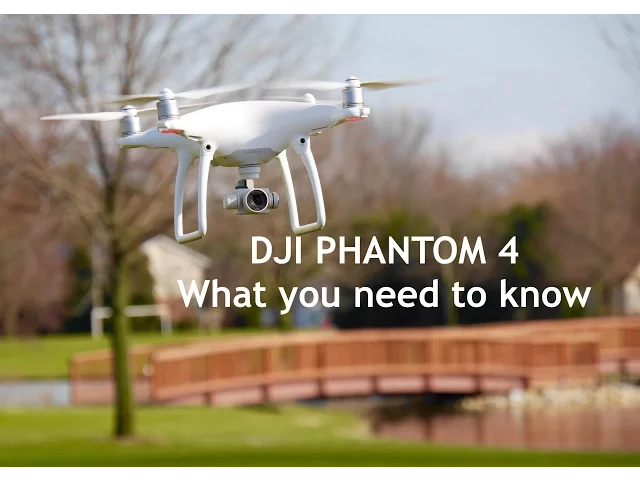
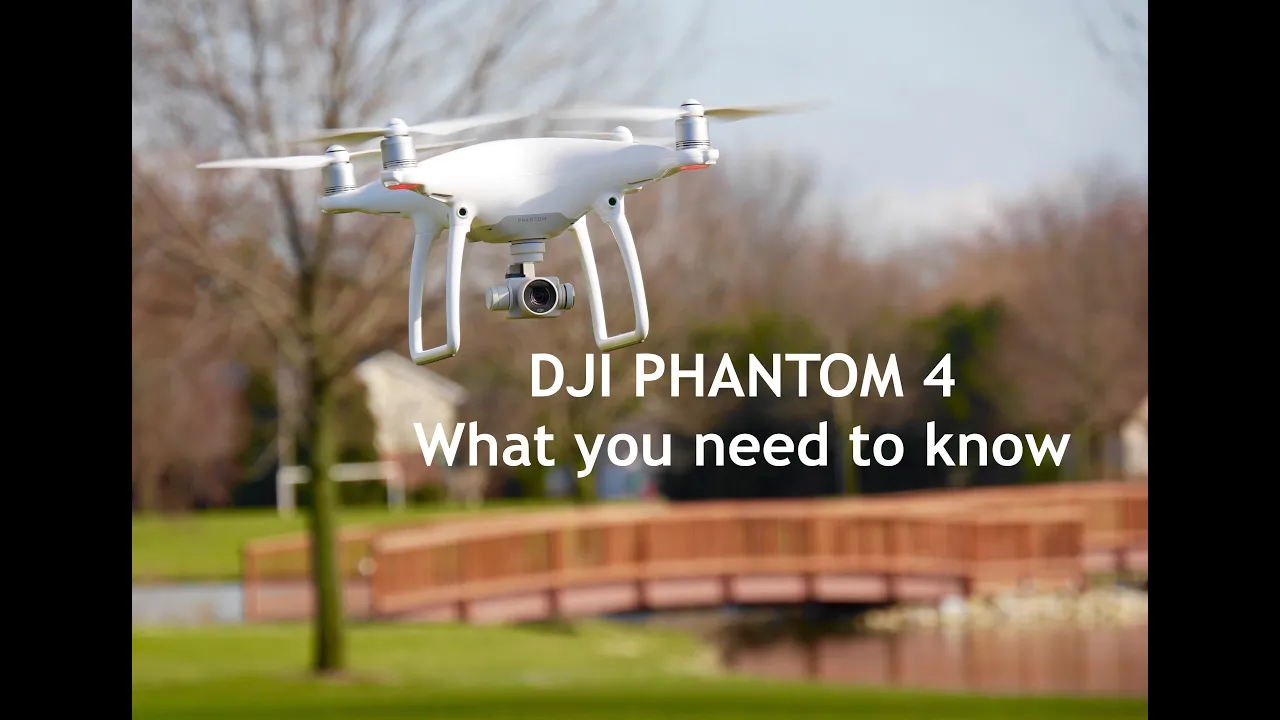
hey everyone Adam with arrow Works Productions today we're going to be covering the new DJI Phantom 4 and we're excited to do a review on this one a couple things before we get started uh one all the reviews that we do uh we do them because we love the the hobby uh we're also commercial operators and we fly all this equipment we we buy them ourselves people don't send them to us we're not we're not claiming to be gurus or you know slap a kiss on the wife for me and all that kind of stuff
the reviews that we do our Real reviews uh by experienced Pilots that have been flying these things for many many years uh 25 years in the hobby uh and pretty much in the beginning uh since the UAV Market really came about in the consumer market so the reviews that we do are real reviews we're not being paid to do these reviews we go out and we buy these drones just like you guys do so with that in mind let's get started today we have the DJI Phantom 4 this is a uh really anticipated drone for
2016 and we know there's a lot of competition in this space let's go ahead and get started uh we're not going to do a full unboxing we'll go ahead and get it opened up and we'll just talk about what's included in the Drone and we'll start talking about some of those features that you guys all want to know about so let's get started now the first thing you're going to notice is that DJI packs the Phantom 4 in somewhat of a shipping case that that can be used as a carrying case uh it's got a
lock on it you simply flip flip it out and twist it and there you go you've got a nice case now is this something you're going to throw on an airline in the baggage compartment no is it something that's going to last years and years no it's not waterproof it's not dust prooof but it's a really nice touch when youve paid what you've paid for the Phantom 4 to know that right out of the box you can essentially start flying and carry it with you wherever you go so it's a really nice feature uh inside
of the case you're going to have your Phantom 4 go ahead and pull that out here you're going to have your controller you're going to have two sets of props and you're going to have one battery now we actually have a second battery in here so right out of the out of the box you have a spot to put a spare battery but we'll go ahead and take out the battery that comes with it it's a very tight fit in there you're also going to have your manual you're going to have some cables and some
other things you guys know how that works and you're going to have your props of course we'll go ahead and take the props out you do get a full extra set of props in the typical DJI bag it's includ in the case and your quick start manuals um one thing they don't give you is an apple cable I still don't know why they do that when all their apps are really uh built around the Apple products like the iPad and the iPhone 6 and things that people usually use they do give you cables for Android
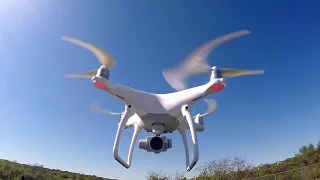
and there's a new cable included in here uh I'll have to find it there it is and this is the update cable and essentially what that is is an OTG cable with a USB female port on it we're going to get into how you use that in just a second so we'll go ahead and set this aside now First Impressions right out of the box uh it's a it's a nice looking machine I mean they really outdid themselves the Finish is a more of a glossy finish they've changed the shape of the arms to give
it a more rigid arm uh strength to it more of a uh kind of a octagon or a diamond shape to the uh to the arms which gives it more rigidity the motors are taller and we'll talk about why they did a taller motor U that basically has to do with when you're in forward flight or fast forward flight in let's say like the sport mode that keeps those props a little bit higher up so that when you dip forward they're not down here in the way of the shot and we'll give you some examples
of that later they also upgraded the Gimbal and then they put all of the guts to the gimbal inside of the copter um so they're a little bit uh more streamlined and I'm pretty sure they beefed up the the cushioning um they don't have the four balls the cushioning balls like they do on the Phantom uh three and earlier everything is inside and it's up inside of here the gimbal lock straps onto the bottom and then it pulls off of the bottom of the gimbal it also provides a lens cover and that gives your gimbal
lots of protection when it's in the case the battery of course is much larger now this particular battery is a 5350 milliamp 15.2 volt battery it's a lot wider but it's a little bit shorter so uh the overall weight of it is pretty close to the original the one thing that they did change is the connector there's kind of a universal connector on the bottom and although the battery does have to be inserted into the copter one way because there's more material on the top than the bottom when you go to charge it there's really
no right or wrong way to plug in the charger and we'll show you that when we get to charging so you simply just insert it click and the battery is in they did upgrade the props again um now we know we had originally we had nuts on the Phantom 1 then we had self-tightening on the Phantom 2 and three and now with the Phantom 4 we have more uh something more similar to what's on the Inspire which is a press and twist fit uh again anytime you're doing any of the props and especially we saw
a lot of complaints about the Phantom 3 and the fact that you know guys were cracking having cracks down here around the old motor mounts a lot of that's because guys are cranking them on and they go to take the props off and maybe the first they twist it the wrong way and they twist it the the the correct way afterwards that's causing a lot of stress on those bolts and and that's to be expected that when you have all that motor mounted there and you're cranking around on that motor trying to get your props
off you're going to put a lot of stress on that they they fix that on the phanom 4 I think we're not going to see those cracks mainly because the plastic is more rigid and the mounting uh Hardware is different as well as the props now you get two types of props you have a a prop with a silver stripe and a prop with a black stripe the prop with the black stripe goes on the motors with the white um motor mounts with the black tips on them so it's simply set it over the top
set it down and give it a Twist until it stops the silver ones are going to go on just the opposite down twist and lock and again and it's this quick and we've seen even people on the forums wondering well how do I get these props off they don't come off you have to push down and follow the little symbol on the props to know which way you unlock or lock it but make sure they're on there give them a little twist know that you've engaged a locking mechanism that is a fully assembled Phantom 4
the Phantom 4 radio is very similar to The Phantom 3 and Inspire radios is it's exactly the same actually they did a couple upgrades one is they put a metal bracket on here we know we had some problems with the Phantom 3 and it was wobbly they've upgraded that to the aluminum um it does appear to have a little bit more of a glossy finish like the Phantom 4 the big difference comes when you get into the switches on top we still have the traditional start and stop your video here and we have your start
and stop or take pictures here but what they did away with was the play button where you could play back your videos that now has to be do uh done through the go app what they've replaced the playback button with is a pause button so if you're using any of the new smart modes the active track or anything where the copter is in in autonomous flight and you decide that whoa I need to stop that you can just boom and you hit it and it stopped you can also do that by taking it out of
whatever mode you're in and switching it back we've also added the uh addition of sport mode now which we'll talk a little bit L later when we go into the flight characteristics of flying it but other than that the radio is the same you have your traditional buttons back here that allow you to program um you know your favorite things that you like to do camera settings battery mode whatever that may be um and you have your dial wheel for tilt this dial wheel uh unlike on the Phantom 3 where you could hit the play
button and actually scroll through your videos this is now basically a camera setting button so if it's your iris you want to adjust things like that shutter speed you can do that here other than that traditional return to home button and your power button and it recharges the same uh with your typical charger all right now let's talk about some of the really cool features in the Phantom 4 uh besides a really cleaned up look to It New Motors and prop design they've done some really amazing things with the internals not only on the gimbal
but the externals as well one of them being these two guys right here now these are stereoscopic cameras that actually work as collision avoidance now we've heard a lot of companies talking about collision avoidance unique was one uh there's a lot of other manufacturers out there that are doing some type of collision avoidance or electronic e bumpers they call them but again bam DJ knocked out of the park again with this one um these if it's enabled and we're going to go through that in the go app if you have the collision avoidance enabled uh
and you're flying along in the GPS mode if this senses anything in front of the copter and it goes out to I believe about 45 ft the actual it's kind of like a rear camera a backup camera you start to get a warning it starts out green then it's yellow then it's red then you get a beep and then the copter will actually stop and will not fly into that subject now it's not going to work with small things like power lines and even some small twig trees we've tested it out it definitely works on
solid objects like vehicles and walls and houses uh and trees that have thicker branches the big thing is again guys it's another safety it's an added safety measure it's not something to go hey I want to go see if I can run into something with my $1,500 quad it's a it's an added safety feature DJI keeps trying to make these things safer for you guys because as we know in this industry more and more beginners are getting into the industry and they want to fly the safest possible quadcopter on the market now along with the
stereoscopic vision on the front of the copter they've also added on the bottom here a second Optical flow camera and this is basically a camera as well they used to have the two sonar sensors and one Optical flow now they have dual Optical flow and why that's important is because anytime you're flying in an area where maybe you don't have GPS maybe indoors in a large Warehouse or a factory um where you don't have GPS the copter is going to drift around but with the with the vision positioning system on the on the bottom or
the optical flow sensors they're taking a video of the ground and if they see any changes in that video they're going to correct for you and what having two sensors does is it takes it from about 9 ft Max on the on the Phantom 3 to up to 30 feet on the Phantom 4 so you've got a lot more room to play with there it also helps in landing in both the auto and takeoff modes because it's another visual aid to help sense when the ground is coming up the sonar on the bottom is essentially
sending out a sonar sound to bounce off and reflect back so the combination of the sonar sensors and the optical flow cameras is how you get smooth Landings and allows you to fly indoors over a smooth surface without GPS now again if you're flying over you know funny textures like Tall Grass sand things like that that can be difficult for any Optical camera to pick up but typically cement floors if they have lines on them or the the the crack lines anything that has some kind of a reference point the the copter will track those
in maintain position along with the new sensors they've also beefed up the gimbal we have dual-sided gimbal Mount now the camera specs are pretty close to the same it does have some pretty amazing specs and we'll put those in a link below and on the screen right now um they did Mount the SD card and the micro SD uh cable uh excuse me the micro cable on the outside here uh for programming and access to the SD card and again they put all those guts up inside of the copter rather than have them all hang
down out here and exposed the battery of course we've talked about that they say 28 minutes we know you're not getting 28 minutes with that um probably closer to the 18 to 22 Mark um again if you're flying down uh to the 30% cuto Mark which most of you should be doing when you get that first warning at 30% you really should be working your way back home and then when you get to 10% that's your critical low battery that's where it's going to go into Autoland and you don't want to be out over water
over populated area or a house when you go into 10% so we recommend you know that 30% to 10% range where you should be landing so if you take that in consideration you're really only flying this battery to 70% uh maybe 80% of its capacity so the 22 minute Mark that would be a per you know or excuse me 28 minute mark would be you know laboratory perfect hover not doing anything you're not going to get that if there's any kind of wind if you're flying it down to those saf margins you're really going to
get about 22 minutes uh safely of flying 18 to 20 minutes um again they raise the props and the motors are taller and this gives you a better forward flight so when that camera is pointing out at level your props are now higher so that they're going to be uh easier to avoid getting the props in the shot again uh we'll talk about the sport mode here in a minute um I would call that a very advanced mode when you compare it to the Phantom 3 um the phantom 3 out of the box the GPS
mode was actually pretty quick um but yet you could let off the sticks and get that instant hover I've noticed that with the Phantom 4 in the GPS mode it flies a little bit slower than the Phantom 3 same control ability and same uh position hold when you let off the sticks but when you switch to sport mode it's like a rocket ship and I would definitely not recommend that for any beginner because it is way too fast um and even for professionals unless you're chasing racing boats or racing cars you're probably not going to
need to fly 50 m an hour with your Phantom uh 4 uh it's a neat feature you'll do it once or twice and you'll probably switch back to GPS mode the other big thing on the inside of the Phantom 4 is dual Imus and that is the inertial measurement unit that's the device that keeps copter level and the fact that they have dual Imus and dual compasses should uh add an extra layer of safety margin to the Phantom 4 for those who are concerned about flyaways and things like that we have our own opinion on
flyaways again regardless if you have dual IMU single Imus or the very first flight controller on the market you need to do an IMU calibration you need to do a compass calibration and you should do the compass calibration you know somewhat often when you travel around with your copter or if it's been in contact with anything magnetic like tools a speaker in your trunk uh the airlines you know throwing it on a conveyor belt things like that these are all things that can throw the compass is off and if you're worried about flyaways you want
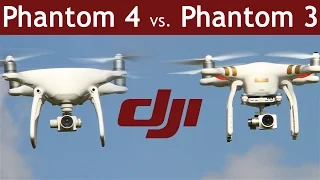
to make sure and have your own maintenance schedule and actually go through some of those uh calibration methods that we're going to go into the uh Go app here right next so that's a a brief overview of the sensors the upgraded items other than that we have a phantom 3 here to compare it to and the Phantom 3 still an awesome copter um is really about the same size you've got basically a different finish you've got the same size about the same flight time the big differences again are in those gimbals down below and the
the addition of the optical sensors as well as the Dual Imus in the Phantom 4 other than that if you just want to get a 4k camera in the air and your budget is limited there is absolutely nothing wrong with the Phantom 4 professional this is an awesome machine we still fly it every day um if you got to have the latest greatest and you want the Optical avoidance sensors and uh a slightly higher flight time and some of those thing some of those things you may want to go with the Phantom 4 but again
both great copters um obviously a lower price with the Phantom 3 so let's get into the DJI Go app we're going to show you a couple changes including the firmware update which we love totally different than how you do it on the Phantom 3 and the Inspire which is the method of in putting the firmware update on an SD card and sticking in the slot and wondering when is this copter going to get done updating they've taken that mystery away with the Phantom 4 with the addition of this new cable here we're going to go
into how that works right now now one of the first things you're going to have to do with your Phantom 4 when you get it out of the box is check for updates and do the updates um now DJI has updated one of the items to where it's completely done on Wi-Fi and that is the actual Go app and the updating the RC if you remember if you had a phantom 3 or the first inspire you used to have to put a SD stick in the back with the firmware on it they've now uh eliminated
that and you can now do that using the go app and the cable that's already connected to your radio so when you go into the top where it says either safe to fly or ready to fly and under firmware you're going to notice that it may say your RC needs to be upgraded now as long as your mobile device whether that be your tablet or phone is on Wi-Fi the update will be able to be downloaded from the DJI site and once the update is downloaded you can simply do start the upgrade to the RC
and it's all done through the cable here your radio will beep uh and the LED will turn blue once the RC is updated it'll tell you on the screen that it's updated and you restart the RC and the RC is done now let's jump to the copter now previous to the Phantom 4 the way you updated the copter and this is the same on the Phantom three and the Inspire is you took the SD card the micro SD card out of the camera you took it to your computer you put the latest firmware in the
root directory of the card then you brought the card back to the camera you left your radio off you turned on the copter and you waited for a series of beeps and dings and lights flashing and it may take 5 minutes it may take 20 minutes nobody really knew a lot of people were stopping the update in the middle cuz they thought it was done only to find out that it didn't work so people are having trouble with the firmware not uploading so what DJI has done now is that they've included this small cable and
it's basically a USB connector on one end and an OTG cable on the other end and what that allows you to do is when you want to do the update or if your app indicates that there's an update for the copter you're going to take this cable and you're going to insert that into the left side of the copter you're then going to remove the large end of the USB cable from your radio leaving it into the tablet or mobile device which again is on Wi-Fi or connected to your network you're then going to plug
this in directly to the copter the copter will be recognized the update will automatically download and it gives you a progress bar which is great because before we were waiting on beeps now we actually see the percentage going across once the update's complete the the on- screen menu will tell you it's complete restart the copter you restart everything's good to go so if there's any updates for the camera or the copter that's all going to be done directly to the cable now there's no more putting it on an SD card and wondering if it worked
or if you formatted the card correctly so they've really stepped it up as far as doing firmware upgrades both for the radio which is completely done automatically through the cable connected directly and using the new cable plugging it directly into your Phantom 4 and doing update that way so big Improvement there and we're now going to move on to getting out and flying this guy we're going to take it outside we're going to show you the sport mode we're going to show you GPS the collision avoidance we're going to show you the active track and
some of the other autonomous modes and let's go out and get flying now sometimes you get out and now you find a really nice place to take off from nice smooth surface and then you notice that your DJI Go app says that you need to move the aircraft or there's a compass calibration that's needed now that can happen now maybe you already did a compass calibration just 5 minutes ago but we're sitting here on smooth concrete and right under concrete is usually rebar and cement and sand and everything else but the rebar that's inside of
there is causing some interference with your compass so it's as simple as either move it to a new location on the concrete or even better yet take it off the concrete and move it to a grassy area where you know there's no rebar under it and then your compass will show that it's all good to go and you're ready to fly the home Point has been update take [Music] off so now in GPS mode it's very stable very smooth and even with full deflection uh the copter doesn't travel that fast and that's full forward flight
right there in GPS mode okay now we'll come [Music] back now in sport mode the collision avoidance is turned off so you're not going to have that c collision avoidance and the copter travels a lot [Music] [Music] faster wow now to set up your obstacle avoiding sensors for the first time you're going to want to go into the main menu item and then under the main menu item you're going to see a new icon here that looks kind of like a uh signal strength bar that's your sensor bar and the nice thing that DJI did
here is they actually gave you a description of what everything is so the first thing right out of the box is do you want to turn on Ford obstacle sensing system yes or no so if it's off it's going to be off you're going to go ahead and turn that on and then you're going to have the front sensors on after that there's some options so not only do you have the obstacle sensing turned on but you can also turn it on or off for when you're using the tapfly function which we're going to show
you in the outside demo and the active track now one thing with the active track is that if you have this enabled it says right here if activated aircraft will automatically fly backwards if a subject being tracked is moving towards it so if you walk up and put your hand in front of it the Phantom 4 is going to move backwards and since there's no sensors on the back you could potentially run into a fence or a tree so I don't particularly have that on mind but if you want that you could enable that there
enable obstacle avoidance for when you're using active track so let's say you're tracking somebody on the ground but you fly towards a tree and there's a tree there do you want the copter to actually avoid that horizontally yes or no if you have that turned on it will side step left or right to avoid it if you have it turned off it'll just slow to a stop and not move anywhere and then the tap fly is for allowing horizontal obstacle avoidance again if you've done that dot on the screen and you want it to fly
to a location while it's flying there do you want it to fly around obstacles or just stop and if you have it enabled you're going to fly around the obstacles and that pretty much covers how you set up and change the settings for your visual navigation system now with the collision avoidance on the copter will sense and avoid obstacles now we have a building here in front of [Music] us and you can hear the app has now triggered the alarm and even with full stick deflection we cannot move forward so we must either raise up
and go around this obstacle or turn around and go the other [Music] way okay the obstacle has been avoided I could now proceed on now one of the really great features of the P4 was the addition of a Mode called active track and you simply touch active track and then you're going to draw a small square around your subject as long as the camera picks it up you'll get the green box you'll hit go and then the copter will now follow that subject and it does this completely handsfree now this differs from follow me mode
because in follow me mode the copter is tracking the radio which has a GPS in it this mode it's actually tracking the subject walking and will stay on that subject the entire time even though he has turned around the copter is now going to track him both with the camera tilt and the direction of the copter now one area where you may have trouble using the active tract is in a high contrast situation uh sometimes if you have a very very bright background or a dark subject on a dark background you'll have a hard time
getting that in the shot let's see how it works here so so far it's doing pretty good tracking him no problems there even with the tilt down and we have our camera rolling we also have if anytime you want to cancel any of these active modes the active track or any the autonomous flight you can either hit the stop button or you can hit the pause button which we we covered earlier in the video now you see it's back to tracking and do you want to track the subject now he's out of range so there
is some limitations to the active track um Range being one of them high contrast situations U you can see now he's pretty far away but once you have caught up to the subject once you're you're kind of locked on you can then retract the subject and start over again and there we go and he's moving on us there there we go and we're backtracking him he's walking directly under it the camera is not only rotating down to catch him but the copter is yawing and rotating around to follow him and now we have him perfectly
in View and the copter is tracking him so that's one of the really cool modes the next one we're going to cover is a is a pretty uh generic mode but it's one that can be used to to capture some really neat shots and that's one uh that's called tapfly now let's say you want to get that really cinematic shot here we want to um maybe catch a a shot of this this Lake here and we want to get a really neat climbing shot maybe climbing up through the trees so what this shot and this
mode allows us to do is simply pick an area in space to record and the copter will fly to that position so we're going to go to tap fly we're going to go ahead and start our recording and we're going to pick an area right there and when we like that area we just say go and the copter proceeds to follow the dot that we put and give us this nice cinematic shot as it flies through there you can see the Collision of void started to pick up that twig a little bit there but we
were clear of it so we're continuing on and again this can give you that really smooth shot especially if you have to get through a narrow area or something to that effect all right guys well I hope you enjoyed the Phantom 4 review and demo and make sure you get out there and like And subscribe our videos also if you have a comment or question leave it down in the comments below uh we'll also put an email address there you can contact us if you have questions uh get out fly safe and blue skies [Music]