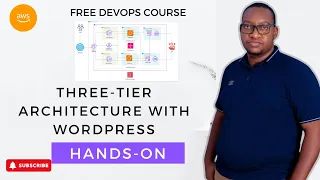
hello so this week uh we are going to do another project in which we are going to uh launch a website using uh WordPress CMS and then for this project we are going to utilize uh RDS uh for our database and then we are going to launch one easy2 instance for our web server and then uh we are also going to uh use uh EFS uh for our file storage so these are the three main uh IT services we are going to use today and then we are going to launch our WordPress CMS so okay let's let's jump into it and um so first thing first uh let's create our VPC um for the environment Network environment um so create VPC and then I'm going to name this uh WordPress WP project and then side the block 24 uh tency default and then also this is 2 a uh and then we are going to have two subnets public subnet and then also private subnet uh okay everything looks good and then just create so this is going to create our VPC okay great our VPC is done and then let's create security groups for our services um see to um and then security groups okay so we are going to create three security groups uh one is for our ec2 server so ec2 server SG Security Group I'm going to copy and paste it here and then this is going to be in our VPC we created earlier so for the rules so this is for the uh web traffic so for our web server so we are going to accept HTTP in bound traffic from anywhere ipv4 and then uh we Al we will also and aable SSH uh so that we can uh SSH into uh our uh server so okay that's it for for our ec2 security group and then we need two more so okay create another Security Group uh this will be for for our EFS uh so e FS uh let WordPress and then EFS Security Group uh this is the name that I want I I choose so you can name whatever you want and then this is going to be an our VPC we created earlier and then uh so this is EFS so it has to be uh an FS Network file system so uh the part range is 2049 and then uh uh uh the traffic inbound traffic is from our security group uh we created earlier the the our server so it's going to talk to our server and then that's it we don't need anything else for our EFS uh and then for the outbound all traffic from anywhere and create Security Group so and then we have our EFS Security Group and then and then we need another one for our database so okay WP database and then SG so this will be in our VPC and then so for the database uh we need to I'm going to use the SQL so SQL my SQL and then the PCH will be 3306 and then for the database this is is uh also from our custom uh the source will be from our security group uh for the ec2 because uh it has to to to communicate uh to our E2 um so this is the only inbound rule uh we we have to allow and then uh the rest it will be denied okay uh now we have our three security groups ready so let's prepare for the rest so what do we do next what should we do let's create our EFS first our file storage okay EFS and then create file system I'm going to name this uh WordPress storage EFS and then the VPC we created earlier and done the custom it and then uh yeah Regional I want this uh it's it's going to cost more if you enable this so I'm going to for this uh demo I'm not going to use the infrequent access and archive um uh features uh what do I need here so I created uh my KMS key already so I'm going to use my KMS key and then and uh what else do we have here so we don't need anything else so next so this is the VPC already uh chosen for for us um the VPC we created earlier and then the AC AC availability Zone us2 A us2 B to availability Zone I want it to be in our public subnet so public subnet one change it public subnet to okay and then this is I'm going to cross it out because I already created our security group for our EFS where is it here wpfs Security Group and then also here uh EFS Security Group okay and then next uh you can leave it as it is uh uh I will I will leave it uh as default and then I think that's it create okay now we have our file storage EFS created and then we are going to also create a database to store our uh WordPress uh database okay and we're going to use IDs so RS and then uh okay create database so I'm going to use my SQL and then Community Edition uh version I leave it by default and then I'm going to use a free tier and then so I'm going to name this WP dat base okay and then yeah just I will leave it at me it's not a it's not a best practice so if you are doing it in production uh name name this something else um so for my for for for me because this is uh a demonstration Pro Pro only uh a lab project so I'm going to leave as an admin and then uh the master password you can you can use it auto generate for you but uh for this I'm going to just use password 1 2 3 4 5 6 don't use it in production 1 2 3 4 5 6 okay uh just for easier demonstration so uh okay connectivity storage okay we don't need anything else here yeah we will we will manually connected to our uh ec2 so we don't need that and then not default VPC we are going to use the VPC we created earlier and then not public assess this is not going to be uh for for we are not going to open for public asset uh access uh this is going to be accessible uh by our ec2 uh E2 instance ec2 server only so no and then choose existing yes uh we are going to deselect the default and then where is here is our database Security Group and then availability Zone you can choose or no reference but I will choose USS 2A uh um and then the port 3306 okay I think uh we also need additional setting here so we can name our uh the database name we need this when we configure our project uh our WordPress uh files um okay okay okay encryption and then this is going to be m key I created for myself and then what else that's it create database what oh didn't match okay let me let me do it again 1 2 3 4 5 six p a SS W oh I have it C oh sorry about that so let's go again b a SS r d 1 2 3 4 56 I tell you this is not the best practice to have this week password if it isn't uh if you are doing it for production uh you should have a really strong password okay create database hopefully no error this time we good so we have our database we have our EF EFS uh storage configure now let's boot up our ec2 instance for the web server okay I have one running but I'm going to launch another so let's name it like WP WordPress server one and then we are going to use Amazon Linux Ami and then leave it by default you to my Crow free tier and then keypad I have my keypad here and then I'm going to configure my network so this is going to be the VPC I created earlier and then I want this to be in public yeah Public Sub one okay and then I would like to have or to assign I public IP and then I have security group created earlier selecting from the where is it oh man where is it easy to Sero okay what else we need here we don't need anything from here and then so you also need to uh identify your EFS so this is the one we created earlier and then the mount Point uh for our uh web application will be V ww HTML so this is where our WordPress file will be store and then we don't need Auto automatic create because we already created the security group and then but I we want this one so that uh we have the user data uh to put up the uh to mount to mount the EFS uh drive so you can have a look at down here it is uh populated for us uh so we don't need to worry anything if you select uh here to to to be automatically uh Mount our share files then you'll have all the St script uh be predefined for you here so that's good for us I think uh that's good to go but let's double check um so Ami micro and then okay have a PR key pair and our VPC and then also we have a public IP Security Group okay okay I think we good so launch instance okay let's check pending okay let's give it some time so um but let me go in and then I try to connect uh so let's connect connect to our server and see if it is up and running okay let me check adf-h to see if it mounted yet oh it's not yet so we don't see we don't see uh the the EFS has been uh mounted yet uh our file storage system uh I think because our instant is still booting up oh it is already running uh if we have no issues it should be oh no not running uh status is still initializing so probably it's not done yet so let's check back again oh okay now you see we have uh the our EFS uh mounted the way we want it to want it to be uh so I think we're good to go and then I'm going to change our directory to this uh um v r ww HTML so this is the directory we are going to work for our WordPress so so before that uh we have we have uh I I mean we link uh uh our ec2 and then EFS already and then uh um we are going to now install our web server so sudo um sudum install uh Dy and then httpd for the web server and then PHP PHP my SQL N D I think that would be it for our web server D okay great installing installing it would take a little while okay great uh so let's start our web server uh sudos Sy CPL start httpd web server and then okay you start a web server and now let's enable it CTL enable httpd Okay and then let's check uh if it is active uh sudo system c l status httpd okay we good it's active and running let me clear this okay ah okay then let's go into our public IP address and see oh I'm not configur to have a https so delete the S and then refresh okay our web server is working fine so right now let's test uh the the um uh if our file storage is working correctly so I'm going to put the index uh HTML file into the the uh directory that we created earlier into our EFS uh so for that uh sudo I'm going to have a text editor sudo and then index. HTML so so this is going to HTML okay great HTML I'm just going to write a symbol HTML tag here and then title title this is my WordPress application okay and then let's have something in the body okay okay e o D1 okay this is working perfectly okay and then y okay I think that's a good uh basic HTML tag okay save it yes okay this's okay we have that so let's refresh this okay as you can see uh our EFS also has been mounted correctly it's working fine so let's uh remove that and then uh download the WordPress uh package and then let's remove that to do rmex index. HML thens nothing here that's great we remove so let's get our let's get our WordPress downloaded into our EFS storage so okay https uh WordPress G and then latest version D.
G set okay that should do huh oh okay sorry typo the web get https okay hopefully this time I got it right G okay before I hit enter let's double check sudo web get HPS okay I think we're good to go enter okay successfully downloaded uh L okay we we have this here great so let's unip this um sudo and then uh this is extracting Z wers file and then latest so okay I think that's it enter okay so it's going to take a while I'm zipping all the WordPress uh baggage uh let let it run and until it's done okay I think that's it that's TR listing it again just to see okay we have the WordPress so so we don't want this whole file here uh we want every WordPress file in this WordPress folder to move up uh one uh directory up one okay one okay what do we do so we are going to move it uh One Step Up sud do and then we are going to move so MV and then uh WordPress WordPress and then everything from WordPress slash to up One Directory okay D okay and then let's check back L okay we good here we get everything but I I want it clean so I'm going to remove the the zip file and also the the the WordPress folder so let's do that sud uh remove uh let's make sure it remove everything every files okay and then uh what is that latest and then also WordPress okay and let's list it out again and see okay they're gone okay I think we good uh so right now now what I need to do is I need to um uh edit this uh WordPress configuration file the PHP file so let's do that uh I'm going to uh copy and then rename it into uh WordPress config. php that's uh the the the one uh the the config file we need so for that sudo and then copy uh we are going to copy uh WP config uh sample file sample. PHP to uh WP config do PHP okay that's good no typ okay great uh let's list it out and check again do we have config file we have config file here okay great let's add that sudo Nano and then uh WP config.
php great so we need to Define our database name uh so this has to be database name we created earlier uh the the RPS s MySQL so I named that WP project uh so this is going to be this and then our usern name so we have um I I left it as default uh at and then okay we need also to Define password here so password I put it uh easy as password okay pass word 1 2 3 4 5 6 this is not recommended okay so if you are doing in the production you have to have a strong password for the host so this is going to be our database endpoint so let's go back to our RDS and then get the endo URL where is it here database and then here it will be our end point and then okay just paste it here okay we're good now and then I'm going to save it and then out okay I think we are pretty good uh oh I think I also need to uh change the permission so that um we have the uh the uh the the owner has the right permissions to to the WordPress uh files uh the WordPress package so let me do that um so that we don't encounter any permission issue down the line so okay sudo uh I'm going to change ownership okay R for every files and then it's going to be uhi because I'm using httpd Apache web server Apache and then uh the file the directory that we mounted our uh web application okay I think that's it any typable no typo okay great okay let's see taking a while okay done so let's list up and see okay now we have uh uh the the Apache uh the right uh okay we change ownership right now we change the uh the we change the re commission the right permission uh chain Mark and then every files 2775 uh okay and then to which directory this directory www HTML great so read read write uh that's it I guess it's taking a while it should be okay let's check okay all green now we have read right the own uh the the web server Apache okay read right okay great I think we're good to go now let's see let's access our website so if everything is good yeah everything is good then you should get this window uh for you to install the WordPress so okay so my WordPress CMS web application okay username I'm just going to leave it admin and then password easy just for this uh um just for this project okay confirm week password because is weak and then this is just going to be anything I'm just going to make it up side.