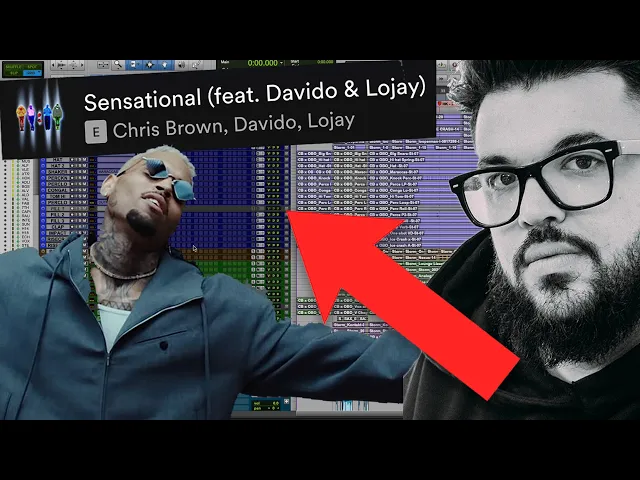
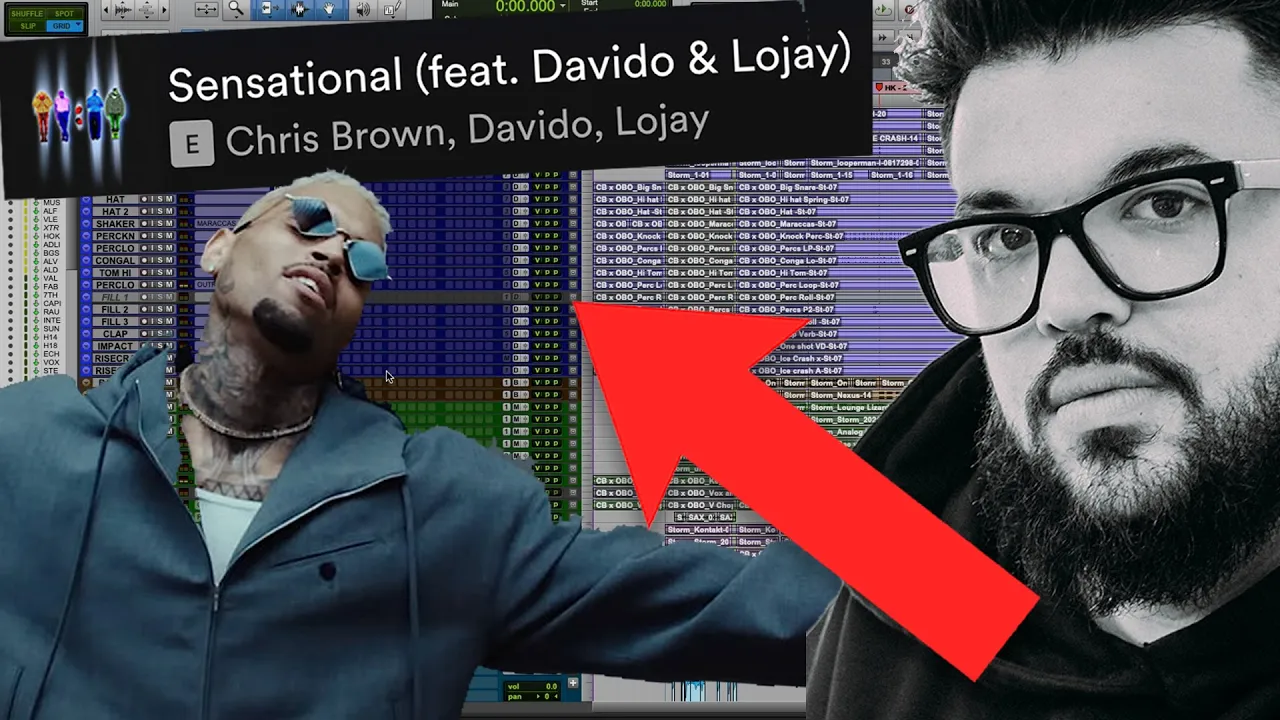
right here chapter 12 the Drake chapter Drake was having some family members over and friends over to the bowling alley I went to the party with my assistant and Junior engineer at the time tiio tiio is a Grammy awardwinning mix engineer who's worked with some of today's biggest artists today's video we're going to be taking a behind the scenes look at his home studio and do an exclusive mix breakdown of the hit song Sensational by Chris Brown featuring deito and loj what's up guys this is Tio we had George T music come to the studio
right after n I'm going to show you guys the house the studio and then we'll get into the actual Studio section where we're going to break down some stuff uh but yeah let's let's come over here these are all actually the newer plaques that I've gotten recently um probably my favorite one or the biggest one I have so far is the L NAX industry baby which is this one here 5x Platinum one of my favorite mixes we'll start here Jack harlo first class this is actually an older record the Chris Brown record privacy um funny
story behind that record I think we cut that record in 15 minutes we just had a beat from da domen and we were in New York it was um it was New Year's time and Chris pulled up the beat and he wrote privacy within 15 minutes so that's that's this plaque here this one is my first number one record that's my second number one record on Billboard um so yeah Lil M X1 was obviously one of the biggest records I've ever had um next to no guidance um so we got that on the wall and
we got room for more to continue up up here cuz I got a blank canvas one of my favorite visual plaques is the trippy red one if you want to go in you can kind of see got like this 3d effect um this one I got with my boy uh Scott Storch who had me mix the record after they had done the record this is my biggest physical plaque and the most expensive one but this is uh the Cris Brown Indigo sort of it's all put together with like Indigo no guidance undecided which was the
first single from the album and don't check on me which was featuring Justin Bieber uh so this one's huge this one's like 25003 grand for this plaque so it's [ __ ] massive and really expensive Danny L easy which is now I think 3x Platinum this is my smallest but very powerful plaque up here this one is tiny but it is the Freaky Friday song when Chris walked in the room Lil Dicky broke down the entire song the video exactly how it was going to go like word for word and the record is one of
those things where when you hear the record you don't really understand it but if you see the video then you kind of get it cuz it needs the visual to go with the fact that Chris and Little Dicky sort of swap bodies um but the way he explained it to Chris Chris was on board right away he thought it was funny then we have the party song which was one of the first songs I had done with Chris for the Heartbreak album Indigo this is the Billboard number one for the album we got number one
on the billboard 200 and uh rap and hip hop at the same time um we'll jump right down to this one this is actually a funny story so I'm from Argentina and I like working with artists from Argentina to sort of uplift and help the artists over there from where I'm from and I don't have any other International plaques except this one right now I went to Argentina uh to visit family and I stopped by their studio and I hung out with them cuz I hadn't met them in person yet and they were like you
have to take a plaque with you it's funny they gave it to me and I kept on saying like I don't know if I'm going to be able to walk through the airport with this or get this on the plane cuz I didn't want to put it under the plane so I literally just walk through the airport like this in the backpack then we jump into the billboard number one Hot 100 L nox and Jack harlo first number one record on the Billboard 100 jumping here we have a song called questions um which I really
loved it didn't take off as much as it should have but it was an actual sample from an old record that was like really catchy I love that so that's that then this is for Jack Carlo and Chris Brown we did a feature for him Eric Bellinger heartbreak on a full moon this was the first album that I had worked on Chris with and we went number one on the billboard uh R&B and hip-hop album chart gunana when we did w we went top or we went number one in three categories billboard 200 top R&B
and hip-hop and top rap albums so that was a big one for me when we did the one album jumping down here kid ly jump in here we have pills and Automobiles This Record we literally cut it in like 10 minutes it's it was super simple this song mil was pre chis so this is like years before working with Chris I did Fergie Fergy's second album I think it was our second ever it was like The Duchess 2 and the mil song went gold so I got the plaque for that and then of course Tory
Lanes love me now and this is the second biggest plaque I have which is um gun a dollas on my head featuring Young Thug and I just love the plaque it's just so big and like I love like the mirror type of letter ing up there with the word gunana there's actually a funny sign the guys from audio movers got me this and they were like when they got acquired by Abby Road they were like they gave me this as a gift so I keep this here as Studio 2 ABY Road Studios and then we
enter the studio I don't have any plaques in the studio I used to back in the day and I kind of just now I have room to put them elsewhere but I do have my grammy participation SL losing Awards up here cuz we haven't won a Grammy yet but soon soon we will album of the year for Montero we lost that one obviously album of the year for her Jack Carlo last year for first class rap album of the year and one of my favorite ones is the no guidance one which I actually that was
nominated in 20 it came out in 2019 nominated 2020 this is where everything happens uh I moved into this house probably 3 months before I mix industry baby so industry baby was mixed in this room along with first class and pretty much every record you've heard from 2021 and on until now um so yeah all right so now we're going to jump into the gear we'll start up top uh with backup drives very important so these are this is the backup drive for me this is Chris's backup drive here CB backup so I'll use this
cuz I have another engineer cutting his vocals now so basically whenever stuff's sent to me I back it up on this drive he also has a backup drive as well when my backup drives are up here I just use them every night when I'm finished I plug them in back up the drives just in case something happens um after that we have the TC electronic meter control which sort of as you guys know gives me the the uh the levels of everything and all kinds of cool stuff the correlation between the phase under that I
have my uad2 satellite which I also have a um what's it called the PCI card inside of the computer so this is just sort of a backup that I have Sonos so I really like how this speaker sounds I use it when I'm kind of maybe having trouble not hearing something maybe in the car I just want to hear something in Vibe or I have clients coming over and something's happening here with my assistants and we want to play music so I have the Sonos box which is really nice to have jumping down into the
actual gear interface the Aurora uh links which is my favorite interface I um I've had that for about 3 years now um underneath this is the 5057 orbit summing mixer so this as you guys know has the blue silk red silk um and the texture knob and my output trim which when I discuss like sending stuff to mastering what I'll usually do is I'll back off here on the trim um so right now I'm mixing so it's just a zero below that the insane mcdsp APB box 16 so this gives me 16 monoch channels or
eight stereo channels of uh processing jumping over here we have the fern Hazel rig industry VLC preamps which are incredible um I love using those to like reamp vocals if was cutting vocals I could use them as a preamp um but a lot of times I get vocals sometimes where the vocals like recorded really low so instead of like gaining it on the track I'll actually reamp them through the preamps um and above that is the magic box as I call it the DWF vt5 which is a tube EQ um it's really dope I have
it on all of my mixes it's just on this is where I have my grace box the m905 which this is the controller for it and when I want to hear it quickly I can literally just press this button it instantly switches over to the rough mix this is my co1b and then I have the Aurora audio GTP 1 preamp and the speakers PMC 2 or 62s which are my favorite speakers I know Baines has the 8 tws but he likes like a more robust lowend sound the thing about my room is since the floors
are floated 2 and 1/2 ft above the ground the low end literally just like like resonates the whole room you could hear when I was when I was playing music earlier um that the whole room just fills with Bas and yeah so these are amazing amazing speakers I'm thinking of getting another pair in case I want to travel and just like take them with me so yeah this is the studio and let's get into uh some breakdowns and some [Music] questions and all right cool so top of the session you can see we have the
marker showing all the sections which is really important for organizing and moving around the record uh this is the Mix 4 which is what ended up on the album um this is the print that essentially I sent to Chris for him to approve um and yeah so this is the print track and these are all my buses here so we got we got drum bus um which just has God Particle just doing 28 there's nothing on the limiter happening um this Weiss compressor which let me just solo out the drum so you guys can see
what's going on with that um Okay cool so we got this wise compressor which once I've got all the drums sort of set up and going I've got four DBS of gain some compression happening which is what's going to allow me to have reduced Dynamics so I can get louder with the mix base bus which is here I usually put this Elm on there I don't think I'm using it on this record but occasionally when I'm feeling that the base is missing a little bit of saturation I'll come up here and just gain this up
and give it some saturation and pull that saturation knob up this is one of the plugins from the mcdsp um APB box again I have these these These ozon are here just in case I need to do some uh lowend Dynamic compression or dynamic EQ compression um so I just have it there in case I need it if not it Just flows through my music bus I don't have anything on it for this song occasionally I'll put the track spacer on there which I'm sure you've heard of the track spacer that'll sort of just react
to the vocals and sort of push down the music as the vocals going so that things don't mask each other if I'm having that issue my all effects bus is where like the Reverb the delays anything that's in effect will flow through here and you can see my outputs 9 and 10 11 and 12 13 that's what's feeding my summy mixer so the summy mixer is being fed by all these buses and then the sum then then the summy mixer is feeding it back to the KN return here so three and four input and that's
what's going then to the mix bus so coming down we have the verse leads I usually separate drums based music all effects leads um hook lead and verse leads go to the same channel in the summing mixer just because usually those things don't end up on top of each other um and also just the same space I have this for features occasionally if I have a feature that I don't want it to run through the V leads I can add that to the extra lead so I just have that inactive ad lib leads those are
important for for especially for Chris that does a lot of AD libbs and stuff like that that needs to be treated on its own or or separated on its own in create separation from The Hook and the leads in the summ mixer background bus that's where all the backgrounds go I have some plugins here inactive that I can use if I'm feeling like oh the backgrounds need a little bit of Soo I can activate that if the overall backgrounds have a little bit of essing that I still need to take care of even after I've
done it down where the backgrounds are I can add that here um and the chicken head so the chicken head is another APB plugin that I use I will use this more normally on the leads cuz that's where usually I need things to sort of squeeze down the backgrounds I don't usually have an issue but I do have it there in case I do need to pull it up this is where my all verb and all delay buses go um so both of these channels feed that all effects channel the reason why I have the
verb and the delay separated is cuz occasionally clients will ask me hey can we get a split out of verb on its own and delays on its own instead of the all effects which would feed um all the effects would be on one channel so I have these separated not because I really need to but in case client's like yo can we get the verb separate then I don't have to do the work of creating a new bus after that I have these effects which are like Valhalla 7th Heaven Fab filter Reverb the capital chamber
uh the ROM verb which I use actually a lot I love this plugin I don't know if you guys have seen this from uh Native Instruments but it's like this super big super Airy Reverb um the intense verb which I don't use that much um but it's still there and if I need it I can just go and reinstate it I don't use that too much cuz it feels like a little bit too shiny sometimes Sunset verb which apparent I probably won't have either now oh no it's still good this is from T-Rex so this
is the studio verb like a little Sunset if I'm doing something funky where I want to get out of the normal 7th Heaven or Valhalla I can use that um my standard delays which I have here I have I think I have this Clipper on here too do I have a Clipper on here oh no that's for combination so let's say I want to add some Reverb to my delay I put that I can put the sunset verb on there my eighth note delay well we'll jump here first the corner delay I have it on
ping pong just standard and I have this High Pass low pass thing going where it's not going to interact with the frequency the high frequencies of the lead vocal too much I can obviously make adjustments as I'm mixing but this is kind of my starting play same with the uh H delay this is the one that I use notoriously on Chris's lead where you kind of hear like this pingpong but you like feel it more than you hear it um so I have this again a filter at 1.27k and at 247 uh HT so that
just gives it like an underwater feeling and I'll lightly use that on pingpong and that's what you're hearing kind of left and right occasionally I want to get you know spicy with it I'll put a flanger on the on the delay if I want to create like some some texture depth with the delay um so that's there just in case the sound toys Echo boy my quarter notes so if I don't want to use my H delay quarter node I can come down to the echo boy and and put that in doubler effects that I
have this or sort of does something similar to what I was talking about earlier where if I want to create some WID within a vocal this is my my setting which is always turn the direct off and leave the side channels on um I turn off the EQ usually this comes like this when you first start it but um I put it to zero just there um and after that I follow it with a 16 note delay so that gives me a hard slap back with no Center channel so that'll create some width within a
vocal and these are all just like literally the standard pieces of my effects I can always add stuff or I have these like open tracks here where I can add you know if they're like hey can you do a one a quarter note triplet delay I can just throw one on here set an input it's already going out my FX bus um and then what do we have here we got this stereo delay um distorted DeLay So this is like a super distorted Reverb delay with a quarter note on there so occasionally I'll use this
I think I made this one time in a session and I really liked it so I brought it into my mix template um and then I have micros shift which as you guys know this also can create some width within a vocal and some H Reverb after that just to create some distance and then just a St standard doubler sometimes I just need a little bit of a doubler if I have like a sound that's in mono and I want to just like give a little information to the sides I have a roll off here
like starting at 250 and then kind of just gradually rolling off just cuz a lot of times when you're creating width you're not necessarily looking for low end width you're looking for top end width um so yeah so that's it for my sort of template that I have it's really simple really intuitive um and then we get into all these drums which for this record there's a lot of drums um so we'll just press [Music] play so boom we have the kick real simple [ __ ] I mean like again like I look people have
been seeing me do real slight resonant frequency things this is something that I caught at 157 and then obviously that bulk that's happening here I'm just toning that down a little bit all these things are sort of reduc in dynamics of the kick so that I'm able to get the song to be really loud um if you let the kick sort of just go crazy you're never going to get past - 10 - 11 on the ls and you'll never get it approved by the client cuz the rough is probably bounced really loud um I
have a question can you explain how you're determining what frequencies to take out so a lot of people wonder about this yeah so I'll just mess with it here so I can hear it that sort of was like a let me turn it up so that was like a weird frequency that I wanted let me bypass it so that's the kick and then this is with that raise so I wanted to kind of get that frequency out of the way and then this one the reason why I'm turning it down is because as you can
see on the on the analyzer this is where that punch is coming um but I need to start to reduce the punch and get it louder just in general so that's and it's really small I mean this is half a DB this is 1 DB of reduction so these are small little things and they may not make a difference like if I bypass this right now it's not going to make a huge difference just on this sound but over the course of the 808 being put in and other elements being put in those things start
to sort of clash a little bit um add the snare in turn it down a little bit snare real light work here uh you can kind of see like that's why I love like the analyzers here we'll make it stick I love the analyzers because you're able to see where problematic frequencies are but you're also able to confirm with your ears like okay yeah that's an issue there's occasionally times like you can see right here why didn't I bring this down why didn't I bring these down those weren't really bothering me this one for sure
this this 519 is definitely an issue brought that down just a little bit if I were to try to completely take away this frequency um I think that it would kind of destroy this the sound of the snare and that low end is coming from there so I just did like a little half DB and right here on this frequency I boosted 32 so it's like real small work here the the snare was a little bit bright so I kind of just tone it down and these are all small tiny moves that I'm making as
I'm moving um Bongo which these are like the boring stuff it's just like a bongo um I added some Fab verb to this which is that Fab verb you saw in the effect upstairs which is it's really dope cuz I can just come here and just do you know Valhalla and type it in and boom it pulls up it's already part of my template so boom there's that there's this little rise right here which is um what you hear in the thing so pretty a lot of work here but you can see where this is
an issue already like you're seeing it right there I'm confirming with my ears I want to get rid of this I'm seeing it I'm hearing it so I'm sort of toning that down I got a little bit of the low end out of it cuz there's base there as well and I want I didn't want there to be any interaction between the rise and the base high hats I added this Omega thing which I don't know if you guys have ever Kush audio is really dope um just to give it like a little bit of
saturation cuz I felt like the high hat was a little bit boring before here again you can sort of see visually like this is an issue this is something that's a little bit too high so I just Notch that down a little bit um here as well and then I to make up for the fact that I may have gotten rid of a little bit of um the top end I had a little body too just in case you know the high hat doesn't have a lot of body but I didn't want it to be
too thin so I added that uh a little bit of soothe 71% really sharp so it's catching like those individual transients of the of the frequencies right there boom compression fast attack fast release almost 2db 2 to1 ratio there there's a Shaker here silica I love this plugin I put it on Fury this is like an in between for decapitator like it's not going to go as crazy as decapitator but it's still like a nice texture sound or nice texture plugin that I can put on sound uh another Bongo it's an afro song so there's
going to be Bongos this is the perfect example of me just going in and finding one thing boom that's an issue and it was this frequency here if I were to solo this that's like really resonant so Notch that down a little bit again if I go down here kills the sound so it's like an in between that I need to figure out like I can tone it down a little bit not but not too much open hat here let me open the way for a little bit so you can see it so that's a
sort of like a a rise open Hat type of thing I didn't even add compression to it I just did a little bit of work on the EQ and I panned it to the right a little bit cuz again I'm trying to create width within the mix so I'm panning certain things to the right or to the left not everything will be able to live down the center along with the Basse the music and the vocals um here is this roll which it's one of my favorite parts of the [Music] song little bit of a
dynamic EQ here and reduce this here as a little bit of that high mids and almost 4K pretty wide Bell uh symbol again just getting rid of some of these bad [Music] frequencies and what do we got here this is the shot which is sort of like this gunshot type of sound a little bit of reduction not too much work I mean it doesn't need that much almost two DBS of reduction on it um what else another hat there tends to be multiple hats in production not just one some supporting hats the other hat was
the main hat this is more of a supporting hat um just a little bit of dynamic reduction there nothing too crazy this is another high hat which is another background hat little futs box added a little bit of distortion to it just to uh actually gained it up as well so I Ed Distortion to actually gain up the Hat cuz it was really low um these are the great shakers I think the pan shakers yeah so I have the Pan Man on this so this wasn't there when they gave me the record the Pan Man
wasn't there and it's just something I created to sort of like create some movement within the mix so stuff is not just so stagnant in the center um I have it on Tempo with half note so every half note it sort of moves across and you can really hear this in the intro where the hats the shake are sort of moving left to right um then we have this perk knock it almost sounds like a really shitty Kick Drum but it's sort of just there to support the other elements um just a little bit of
compression there wasn't any EQ issues that I heard with this and it's so low in the mix as well that like sometimes like if it's not really needed I won't do it I'm not going to go through and like put plugins on everything just because I think you know I have to put a plugin on every single thing so this just has a little bit of impression um you know mid ratio 2 and 1/2 almost um and I'm getting probably 3 or four DBS of reduction on it um low five perks so this is something
that I again did not come on the mix I just threw this on there to give it some width so without the doubler this is just playing right down the center and again we have a lot of like look how many drums we have we have so much drum information that I just put the doubler on there and I was like [ __ ] Fu it that went left and right there's a little bit of phasing that happens with the doubler but it's such a background thing that you don't really hear it or notice like
oh my God there's like some phase issues on it so that's the doubler um in in its in its prime there on like a a drum procussion thing um getting about 2 DBS of reduction maybe a little bit more on the compression real simple [ __ ] Conga Conga just a little bit of low in information that I did a multiband on and high Tom here which I probably eqed some mid-range frequency yep right here well lower than mid-range but you can literally see this sound is just like it's all living in this triangle right
here so I did the opposite effect with the EQ and sort of brought that down if you kind of let those things live too much like they'll start to build up those resonant frequencies start to build up so I start to like reduce them a little bit and then sort of let them live um let's go over here I think this is the perk loop from the beginning yeah so this is the intro and outro so it's a in intro and the outro and this is what you're [Music] hearing boom we're almost done with the
drums another roll here another fill so I think this one goes on top of this fill snares so that those are them playing together but this on his own is just like a like the Reverb I think paralleled squash version of that is this and they kind of just put that as an effect um I probably squashed yeah so I think what I did was I gave it the squash cuz it had Reverb on it already and I didn't want it to interfere with what I had on the roll up there so this is like
a ton of I'm doing I mean let's get back let's let's zoom out of this to 18 yeah so I'm doing almost 15 DBS of compression on this but again this is like a supporting sound that's supposed to be paralleled underneath the main the main roll and then down here I have this clap which is sort of like this it's really low in the mix you can you can really barely hear it that's why I probably didn't EQ it probably getting I'm probably getting yeah 3 DBS of reduction pretty low ratio impact this also plays
alongside the other impact where is it well this symbol here and yeah so those two impacts sort of play together and uh Little Ride crash here with some reduction on the EQ and I think it's the same sound over here but it's just a different part of the song yeah so it's very similar I just did a little bit of compression this one's lower in volume than the other one is base so there's two sections of Base there's the hook and verse two base which happens here and then there's the rest of the song is
is this other base so we'll play each one individually this is the first base and this is sort of supporting the kick as it's playing let's go up to the kick really quick and solo these two together sort of actually it's like a response 808 because it doesn't hit with the with the actual kick um [Music] which so the kicking those Bas sort of interact as like a call and response more than just being on top of each other and then this base actually plays the hook base and the verse two base actually play together
what I do for you girl and I know [Music] boom so that's the 808 and the other base um what's on there let me see really quick what I did on the [Music] EQ I just did some reduction on this here A lot of times I'm getting stuff sounding like pretty good already um another notch that I did this time I did it with the neutron so apparently that was an issue in the mix and what else lowii I was out a little bit of Loi just 0.1 which is nothing but in the grand scheme
of things when you hear the difference it's it's pretty it's pretty big for me it's like I'm looking under a microscope mv2 which is just bringing some of those low frequencies up closer to the high frequencies compression here about almost 5 DBS of compression so it's a pretty Dynamic Sound um and then I close it off with this another two DBS of compression so I'll just take everything off of this so that's the sound with nothing it's a lot lower so those sounds like what happens is like the demo or the the the two track
that the producer sent us is being slammed through an L2 or whatever sort of stuff on their master so when this sound actually plays on its own with nothing it sounds like way too crazy so me when I get it I need to make that fit in the Box before mashing it with something so that's why that's that's sort of the difference with mixing a lot of these producers they rely on their Master their Master track to sort of control everything and bring everything uh close together but what ends up happening is you're not individually
treating things so things are kind of all over the place with this 808 here it's a totally different sound so it's a different EQ that I did on it and it's really just getting a couple of these like mid low frequencies and this low here a little bit again lowii on 0.1 which I don't know if you guys will be able to hear the difference but we'll play it really quick it's just like a little it's a [Music] hair add like a little bit of sub to it it's really small but to me it makes
the difference as I'm then putting on stuff like this the mb2 again bringing the lower stuff closer to the higher stuff and the higher stuff down closer to the lower stuff um a lot of my ad0 weight treatment is very similar it's like EQ Loi mv2 uh Neutron 3 and almost 2 DBS of reduction on this one on the Fab filter jumping into some music stuff um main element for the long is this this sort of [Music] chords this is where the issues were right here so I was sort of getting those out with the
EQ I love Soo it's sort of like this I call it like the AI compressor it just knows exactly what to do and when to do it so this is the sooth I left this on 100% a lot of times you guys will see like I'll lower the percentage but for this I put it on I lowered the depth a little bit and it sounded fine like if things sound fine like you shouldn't have to just change it cuz oh I don't usually do 100 I don't want to do that if it sounds good just
leave it this is a newer compressor that I use I really like using this for some reason it's the Slate digital um FG gray compressor and you can see I'm getting a little over 3 DBS of reduction on it um then I'm hitting it with the C2 I'm doing another two DBS of reduction at the most and the pro just catching a little bit more of these uh frequencies right here which let's solo these out some of that resonant stuff that I didn't want to get in the way of other stuff that there's other musics
happening here like [Music] this shave some low end off just to make room um and then brought down some of this stuff [Music] ped it out so it would cut through the mix a little bit more this is one of those sounds that you want to cut through the mix cuz they actually make up that rhythm in the [Music] song I would say this is lowkey the if not the most important sound of all the sounds in the song this is the second if you if you counting this is the first you build around the
most important sound in the song yeah so I'll listen to the demo and figure out like what's driving the record and besides the vocals from the artist like what's driving the the sound of the beat and it's usually going to be the main chords the Main Music is which is the chord one that we just went over but in this one because it's like a vocal chop sample and it's got this Rhythm like like that stuff that usually gets put and I'll mix everything in order of what I feel is the most important so I'll
start with this then I brought the vocal chop in and I knew that that was like a huge part of the record was that cuz there's a lot of times where it plays isolated like in the beginning on this [Music] part very important part of the sound and that's part of like being an engineer and understanding like what you you need to prioritize versus what you don't need to prioritize um so yeah there's that there's this roads that like barely plays in the song I think it plays like and that's like and I know and
I know just during those core changes that plays um shot [Music] folks so those kind of interact together it's like a call and response thing um so yeah just probably like you can already see this frequency right here was was an ISS issue so I brought that down what these EQ moves are doing is like taking a sound that maybe has certain resonant frequencies that are like unbalanced with the other frequencies of the sound and sort of bringing them sort of more into balance um so that's what's happening here if I take this off you
can hear it has like a weird resonant frequency and now it's taking that away I shaved out the low end and brought that there Spectre so again people will be like oh my God you did seven DBS of of adding but listen to the sound without it so that was a sound without this and now here it cuts through the mix now and it's the reason why I had to do seven is because the the sound was so muffled under the filter that they may have had that I had to go plus seven on it
but this sounded good I did it I didn't want to do a number seven I you know no one likes to do seven DBS up on a spectre but I had to do it sounded great and I left it after that compression probably doing yeah 5 DBS of compression without this it's probably way too Dynamic and then put it back on so that just sort of shrinks the Dynamics of it so that it'll sit in the mix properly um what's this a little xylophone sounds like a xylophone I don't know if it actually is but
that's what I called it so that's sort of interacting with the with the rest of the song [Music] that's just a supporting element so it's not something that I'm going to prioritize too much the song could have lived without that sound and we would have been fine unlike the vocal sample which I feel like the song would have been totally different without this sound like it would have just like this would have been the song [Music] without and then you add this vocal set so that you can already see without that sound like the song
loses a lot of the vibe um then there's some keys those sort of go with these chords [Music] here so these chords the main ones that I had up top and these other supporting Keys sort of play together um intro vocal chop so that's what you're hear the beginning [Music] the I didn't compress or anything I just took away some bad frequencies it's a pretty low sound so I didn't feel like I had any issues Dynamic wise and then we got some guitars here we got stuff like this [Music] what do boom so that's that
some plucking down here probably just some EQ moves here you can already see that was an issue for me right there 354 705 um so I brought that down some compression um and then we got the guitar 3 night that's pan to the right so I have this Panner going this way so i' I'm moving stuff out of the way as I'm as I'm mixing um and then we get to the vocals this song also features DeVito and loj by the way um these are all the vocals this is an afro song so you're not
going to see like the typical 100 tracks of backgrounds from Chris it's a more simplistic um style of music um this is Chris's hook so we'll solo that and you can hear that e note delay going back and forth and that's sort of giving it WID that you don't really necessarily hear as much with all the music playing um but it's there to sort of widen the sound of the vocal EQ on Chris is like pretty pretty simp simple I just Notch out frequencies that are bothering me eqp that's that 10K thing that I do
to give it brightness this one needed more usual sometimes I do two two depend uh 1176 getting like 3 DBS this one is to be honest like my carving like the the Fab the Fab filter one is like my my surgical EQ and then this is sort of like my carving EQ lower a lot of that lowend stuff here with this the two and six and the is doing the shave off on the end um rokes to push things things up like I said I don't really use rokes in this capacity where things are like
this um I usually do very little it'll just push the forward the vocal up a little bit forward some soothe dsing which I'm doing 5K to 14K which is sort of where his s live you can see I'm catching those s's there um and then the last is the the compression overall I think yeah I'm doing up to 4 DBS of reduction but Chris has recorded so well and we do such a low ratio on his recordings that um even when I'm hitting it at you know minus 4 DBS of reduction the vocal doesn't sound
smashed or anything um so there's that I have my effect sends which I'm using the seventh heaven a blend between the 7th Heaven and the ROM the sth heaven is always more and the ROM sort of just gives it like that extra air and here's that eighth note delay which I'm sending so it does that ping pong effect um so that's the case for like most of the Chris vocals are all the same even the verses like you'll see like the EQ is pretty similar same top end that I'm giving it so it matches um
but we'll move over to like deito which I think that one needed a lot of work just because of how they had recorded it um let's see that soloed [Music] out so yeah this one needed a lot more work this is like almost 4 DBS of reduction on these right here without it it takes away that it gives it a little more heightened this in the in the top end this has a lot less on the 10K boost cuz his vocals are kind of bright especially after I took out this stuff here it heightened the
frequencies up here so I only have a DB and a half going of 10K 1176 something similar like minus three on the compression um Mid attack slow or yeah fast release actually um arok again just to push it Forward Soo again catching anything that I maybe weren wasn't able to catch with this um the neutron which I just skipped over but that's also sort of Shing it without it a lot more low so that sort of cleans it up um just cuz I want all the vocals to cut through the mix as much as possible
um and then C2 3 DBS of reduction maybe a little more in some spots um and again a combination of sth Heaven and the ROM this has less ROM on it than Chris's but it's very similar I want to keep both artists sounding like they're in a very similar space um and then let's see we got LJ over here so this is LJ's vocal uh we'll play it solo a lot less work than I had to do with like Chris or deito on this just a couple this has higher than deito but lower than Chris
on the 10K boost so it just depends on the singer every singer every song is always going to have a little bit of a tweak even if I'm using the exact same plugins they're not going to have the exact same EQ patterns because the key of the song makes a difference the microphone the the state of that person's voice that day can make all the difference a little more than 3 DBS of reduction on the L some carving top boost without this only need your and if you to pull up my just makes it cut
through the Mix A Lot More rokes again really pushing that vocal to come forward 87% on here the sharpness isn't that sharp cuz I'm trying to DS catching it without just kind of toning those s's down a little bit especially as I'm brightening the vocal with stuff like this and this here you kind of need to uh you know pull yourself back with stuff like a dser and then on the similar and of reduction and that should be the end of the session yeah I mean we have some backgrounds here from LJ which I probably
put a similar pattern to his um to his leads so they're just left and right that I panned left and right just to give it some some space out of the center um but that sort of all these pannings and moving things to the side sort of what build up to like a wide mix when I get this stuff everything's usually just down the middle even Chris like everything's down the middle I think his ad libs I mean his ad libs his backgrounds are usually panned like at 30% on each side and just for the
recording process so that Chris is able to really hear everything um we keep stuff close to the middle and then as we're mixing we start to pull the mix and sort of widen the mix by panning a lot of things um but yeah so that's the whole mix we'll just give you a huge pan out here of everything um as we move up all the vocals then this is the demo which I've said before like I keep the demo between the vocals and the music so it's accessible if I want to come up here and
loop something or mess with it or find the key cuz the autotune reset um guitars are always pink music's always green bass is brown and drums are blue so that's this is the whole session it looks like a big session it is a big session but these aren't sessions that uh I'm scared of I've I've had a lot worse I mean you guys know Lil naac Session was absolutely a monster um but yeah so this is the whole session here and here's the mix that went to Chris and yeah thank you guys for coming in
and seeing the studio checking out a break down from Chris's 1111 working on the deluxe right now so hopefully we'll have some new stuff for you guys soon thank you thank you for coming to the crib this is the studio this used to be the designated smoking area but I stopped smoking weed so I don't smoke weed anymore but it's still a designated smoking area for clients um yeah thank you for coming thanks for watching the George te Channel and you're here with tiio