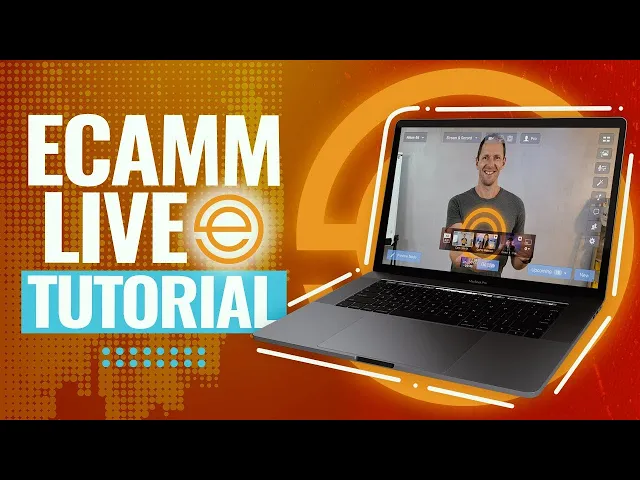
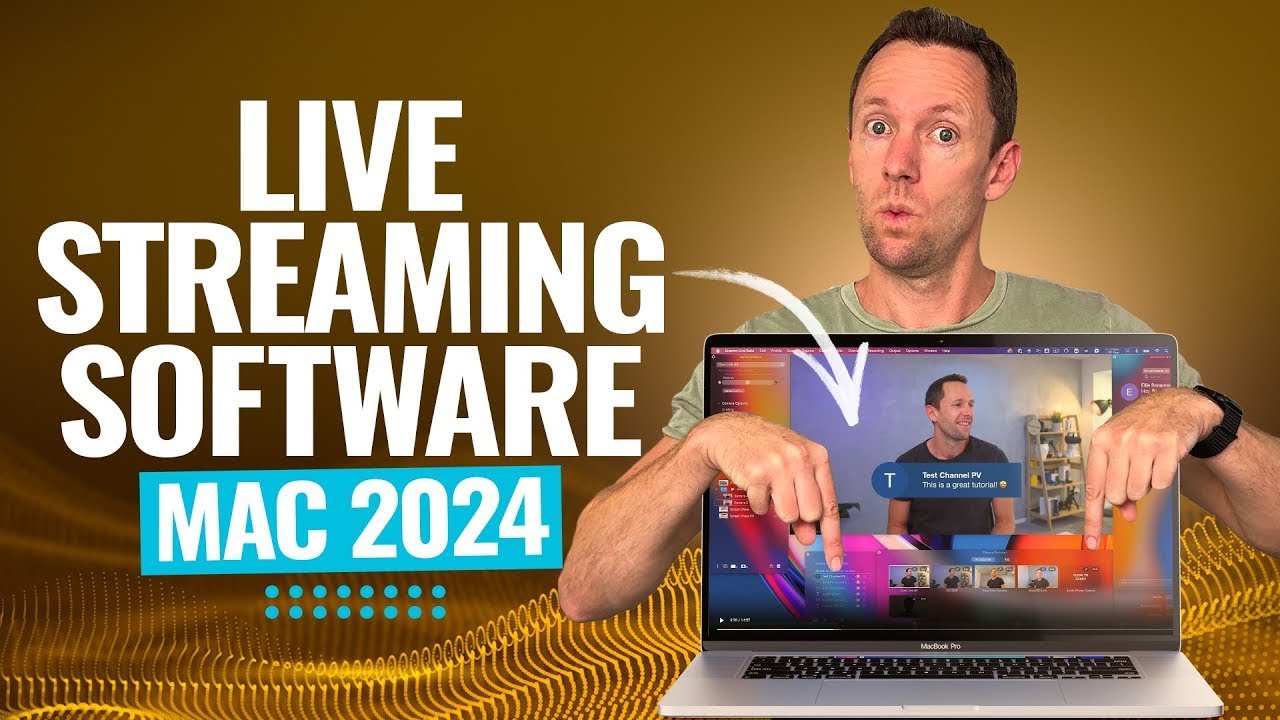
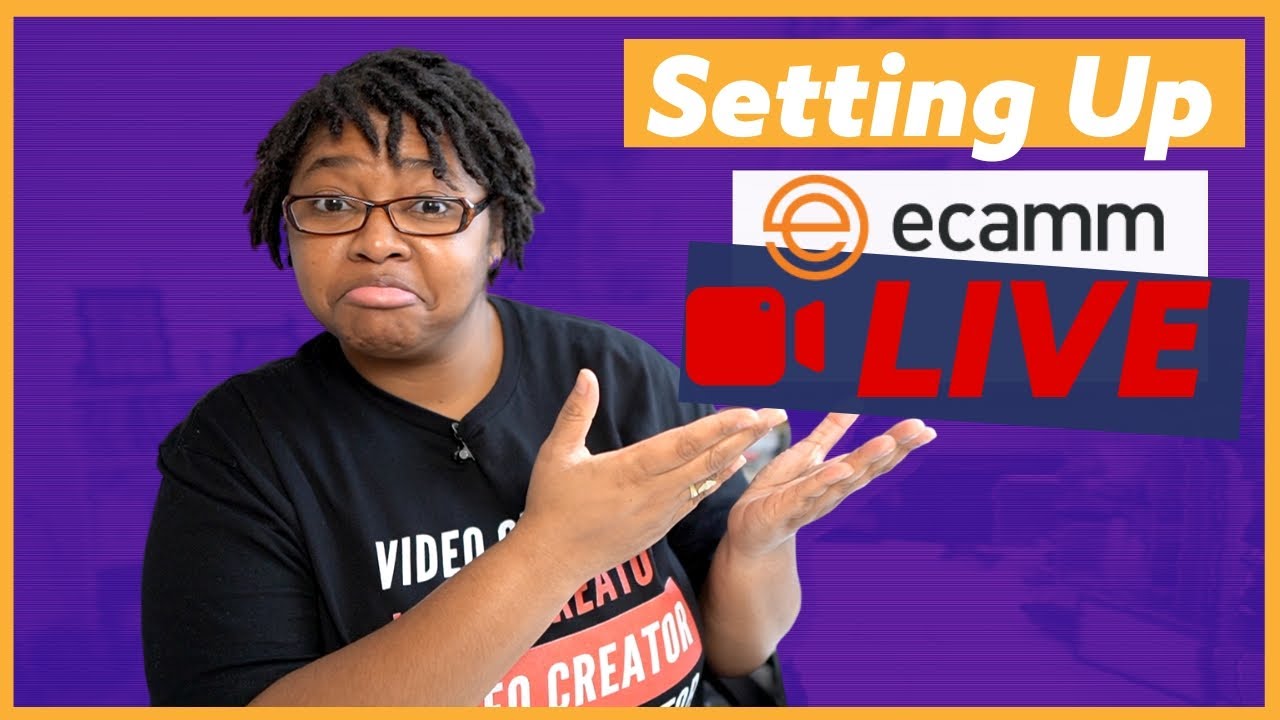
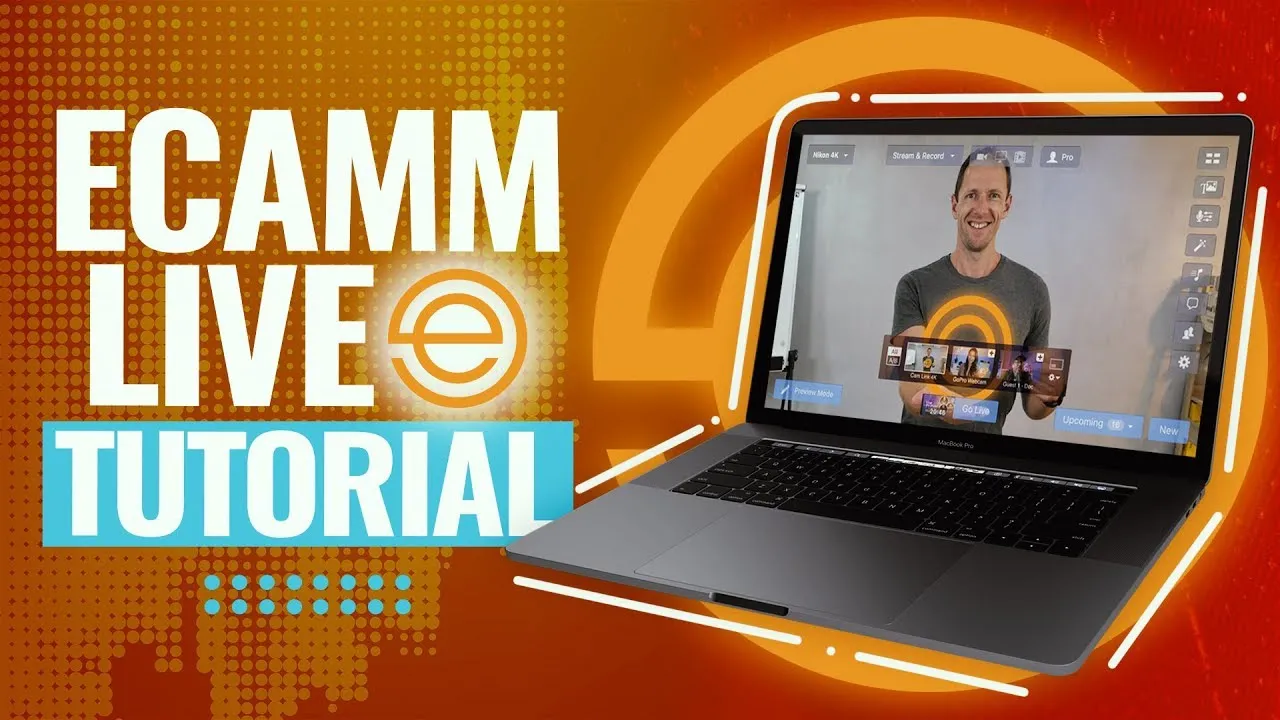
in this complete ecam live tutorial we'll show you how to live stream with ecamm live step by step and why we think it's the best live streaming app for Mac right now so jumping straight into it this is what ecamm live looks like now this is how I have it set up usually when I'm using it but know that it can be fully customized and it doesn't need to look this crazy in fact by default a lot of these menus and things are hidden so all of this is completely customizable so we can just come
up here to window and we can hide all of those extra utility windows and this is really all you need to use here but I'm going to run through the overall interface and show you a lot of these tools and menus and things because they will speed up your workflow in here and just note that anytime you can access all of those windows and things up here under Windows you can turn them all on and off here to customize up the interface for you so let's go again show all utility windows and we are back
where we started so the first thing you'll want to do when you open up ecamm live is go through your settings first to get everything set up then we'll customize wise up the interface so that yours is looking something like this and then we'll get ready to go live or to record so there's two ways that you can access the settings menu one of them is this little Cog wheel on the side here and the other one is up in the menu options if we go to echem live come down to preferences we can open
it up that way now I want to call this out straight up and let you know that I am actually using the beta version of ecamm live right now I personally think it's absolutely amazing it's been Rock Solid in all of my testing and I've actually been using it for years like this it's the only tool only program that I've ever used in real life production use that is beta software so Props to you ecam team it's absolutely amazing so if you do want to have access to the latest and greatest stuff as it comes
through and geek out on that stuff like I do then yes definitely grab the beta version I can vouch for it but if you do find some things are looking a little bit different to what I'm showing you here versus what you're seeing in the full release version of ecamm live it is because there might have been some updates in what I'm seeing but these will be pushed through to you very very soon so you've got something to look forward to and again links for everything I'm covering will be linked in the description box below
so we want to go to preferences to get everything set up first and as with a lot of programs and tools and stuff there is a lot of settings and functionality and customization stuff in here I'm not going to run through every single setting I'm going to run through the key stuff for you but what I would recommend is that you're coming in here and you're having a read through to see what you might want on for you because again you can streamline this for your workflow and for what you actually want so General pretty
self-explanatory these are your general settings and I pretty much leave everything on here at default account is where you log into your ecam account to unlock your features if we come across to stream this is really the first place that you'll want to come this is where you can set your stream size or your recording size you can use ecam for recording and for streaming as well so here you get to choose anything as low as 540p right up to 4K 2160p so for any video recording I'm normally leave this one on 4K but for
live streaming I generally just live stream at 1080. we can then change the shape of our live stream as well so we have the standard wide screen we can go extra wide we can do a square we can do short we can even do portrait live streams from here as well if you're going live to places like Instagram if you've got access to that feature right now so we'll leave this one here at standard widescreen we're going to choose our frame rate again you've got options here from 24 frames per second right up to 60
and what I love about this is when you specify your frame rate here and your quality it's automatically analyzing your internet bandwidth speed down the bottom here and you can see it's actually run a speed test and so for this connection here we have pretty much 30 megabits per second upload the based on these settings here the required speed is going to be around 8 megabits per second upload you can see if we drop to this to say a lower quality stream that's going to drop quite a bit as well same with the frame rate
so let's go back to 1080P and let's change the frame rate to 30 and generally here I'll tick this box to use high quality video mode as well it obviously does use more bandwidth you can see how much more if we deselect that there so if you are on a lower speed connection you can deselect this you'll still have a decent quality stream but for a really clear stream then you can leave this one ticked likewise for audio I normally leave this one unticked though but if you are doing any audio production or live streaming
or recording where audio quality is really critical and you want the best quality then you can select this box here so coming across now to a recording in here the default setting is to record all broadcasts so as you're live streaming it's also going to be doing a backup recording to your computer as well which I personally think is awesome now if you are on the pro version of ecamm live then you can unlock isolated video recording as well this is one of my personal favorite features in here and you can see that we're able
to record some of our different video sources or cameras separate currently as separate files but also with our audio files as well so we use this to record content for our accelerator program where it's recording my computer screen but also the webcams or the camera separately so we can edit things together afterwards but you can also use this for your interview guests as well so you're bringing a separate recording and separate audio for each of the different inputs or guests and then you want to come across two destinations now this is where you can add
in your live streaming destinations where you want to live stream to so you can see we've got our YouTube channel listed in here but to add a new one we can just go add a new destination we can add a Facebook page a profile a group we can add a YouTube channel Twitter LinkedIn lots of others as well rtmp support so you can really broadcast anywhere and if you're one of the lucky few that have access to Instagram live streaming right now at least anyway you can enable that here too if we hit this little
drop down arrow here you can see you've also got multi-streaming support using restream switchboard and one stream live as well so we can integrate directly with these multi-streaming platforms but also note that ecam itself does have multi-streaming in it too so if I wanted to broadcast live to Facebook as well we could go ahead and add my Facebook page in so there's my Facebook account we can choose what we want to broadcast to let's go to our business page Justin Brown Primal video and we can add that in there now as a source and we
can just select if we want to go live to both of them at the same time we just leave them selected like this and what's cool if you're going to be doing multi-streaming directly from ecamm is that we can now that we've got multiple destinations added here we can come back over to stream and we can see here how much bandwidth it's going to actually use so we can change the required speed here for one stream let's switch it to two so we're going to broadcast to two locations it's now saying that our estimated usage
will be around 11.5 so we want to make sure that we have that amount of upload speed there available but you can go ahead and add in all of your different destinations and then you can easily pick which ones you want to use at the time of streaming next one across is a video this is where we get to access all of our camera settings all of our video modes again a lot of these settings I'm just leaving at default unless there is something specific that you need to change again I'd suggest that you have
a read through here likewise with the audio as well if you are going to be sharing your computer screen on a live stream or recording and you want to broadcast your system sound so maybe you're going to play a YouTube video or something like that you will want to actually change this setting here broadcast system audio I currently have it set to never for the screen recordings and things that we've been doing but you can actually customize this up so play computer audio when you're sharing the screen or all the time during your broadcast too
so that's an important one that you need to know about you can also adjust your microphone delay in here as well so if you're using a more professional camera that's hooked up via HDMI or something and you're using a USB microphone it is pretty common to have an audio delay or separation but between the two so you can actually adjust this manually here to make sure that everything is perfectly in sync for your viewers so let's jump across now to the screen sharing settings there's some cool stuff in here like being able to turn on
or off your desktop icons if you are sharing your computer screen I absolutely love this feature also they have the ability to turn on or off your desktop wallpaper so I mean the one I'm using now it's stock standard apple one but it's pretty colorful and it could be pretty distracting so we can choose on our live streams or recordings to have this on or off likewise with your mouse cursor and you can even make the mouse cursor gigantic if you need to so that people can follow along with what you're showing them for those
of you that are more advanced you can also set up some shortcuts and some animations and things in here so you can have events and things trigger when ecam live opens when your broadcast starts finishes or when you quit ecamm live so I've seen some people set things up where all the lights will go off once ecamm live closes so you can really customize this stuff up too which is pretty cool over under remote control if you ask someone who is using something like the Elgato stream deck to make your live streaming easier and switch
between things easy when you're live then there is full integration and support with that too okay so now we've got all our settings done let's close this and let's come back to our main interface here so we're going to look at the main ecam window here first which is this area here and then all these extra windows and things are really quicker and easier ways to access some of the key settings too but again you don't need it to be as overwhelming as this so straight away up the top here you can see that the
mode that we're currently set to is record only if I press on this I can choose if we want to be streaming so if I select stream you can see that it's going to check to see if we have any scheduled or upcoming streams based on those destinations that I picked in the settings and if you do have any upcoming streams they show up down the bottom here with a countdown timer for you when that's upcoming I'll go ahead and turn that one off I don't want to accidentally go live I normally leave this set
to record because I said we're using this for a lot of recording content as well but the other one I normally leave on is this virtual camera and this is super powerful right now with this enabled we can see that this is enabled by this little red box up the top here now when we open up apps like Zoom Google meet or any app or tool that's going to use a webcam we can now take this feed here from ecamm live and it's picked up as a webcam in those other tools which means that then
we can add titles and graphics and all the stuff that I'm about to show you how to do you can actually bring all of those into your calls and webinars and presentations and stuff too just as if it was its own webcam it's a really really powerful feature and something that I use all the time now next to that is an easy way for us to switch between camera mode which I'm on now we can switch to a screen share or we can play a video file so if I press screen share we're now seeing
one of my screens that's on the YouTube channel and what I love about ecam live is it makes it so easy for you to customize this stuff up again this is super basic right now but you can see here that I've got the webcam here it too so I can pick this up I can move it around if I don't want the webcam on this scene here I can hit the little X and this is now our screen share but you can also see how it's not quite fitting the full broadcast window here because we're
on a Mac we can pinch to zoom on this window here using the trackpad and we can rescale that and move this around and the beauty of this is if you are running tutorials and things live and we want to zoom in on a thumbnail image we can do that literally by pinching to zoom making helping you make really engaging content for your viewers and then the next one across if we want to play a video file we can click on this and we can just pick a video so here's a recent webinar that we
ran if I hit on that welcome everybody to this that's going to start playing automatically I've then got video controls so I can scrub through that presentation I can then easily switch back to me on camera here just add a click of a button again this is super basic entry level ecamm live you can just use it like this you don't need to get carried away a but there are a lot more features that I'm pumped to show you now just going back to the screen share here if we press the screen share we see
this little pop-up pops up here so we can choose which application which screen or the specific app that we want to share as well so we can customize all of that up and likewise with the cameras whenever we Mouse over this window here you can see down the bottom we have the option to switch between some different cameras so the built-in one on my Mac here this looks absolutely terrible I've also got the insta 360 link up here so if you're someone who wants to run a multi-camera stream you could literally just be clicking between
these different cameras and things easily while you're live and if we hit this little plus button next to them then we can actually add that camera onto the screen at the same time so we can really go ahead and add three of these here all at once and just hit the little subtract button and they will be removed again super basic settings now for each one of these cameras and inputs that we've got down the bottom here if we open up the camera effects window and again if you're not seeing this you can enable it
up here under camera effects we can pick our camera here so cam link 4K and we can enable things like green screen we can actually pan and zoom our shot so if I wanted to zoom in on it a little bit I can zoom in I can pick up this box here and move it around and we can reframe our shot or even create a second virtual camera really a second shot we can switch between while we're live so it could be this zoomed in shot here and then we can switch back to a wide
version of this as well but if we keep scrolling down here as well this is where we can dial in the look and feel of our shot with our camera settings here too and we can even select Luts to really bring in the look and feel that you're looking for you can even mirror the video image here if you need to so maybe you're holding up some text I have no text here to hold up for you but you can imagine that we could flip it around if it was showing the wrong way there's also
a blur effect that we could add here too and so all of these settings are saved for each of the different cameras or inputs that you have so you can see back at the top here cam link 4K I could actually pick one of the different cameras so the insta 360 link and I can have different settings applied for that camera so when I'm switching between the different cameras I can really have them looking cohesive and looking the way that I want now I can easily add in any text and Graphics into our live streams
or recordings here as well and you can even create them inside of ecam so you want to make sure that you have this overlays window shown you can actually turn a lot of these windows and things off with these buttons on the side here so we can enable and disable them here too so we want to come down to this overlays window here and we've got some options to add some different things down the bottom so if we go to this text option here then we can type in some text let's go Justin Brown we
can adjust how this looks whether we want rounded Corners margins borders all of that stuff we can also add some different effects to the text and we can pick all our fonts and sizes and formatting here if we go to add then we now have this as a title that we can pick up we can move around we can again pinch to zoom or to scale this up and down and you can actually do all of this while you're live as well so let's just say that we wanted this down the bottom left hand corner
here and this was a title that I wanted to show when I'm live now at a super basic level we can just come down to this overlays area here and I can hit the little eyeball on that to show or hide that while I'm live now you can automate a lot of this stuff and we can set up scenes that we can switch between as well which we'll get to very soon but that's how easy it is to add graphics and text in here now you can also easily create countdown timers and things too so
if we come down the bottom here there's an option for a countdown timer let's say we want this to count down from 10 minutes here maybe we'll change this to five minutes so we're going to specify the time as I have here or we can actually specify a date and time so this is something that you could set up earlier and say okay on this day at 10 A.M we're going to count down to that and you could also have it count up like a stopwatch 2 if you would like to so we hit add
and again this is something that we can pick up we can move move around and fully customize up there is an option here to bring in your images you can also drag and drop them as well I mean here's one on my desktop here sorry Tiffany this is not gonna like that but you can see how easy it is for us to add this screenshot in and drop it into our video here we can hit the cross here to remove it as well but you can also customize things up a lot by adding in widgets
so we've got an option here for adding in widgets where we could integrate with other live streaming tools to bring in titles and things or you could actually bring up your website just from typing it in here too and have it as its own overlay now in terms of audio we can see down the bottom here we have access to our sound levels you can see the microphone that I have selected here we can pick the microphone we can adjust the volume levels here we can also add multiple audio sources as well so we can
add an audio Source by hitting this plus button here if we scroll this up we can then have multiple audio sources we can also control our video sound volumes and any sound effect volumes in here too and speaking of sound effects there are some built-in ones that you can use if you hit this little button here it's going to pop up a window it's on one of my other screens so bring it over this is it here and we can play through [Music] some of these sound effects definitely definitely my favorite so it's cool that
you've got that extra stuff in here too so that's a lot of the basic functionality and how we're able to switch between things just clicking on this main interface now we can take things up to the next level by using scenes and essentially have presets or templates that we can switch between when we're live with different settings and different scenes so we want to come down here to this panel here scenes and again if you're not seeing it you can enable it up here under window and I'm going to add in a new scene let's
give this a name let's call it camera two and let's then choose for this scene which we can now see is selected up here scene two we can then pick our insta 360 link camera right so this one over here so when we're live now we don't have to Fumble around up here and click between different things we can actually just hit the little play button or select on our scenes over on the side here and that switching can happen for us now we can actually set keyboard shortcuts for these to make it even easier
so if you press on this little button here on the side then it's going to say type A hotkey so let's go command 1 for scene one let's tap on this one go command two for scene two and now just pressing command 1 and command two I'm able to switch between these scenes really really easily so just using your keyboard alone you can start to speed up your workflow or over here now back to over here but this is also what's going to make it easier for you to automate things with your stream decks if
you're using one of those and so we can add in another scene here which could be screen share and we'll set this scene here to be sharing Arc browser here and maybe we'll zoom in to this shot so that it fits the YouTube website so again we're just pinching to zoom to do this and something like this and now our scene here for screen share is actually set at that point so it could be on the second camera we could be on the first camera come back to the screen share and all of our settings
and everything there are perfect it's scaled to the right size and maybe we'd give this a keyboard shortcut command three so we can again easily switch between them when we're live now maybe we want to do another variation of this with a picture-in-picture on my image down the bottom here we can hit the little duplicate button down here to duplicate this scene and let's go screen share I'll go pip picture in picture that's what this effect is normally referred to as so we've got our screen share here now there's a couple of different ways that
we can do this but my favorite and for full customization is to come down the bottom here and we want to add in a new camera Source or a new camera overlay so we press that and you can see we now have our camera box on screen here and again we can pick it up we can move it around now it is our wrong camera it is the terrible looking face cam here so we can switch that by hitting the little edit button on here we can change it from FaceCam let's go to insta360 link
so maybe our side camera here we can also change the shape of It Wide classic we can put it in a circle if I click off this we'll see what this looks like so maybe I want to be up the top corner here we can customize this up further now one of my favorite settings in here is that we can go uh change this from Circle change it to custom then we can get a great amount of control over how we want this to look so if I deselect this now so we have it again
we can pick it up we can move it around we can adjust the scaling and you can see we can actually bring in some of the background in here too if we wanted to but if we deselect this now if we hold down option and click and drag you can see we can actually crop this as well so if we just want my face in here we can hold down option we can crop this to how we want it to look and then we can move it around you guys are over here so pretty amazing
how easy this is to customize everything up now in terms of this picture in picture or this effect that we've added down here we can choose to just show this camera this overlay in this current scene or we can actually drag it up so that's like this in all of our scenes if we wanted to as well so if you've got a title or a graphic that you want to show or have the ability to turn on or off across your entire scenes across your entire live stream or video creation then you can do that
in here too I'll leave this on the current scene and maybe we'll switch this to the front camera so let's go cam link and let's adjust the crop here there we go down at the bottom so pretty cool so this will allow you to build out some really complicated scenes if you're going to be bringing in guests or want to use multiple cameras then you can do all of that here in ecamm so these overlays that you can add in these scenes aren't just limited to other cameras as well let's go back to our start
scene here we could duplicate this one so that we have another shot looks just like this let's call it Camera Plus screen and instead of adding another camera this time we could add in another screen share so we hit the little plus button down here on screen share and you can see that we've now got our entire screen so we could then pick which screen with this edit button so we'll choose instead of the primary screen maybe I'll share my arc browser again we can choose our aspect ratio let's go custom and we can then
resize and reposition this wherever we would like it we can scale it up and down to again create whatever look you'd actually like and with these scenes on the side here you can categorize and group them all in folders and you can even add automations around the folders as well and automatically switch between different scenes after a certain point in time or after an action is triggered so we can come down here to automatic group and we can add all of our scenes in here so let's say that we want it to automatically switch between
different cameras we could put this one in here we could put another camera in here and we could then hit settings on here and we could choose to move between automatically the next scene at a fixed interval of every 10 seconds so every 10 seconds we're going to switch between these and this is an awesome setup that I saw I think it was Tom Buck did an amazing video on this where he'd set up all of his different cameras inside of ecamm and when he's recording his videos it was switching all the different angles for
him really just making it an amazing production in a box now the other window that I like having open all the time is this camera switcher down here so that I'm able to preview all of my cameras and video feeds and inputs and things all down here at any time instead of needing to have my mouse cursor over but again they treat it the same I can just tap on them and switch between them to make things really really easy now one of the other really powerful features inside of ecamm live is its guest feature
and the ability to bring guests into your live stream and your recording and again all of it is fully customizable there's a couple of different ways that you can do it there is direct integration with Skype so if you start a Skype call then you can easily bring your guests in your guest will actually show as extra video sources down here and you can add them into your stream or your recordings that way or if you're on their Pro Plan then that's when you can turn on their interview feature and bring in a guest that
way with no extra tools or anything needed so switch back to the start scene here so it's full screen me we can see that I am M on the Pro Plan here so I've got access to the interview feature I've got access to the interview window down the bottom here I can select this box here to turn it on and then we get some extra features straight away on this main interface you can now see that we have a guest one input here as well so I could just hit this and we've now got a
placeholder for when our guest comes in so we can even go through and create our scenes with placeholders so that when we have a guest in that placeholder is going to be filled with our guest and they can also be added as overlays as well so let's say that we picked this screen share picture in picture that has me on it let's say that we also wanted to add Our Guest into this scene here as well we could come down here to add a new camera overlay here it is we can move it where we'd
like now let's switch this input from FaceTime camera let's go to guest one and you can see we can have up to 10 guests on here and use them as presets or placeholders as well so let's go guest one now obviously we're not going to see guest one but this is where they will appear so we can scale this down we can move it around to where we'd like and then when we're live or when this person joins they're going to fill this section here so all the same settings apply in terms of scaling and
cropping and everything as well so fully customizable now if we come down to this interview panel here and bring this up so we can see it we can see we've got our direct join link so I can copy this link here I can then send it out to whoever I want to have join and then they will show up in here as a camera feed for me to add into the stream or so that I can see that they're ready to join the stream okay so I've sent out the link now to Ellie on our
team let's switch back to the primary scene here here let's remove this guest here just for now so we're back to me let's just pretend I'm live right now I've invited a guest to come and join me we will see Ellie pop up down the bottom here once she is on we can see here that Ellie is joining we can accept or decline her so let's accept her in here so straight away we're seeing Ellie here is added in as a video source so using the simple settings at the top here without getting Advanced at
all we can just click on Ellie and now Ellie is full screen in the Stream if I wanted to bring me on I can press the little plus here and now it's both of us on screen and we can switch these around we can customize this up but what we can do from here is we can assign Ellie as guest number one which means that wherever we had a placeholder in our scenes with guest one Ellie is now going to fill that Gap so let's go back through let's find this scene here so this was
the scene here let's customize this up so we can see Ellie let's uncrop and let's reset this up here again you want to be doing all of this before you bringing your guest in but you can see how easy it is and how customizable it is and you could be doing all of this on the fly when you're live too and your guests can even bring in their own screen share as well so really really powerful and then when you're finished with your guests they can either leave themselves or you have the ability to remove
them from your stream by hitting this little X here see Ellie thanks for joining and she's gone and uh your guests are removed from the stream so again I love how easy it is to keep things simple but also you can easily level up your live streams in here as well now to start and stop live streaming or recording we have the button down the bottom here I'm in record only mode so we can record start and stop from this let's do a really quick recording here so we are recording we can see that we're
recording as we would see that we are live when we hit finish here this is really cool we can end recording and then it's going to automatically let us edit this in dscript so because I've got D script install on the computer we can send it directly to YouTube as a new YouTube video or we can show the file and bring it up on our computer where the file has actually been saved so we can then repurpose it and upload it too now I'm actually going to do a quick live test because there's one more
amazing feature that I really want to show you here so let's set this to stream I'm going to come back over here to our preferences destinations let's choose YouTube now we're coming down the bottom here to New to create a new live stream and this window here pops up so we can see that we've got our Channel selected here we can add extra destinations from this window here as well we do need to give our live stream a title let's call it test live just in case anyone finds it they shouldn't because I'm going to
make it unlisted we can look at our additional options in here as well so our latency for YouTube we get to choose if it's low ultra low or normal so it's awesome that we can configure all of that for here normally I'll just leave it on low we can schedule up our live streams from here as well we can add in our thumbnail images and all of that stuff but I'm going to go live now unscheduled unlisted double checking unlisted and let's go live so we can see that we're live up the top here because
we've been live for 21 seconds we can see the format 1080p 30 frames per second we can see how many live viewers we have currently which is zero but we can hit on this and we can view our live stream in the web browser we can copy the video URL so if we want to send it out to someone we can go directly to the YouTube live studio or to the live control room and we can end the stream from here as well so I'm going to send this out we're going to get some comments
on this stream and I will show you what you can do with comments because it's really cool okay so I sent it out to the team we have uh Ellie and test Channel PV which is Matia thanks for joining but you can see what's happening here we've got this comment window so the comments are coming up on the side here so I don't need to rely on being over to YouTube to manage the comments and same if you're multi-streaming to Facebook and other places as well there's a curated list of all your comments here on
this section and we can favorite them so if there's a good question that we see we can then come over here and we can shortlist our question questions and things to address but we can also feature these comments on here as well so if I just select on one of these comments then we can see that we've brought it up on the screen now this is a template that I used from a while back where I wanted them really big but we can scale these down too so again we can customize this stuff up so
now we've got Ellie's comment on screen this is live it's going out to the live stream we can also click on the next one and feature that now and easily bring these up so if you're doing a live q a it's it's an amazing thing for engagement that people can see their comments on their plus it also makes it easy and fun for you to create an engaging live stream this is a great tutorial yeah let's make this one bigger uh yeah hopefully it is give this video a thumbs up thanks guys so then we
want to stop the live stream we can just come down the bottom here to finish we go and broadcast and we are no longer live once this changes from Red now so we can go from here to view the post so view the video on YouTube we could delete it if we wanted to we can show our local recording and again we can edit in dscript as well so there's a crash course on using ecam live and hopefully now you can see why it's my favorite live stream program on Mac so now that you know
how to live stream in ecamm live if you want to know how it Stacks up to the other options out there then check out the video linked on screen as always don't forget the links down in the description there's a bunch of resources and now top tools to help you with your live streaming and video production so definitely check that out and I will see you in the next video