capturing action is such a thorough rde for photographers but let's face it it can be a bumpy one filled with near misses crucial setting slip ups and pure adrenaline I'm sure you've experienced it all and then summer right while luck definitely plays a role capturing jawdropping action shots demands more than just pure chance so buckle up as we embark on our journey to turn those near misses into photographic Perfection cameras lenses the right settings all of these are very important but even the best and most expensive gear won't help you if you don't put yourself
in a position to succeed while we sometimes can get lucky and just step out of our front door and take some great photos of a bird flying by for instance this is not usually what happened and it definitely pays off to invest some time and energy into finding spots that guarantee that a lot of action will happen but even if you find the perfect spot there's two more crucial factors that will influence whether you come home empty-handed or with some killer shots I'm talking about the light and the wind birds and most animals actually always
face into the wind because they don't like the wind kind of blowing underneath the fur or the feathers and birds on top of that just like airplanes also like to take off and land into the wind so if the wind is not in your favor and belong in your face for instance you will end up with a lot of bump shots and that's not exactly what we want is it so to get the best results we need the wind to come from somewhere behind us it doesn't need to be directly behind us but somewhere on
an off angle behind us will guarantee that we get the best shots and no bum shots and it also helps if the wind is actually a Little Bit Stronger because if you're on a cliff for instance and there's lots of birds flying past on a very calm day the birds will fly much lower whereas on a more windy or even a stormy day the birds will often fly higher up and they will battle with the wind and it will also slow down smaller and faster birds like swallows for instance so wind from the right direction
and actually not too slow can definitely help us to get those amazing Keepers when it comes to the light there's two fantastic option basically you can either have the light coming from somewhere behind you or you're shooting towards the light to get some nice silhouette shots what we don't really want in our action shots or birds and flight shots is Harsh light or the sun being too high up in the sky because then we get a lot of Shadows on our subject so now we have ticked off all these things we're in the right spot
with the perfect conditions there's still another thing you need to do when you get to your spot and that is study the bird's Behavior birds and animals are creatures of habit and often times you will see patterns in the behavior that you can use to your advantage one of my favorite flight images of all time is this region parrot it's a beautiful parrot and I only got this shot because I quickly realized in the field what the birds were doing on that day I didn't expect to take any flight shots at all I was just
set up near water source and had a LW perge while I was hoping the birds would land on after a little while a few Birds started to come in but instead of landing on my perch they actually kind of flew down to the perch but then they weren't sure whether to land on it or not and and so they did a little circle and flew back into another tree and this actually happened twice and so I instantly thought in my mind this might actually be good opportunity for a flight shot so I started to focus
on the birds on the tree and when they started to come down to the perch again I anticipated that they would not land again and they didn't and so I actually got a nice banking shots off the bird flying back to the tree recently I was also photographing at this cred turn colony and I really wanted to get some nice banking shots off the birds with fish in the beak however this didn't turn out to be too easy because the wind wasn't totally in our favor and whenever the birds were flying around it was kind
of hard to get the right pulse at the right time but then after a while of just standing there and looking what the birds were doing we noticed that some birds would come in from behind us instead of in front of us and all the birds that were coming from behind us would need to make a quite nice big turn giving me the best opportunities and I actually ended up with some images that I really liked and sometimes the best SP spot can actually be somewhere that you don't expect at all like the back of
your car a few years ago I was driving around the coast and noticed that whenever I stopped a few welcome swallows would kind of hover behind my car because it was kind of breaking up the wind for them in a perfect position and I also noticed that these birds like to pick on these thistles so I actually grabbed one of these thistles and attached it to the little antenna at the back of my car and then more more swallows would actually start hovering right behind my car in the wind basically standing completely still in the
wind allowing me to get some amazing shots so sometimes you think it's actually really difficult to get shots of swallows and Swifts in flight but in certain situations especially with some nice strong wind you can get some shots where they're basically standing still in air editing birds and flight and action photography shots is definitely not an easy task we're often dealing with unique circumstances in these photos like Shadows on the bird's body that we want to lighten up or remove Skies that a little bit blown out where we want to bring back some color and
some clouds and other situations where we might have to smooth in a little bit too busy background and I would love to help you to get much better results with my masterclass my Pro sets and my brush pack with my Pro sets I allow you with just one click to transform your ra fs and get amazing details into them and in my master class I teach you step by step everything you need to know in Photoshop to get amazing results like removing Shadows with the Clone tool for instance and with my brush pack I allow
you to make it much easier to brush details into your bird so if these of interest to you make sure to check these out down there in the description when it comes to the camera settings for birds and flight and action photography it's actually pretty straightforward and simple the only thing you might find a little bit daunting is that I would highly recommend that you shoot in full manual mode because it will definitely give you the best results any automatic mode like shutter priority aperture priority or manual and auto ISO will give you bad results
in certain situations when this shows the most is when the background changes quickly most automatics modes will struggle when your bright Sky background suddenly changes to darker tree background so what I like to do when I arrive at a location I look at the light and I look at my subjects and then I try to find The Perfect Exposure in full manual mode so I pick a good aperture I pick a good ISO and I pick a good shutter speed and then I check my histogram and make sure that the settings I've dialed in will
give me a perfectly exposed image not too bright but also not underexposed and the best way to do that is definitely to look at your histogram and make sure that there's no areas clipped on the right hand side I'm using full manual mode because once I've died in my exposure I'm set and ready to go and no matter what happens behind the bird whether there's a sky background or dark background I will always get The Perfect Exposure on my subject and that's what's the most important after all now that we've dialed in full manual mode
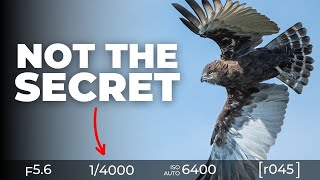
you probably wonder what are the perfect settings for birds and flight and action photography and and of course it depends a little bit on the Senor shooting and the lighting conditions but at the same time especially when it comes to the shutter speed I would recommend that you use the highest possible shutter speed unless you want to do some blur images some artistic blur where you need a low shutter speed I would always recommend that you have a shutter speed of a 4,000 of a second or more you can get away with lower shutter speeds
but if you know that a lot of action will be happening right in front of you choosing a shutter speed of a 4,000 of a second or more will definitely give you the best results and not have those annoying blurry shots that kind of creep in from time to time of you're shooting at like a 2,000 of a second for instance and to get to these high enough shutter speeds we need to make sure that we shoot at a sufficiently high ISO level my goal to ISO is usually anywhere between 800 and 6,400 and when
it comes to the aperture I like to stop down as much as possible without sacrificing shutter speed or having to use twoo high isol so on an F4 lens I would typically shoot anywhere between F5 6 and f8 and if you're having a zoom lens for instance that's wide open at 6.3 or like the Canon turn it to 800 at F9 there's not as much room to stop down so to turn to 800 for instance I would usually shoot wide open or 100 to 500 I would also shoot wide open where some other lenses that
are wide open at f5.6 or 6.3 I would probably stop down to f8 if I can because this will allow you to get more in focus and sharp photus sometimes the autofocus will jump off your subject a bit onto the wing or onto the tail and if you're shooting wide open at F4 often times the shot will turn out out of focus or blurry whereas if you stop down to f8 the depth of field will be enough to still get the bird's head in Focus even if it's focused on the wing or the tail so
stopping down will definitely help you to get more Keepers but at the same time you have to make sure that you're not sacrificing too much on that shutter speed side of things because you may end up with a blurry shot so getting your settings styled in for birs of flight and action photography is actually not too diff difficult we use full manual mode an RR range anywhere between like 800 and 6,400 and an aperture that is a stop down as possible without sacrificing the shutter speed or having to use two high iols and then we
also want to use a shutter speed of a 4,000 of a second or more to make sure that we freeze that action when it comes to the camera itself you can basically take grade birs and flight and action photos with any camera model yet there's a few factors that will definitely help you to get better results first of all we need to have a high enough frame rate if you have a camera that has four or 5 frames per second you'll definitely get some shots but you won't get a variety of shots you can get
with cameras that shoot at 20 30 or 40 frames per second while 40 frames per second definitely gives you a lot of images and a lot of images to look through at the computer after you're done shooting it does help you to get the best poses possible because instead of just getting one pose with the wing up and one pose with the wing down or one pose with the wing sort of in the middle what we don't like at all you can get a lot more different poses to choose from so shooting at these higher
frats is definitely better and I would recommend that you shoot in the highest possible frame rate your camera has with most mirrorless cameras that is actually in the electronic shutter mode and that comes with it on issues because most mirrorless cameras except for a few will have something called rolling shutter effect and in lments term that basically means that your images may be distorted or the wings of the birds will look funny because the camera's read out the sensor from the top to the bottom they don't read out all the sensor at once so if
the birds flying up and down through your frame the camera starts reading at the top and then finishes at the bottom and even though it does this really fast by the time the camera has come down to the bottom of the image the bird's Wing will have actually moved already so you might get a wing that's a bit too stretched because while the camera is reading the wing was still moving or you get distorted wings so with some cameras and in most situations this is not a huge huge issue but the hummingbirds I just mentioned
it's definitely an issue and you may be better off using the slower mechanical shutter of your cameras because that will allow you to not have that rolling shutter effect now there are certain cameras like a Canon R3 or an icon Z 8 or z9 or Sony A1 or a93 where the rolling shutter effect is minimal or non-existent and in these cameras using the electronic shutter it's definitely the most Advantage but in other cameras where the read oute is very slow you have to test a few times whether the rolling shutter affects your images or not
and if it does like if you're shooting hummingbirds you might have to use the mechanical shutter there's something else we need to talk about and that's the autofocus because without a good autofocusing system and good autofocusing technique it's almost impossible to capture great birds and flight and action shots and if you want to know how to set up your camera to get the best possible results I've linked a lot of different PDF guides down there in the description that will help you to set up your camera the perfect way and to get the best results
also check out a lot of other videos on my channel that are made about different camera brands and different cameras and how to set them up for the most success in the field when it comes to the autofocus we need to divide it into two sections the settings that we dial in to get the best results and then the right autofocusing techniques in the field that allow us to get the best possible results in this video I don't want to get into too much detail because it would make it way too long but generally speaking
if you're using a mirrorless camera I would highly recommend that you activate the ey tracking that will definitely be your best bet on finding the birds quickly and also staying on the birds with DSLR cameras it's actually a lot harder to do action photography because you have to make sure that you stay on the bird with your autofocusing field whereas with the modern mirrorless cameras it allows us to just find the bird focus on it and then the camera will do the tracking part for us so that's substantially easier when it comes to action photography
and it's also easier to find the bird and track the bird so with a dlcr camera your main task is to stay on the bird and keep the autofocusing field on the bird while also trying to keep the bird in the frame whereas with a mirrorless camera you basically just have to focus on keeping the bird in your frame and having a good composition without having to worry about keeping that autofocusing point on the bird because the camera will do that for you I'm sure it's a given but we also definitely want to set our
camera in a continuous tracking mode a Sero for Canon for instance to make sure that when're not just focusing on the one point with the onot mode but the camera continuously tracking our subject as we go along and once the camera is acquired the focus and the bird's in a good spot we basically just fire away ultimately for birds and action photography there's nothing else you can do than spray and pre I know there's always people saying that wait for the perfect moment they just need two frames per second and then they get all these
amazing shots but in my experience at least that's not really how it works in the field the only obstacle to that is the buffer size and it's definitely helpful to have a camera that have a large enough buffer size and and I would also recommend to shoot in compressed draw because that will usually give you a larger buffer on a lot of cameras so the only time I'm a little bit careful when it comes to the spray and prey approach is when I know that I have a camera that has a small buffer the Canon
R6 Mark I is a good example it shoots at 40 frames per second but it also has a relatively small buffer that you can fill in just one or two seconds so on this case it definitely makes sense to use Zoll because it will increase your buffer size and then I'm also careful when I'm shooting and I don't want to start shooting too early because what happens when you shoot too early like when the bird's really small in your frame by the time the bird's perfectly sized in your frame you will have hit your buffer
and will not get as many shots so when I have a camera that has a slightly smaller buffer I tend to wait for the moment to look like now I really want it and then shoot away and by the time my buffer is fill usually the moment is over as well there's other brands like Sony and Nikon where the buffer is a little bit better sort because you can basically continue shooting even though it's at a lower frate whereas on Canon once you hit the buffer and it's zero there's usually a little bit of a
delay and you will miss all the action or the bird will be long gone by the time you can shoot again so with Canon you definitely have to be the most careful when it comes to not filling up your buffer when it comes to picking the right autofocus field size or Zone I would recommend that with most brands to use to autofocus where the camera just finds the subject all over your viewfinder and if that doesn't work it can help to just select a certain Zone because that will help the camera to know what you
want to focus on but with most cameras these days with the auto area on Nikon for instance or the normal it trer or Canon you definitely get away with just using that and that will give you the best results with Sony in the past I've often had slightly better results with using a bit of a Zone to put that on the bird initially and then have the camera track it from there now you might have the best camera with the best setting styled in but you're still not getting the shots that you want and that's
usually because you're using the wrong technique when it comes to the autofocusing the first thing you need to learn when it comes to action photography is to find your subject in your viewfinder instantly if you can't rip up your camera and instantly see your subject in your viewfinder chances are you will miss most shots because often actions happen in a fraction of a second and if you can't find your subject fast enough you will not get any photos so it's definitely important to practice that hand eye coordination but even if you master that skill there's
a few more things you can do to get the best possible results the first is pre focusing you always want to focus on a certain area that you expect the birds to appear in because most cameras really struggle if you're completely defocused and then then have to find the subject Without Really knowing what you want to focus in so if I'm on a cliff for instance and I want to photograph birds and fly I will simply focus on the water or on a rock that's in a certain distance to where I expect the birds to
show up so when the birds show up and I rip the camera up to my eye the bird in my viewfinder is also almost in Focus already and then by simply pressing the tracking button on your camera it will jump right onto your subject and track it very well whereas if you're completely defocused first of all it's very hard for you to find the bird and the viewfinder and also very hard to for the camera to latch onto your subject so pre focusing is important and there's also another technique called bumping your Auto Focus that
I think is also very important cuz not all birds just appear out of nowhere and we instantly need to focus on often times it will see a bird from a large distance already and what I usually do in that case is that I focus on it initially so it's nice and sharp in my view finder but I don't want to focus the whole time on it because the longer we focus on a subject the more likely it is that our autof Focus will jump off the subject so instead of finding the bird when it's really
small in my frame and keeping my focusing button press the whole time I will focus on the subject let it fly towards me when it starts to get too much out of focus I focus on it again and then I let it fly towards me again and when it gets too much out of focus I focus on it again and when it gets close enough to where I want to photograph I then press the button and stay focused on the bird and then also start shooting and in my experience that works by far the best
because you're not challenging the autofocus to track something for 30 seconds or so but rather just for 2 or 3 seconds when it truly matters it has happened to me in the past many times where I focus too early the bird small on my frame and I track it I track it I track it and the moment I start shooting the autofocus jumps off so by using the bump Technique we can avoid it and make sure that we acquired autofocus just at the right time there's one more recommendation I have for you and that is
to not shoot too tight when it comes to birds and flight and action photography what will happen is that if you're too close to your subject or using a lens which with too much focal length that you will clip the wing or when the peak action happens you can suddenly not fit your subjects in the frame anymore and that is so frustrating and super disappointing so finding the right focal length for where you're shooting is definitely key and this is also where zoom lenses can definitely help usually prime lenses have slightly better image quality and
slightly faster autofocusing but at the same time the flexibility of a zoom lens definitely helps in the field because if the action has happen too close to you you can slightly Zoom back and still got the shots that you really want so personally I prefer to use zoom lenses for birds and flight photography and action shots unless I know that the action that is happening is always far away from me and the subjects are rather small as well so in that situation using a prime lens maybe even with a teleconverter will help you to get
the best results but for most other subjects that are larger or closer to you a zoom lens will definitely have an advantage and there's another Factor that's very important when a when it comes to flight photography and that's the weight and size of your lens now you can grab a big F4 600 mm prime lens and get great action shots but at the same time this will wear you out very quickly for instance if you're out on the ocean on a pelagic trip and you're shooting all day it tires you out very quickly if you
have a quite large and heavy lens so my goto lenses for birds and flight and action photography are definitely the lightest possible lenses and ideally zoom lenses but there's certain companies like Nikon for instance that also have fantastic lightweight prime lenses like the 400 mm f4.5 lens or the 600 mm PF lens that should give you some fantastic results in the field and a 400 mm lens for instance can be quite good and not too zoomed in for many situations what's your goalto equipment for birds and flight and action photography make sure to let me
know in the comments I really hope that you enjoyed this video and that it will help you to get those amazing action shots off your dreams and if it does please give me a thumbs up for the video check out my channel membership and hit that subscribe button and I will see you guys in another video very soon bye