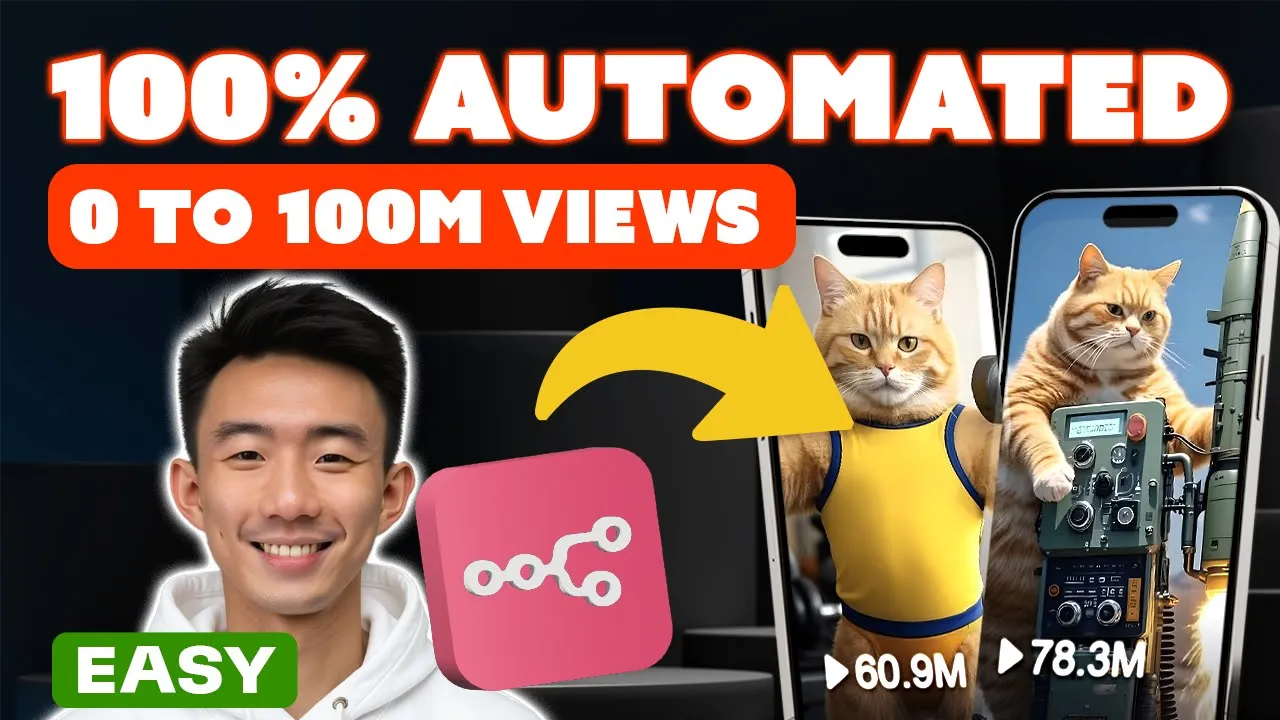
I just built this AI agent system to create and publish these funny cat AI videos that are getting millions of views and I'm sharing this system with everyone because if you haven't seen this kind of cat videos AI videos like this are getting tens of millions of views and you can actually automate the creation of this videos through Ai and no code tools like NN for example this account already has more than three million followers and this video's got more than 100 million views so you can just imagine once this process is automated how powerful this could be what you can do is to set up this workflow once and you can let AI do the rest of the work for you as you watch your channel grow how it works is the AI will come up with the story itself with this story AI agent for example this story agent has come up with this story of a fact cat getting back up from a set breakup it then creates detailed proms which affect to the image and video AI agent to generate images and videos so let's take a look at the images first we can click preview image here this is the first image the second image the third image and the fourth image great and let's take a look at the video we can click preview videos here few video one it's animated then the second one great it's pretty cute and the third one and the fourth one nice then it all combines with the background music together to come up with a full video like this we click VI here [Music] great and then it got published to the social media channel of your choice and that's YouTube in this case and let's take a look at our YouTube channel here let's refresh great it's already posted here and let's take a look at the URL here [Music] great it's published successfully and it all happens fully automated it can be run daily or even every single hour if you wanted to and it's fully customizable to your niche of your choice what's great is since we are using NN which is a no code tool anyone can do it even if you are a complete beginner all you need to know is how to drag and drop things and you all set learning about AI agents is also one of the best uses of your time given the demand for it so infest the next few minutes or so learning about AI today and watch till the end because this might just be one of the most important skills that you ever learn by the way if you are new here my name is Andy and I have two key missions first to bring you the most updated AI tools and tutorials so you are always ahead of the Curve second to make AI as easy to learn as possible especially if you want to make a living from this wave so let's dive in and unlock the power of air together in fact to make this as easy as possible I've gaed all the resources and prompts you need for this lesson and this page in our Endy no code community and we have this workflow template blueprint file here where you can just download it we can click this download and then we can import to NM so how we are going to import this we can drag and drop here and we have all the Json file here and you can copy and we can go to n end workflow you can create in your own project for example I create an proxel without saving it's a new workflow and then we can just paste command fee or control fee and we can have the workflow ready here if you are not yet part of the community check out the link in the video description we have tons of other lessons around AI agents and also social media automation Etc we also have faces video Generations uh tutorials here and also the templates so we have all the resources you need for some like the proms blueprints you need to get started we also have a growing Comm community of air professionals who are doing a lot of cool stuff with plenty of knowledge sharing going on so if you are looking for a network of people interested in this space as well then any noal community may just be great for you inside you will find ready to load automations blueprints you get access to step-by-step tutorials our tech support and the community of air professionals as well check that out in the link below if it's for you okay so let's dive into this the frame of what we'll be setting up today is provided in this slide there are basically three agents that will be setting up first the story AI agent which generates the AI video story for you second the image AI agent which automates the creation of the images for the story third video air agent which automates the video productions from the images so let's dive into this tutorial and I'll share with you how we can create this note by note all right let's get started first of all we are going to create the story AI agent first let's search for schedule it means that it is going to be triggered once per day during the midnight um and you can choose different interval for example seconds minute hours and different at different time as well so we just use a default and we are going to have another note we can search for edit Fields so we are going to have um some custom Fields here uh the first one we are going to add is the number of video and we are going to put four here and we are going to add another field called background music we are going to copy and paste this URL that we prepared for all of you at this this the same um backgound music that we use in the demo video of course you can paste another U MP3 file or any other music um with the URL as well we will rename this field as coniguration okay so that's set for this note and we can try to um click this icon and you will see it's for testing like let's click this and test step so note executed successfully and then we can save it here we can go to the next note we are going to add the llm chain here we are going to Define below and we caname it as the story AI agent all right and we are going to choose expression this time and try to click this little icon to uh enlarge it so that it will be easier for us to uh edit and we're going to copy this prompt from our community and let's paste it and this one you'll see it is um highlighted in green color basically it means that it has the values and it is a correct fil we can just it means that it's actually just try and drop this Json means um it this a previous note so we are going to get the number of videos from the previous notes for notes it means this is a note this is a note and this is a note all right and we are going to add another model here we going to choose open router why we are going to choose open router because when we click this drop down menu you will see a lot of different models it's very convenient so at this time we're going to search for dip seek chat and how we going to uh set the credentials basically at this p uh pencil click this pencil and or you can just we click the drop menu we can click create a new credential um we can see we just need to paste the API key and how we are going to get the API key we can go to open router. a and just register and you will go to the API Keys um section just create key and copy and paste it here and that's very simple you can save it and after you save it you can just um choose the Creed from this drop menu and choose the model from this drop menu as well all right so this is all set here okay let's double check all right everything is set here okay then we can click test step we can click the test step here or we can click test step here okay or we can actually click this test workflow as well so for test workflow it will run all of them and but when we click just this icon it will just test this step only great we can see on the right hand side um it's the output we have the story and we have the different scenes one two 3 four great and we can save it so basically this section uh is the story agent we can add a STI note try to enlarge it and then we can put um story AI agent okay so let's try to Tar It Up great and we are going to save it again uh you can just use command s or control s um or just click this button to save it all right for this three steps we have already completed the first one the story AI agent uh we are using deep seek fe3 for that so it is very cheap um it's just called 0. 001 stores per um for that video I means there are four prompts um for the image prompts basically it generates the whole story and also provide the output prompt in Json format uh everything included is just 0.
01 per video and we are going to dive into the second AI agent which is the image a agent we will have another note and the the note we can search for LM uh chain as well and for this one we are going to Define below this one is basically um the the second one the image AI agent so we can rename it image AI agent rename it and then we can choose Define below and again we are going to um click the the expression here and try to enlarge it and we go to our community and copy and paste this prompt just copy here and paste it here so for this one we can just drag and drop here why we are going while we are seeing um the red uh for example let let me past it again why this is red because for Jason it means the previous note but the previous note is Theory agent it doesn't have the number of video so it showing us red so it means it's invalid so you can see it is undefined so let's try to remove this and try to drag and drop okay and we can see that it's well defined as four as for the upper part um you can see it's Jason text it means it's referring the previous note the text fil here and on the right hand side it is the result it is showing the exact same uh content here so um when you see everything is green that means that it's working that's great and we can enable required specific output format here okay we are going to choose the model again we can choose open router chat um just connect with the credential that you just used in the previous note um and then we can search for deep seek chat so it's the same as the previous one actually the output parsa okay this one so we are going to have the structured output parel so what it means let let let me show you again um return data is in a defined Json format so we just want um the output to be well defined we we don't want any other format so that's why we need to specifi the uh output here so we just we have prepared it for all of you as well we can just copy and paste this all right um basically this is the example prompt example um the format that we want sln means new line all right so this one is set as well we're going to add another note actually we can just test this first we can click this button and see how it goes great uh on the right hand side we can see different prompts one two 3 four so because we we have four scenes um zero means the first one and so in total we have four prompts all right and then we are going to add another note here we can choose the split out note what it means that U to turn the list inside items to separate items so we are going to because we have four items we have four um prompts we want um to run them simultaneously actually so that's why we would like to add this split out Noe and we are going to split out this so we can just drag an input fi from left to user here so we can just drag this let's do it again this one so we can see output. image prompt this so basically this four will be split so that we can run all of them uh simultaneously great we can click test St here great we can see the um note executed successfully and the check green check mark here as well these are the prompts great and we are going to add another note um first we can save it first here we are going to add another note uh we can search for HT HTTP requests so we this note is for making an HTTP request and return the response data um this is um not that complicated we are going to use this note to use an AI image model to generate some images so how it works it's very simple um let me guide you step by step first of all we are going to rename this we are rame it as f um generate image uh what it means is that we're going to use one of the API it means that one of the AI models from fail AI fail AI is this platform they have many different models for example we can search for uh flux Pro this one there are so many model and we are going to use flux Pro uh today flux Pro uh version one this one uh version 1. 1 this one we are going to use this one and but how how we going to use it we we are going to put the URL so that we can use it first of for we are going to use post method Okay so so um this is like you can see there are different methods because we are going to um ask this file AI to do something for me um for us we're going to use this pulse method so we are going to have uh the URL we have prepared this for you guys as well you can just copy and paste q.
f. run fil AI flux Pro for . 1 basically we can go to search from here we can take a look at here API when we scroll down we can see is f AI flux pro version 1.
1 all right so in the beginning this is for running the API and this part is for running the specific models and you can find different models um here all right and we are going to have the authentication here we are going to choose generic credential type it means it is fully customizable okay um so we can choose head all all of two so but for beginners you don't need to um really understand what the difference between them you can just choose um generic credential type and we're going to choose header off all right and for header off we are going to choose the um fail account for those who haven't set your head off yet I'm going to teach you how you can set it first of all you can create new credential head off because once you have have set you have chose you have chosen SLE off here when you uh click this drop the menu when you click this create new credential it will be shown as head off and then we are going to rename it by clicking this pencil icon you can rename it as F AI account or something like that all right and what we are going to do let's close this first let's let me show you what we have set here so we put the Au authorization as name and then we are going to go to um fil API keys so basically the is f. b SL keys and you can add a key here after we create the API key from file AI here we go back to the credentials here on NN for the head off we rename it to fail account for the name we input authorization with the capit capital letter a and for the value it's very important we need to be very careful about that so we go to dashboard fil AI dashboard and then we scroll down we'll see call the AI end point and then we click curl here for the name we have already inputed authorization here so for the value is on the right hand side we need to input key space for the key for the K in key we need to be uh have the cap letter K so k y space and then we paste the API key we got here so let's do it again capital letter K and then small letter e small letter y space and then paste the API key so that's how you can set up the head off credentials for fail account all right so it's done so everything is ready here we just need to enable send body here we choose Json as the body condent type using Fields below so we are going to have prompt here um so we can just try and drop this one as our prompt this is a prompt so we are going to try and drop this one it's showing screen so basically is U processed correctly and we are going to add another parameter because we need to choose the image size um let me show you how we can actually get the image size um let's scroll down when we search for um schema um basically we can see the image size here all right and these are the uh variables these are the values and we are going to choose this this time so we can just go back here um copy this value and paste it here Port tra 16 to9 all right so we can click test step great we can see the status request ID response URL status URL cancel URL that's great it's all set here let's save it so when we see it's all green that means that it's processing correctly and one more thing uh when we right click it we can see pin what it means that um because if we want to um run every notes it may take a lot of time but sometimes we just want to make sure that um specific for example this note because it has already spent some money on on the F AI to uh do some uh image generation so we what we are going to do is to pin it so we when we try to testt the workflow again um it won't be processed again so we are going to just use the data that all that is already generated so you can see this data is pinned so when it is pent it means that when this note is processed it's only only processing this data it will not create anything new so uh of course for your own um day-to-day operation you don't want it to pin uh you want it to be unpinned but for demonstration I just um showed you what is the usage of the pin function all right then we are going to add another note The Waiting note wait before continue execution because it takes time for the fail AI uh for the image model to generate um some images so we're going to uh choose one for one minute we can click test up so it will wait for 1 minute basically then um let me try to show you another note as well while we are waiting we can still add another note here so we can add another HTTP request note so this time we are going to get something because we have used the post method in the previous note we use post method here we're going to use the get method here to get back the images from the file AI using the flux model so we are going to use uh this URL so basically q. f.
runfell AI flux Pro request all right so we are going to use authentication okay we are going to choose generic cral type um generic or type which is header or we can choose the account fail account yes it's all set and for here very important we are going to drag and drop the request ID here because without the request ID the system will not know which one we are trying to get so be careful of this space so this one is basically the request ID so the URL is correct you can try to click test step all right this is the image the seat prompt we can just actually copy and paste this URL and then we can get the image here great this is the fact cat it's cute cat great and then we have this note set already we are going to have another HTTP request note because um let me try to rename this as well first uh F get MH for the next note um because if we want to preview the image but it's very diff u i mean it's very Troublesome to copy and paste every single time uh we can add another note to preview the image we can use um HTTP request again and um we are going to use get method again this one for the URL we can just drag and drop this one and none for the authentication we can just click test up and then we can click view here great this is the image and this is the image great and the next um again we can try to name it we can rename it is as preview Mage all right for the next step we are going to um uh add this sticky note here right click at sticky note we can choose the color here for example we can choose green try to enlarge it okay let me try TI It Up and double click and we can try to edit here um image AI agent and we can save it let's try to taret it all right so it's all set all right so we have also completed the the image a agent tutorial so let's talk about the cost um for the cost we use the API from F AI again this is the platform F Ai and we used the model called flux um pro version 1. 1 all right and the cost is around 0. 05 us per image as we have four Images so it costs around $0.
2 um so after we have completed the story air agent the image air agent so let's talk about the video air agent we are going to use this agent to turn the static image into an animated video so so let's dive in all right the next step we're going to add another note uh of course is another HTTP request not because we are going to um use another another model from fail AI to generate the video okay so this is the video air agent so we are going to use post method this time and of course we just paste copy and paste this uh URL first and we're going to paste the U um the video model and let's try to close this first so we have Minimax video01 image to video basically we can just copy this and paste it here U we have double this so let's remove this okay so we have this URL F AI Minimax video View Run uh video o1 image to video again we have the same credential type um generic credential type head all and we can choose the uh the F account here and we will enable send body again just the default setting Json and use fills below uh we have the prompt here we can just use the simplest uh value which is a static short and then um basically can actually find it from here static short okay you can see static short static short okay um we can refer this refer to this let's see this are the camera movement let me show you for example we can pen left truck right Etc so like this static right we choose static and static shorts like this shake tracking shorts so you can use different camera movement all right as a prompt all right I can show you here so uh also of course you can choose The Prompt here this is another example and this is another example like this so for more details um you can always go back to this AI model from fil and choose API and you can just search for The Prompt and try to get some inspiration out of it but for Simplicity we can just choose some static shorts as say um camera movement all right the reason why we can just input um this simple camera movement as a prompt because we have an image as a prompt uh we can choose we can input URL because for this model we are going to use it as image to video so we need to input the um the image URL so how are we going to do that we are going to click scammer and then we are going to drag and drop this URL basically here and then we can um click test step great the status in Q in Q in Q in Q request ID response url stus url cancel URL Etc all right then we are going to The Next Step let's try to move it here down below first okay we will add another uh weight because sometimes U it may takes little bit longer for the AI model to generate from image to uh video it's kind of much longer than just generate image from text so maybe we can input 10 minutes here and we can run um test step so it would be uh running for 10 minutes at background great after 10 minutes it is completed um let's continue our tutorial let's search for HTTP request note um for this note we are going to get the video generated we can search we can rename it to F G video and we are going to choose the method G of course and we are going to input the um URL this one q. f. run Fel AI Minimax request basically it's similar to this one it's just that we are using different model but the format is similar like the formal uh the model name and the request and this one is similar U Minimax request and more importantly we are going to have the request ID so after we input slash after reest Quest we are going to drag and drop this remember to remove the space so we have the URL ready and we will have the authentication um to be set as generic credential credential type and then we choose head off and we will have the F account here all right everything set we will click test step great we have the output here again in order to allow us um to preview the video in an easier way we will add another preview note we can add here we can choose HTTP request rename it as preview video and here we're are going to use get method and we are going to drag and drop this Fe video URL none as see on that authentication we can click test step and we can feel all of them one by one let's feel the first one great is L SEC cat and this one great and then we are going to have another note uh because we have split out everything it's time for us to Aggregate and combine everything this one combine a fil from many items into a list in a single item all right we are going to choose individual items and we are going to um go to clict schammer and then we are going to choose um video URL this one drag and drop this one drag and drop this one all right we click test fi test step we have um the item successfully created all right so we have already created um four animated videos from f using the minex model we are going to combine all of them together and try to render the video so we are going to add another note uh called HTTP request of course and then we try to rename it as Randa video and this time we're using the post method because we're going to use the API and ask it to help us do something and we are going to have uh we are going to use the API from OC code.
com by the way it's free it's free of charge and we can go to any noco. com um documentation Loop video gener ation and go to endpoint we can just copy and paste here okay we click expression so we can see it's any no code. com API function video generation Loop video this is the API we prepared for you guys for free all right and this time we're going to use generic credential type as well but please be aware of this we are going to use cury off cury off and we're going to choose any no code so how we are going to set this up after you choose create um off we can click create new credential okay and then we can go to API details on any note code and copy your API key and paste it here all right as for the name we can just input API uncore key so that's very easy let me show you the one that we have set already so we can click um this icon the P icon again this API key and then copy and paste API key that you found from OC code.
com API details copy and paste to here and rename it to anti note code remember it is query o query o okay all right so we have another point that we need to be aware of which is to enable this send body what we are going to do is this first of all uh we are going to use Json we click expression all right what we are going to input here we can just copy uh the request body from any note code again it's documentation Loop video generation and then we scroll down to uh request body here just copy this one and paste okay first of all the type we need to input a string value let's go back to the full description um type of video to generate currently only Loop video is supported so we can just copy this Loop video and we can remove this and remember to add semicolon here and input here Loop video and then the next item would be the background URL and now again we need to another string value here let's take a look um it means the URL for the background Loop it means the uh background music actually so what we are going to do uh we can just let go to configuration and then try to uh put the semicolon again as well because we need a string uh value we can just drag and drop here okay configuration item Json background music you can just drag and drop this URL and the right hand side you can see this is a URL great and then for the third item as we can see we need a string value and this means array okay so what it means is that array of media URLs to be shown in the video so which means this one this is the this is list that we want so first of all we need to get the array and how we're going to get um if we just St and drop it it's just going to get one item so it is just one item one Ur but there not something that we want so what we need is that um uh we need to first of all um let me show you let me just copy and paste and share with you how it works so we need to have aggregate which means this one and then do item and then json. URL all right so um the item refers to the current item being processed and the array within this note okay so because we have multiple items so that's why we need we cannot just use Json URL and why we are going to use Json stringy because U we need a string array value here so we need to Jason stringify everything here so that's why we need to add and more importantly we need to add the bracket here okay great and then the next step we are going to have the duration duration means um the duration of of the video in seconds is optional but we can still add this let me show you as an example again we can just copy and paste I will show you this and then um actually you can it means that you can um actually it means that actually it means the length of each video here times 5 Seconds actually it means that how many URLs here that means how many videos right so we have four fos here four items here why we times five because for each FAL we generate from minimum Max AI model through fail AI is 5 seconds so that's why uh 4 * 5 = to 20 so when we see everything in screen here um it's good to go let's click test step great video generation started so we can go to the next note and we can add uh weight note as well so for example this time we can choose um 4 minutes okay and then we can start great it is completed and then we can add another HTTP requ note uh as for getting the uh video progress so we rename it and to get video progress okay so of course we're going to have get method and then we are going to input this URL this one um expression api. any no code um API function video generation progress and then we can slash uh we need to have the a ID as well so we can just straight and drop this ID okay this is the correct one and then we are going to have the authentication set as generic IAL typee and we have query or we need to choose any not code here all right and then we can click test app great it is done the status is shown as done all right we will add another uh model here uh for creating the video title for this AI video so we are going to search for open AI we have the message model here and we're going to search for open router account which we used uh for the previous notes and we choose deep seek chat model to save course so we have the system prompt here first and then we will click expression here for text and then enlarge it go to our community copy the system prompt and paste it here basically is asking the AI to create a the video title in just less than 8 characters and we are going to add the user prompt here expression so we can go to the um image uh air agent and try to Drand drop this image prom list um and then we can add remove the item and then choose as first remember to add the bracket so I will show you what it means so again let me type first so it means to return the first item output by the note remember we need to have the bracket so first bracket okay it's not done yet we need to stringify this because we need to it to be a strength value so json.
stringify and then give it a bracket and give it a close bracket great it's green right screen is um done correctly then uh we try to enable the simplify output and we'll click test step here great this is the title this output uh not successfully executed let's save it and then we are going to um download the video uh because we have already generated it and let's try to add another HTTP request note okay we'll rename it as um download video and we use get method the game um so now we'll input the api. nyot code. com and then we are going to just try and drop this one um get feed progress URL just try it here so make sure that there's no space here okay this URL is correct API SL function SL video generation pref then um everything set non indication we can run this test step nice we can view this output now let's take a look at this [Music] great seems like a great Sweet Love Story and of course you can always change the prompt to try to modify the output and the style all right so we have um the video ready and we can actually upload the video to YouTube so we are going to add an other note which is we search for YouTube this one and then we are going to choose up upload a video this one uh we can rename it upload to Youtube rename it and here we are going to um add your YouTube account for the credentials so um we can create for example create a new credential so we need to add the oo redirect URL client ID and client secet key let me show you the one that we set so this one you can just um paste it um just copy this one and then we can go to console.
cloud. google. com go to API and services enable apis and services go to YouTube data API V3 okay and because we have already enabled this API um you will be able to see that you need to enable this API first okay after you enable this API we go to credentials and then we create new create uh credentials we go to O off client ID use web applications rename it for example n n 2 something like that and then we will add URL just paste this redirect URL and then create all right right we will have the client ID and paste it here client circuit key and paste it here great and then you need to sign in with your YouTube Google account so that's all set here and what we are going to do after you have created the YouTube account we are going to input the title here so we go to uh schema and then for the title we can just drag and drop this content okay okay for the title you can actually drag and drop this one or actually you can drag and drop this one because they are the same as you can see and when you drag and drop this item uh you will see it is specifically for open AI item and the message content and when you try and drop this previous notes that's for you can just see Jason message content sometimes it will be uh much more accurate when you specified uh which uh note is it it is and which item it is so for example open AI item Jason message content so uh we can use it for uh to be safe and then we can search for Hong Kong because we are based in Hong Kong and category you can search for pets and animals and input binary field we can just keep it the same the data and we can click um test step and this is our Channel let's wait for a bit upload ID and let's refresh it again okay it's uploading let's take a look at this this is shorts [Music] URL okay so we have completed um everything so this is the uh video AI agents so let me try to right click at a sticky note change the color to Red enlarge it okay try to tidy up we can rename this as the uh fedo AI agent great so we have already covered the um story a agent image a agent and also the video air agent and we have successfully uploaded to the YouTube channels as well okay so it's time to talk about the cost let me try to T it up and save it okay so let's talk about the cost um for the third step which is the video air agent we used Fel AI API uh to use the Minimax model for the Min Minimax model uh it cost around $0.
5 per five per a 5sec fetal um because we use uh four fetal so the cost will be around $2 so for one 12 second video it costs around $2.


![Donna from Suits is Now My AI Assistant - Here's How I Built Her [n8n No-Code Template]](https://img.youtube.com/vi/2YsD7Cp56bI/maxresdefault.jpg)
![The Ultimate Social Media AI Agent for Facebook, Instagram, LinkedIn & Threads [No-Code]](https://img.youtube.com/vi/QtIXE7WAr94/maxresdefault.jpg)