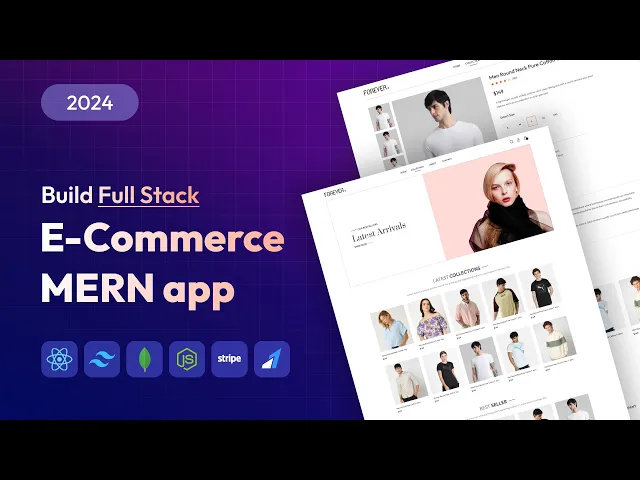
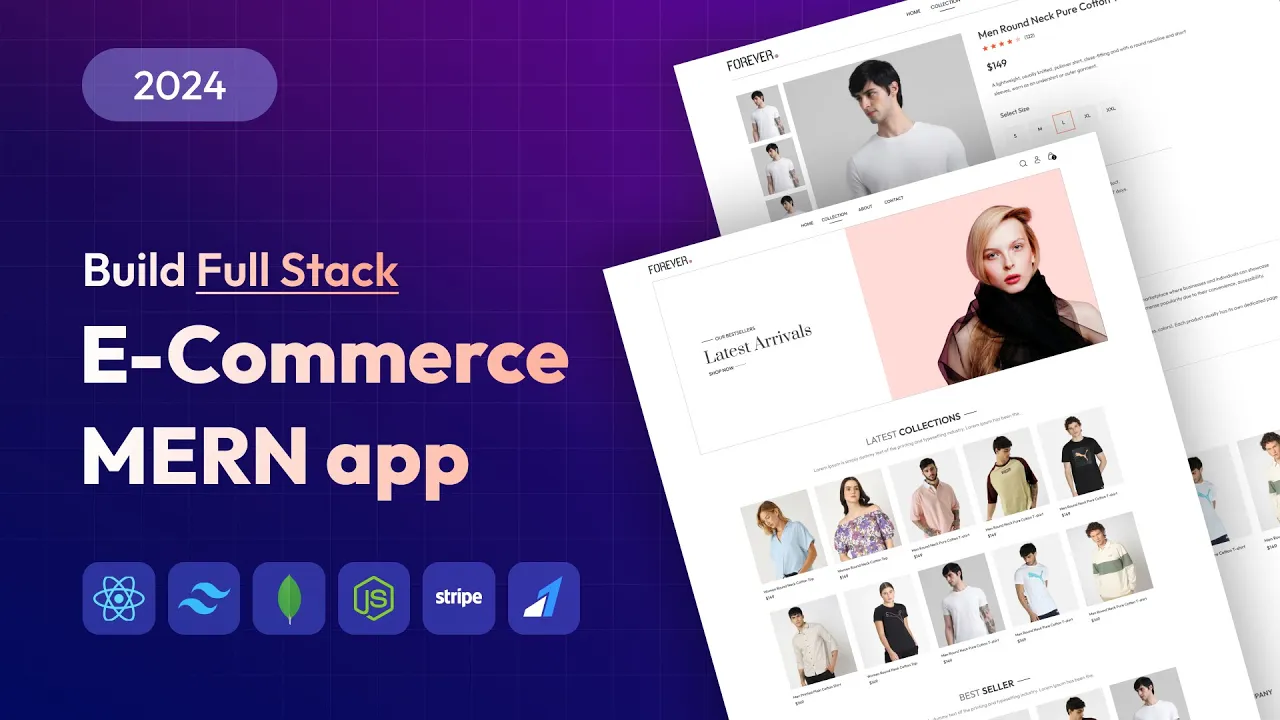
Hello and welcome to another exciting tutorial of great stack in this tutorial we will create a full stack e-commerce website using M Stack we are going to use mongod DV Express react and nodejs to build this e-commerce website project so this is the homepage of our e-commerce website let me scroll this web page so here you can see the latest collections so in this one you you can see the Recently Added products so here We have total 10 products so you can see in this product list we have the product image product title and price
when we move cursor over any product then you can see the transition in this product image let me scroll this web page again so here we have some best seller products and in this best seller products we have added five products after that we have some Pol IES then we have one email subscription form and then we have this footer and at the Bottom we have the copyright message let's see the other page so here if I click on collections so it will open the collection page where it will display all the products available on
this website if I scroll this web page you can see here we have lots of product and on this collection page we have the option to filter these product in the left side you can see we have filter where we can filter the product based on category and type right so if I select Kids you can see it is displaying only kids product from here if I select top we now you can see in this kids category it is displaying only top weer product right now if I uncheck this one and select men and from
here if I select bottom Vier remove this top Vier now you can see it is displaying men's category product and only bottom we right and let me uncheck this one so again it will display all products here we have one product sort option in the right side You can see we have this drop down if I click here low to high so it will arrange these product based on the price so first it is displaying the product with lower price and as we scroll down you can see theu products with higher price if I change
this option and select high to low now you can see it is displaying the product with the higher price and if I scroll down you will see the products with the lower price after that here you can see this Search icon if I click here it will open this search bar in this search bar we can add the search keyword then we will get the product related to our search keyword so let me type desert so here you can see we are only getting the t-shirts in this product list correct so like this you can
search the products on this website here we have this cross icon that will close this search bar right now let's see the next page which is about page on this about page you can See we have one image and some about text now let's see the contact page so this is our contact page where you can see the store location contact information right after that here we have this user icon and if I click here it will open the login page so if you have an account you can enter the email ID and password and
click on this signin button then you will be logged in on this website and if you don't have the account then you can click here on this Create account link let me click here so now we have to provide the name email ID and password and we can create a new account so let me create a new account here so here we have provided name email ID and password then click on this sign up button so it will create an account and we will be logged in on our website so now we are at the
homepage after that let me open any product so let me open this first product so this Is the product page right and here you can see in the left side we have the product gallery and in the right side we have the product information in this product product Gallery you can see some small images and if I click on any small image you can see this image will be updated at the main image position so if I click here you can see the main image will get updated if I click here you can see the
second image here if I click here now you can see another image so Like this you can select any image from this small images list in the right side we have the product title reviews price and product description then we can select the size right we can select size and click on the add to cart button so this product will be added in the cart so we have selected medium size click on the add to cart button so this product will be added in the cart you can see in this cart icon we have the
quantity one if I Click again now you can see the product quantity to in this cart icon if I select another size like s click on on the add to cart button now here you can see this quantity three like this you can select this size and add the product in the cart page let me scroll this web page again and here you can see we have some product description then we have the related product let me click on another product so now here you can see another product and here we will select The size
and click on the add to card button so this product will be added in the cart now let's click on this cart icon so here you you can see all the products that we have added in the cart and here we have the option to increase or decrease the quantity and we can also delete these product from the cart page and if I scroll down here you can see the cart totals where it is displaying total product value then shipping charge and here is displaying the total cart Amount now if I click on this proed
to checkout button it will open this play order page where user can enter their delivery information and select the payment Gateway and place this order so let me add some dummy information in this form so here we have added some dummy information here we have multiple payment option you can choose a stripe or razor pay and you can make the payment online or you can also choose this cash on delivery option so let me Select this cash on delivery and click on the place order button so now we have placed the order and we are
at the my order page on this my order page you can see the products that we have just ordered and here we have the order date we have the size and quantity and here we have the button to track this order right and here it is displaying order placed so this was the front end part of this e-commerce website now let me show you the admin Panel so this is the admin panel so to access the admin panel we have to provide the email ID and password then click on the login button so it will
open this admin panel in this one if I go to orders from this left side bar here you can see the new order that we have just placed right you can see the name now from this admin panel we can update the a status so here you can see this drop down and if I change this like out for Delivery now if I go to the front end and click on this track order so now you can see the order status has been updated it is displaying out for delivery correct so like this you can
update the order status from the admin panel after that here you can see list items where it will display all the products added on this website now here we have one option add items let me click here and from here we can upload a new Product on our website so let me upload the image so I'll select this image now select the other variant of this product so now we have selected four Images here we have to add the product name so we have added the product title means research test here we will add the
product description so let me add the same text in this description also here we have to select the category so we will select main category we will select top we and here we have to provide the Price so let me add 80 then we can select the size so this product is available in small size medium large and Excel after selecting this size you can select this add to best seller then this product will be added in the best seller list after that click on the add button now you can see this notification product added
correct after adding this let's go to this list items and here if I scroll this web page at the bottom you can see the newly added product that is Men's t-shirt test correct and if I go to homepage let's open this collection page scroll down so here you can see the product that we have just added let me open this product so you can see the product title we have added very small description right you can see the same price so this is how you can add a new product on this website so this is
the overview of the project and this full stack project Offers a great opportunity to enhance your coding skills and also provide an impressive addition to your resume you can also customize this project to use in your college project or personal portfolio to explore the feature of this full stack e-commerce app you can check out the live project link provided in the description before starting this tutorial please do comment on this tutorial and help me to get 500 comments now let's start the development process And build this full stack e-commerce website a step by step so
now we are on my desktop screen and here we will create a folder with the name e-commerce app so right click select new folder and provide the folder name e-commerce app now we are going to open this folder with vs code editor so right click so more options open with code so this folder is open in vs code Editor now right click here and select open in integrated terminal so in this integrated terminal you can see we are in the e-commerce app folder after that here in this folder we will create a react project using
the wheat package for that we will type the command npm create V at latest after that here we have to provide the project name so this will be our front end project so write the project name front end After that we will select the framework react then select JavaScript now you can see the project folder has been created in the left side bar now we will open this front end folder in this terminal for that here we will use this command CD front end so it will change the directory so now we are in the
front end directory in this terminal now in this project we will install the dependencies for that we will use the command npm install so just Type npm install in this front end so it will install all the dependencies after installing the dependencies here you can see one nodecore modules folder now for this project we will install some packages so first we will install react router Dom and react toasttify so using this react router Dom we can create multiple routes in our project and using react toasttify we can display the toast notification in our Project just
press enter so it will install these two packages so these packages has been installed next we will run this project to run this project simply type npm run Dev so our project is running on this Local Host Port 5173 so let's open this address in the web browser so here you can see our default project is successfully running in the web browser next we will clear this default react Project for that we will come back to the vs code edit and here we will open SRC folder then right click and delete this app. CSS file
after that we will open this app.jsx file from here we will clear all the codes and here we will use the snippit [Music] rce so it will create this component if this RFC snippit is not coming so you have to install one Extension so go to extension and search for this es7 react Redux just search for this extension and install it so after installing this extension you can use the rafc snipet after that we will open the assets folder and from here let's delete this react. SVG file now open index. CSS file and let cleared
all the code from this index. CSS after that we will open index.html file and from here we will update this Title so right now you can see the title V plus react so let me clear it and here we will add our own title so it is forever so this is our website name after that we will save the changes and open the web browser so here you can see our default react project has been cleaned and you can see the title in this browser which is forever that will be our project name after that
we'll insert all our Assets in this assets folder so here on my desktop screen you can see assets folder where you can see all the assets file related to this project so let me copy all these files and we will come back to the project folder go to front end then go to SRC and open assets folder and paste all the assets here let's close it now we will open the vs code editor so here in the left side word Inside this assets you can see all the images and here we have one assets do
JS file in this file we have already imported all the images and then I have exported it through one object that is assets suppose we have to use the logo so simply we will use this assets and in that image SRC we can provide assets. logo so it will display that logo on the web page with this you can see here we have one aray with the name products and in this product products are we have Multiple object and each object is representing a single product so in each product we have the product ID name
description price image and in this image we have added one aray where you can add the multiple images and we can display multiple images on our website after that we have the category subcategory sizes date so this date is one time stamp when we have added this product after that here we have the best seller property if we will Make it true then this product will be displayed in the best seller section so you can see this is the product two here we have added multiple images in this image array using that we can display
multiple images in the product page and here we have added this export so that we can use this products areay in any component after that in our project we will add the support of telin CSS so let's open the web browser and open a New tab and here we will search for V plus tnd we will open this first link so now we have to follow these steps to add the telin support in our project so first step is to create the project that we have already created so skip this one after that here we
have to use this command to install the tnd and post CSS dependencies so let's copy this command and in this terminal first we have to stop this project so just type Contrl c yes then paste this command so it will install the dependencies after that again come here and copy this second command and paste it here in this terminal after executing this command you can see we have two files in the sidebar post css. config.js and T.C config.js after that here we have to copy all these codes so let's click on this Icon and open
this Telvin doc config.js file and remove all this code and paste this one that we have just copied now save the changes and come back to the web browser and here we have the next step just copy these three lines and paste it in the index. CSS file so let's copy all these codes and we will open index. CSS file which is here in this SRC directory so just paste all these three line of codes after that we can start our Project so to run this project simply type npm run Dev now we will come
back to the our web page and reload the web page now in our project we have the support of telin CSS after that let's close this index. CSS file HTML file now we will create the folder structure for our front end project for that in this SRC folder we will create a new folder with the name p pages and in this Pages we will create Multiple Pages like card page order page homepage contact page about page and other after that we will create one more new folder in this SRC and provide the folder name components
in this components folder we will create multiple components that we can reuse in our project after that we'll create one more folder with the name context in this context folder we will create one context file and using that We can manage the logic of our e-commerce project after that in this Pages folder let's create multiple pages so in this Pages folder let's create a new file with the name home. jsx to convert this file in the component we will type rafc now let's create another file in this Pages folder with the name collection do jsx
here also we will use Rafc Save the changes now create another new file that will be about. jsx here we will create our afce save the changes create a new file and write the file name contact. jsx here we will use rafc snippit Save the changes now create a new file in this Pages folder and the file name is product. jsx here also we will use R fce save the Changes now we will create another new file so it will be for the cart page so just add cart. jsx here we will use rafc similarly
let's create one more file it will be for the login page so let's add login. jsx here we will use rce Save the changes now let's create another new file with the name place order. jsx here we will use the rafc Snippet now let's create one more new file so we will use this file to display the order so let's add orders. jsx here we will use the rafc snippet so here we have created nine pages in this Pages folder Now using these Pages we will set up our route so to set up the react
router first we will open main. jsx file and from here remove this react a strict Mode and here we will use browser router tag so just add browser router and now we have to import this browser router from the react router Dom package so here we will add input curly bres browser router from react router Dom so we have wrapped this app tag using this browser router tag so that in our whole project we will get the support of react router Dom now close this file now we will use this react router Dom to create
multiple routes for the multiple pages so that when we go to SL login then it will display the login page for that let's open this app.jsx file so this div will be the root container so for this one we will add the class name property so here we have provided the padding X for different screen sizes like a small medium large after that we will use the routes Tag we have to import this routes tag so here we will add import curly bres routes from react router Dom with this we will import the route tag
also so we have imported the routes and Route tag from the react route ter so in this routes we will create multiple route so first let's add one route for The homepage for that let's add the opening Arrow Route tag close this tag and in this one we will Define The Path property and element property so let's add the path that will be SL so whenever we will open the slash it will open the home.js x file with that here we will add the element property equal to curly presses and here We will provide the
home component so select this home from the suggestion if I click here so this home has been imported from the pages slome let's close this home tag so whenever we will open this SL path then it will Mount the homepage after that here we will add the new route here we will add the path slash collection here we will add the element property and in this one we will provide the collection component so select it From the suggestion so this file has been imported close this tag similarly we will add another route here we will
add the path SL about here we will add the element property and here we will Mount the about component after that create another route in this one we will add the Path property it will be/ contact here we will add the element property that will Be contact component after that we will create the route for the product page so just add route here we will add the Path property here let's add/ product in our product page whenever we will open any product then we need the product ID so here we'll add the parameter that will
be colum product ID using that we can get the particular product on this Page here we will add the element property and and here we will provide product component after that we'll create one more route this will be for the cart page so just add path SLC cart here we will add the element property and here we will Mount the cart component after that we will create another route here we will add the Path property this Route will be for the login page so just add/ login and here we will add the element property here
we will Mount the login component after that we will create one more route here we will add the Path property that will be slash place order here we will add the element property and in this one we will Mount the place order Component after that let's add one more route in this one we will add the Path property that will be/ orders and here we will add the element property that will be orders component so here we have created nine pages and here we have created nine routes so if I go to the homepage that
will Mount the homepage if I go to the another route then we'll get these components so we have set up the route Now we will start building the UI so first we will build the navigation bar for that let's create a new file in this components folder that will be na. jsx here we will use the ra fce after that we will Mount this component in the app component so we will Mount this nav bar outside of this routes tag so that this nav bar will be available in all pages so before this routes let's
add the opening arrow and provide Navar Component so select it from this suggestion so this file has been imported close this tag save the changes so now this navbar will be displayed in all pages because we have mounted it before this routes tag now let's open navb bar. jsx file and start building this navigation bar so first in this D we will add the class name property and here let's add the classes so let's add Flex item Center Justify between then padding from the y- AIS then font medium in this div first we will add
the logo for that we will use the IMG tag and in this SRC we will use this assets. JS file so from this file first we will import this object that is assets so to import this one simply add import cly bres assets from double do/ assets folder SL assets. JS file after that in this SRC let's provide assets do logo so that in this SRC we will get this logo image after that here we will add the class name property and here we will provide width and save the changes if I open the web
browser so here you can see this logo after that here we will create one UL tag and in this UL tag we will create multiple menu items so in this UL tag first we will add the class name property so let's provide class name hidden for a small and above a screen just add Flex Gap five text then text color so this menu will be hidden and for a small and above a screen it will be displayed using this Flex after that here we will use the naving Tag so first we will import the nav
link tag so just add import curly bres nav link so let's select it from the suggestion nav link from react router Dom so this tag has been imported now within this UL tag we will use this naving tag in this tag first let's add the class name property and here let's add Flex Flex Column item Center Gap one within this nav link tag let's add one P tag where we will add home and here we will add one HR tag and here we will add the class name property and here let's add width border none
height background color if I save the changes and open the web browser so here in the right side You can see this text home and here we have one underline that we have created using this HR tag so whenever we will be on the homepage then it will display this underline below this home text and whenever we will open the other page then it will display this line below the menu text of other page after that here we will add the two property using this property we can add the path name so whenever we will
click on this nav link it will redirect us to this path which Is the slash after that let's copy this complete naving tag and paste it for three times now in the second naving tag we will update this text here we will add collection let's make this home text also in the uppercase now rename the third text and rename the fourth text so we have added Home Collection about and contact now in the second nav link we will add this route that will be/ Collection now in the third one we will add slab and here
in this two we will add/ contact if I save the changes and open the web browser so now here we have four menu items first is home then collection then about then contact so right now you can see this underline in all menu items if I click on this collection so you can see in the URL and we are on the collection page if I click on home so now we will come back To the homepage if I click on about you can see slab and if I click on contact you can see the URL
SL contact now right click and select inspect right now we are on the contact path and uh from here if I select this contact so in this code you can see in this a tag we have the extra class name called active as we have not added any active class in this nav link right the last class name is Gap one so You can see after this Gap one we have one active class because we are on the/ contact path if I click on collection so so in the right side you can see the active
class name has been removed from the contact anchor link and this active class name has been added in the classes of this collection link so in this a tag you can see active so we are getting this feature because of this nav link so whenever we Will open any route so in that class name it will add the active class name automatically so using this active class name we can display the underline below that menu item for that in this HR tag after this BG color let's add hidden class name so it will be hidden
from all the links so you can see all underlines are hidden now let's open index. CSS file and here let's add anchor tag do active then HR Tag so whenever in any of the anchor tag we have the active class name available so in that HR tag we will make that visual so simply add display block now if I save the changes so you can see this collection page and here we have have the underline below this collection menu if I click on home so we are at the homepage and here you can see the
underline below this home link if I click on about and contact you can see So this underline is perfectly displayed on particular menu after that let's come back to the navb bar. jsx file now we'll create the right side section of this navigation bar for that after closing of this UL tag here let's create one div and in this div we will add the class name property so here let's add Flex item Center Gap Six let me hide this terminal so we will get more space to type now within this div we will insert insert
one image tag and in this image SRC we will use assets do search icon then we will add the class name property and here we will add the class name width and cursor pointer if I save the changes and open the web browser now this menu item is Displayed in the center and in the right side we have the search icon after this image tag we will create one div and here we will add the class name property so let's add the class name group and relative in this step we will create one image tag
and in this SRC we will use assets dot profile icon after that here let's add the class name property that will be Width and cursor pointer if I save the changes so here we have the profile icon after that on this profile icon we will add the drop- down menu so whenever we will hover on this profile icon it will display one drop down menu where we will add the login log out or order page link so after this image tag let's create one div and in this div we will add the class name property
and here we will Provide group over block then hidden then absolute drop- down menu right zero padding top after that within this div we will create one another div here we will add the class name property so here we will provide Flex Flex column Gap width padding background color text color border Radius after that here we will create three P tag so let's add P into three now in all three P tag we will add the class name property and here we will provide cursor pointer hover and here we will provide the text black so
in the first P tag we will add the text my profile in the second P tag we will add orders in the third one we will add log out If I save the changes and open the web browser so if I H on this one here we have one drop down where you can see three options my profile orders and log out so if I H on these text you can see the text color is changing and it becomes black now we will create one link tag so we will get this link tag from the
react route ter so just click here so link tag has been imported from react router D in this link tag first we'll add the two property and here we will add slash card so whenever we will click on this link tag it will open the card page then we'll add the class name relative in this link tag let's add one image tag and in this image SRC let's provide provide assets do cart icons then we will provide the class name property where we will add width And minimum width we will save the changes and open
the web browser so here we have one cart icon now we will add the cart count in the right side at the bottom of this cart icon so just add one P tag here we will add the class name property in this P tag let's add any random number like 10 and in this class name let's provide absolute right bottom Width text Center leading fold then background color then text color then aspect Square border radius and text size that will be 8 pixel if I save the changes and open the web browser so here at
the bottom in the right side of this cart icon you can see the number of count it is displaying 10 so here we have created the Navigation bar for the desktop screen now we will make it responsive so that it will look perfect in a smaller screen also so let me right click and select inspect so right now you can see that menu items is hidden so now we will create one section where we will create one sidebar menu for the phone screen for that after this link tag here let's add one image tag and
here we will use the assets do menu Icon after that here we have to add the class name property here we will provide width cursor pointer for small and ABA screen it will be hidden so if I open the web browser here we have this menu icon if I open in desktop screen that menu icon is hidden and if I reduce the screen size that menu icon is visible now we will create one state Variable so before this return statement let's add const visible and the set function name will be set visible equal to user
State and initialize it with woan data for false so here we will create one div and display that whenever this visible state is true so in this image tag where we have added the menu icon here let's add the On click property here we will pass the Aro function and here we will call the set visual Setter function and here we we will make it true so whenever we will click on this menu icon then the visible state will be true after this div here we will add one comment so that we will get to
know why we have created this div so in this one let's add one Comment sidebar menu for a smaller screen after this commment let's create one div and in this div we will add the class name property here we will provide the dynamic class name so the dynamic class name is that where we will use the state variable and whenever the variable changes then it will change the class name so to use the dynamic class name here we will provide the curly bres then Back text and in this one let's provide this class name absolute
top right bottom overflow hidden background white transition all after that here we will use the dollar sign curly resses and in this cly reses we will use the turn operator so we will check if this visible state is true in that case here we will add the class name That will be width full and if this visible is false in that case we will add the class name that is width zero if I save the changes and open the web browser if I click on this menu icon so here we have one div in this
div we have not added anything that's why it is displaying blank if I reload the web page again you can see this navigation bar now in this div we will add the multiple menu links And with that we will also add the close icon so whenever we will open the sidebar menu then we can click on the back so it will close that menu for that here let's create one div tag and in this one we will add the class name property that will be Flex Flex column and here we will use the text Gray
600 in this div we will create one more Div and in this one also we will add the class name property and here we will provide the class name that will be Flex item Center gap of for and padding within this div we will add one image tag where we will use the assets do drop-down icon and in this image tag we will add the class name property that will be H4 rotate 180 after this image tag let's add one P tag and here we will add the text that is back with that in this
D we will add the on click property and here we will pass the arrow function so whenever we will click on this div where we have the image and text called back so whenever we will click here it should close the sidebar menu for that we will use the setter Function set visible false if I save the changes and open the web browser if I click on this menu icon so here we have the sideb bar and if I click on this back so now it will display the main navigation bar it will close the
sidebar with that in this div we will add the cursor pointer so that whenever we will h on this div we will get the Cur pointer Effect after closing of this div here we will create the naving tag so let's add the opening Arrow nav link here we will add the two property here we will add the Slash and here we will add the text home let me copy it and and paste it for three more times here we will provide SL collection and here we will add the text collection here we will provide the
two SL about then we will add the text About here we will add this SL contact then up update the text contact after that in all four link tag let's add the class name property and here we will provide padding y then pring from the left side then border if I save the changes and open the web browser and if I open this menu so here we have the Home Collection about and contact if I click on this collection so here we have the SL collection if I Click on about so here we have the
slab slash contact so this nav link is perfectly working if I click on this back right now we are on the contact route so here we have one issue when we change the route we have to click on the back button right so we will add the logic so that when we click on any menu item then it will close the sidebar menu automatically for that on these NAB Links we will add the onclick property and here we will pass the arrow function here we will call the set visible function and provide false if I
save the changes and if I click on contact so now we are at the/ contact path and the side menu has been closed so this logic is perfectly working now let's expand the screen size so now we have completed the navigation bar component now we will create the hero Section for our homepage for that in this components folder we will create a new file that will be hero do jsx here we will use the rafc snippit we have to mount this hero component on our homepage so let's open home. jsx and in this div we
will add this hero component so we will select it from this suggestions so this Hero has been imported now close this Tag now the hero component has been mounted on the homepage so whenever we will open the homepage it will display the hero component after that we will Design This hero component so in this D we will add the class name property and here we will provide Flex Flex column Flex row border border gray we have provided Flex Row for small and Above a screen size now in in this hero section we will create two
section hero left and hero right so here let's add the comment where we will add hero left side and here let's add one div and in this div we will add the class name property and here let's provide width full for a small and above a screen width half then Flex then item Center justify Center padding y then for Small line above padding y zero now we'll add one div and in this div we will add the class name property and here we will provide text color just provide this color code within this div we
will create another div and here we will provide the class last name that is flex item Center gap of two after that here we will create two Paragraph tag so just add P into two so in the first paragraph tag we will add the class name property and here we will provide width for medium and above screen size we will provide the width 11 after that we will provide the height that will be 2 pixel then we'll provide the background color so here we will use this color code so we are using this paragraph to
display one line that will improve the Looks of our theme after that in the second P we will add the text our best seller and in this paragraph tag we'll add the class name property so here we will add font medium texture small here we will add the medium screen and here let's add text base if I save the changes and open the web browser so here we have the container Where you can see this our best sellers after this TP we will create one H1 tag and in this H1 tag let's add the text
latest arrivals after that here we will add the class name property and here we will provide this class name that is text then padding for a smaller screen then for larger screen text then leading after this H1 tag let let's add One more div in this div we will add the class name property that will be Flex item Center Gap two in this div we will add two P tag so in the first paragraph tyag we will add the class name property so here let's provide font semi bold text small and text base for the
medi screen here we will add our text that is shop Now and we will use this second paragraph As a line so just add the class name property and in this class name we will use the same class name that we have provided here so let's add the same class name if I save the changes and open the web browser so here you can see it is looking like this here we have to update the text stop now after that in the right side we will Insert one image so after closing of this div here
let's add one comment and let's add the comment hero right side after that here we will insert one image tag and in this SRC let's add assets dot hero image after that here we will add the class name property here let's provide width full for a small and of screen size we will provide width 1 by 2 if I save the changes open the web Browser so in the right side here we have the image now this design is looking perfect now we'll add some custom fonts so that the UI of the web page will
look better so for that we will open new tab and here we will search for Google fonts let's open this website fonts. goole.com here we will search for outfit in this search bar just click Here then click on this button get font then let's come back to the fonts again and here we will search for this font Plata let's click here and click on the button get font now just click on this button get Ed code and select this import a statement and from here just copy copy this line now we will paste it in
our code file so let's open index.css file and in The first line just paste this statement so after adding this in this project we will get the support of outfit font and this parata font now just come back to the web browser and from here let's copy this code and come back to the vs code editor and paste it here after that let's add the CSS properties for all the HTML elements so just add a star and here we will add Font family outfit so for all the elements we have provided the font family outfit
after that let's copy this class name and and we will paste it here in this H1 tag so let's paste it here if I save the changes and open the web browser so here you can see the custom font has been applied on our web page this latest arrivals text is looking good and all other text we Have the outfit font now our hero section is looking perfect and this section is completely responsive for phone phone screen also so let me right click and select inspect and change the screen size so you can see in
a small screen it is looking like this now we will create the context using that we can store all the common variables and state variables at one place to create the context in this context folder we will create a new file With the name shop context. jsx so here we will create one variable with the name sop context so just add const sop context here we will use the create context API so just add create so here we have the suggestions create context from react so select it so this create context has been imported from
the at library so here we have created the context variable that is s context so here we will add the export So that we can access it in any other component also after that here we will create one context provider function for that let's add const shop context provider equal to and it will be one Arrow function within this function we will create one variable where we will add the name value so whenever we will add any Variable State variable or function within this value object then we can access it in any component using the
context API after that here we will add the return statement and use this blacket and here we will provide sop context dot provider and within this tag we will add the curly bres and from this parameter we'll get the Props and here we will add props do children with that here we will add the value property and here just provide this value object that we have created here so here we have created the S context provider function now we will export this function so just add export default sop context provider function after that here we
will add One Import and let's add products that we will get from the assets folder assets file so it will import all the products From the assets file now in this value we will provide this products so in this value object we have added this products so using the context API we can access it in any component with that here we will create some variables so just add const here we will add one variable with the name currency and here we will store the dollar sign so that we can change the currency symbol for the
entire web page Suppose if you want to use this project for other currency and want to add any other currency symbol then they can simply change the currency symbol from here like I can add the rupees symbol so this currency symbol will be updated on complete website so for now I'm going to use this dollar sign symbol after that we will add one more variable that will be delivery fee so just add cost delivery fee and here we will add 10 we will pass these data in this value object so that we can access these
variables in any other component so just add comma currency then add comma delivery fee after that we will create one component with the name latest collection and in that one we will display the latest added products for that in this components folder we'll create a new file and here we will add the name latest collection. Jsx here we will use rafc so first we have to mount this component on the homepage so let's open home. jsx file and after this hero component we will Mount this latest collection component after that let's come back to the
latest collection after that let's come back to the latest collection. jsx file and here before this return statement we will get the products data using the context API so just add con cly Addesses products equal to here we will use the use context hook and in this one we will provide our s context so we will select this sop context from the suggestions so we will add this sop context so it has been imported now we will open main. jsx file and within this browser router tag here we will create sof context provider tag within
this tag we will place this app Component and we have imported this sof context Provider from this sop context. jsx file save the changes now after adding this we will get the support of context API in our project and we can use the context values in any component now let's come back to the latest collection. jsx file now this statement will work and in this latest collection we will get the products data to check that whether we are getting the products Data or not here we will simply add the console log and in this one
we will provide the products if I save the changes and open the web browser and right click select inspect then select console so here we have one aray and in this aray we have 52 items that is displaying the 52 products in each product we have the ID category based seller date description image name price sizes subcategory so we will use these data to Display One latest collection section where we will display the Recently Added products for that we will come back to the vs code editor and in this compon components folder we will create
one new component with the name title and using that component we will display the title in each component so in this components folder let's create a new file and let's add the file name title. Jsx after that we will add the rafc so in the title we will display two text so we will get that two text using the props so just add curly brushes first one will be text one and the second one will be text two after that in this di we will add the class name property in this class name we will
provide inline Flex Gap two item Center and margin from the bottom after that we will create to Paragraph tag so simply add P into two and in the first P tag let's add the class name property and here we will add the text color so just add text Gray 500 after that here we will add the text one in the curly Braes and here let's add the aspan tag and in this asan tag we will display the text two so just add curly bres text two now in this aspan tag we will add the class
name property and here we will Provide text Gray 700 font medium so in this paragraph tag we have added text one and text two and we have added the text two in the span tag so that we can add the different CSS properties for the text to now we will use this second paragraph As a line so let's add the class name property and here we will provide width then height then background color so we have created this title component let's close it and now come Back to the latest collection. jsx file here remove this
console log after that in this div we will add the class name property and here we will provide margin from the Y AIS within this we will add one more div and just add the text Center padding Y and text size 3 XL now here we will use the title component that we have created so just add opening Arrow title we will get this option from the Suggestion so just click here so this component has been imported now close this tag so in this title component we have added text one and text two so we
have to pass the text one and text two using the props so come back to the latest collection and here we will add text one and here we will provide latest after that we'll add the text two and it will be collection if I save the changes and Open the web browser so as you can see here we have one title component where you can see the text latest collection and after that we have one horizontal line so we can use this title component multiple times on our project so after that we will add one
P tag and here we will add the class name property here we will provide width margin text size text Color and in this P tag let's paste this text if I save the changes so here we have a small text below this title after this div here we will add the logic so that in this latest collection section we can display the recently added 10 products for that first we have to get the 10 products from the products data for that we will store the 10 products from this products areay in one state variable for
that here we will add one New create variable so just add const latest products and the set function name will be set latest products equal to user State and initialize it with empty adday after that whenever this component will get loaded then from this products data we have to load the 10 products in this latest products state for that we will use the use effect hook in this one we will pass the arrow Function and here we will add the dependency array that will be empty array so that this function will be executed once when
the component gets loaded after that we will call the set latest products and in this one we will provide the products do slice and here we will provide 10 product for that we will add 0 to 10 so using this in the latest product estate we'll get the 10 Products Now using this data here we will display the product list so to display the data first we have to create the product item and we will map that using this array for that in this components folder we'll create a new component with the name product item.
jsx so let's add product item. jsx here we will use this RFC here we will add the product ID then image then name and price and we will display these data With in this div so first here we will get the currency value from the context so as you can see in this context where we have the currency is equal to Dollar so we will get it in this product item. jsx file so simply add con curly bres currency equal to use context and here we will provide the swap context so here we'll get the
ID image name price from the props and we'll get the currency detail from the SOP Context now we will remove this div and here we will create the link tag we will get this link tag from the react router Dom so first we have to import it so just add import curly bres link from react router Dom after that here we will add the two property and here we will provide the path of the product page so that if anyone click on this product item it will open that product page so to send The user
on the product page path we will use the template literal so just add back tick and here we will add slash product path and here we have to add the product ID so to add the product ID we will use the template literal so just add dollar sign curly Braes and provide this ID so that anyone will click on this link then it will open SL product/ the product ID so it will Navigate the user on this path now in this link tag we will add the class name property so here we will add the
text Gray cursor pointer within this link tag let's add one div and in this div let's add the class name property and here we will add the Overflow hidden in this div we will create one image tag and in this image SRC we will provide the first image from this image Array so just add curly bres and image and index zero now in this image tag we will add the class name property and here we will provide hover scale transition is in out then we will create one P tag and here we will display the
products name so just add cly presses and here we will provide this name after that in this P tag we will Add the class name property where we will add padding from the top padding from the bottom texture small after that create another P tag and here we will provide the price of the product so to display the price we will use the cly bres currency so it will display the currency symbol then we'll add another curly bres and here we will display price after that in this P tag let's add the class name property
and here we will Provide text small font medium so we have created this component Now using this component we will display multiple products in the latest collection component for that here we will add one comment here we will add the comment rendering products here we will create one div and in this div we will add the class name property here we will provide GD columns To for small and above screen grd columns three for medium and above a screen GD column four and for large and above a screen GD columns 5 then gap of four
and GAP y if we will open in phone view we will get column two for above screen we'll get three four and five columns now we'll render the products within this div for that here we will add the curly presses and here we will use this latest products state so this is one array so Here we can use the map method in this map method we will pass one Arrow function and here we will use this bracket so in this parameter we will get the individual item and index number and here we will return the
component that is product item component that we have just created here so in this one you can see we have to provide the ID image name and price so here we will pass the props First we will add the key prop property where we will add the index number then we will add the ID property and in this ID we will add item doore id after that we have to pass the image so here we will provide item dot image after that here we have to pass the product name so just add item dot name
after that we have to pass the product price so just add price and here we will pass the item. Price so here we have provided all the props if I save the changes and open the web browser so here we have total 10 items so here each image is representing one product item component where we have the image product name and price detail here it is also displaying the currency symbol dollar if I click on any product image so we are at the/ product page and here we have the product ID so you can see
the path SL product/ ID if I click on homepage it will Redirect us to the homepage now if I click on any product image it will open the product detail page and now add the logic on this logo so that when we click on this logo it will take us to the homepage for that we will come back to the ne. jsx file and here we have this image tag and now we will wrap this image tag using the link tag so here we will add link tag and close this link tag after this image
tag now here we will add the two Property and here we will add path of the homepage which is SL save the changes come back to the web page now if I click on this logo it will take us to the homepage now if I right click and select inspect and open this web page in phone screen so here you can see on this homepage we can open this side menu so in the side menu also we will add the logic so that we will get to know on which page VR so let's come back
to the Vs code editor we will open index. CSS file here we will add the media qu and in this one we will provide the maximum width that will be 640 pixel and here we will add the Anor tag where we have the active class name available so for this aner tag we will add the property background color black and text color white so if I save the changes and close this file and open the web browser so now we at the homepage and here you can See the white color for this home if I
click on the contact so we are at the contact page and if I open the side menu you can see this contact is highlighted so this logic is perfectly working so till now we have created the navigation bar hero section and latest collection section as we have created the latest collection section here similarly we will create bestas seller section so if I come back to the vs Cordor and this assets. JS file here we have the products data you can see we have added best seller property so wherever you can see the best seller true
we will display that product only and where you can see that false that will be hidden for that here in this components folder we will create a new file with the name best seller. jsx here also we will use the arfc snippit here first we Will get all the products data using the context API so just add const cly Braes products equal to use context and provide the SOP context so sop context and use context has been imported now from this data we will get those data where the best seller property is true for that
we'll add one state variable with the name best seller so just add cost best seller and the setter function name is Set besteller equal to user State and initialize it with empty aray after that we have to find the best seller products from this products data and store them in this best sell state so for that here we will use the use effect hook and here we will pass one Arrow function after that we will add the dependency array and here here first we will create one variable with the name Bas product so just add
Con best product equal to here we will use the products array where we will apply the filter method in this one we will pass the individual item and here we will add the item and here we will return the item. best seller if it is true then this filter method will save that product in this bestas Product after that here we will call the setter function which is set best seller function in this one simply provide best product and in this one we have to display only five products so we will use the slice method
provide 0 2 5 so we have to execute this use effect whenever the products gets updated so after that we will get the best seller products in this best seller state so now we'll display these products for that in this dip we will Add the class name property here we will add the margin y now here we'll add another div then we'll add the class name property here we will provide text Center text 3XL and padding Y in this we will add the title component so use this title component in this one we will pass
the text one that will Be best then we will pass the text to and it will be sellers after that we will create one P tag here we will add the class name property here we will provide width margin text size then text color in this paragraph tag we will add this dummy text and after closing off this div here we will display the best seller products before that here we have to Mount this best seller component on this homepage so that that best seller product will be displayed here so come back to the home.
jsx and after this latest collection we will Mount this best seller component if I save the changes and open the web browser so here at the bottom you can see title best seller and this dummy text now we'll display the products so to display the product let's open bestseller. jsx file and here we Will create one div and in this div we will add the class name property and here we will provide grid for different screen size we will provide the grid columns then we will add the Gap and GAP from Buy now in this
day we will use this best seller state so we will add the CIS we will add best seller do map here we have to pass this addo function after that here we have to pass The individual item and index number and here we will return product item component and in this component we will use the key property that will be index and here we will pass the props that will be ID image name and price so first we will pass the ID and here we will provide item doore id then we will add the name
here we will use the item dot name after that we will pass the image where we will pass the item dot Image after that we have to pass the price and here let's add item. price now if I save the changes and open the web browser so here we have best seller products so this component is also working so here we have two components which is mobile responsive so if I right click and select inspect so this is how it is displayed in the desktop screen and if I change the screen size you can see
in phone screen it is looking like This now we will create one component with the name our policy and in that policy section we will display some policies like exchange return refund so let's come back to the vs code editor and here we will create a new component here we will add the name our policy do jsx here we will use rafc in this STP we will add the class name property and here we will provide Flex Flex Call for a small and over screen Flex row justify around Gap 12 for a small and of
our screen Gap two text Center padding y text size for different screen size then text Gray in this div we will create one div and in this div we will insert one image tag and here we will use assets do Exchange icon after that we add the class name Property and here we will provide width margin Auto and margin bottom after this image tag we will create one P tag and here we will use Easy exchange policy and in this P tag we will add the class name property here we will provide font semi bold
after this P tag we will create another P tag and here we will add we offer hasslefree exchange policy here we'll add the class name property let's add text Gray 400 now we will Mount this our policy component on the homepage so so after this best seller here we will Mount our policy component we will save this file and come back to the our policy. jsx file now if I open the web page so here you can see only one policy so now we'll Create two other policy also so just duplicate this div just copy
and paste it for two times so in this second image tag let's add the quality icon and remove this text here we will type 7 Days return policy now let's update this text also here we will add the text we provide 7 days free return Policy now in the third image tag remove this icon and here we will use the support image remove this text and here we will type the text based customer support now remove this text and here we will add our text B provide 24 by7 customer support if I save the changes
and open the web browser so now this policy section is looking good so here we have created this Component our policy and it is also phone responsive so let me open this web page in a smaller screen so you can see this is how it is displayed in phone screen now we'll create the newsletter subscription field so let's come back to the vs code editor and in this components folder we will create a new file here we will add the file name newsletter box. jsx here we will use the r Fce in this div first
we will add the class name property that will be text Center within this div we will create one P tag and here we will add the text subscribe now and get 20% off after that in this P tag we will add the class name property and here we will provide text 2 XL font medium text color gray now we will Mount this component on the homepage so just open home. jsx file And after this policy let's add newsletter box so the newsletter box has been imported we will save the file and close this now let's
come back to the newsletter box. jsx file and if I save the changes and open the web browser so here at the bottom you can see this tck subscribe now and get 20% off so after this P tag let's add one more P tag and here we will add The class name property here we will provide text color gray and margin from the top in this P tag simply add one dumy text after this P tag we will create one form tag let me remove this accent from here and within this form tag we will
create one input field where the type will be text in this input field we will add the type Email and here we will add the placeholder enter your email after that in this input field we will add the class name property and here we will provide the width Flex one outline none in this input field we will add the required attribute so that when we submit this form it will ask you to fill this input field after that we will create one button tag it type will be Submit and here we will add the text
subscribe after that we will add the class name property and provide this class name background black text white text size and padding if I save the changes and open the web browser so right now this newsletter box is looking very wide so in this form tag We'll add the class name property let's add the width full for a Small and above screen size width 1 by two then Flex item Center Gap margin then border and padding save the changes and open the web browser now this newsletter box is looking good now if I don't provide
any value in this input field and click on the Subscribe button then you can see it is giving the alert please fill out this field after that here we have to create one function so before this return we Will add const on submit Handler this will be one Arrow function we will link this function with this form tag so here let's add on submit and provide this on submit Handler after that in this function we will get the event and here we will provide the event dot prevent default so that when we submit this form
then it will not reload the web page so we have created the newsletter box after that we will create the footer For our front end project so let's come back to the vs code editor in this components folder we will create a new component and provide the name footer do jsx here we will use our afce after that we will Mount this footer component on the app.jsx file so we will mount it after this routes tag here will Mount this footer tag so that this footer tag will be Displayed on all the pages at the
bottom now let's save this file and close it now we will Design our footer component so first in this div we will create another div and in this div we will add the class name property and here we will provide Flex Flex column for a small and above a screen we will we will use the grid grid columns then we'll provide the Gap then margin then texture small so we have used the flex and Grid now within this div we will create another div and in this div we will add the image tag and here
we will use assets. logo after that we will add the class name property that will be margin bottom five then width after this image tag we will create one P tag and in this P tag we will add one dummy Text so we have provided this text now in this P tag we will add the class name property and here we will provide width full for medium and above screen size we will change the width then text Gray now if I save the changes and open the web browser so here you can see at the
bottom left side we have the logo and text after that we'll create another div and in this div we will add the paragraph tag and here we will add company in this paragraph tag we will Add the class name property and here we will provide text font medium margin from the bottom after this P tag we will create one UL tag here we will add the class name property and here let's provide Flex Flex column Gap text color gray within this UL tag we'll create the L tags so let's add AI into four so it
Will create Four lii Tags so in the first lii tag we will add the home in the second one we will add about us in the third one let's add delivery in the fourth one we will add privacy policy if I save the changes and open the web browser so here we have the comp and in this one we have four Li tags after that here we will create another div and in this div we will create one P Tag and here we will add get in touch in this P tag we will add the
class name property and here we will add the class name text Excel font medium margin bottom after this P tag here we will create one UL tag here we will add the class name property and just copy the class name from this UL tag and paste it here in this one we will create two lii Tags so simply add lii into two so in the first AI tag let's add one phone number so let's add + 1 2 1 2 4 5 67890 in the second lii tag we will add one email ID so in
this Li tag let's add any random email ID so I'll add contact at Forever you.com This is the dummy email ID now you can see here we have the get in touch option where you can see one dummy phone number and email ID after closing of this div here we will create one copyright text so here let's create one div and in this div we will create one HR tag and after this HR tag We'll add one P tag in this P tag we will add the class name property and in this class name let's
provide padding from y text size text center after that Here within this P tag we will add one text that is copyight 2024 at forever.com All rights reserved if I save the changes and open the web browser so here we have one horizontal line and this is the copyright text so we have created the footer also now we have completed the UI part of our homepage if I check this web page in the Smaller screen so in the phone screen also it is looking perfect after that we will create the collection page where we will
display all the products and create the filters so now let's come back to the vs code editor we will open collection. jsx file in this collection component first we'll get the data of all products using The context API for that just add const curly Braes products equal to use context and in this one we will provide the SOP context after that in this di we will add the class name property and here we will provide Flex Flex column Flex row Gap one then padding and border border from Top in this div we will create the
filter op options so in the left side we will Create the filter and in the right side we have to display the products so first we will create the filters so here let's add the command and here we will add the commment text filter options after that here we will create one div and in in this div we will add the class name property and here we will Define the minimum width after that in this div we will Create one P tag and in this P tag we will add the filters now in this P
tag we will add the class name property and here we will provide the margin text size Flex item Center cursor pointer and and GAP if I save the changes here you can see this text filter after this P tag here we will create one category filter so basically in this collection page there will be Two type of filter first one will be category filter and the second one will be subcategory filter so let's add one comment and here let's add comment text category filter after that here we will create one t and in this D
we will add the class name property here we will use the dynamic class name that will be updated using the state variable so let me remove it and we will add the curly bres backtick and here we will provide the border Border color padding margin and after that here we will create one state variable with the name show filter so just add const show filter then Setter function name will be set so filter equal to user State and initialize it with the Boolean data Falls after that we will add the Template literal for that we
will use the dollar sign curly brushes and here we will use turn operator first we will check if the so filter is true in that case we will provide the empty string and if it is false then we will provide one string that is hidden with that here we will provide one class name for the smaller screen display block so here we have added this box and If I open this in the phone screen that box is hidden and we will display this whenever we will click on the filters and this box will be always
visible on the desktop screen now within this div we will add one P tag and here we will add the categories after that and this P tag we will add the class name property and here we will add margin bottom text size Then font weight after this P tag we will create one div tag and in this div we will add the class name property here let's provide Flex Flex column Gap text font light text Gray within this diff tag let's add one P tag in this one we will add the class name property that
will be flex and GAP within this P tag let's add one input field its type will be checkbox and here also we will add the class name property that will be W3 after this input field let's add the text Min and in this input field we will add the value property that will be one string so here let's add Main let me copy this paragraph tag and paste it for two Times now in the second input field we will add the value just add woman in and here also we will provide woman after that here
in this value let's update kids and in this text also let's add kids let me correct the spelling here if I save the changes and open the web browser so here we have one category filter where you can see the checkbox after that we will create one more category box where we will filter The subcategory for that after this div tag we will add one comment and here let's add subcategory filter after that let me copy this dip from here and paste it here from here let me remove this category text and here we will
add the type after that in this value let's remove these text and remove this text Also and here in the first value we will add top Vier and here we will add the same text top Vier here we will add the bottom re let's add the same text here bottom here in the last one we will add the value when winter Vier and here also we will add the text winter Vier if I save the changes and open the web browser so here we have one more Filter after that let me remove this margin top
and here we will provide margin y5 we will save the changes now in this P tag after this filters text let's add one image tag and in this image tag we will use assets dot drop-down icon and in this image tag we will add the class name property and here we will use one Dynamic class name so let's add The CES back text and here we will add the height for a smaller screen and above screen size it will be hidden and here we will add the dollar sign curly bres here we will check if
this so filter is true in that case we will add the class name that will be rotate 90 and if it is false simply we will provide one empty string if I save the changes and open The web browser so right now here we don't have any icon and if I open this web page in a smaller screen so here you can see one Aro icon and all the filters are hidden now let me make it true and save the changes so here you can see the filters are visible and and this Aro icon is
pointed downwards now let's make it false and here we will add the logic so that when we are on the phone screen and Click on this filters then it will display the filter options for that here we have this P tag so on this one we will add the on click property and here we will pass one Arrow function here we will call the set so filter function and simply provide not so filter so it means the so filter is true then it will make it false and if it is false then it will make
it true if I Save the changes and open the web browser if I click here so it will display the filters option if I click again it will hide the filter options so this so filter hide and display feature is working on Mobile screen only and if I open this web page in desktop view then this filter will be displayed by default we cannot hide this now let's come back to the vs code editor again and here after this div we will Create the UI for the right side so let's add one comment and here
let's add the comment text right side after that here we will create one div and in this one we will add the class name property and here we will provide Flex one within this div we will create another div and here we will add the class name property and here we will provide Flex justify between text ways Text to XEL for a small screen and above then margin bottom in this STP we will use the title component so just add title and in this component we will add text one that will be all and then
we'll pass the text two here let's add the text collections if I save the changes and and open the web browser so here you can see this text all collections after That in the right side we will display one sort feature like price low to high high to low or relevant So within this div here let's add one comment and here we will add product sort after that we will create one select tag let me remove this name and ID property and here we will add the class name property so here let's add the class
Name border border gray texture small and padding in this select tag we will create three option tag so let's add option into three so in the first one we will add the value equal to relevant in the second option tag in the value we will add low high and in the third one we will add high low and in this option tag we will add the Text sort y relevant in the second one we will add sort y low to high and in the third one we will add sort y high to low if I
save the changes and open the web browser so here we have the select tag where we can select different options after that we will display all the products here for That after this div here we will create one comment so let's add the comment text map products after that we'll create one div and within this di we will add the class name property here we will provide grid grid columns and we will provide the grid columns for different screen size then we will provide Gap Y so here we have provided the different GD column for
different screen size after that here we will map all the products so before mapping all the products here we have to create one state variable so we will add the state variable name filter products so just add con filter products then we will add the setter function name that will be set filter Products equal to use State and initialize it with empty aray after that here we will create one use effect in this one we will pass one Arrow function and here we will add the dependency array so whenever this component will get loaded then
this this function will be executed so here we'll add set filter products and in this one we'll add all The products so we have added this products in this set function set filter products after that let's scroll down and within this div we will add the curly Braes and let's provide this filter products do map method here we will pass one Arrow function and here we will pass the individual item and index number with that here we have to mount one product item component that we have created Here and here we will add the key
property that will be index after that we have to provide the ID name price and image for that here we will add the name equal to item do name similarly we will add the ID equal to item doore id after that we will pass price and provide the item. price then we will pass the Image and here we will provide item. image if I save the changes and open the web browser so here it is displaying all the products so in the assets file we we have total 52 items so you can see all the
52 products are displayed now we will add the logic on these filters for that let's come back to the vs code editor here we will create some State Variables so first let's add const and the estate variable name will be category seter function name will be set category equal to user State and initialize it with empty aray after that let's add another state variable so list at con subcategory Setter function name will be set subcategory equal to user State and initialize it with mty array after that we will create two add A function using that
we can add the data in this category suppose we have selected two categories then these data will be added in this category estate and if I click on these type filter so these data will be saved in this subcategory for that we will create toggle functions so just add const toggle category and it will be one Arrow function here we will add one if statement and here we will take the Event in this if a statement we will check like if we have selected the main category and the main category is already available in this
category state in that case from that areay we will remove that entry and if it is not available in that array then we will add that so just add category dot includes then provide each do Target do Value so if it is true that category is already available in this category state in that case we have to filter out that category so just add set category here we will get the previous categories and in this previous add we will use the filter method and here we will pass the individual item and we will check if
this item is not equal to e. target. Value in that case we will store those categories and if it is matching then that category will be removed from the category areay after that we will add the else statement and here we will provide set category so here if this if condition is false it means that category is not available in this category array so in that case we have to insert that so just add previous array and here we will use the spread Operator to add the new entry in the array so just add the
array triple do previous and add the comma then e. target. value so it will add that category after that we will scroll down in this category filter and here we have have the input tags so here let's add onchange property and here simply provide toggle category function now we will check this Logic For that here we will add one more use effect we will pass the AR function here we will add the dependency aray and in this array we will add the category and here we will log the category array if I save the changes
and open the web browser and open this console let's select this console right now it is displaying one aray where you can see Zero element and if I click on Main then in this aray we we have one entry men if I click on Woman so now in this are we have two entries men and woman if I click on kids so now we have three elements in this aray and if I uncheck this one then men has been removed if I uncheck the woman then woman has been removed from this array now we have
created one array with the name category and in that category you can see we can store the category which we have selected in the filter and using this category we can filter our product similarly we will add one more Tole function for this subcategory so let's come back to the vs Cod editor and here we will add one more Aro function with the name toggle subcategory it is also one Aro function here we will use the same logic so let's add one if statement in the condition we will check if the subcategory dot includes e.
Target do Value in that case we will remove that value so just add set sub category and let me copy this code from here and paste it here after that we will add the else statement here we will use set subcategory and here we will use this same logic and paste it here after that we have to link this toggle subcategory in this sub sub category filter so here we have the subcategory filter so in these input Field let's add the on change property and in all three on change we will add the toggle subcategory
function now in this use effect let me remove this category and log the subcategory and in this dependency array also we will add subcategory if I save the changes and open the web browser then open the console tab we will reload the web page so right now we have the M add and if I select the top Vier so here we are getting one Error is not defined so let me check here we have to pass the event in the parameter now reload the web page so right now you can see empty array and now
if if I click on the top Vier so you can see the top Vier has been added in the aray if I click on bottom Vier the bottom Vier has been added if I click on winter Veer then all three has been added if I uncheck this one then it will be removed from the aray so this logic is perfectly Working now let me remove this use effect that we have used to display the console log now we will use this category and subcategory state to create one filter for that here we will create one
add function with the name apply filter so just add const apply filter and it will be one add a function in this function first we will Create the copy of all the products so just add lit let products copy equal to here we will use the products do slice method using this it will create one copy of the products are in this variable after that we will add one if statement and here we will check if our category do left is greater than zero it means we have selected any category and that category Is added
in the category state in that case we have to use this products copy and in this one we have to provide products copy dot filter method here we will pass the invidual item and here we will check if the category that we have created in that one this product category is available in that case we will save that product else we will remove that Product for that just add item. category after that we have to run this function whenever the category add or subcategory aray will get updated for that here we will create one use
effect in this one we will pass one Arrow function and here we will add the dependency aray and in this aray we will provide the category and subcategory state so whenever any of these will get updated then it will execute this Function and here we will call this apply filter function after that here we have added the filter product we have to save this in our filter products array so here let's add set filter products and in this one we will provide this products copy if I save the changes and open the web browser so
here we have selected the main category so now you can see only main item is displayed if I uncheck this one then it will display all the product Items and if I click on kids so now you can see only kids product is displayed similarly if I click on wom so now only wom products is displayed and if I want women plus kids then we have selected women and kids then these mixed products is displayed that include the women and kids category so this logic is perfectly working after that we will add the logic for
this subcategory selection so here let's add one more if a statement and here we will Check if our subcategory do length is greater than zero it means we have selected any subcategory in the filter so in that case we have to filter the product so just add products copy equal to products copy. filter method and we will pass the individual item and here we will return subcategory dot includes method and here we will provide item Dot subcategory if I save the changes and open the web browser so if I click on the bottom Vier so
now only bottom viers are displayed if I click on top viers then only top Vier products is displayed and if I click on winter viers then only winter Vier products are displayed so this filter feature is perfectly working if I select kids and select the bottom V so you can see the bottom V for the kits if I select the Men bottom beer so now we will see the men's bottom beer product so this filter is perfectly working after that now we can remove this use effect where we are setting the products after reloading the
web page so let me remove this because we have added this logic in this function suppose we have not selected any filter and the page is loading for the first time then this copy will be created and it will be Stored using this set filter products if I save the changes now you can see all the products are getting displayed and this filter is also working after that we will create the feature for this sort by option so that when we select the low to high then all products will be sorted by the price for
that here we will create one Arrow function with the name sort product this will be one Arrow function So let's create the arrow function here here we will create one copy for the filter product so here in this apply filter function we have created the product copy of all the product but here we will create the copy of filter product suppose we have selected any category and we have applied the filter then using that filter we can use the sort feature for that here we will create one copy of the filter product so Just add
let filter product copy equal to filter products. slice method so it will create one copy of this filter products after that we'll create one switch case and here we will provide sort type so here when we have created this select menu here we have different options where we have the value relevant low to To high high to low so here we have three values so we'll use this to create the cases in this switch case so in the first case we will add low high here we will add the set filter products and here we
will provide filter product copy dot sort method and here we will pass pass this Arrow function and here we will pass two parameters and here we will compare a do Price minus B do price so our filter product array will be sorted using the price after that we will add the breaker statement after that we will create another case this will be high to low here we will call the set filter products here we will use the filter product copy do sort method here also we will pass one AR function after that here we will
add A and B and here we have used a do price minus B do price and here we will add the reverse B do price minus a do price so using that our product will be filtered as price high to low after that we will add the breaker statement after that here we will Define the default case where we will simply call the apply filter function here also we will add the Breaker statement so here we have added the logic for the sort product after that we will create one state variable with the name sort
type so just add const sort type set a function name will be set sort type equal to user State and we will initialize it using relevant after that we will use this set sort type function and add it here on this select tag so that when we will Change it then it will update the sort type type a state variable so just add the onchange property and here we will pass the AR function and in this parameter we will get the event and here we will call the set sort type and here we will provide
e. Target do value now this function is perfectly ready and in this function we have added the sort type State variable so so that when we change the menu from the select Box then this sort type will be changed after that we have to run one use effect so here we'll create another use effect and here let's add this Aro function and here let's add the dependency aray and in this one we will add the sort type so whenever we will change the sort type then this function will be executed and here we will call
sort product function if I save the changes and open The web browser reload the web page now all the products are displayed randomly if I click here and select high to low then all the products are displayed based on price so you can see 350 then $340 then $330 $320 and if I click on low to high now it is displaying $100 products 110 120 130 140 like that so this sort feature is perfectly working if I click on relevant now again it will display the products randomly so now we have added the logic For
this product filter and we have also created the product s feature now our collection page is ready after that we will add the logic for this search feature so that when we click on this search icon it will open this collection page and here we will get one search bar for that we will come back to the vs code editor now we will open soop context. jsx file and here we will create two State variables that name will be search and so search so here let's add const search set function name will be set search
equal to use a state and initialize it with empty string here we will create one more State variable with the name so search here we will add set so search equal to user State and Initialize it with Boolean data true so when this will be true then we'll display the search bar and if it is false then we will hide the search bar so for now we have added it as true after that we have to pass these State variable and set function in this value object so that we can access it in any component
so here let's add search set search so search set so search after that we will save this file Now in this components folder we will create a new file and we will add the file name search bar. jsx here we will use r a f c is snipet here first we will get this search set search so search set so search variables from the context API so here let's add const C lies search set search so search and set so search equal to use context and here we will provide the S context So in this
component we will get the search set search so search set so search now we will Mount this component in this app.jsx file so after this NAB bar here we will add the search bar component we will save the changes now come back to the search bar. jsx File and here just after this return statement we will use the turn operator when this so search will be true then only we will return this div if it is False then we will return null for that let's add so search question mark and here we will add the
column null so this search will be true then only this div will be displayed if it is false then it will return null after that in this div we will add the class name property and here we will provide border top then border bottom then background color then text Center within this div we will create another div and here we will add the Class name property here here we will provide inline Flex item Center justify Center then border and then border color then padding from the X and padding from the Y and margin from Y
and margin from X then border radius then width after that in this D we will create one input field the input field type will be text and here we will add the Placeholder and let's add the text search now on this input field we will add the class name property and let's add some classes Flex one outline none then background inherit text small we will save this input field data in this state which is search that we have created in the context file so here we will add the value property that will be search then
we will add the onchange property here we will pass one add function in this one we will get the Event and here we will call the setter function set search and here we will provide e. target. value so after this input field we will add the image tag and in this image SRC we will use assets dot search icon after that in this image tag we will add the class name property that will be width after this div we will add another image Tag here we will use assets Dot cross icon in this image tag
we will add the class name property and here we will provide inline width and cursor pointer with that here we will add the onclick property and here we will pass this addo function and here we will call the set so search function and in this one just provide false so if I save the changes and open The web browser here we have one search bar and if I click on this cross icon this search bar will be removed if I reload the web page again you can see this search bar by default because in this
context you can see we have added true so now we'll add the logic so that when we click on this search icon then this search bar will be displayed else this search bar will be hidden for that first we will make it false so search will be false now open na. jsx File here we have to get the set so function from the context file so just add con set so search equal to use context and in this one just provide s context now in this image tag where you can see we have added the
search icon here let's add the onclick property and provide one Arrow function and just call the set so search function and we will make it true so if I save the changes And open the web browser by default the search bar is hidden and if if I click on this search icon then this search bar is visible and if I click on this cross icon this will be hidden now let's close this nav bar. jsx file and come back to the search bar. jsx File here if I come to homepage and if I click on
the search icon right now the search bar is visible on homepage and other pages also right so now we'll add The logic so that this search bar will be visible on the collection page and if I go to other page then it will be hidden for that here we will use use location hook so just add Con location equal to use location after that here we will add one use effect in this one we will pass one Arrow function here we will add the dependency Aray and in this are we will add this location now
if I add the console log and provide this location dot path name save the changes click on inspect go to console so you can see SL collection and if I go to homepage you can see the path slash then if I go to about you can see the path SL about if I go to contact then you can see the path / contact so using this use location hook We can get the path of the URL using this we will add the logic so that when we are on the collection page then only this search
bar will be displayed else it will be hidden so so let me remove this console log here we will add one if statement and here let's add the condition location do path name dot includes and here we will add the text collection and with that we will add the so Search if these both conditions are true in that case we will display this search bar else it will be hidden for that here let's add one more State variable so just add const visible set visible equal to user State and initialize it with false if this
condition is true then we will make this visible true so just add set visible true and here we will add the else Statement and here we will add the set visible false so we have added this logic after that with this S search we will add the visible State now when this both state will be true then only this search bar will be visible else it will be hidden now if I save the changes and open the web page and now you can you can see this search bar is visible on the collection page if
I go to homepage that search bar is hidden and if I come Back to the collection page again this search bar is visible if I click on this cross icon it will be hidden if I come back to the collection again still it is hidden if I click on this search icon it should display the search bar but here we have one issue so let me reload this web page and click on this search icon it is not opening the search bar so here we have made some mistake so here we have added and operator
and so search just remove It and now let me save the changes and come back to the web browser here the search bar is displayed and if I close this it will be hidden if I click on the search icon again it will be visible and if I reload the web page and click on the search icon so you can see it is visible so this logic is perfectly working after that we have to add the logic so that if I type something in this search bar then it will display the product Related to the
particular search query for that we will come back to the vs code editor now our search bar component is ready so let me close this and we will come back to the collection. jsx file here we will get the search from from the context API and we will also get the so search so we have received this both estate and using these estate we will filter this product based on this search Query for that in this apply filter function here we will add the another a state and here we will check if the source search
is true and with that in the search we have any text available in that case we will use this search to filter the product so just add products copy equal to products copy do filter method and here we will add the individual item and and here we will use the item Do name dot then we'll add the two lower case after that we will use the dot includes and in this one we will provide the search dot two lower case so here we are making the product name in lowercase and we are making the search
query also in the lower case and after That we are searching if this search query is available in any product name then that product will be filtered now save the changes and after that here in this use effect let's add search and so search in this dependency aray so whenever the search will be changed then this apply filter function will be executed if the so search will become true or false then also this apply filter will be executed so this apply filter will filter the category Based on the category subcategory or search query so now
come back to the web browser let me reload the web page let's open the search bar and now if I type something in this search bar like fit you can see in all the product where you can see the fit keyword it is displaying that particular product only right if I clear the search box then it will again display all products here if I type Trouser so again you can see products related to trouser here if I type kid you can see the product where you can see the kid keyword in the title so this
search functionality is also working fine here if I open any product then you can see the product path it is opening product/ product ID now we will Design this product page so that we can display the product from this product ID we will find that product and display that product on this Page for that we will come back to the vs code editor and we will open product do jsx file here first we will get this product ID for that here we will type const curly bres and here we will add the product ID equal
to use patterms using this hook we will get this product ID as we have already added this route in this route you can see we have added Colum product ID right this is the parameter so if we have added the product ID here so we have to use the same text here which is product ID so it will get the product ID from the URL so to check that whether we are getting the product ID or not we will add the console log and provide product ID save the changes and open the web browser click
on inspect go to console so here we are getting the product ID from this URL if I go to Collection and open any other product so you can see another product ID here in the console so in this variable we are getting the product ID after that using this product ID we will display the product from our product data database and we will store that particular product in one state variable for that first we will get all the product data from the context so just add const curly Bres products equal to use context and here
just provide the sof context so here we have the products data after that we will create one state variable with the name product data then we will add the seter function name set product data equal to user State and initialize it with woan data false after that here we will create one function with the name fetch product Data so just add const fet product data equal to it will be one a sync Arrow function after that we will run this function when this component will get loaded for that we will use the use effect hook
here we will pass one Arrow function and here we will add the dependency aray after that here we will call the Fage product data Function and in this array just provide the product ID so whenever the product ID will be updated we will get the product data and we will store that product data in this state variable to store the product data in this state variable we have to find the product for that we will use the products that is the all product in this one we'll add the dot map method and here we will
pass one Arrow function in this parameter we will add The individual item and here we will use one if statement and here we will check if our Item doore ID is equal to our product ID it means we have to set that product in this product data state for that we will add set product data and here we will provide this [Music] item after that we will return null so that it will stop executing this function here let's add one console log To check whether we are getting the data or not not so here let's
add console log item save the changes and if I reload the web page so for this product ID you can see here we are getting the product details so this is one object where we have the West seller property category property date description image array name price sizes subcategory and ID Now using these data we will display that product Here so first here let's add another state variable with the name image and set a function name will be set image equal to user State and initialize it with empty string so whenever we will find any
product then we will store their first image in this image state so let me remove this console log and here we will call the set image Function and here we will provide item do image index zero so now we have the product data and image now we will come here in this return statement and here we will use one turn oper and here we will add product data question mark and here we will add the colum let's add another div and in this div we will add the class name property that will be opacity Zero
so whenever this component will be loaded then using the product ID we will find the particular product then we will save that product in this a state variable product data suppose we could not find the product or our product data is not saved in this product data state in that case we will not display this div we will display this another div where you can see the opacity zero and if we are getting the product data then we will return this Div so now we will create the UI for the product page so first in
this div let's add the class name property and here we will provide border top padding top transition opacity then transition duration then opacity and within this div we will add another div in this div we will display the product images and we will display the Product data so in this div we will add the class name property here we will provide Flex then Gap then Flex call and flex Row for a small and our screen size before this div we will add one comment and let's add one comment product data and within this div we
will create one comment and here let's add product images here we will create one div and In this div we will add the class name property so here let's provide Flex One Flex Flex column reverse then Gap and for a small and above a screen we will add Flex row within this div we will create another div here also we will add the class name property and here we will provide Flex Flex column overflow X Auto justify between Justify normal then width here we have provided the flex and for a small and above screen we
will use flex column So within this D we will display the product images as you can see in this image areay we have only one image so let me come back and open any other product here we have to display the product data in console log so just add Console.log item save the changes so for this product you can see we have four images in this array so now we will display these images in the left side and then we'll display the main image here and whenever we will click on any small image then it
will update the main image so here with within this div let's add curly bres and here we will use product data do Image and in this one we will use the do map method in this map we will pass the arrow function and here we will pass the individual item and index number after that here we will return one image tag in this SRC we will use the item and here we will add the key property that will be index and with that we will add the Class name property and here we will provide width
margin bottom Flex rink cursor pointer if I save the changes and open the web browser so here in the left side we have four images that is coming from this image array if I go to other product where we have only one image so you can see only one image if I open any other product where we have four image then you can See the four images after this do here we will create one on another div and in this div we will add the class name property that will be width full for the small
and above a screen size we will provide width 80% after that within this D we will insert one image tag and here we will provide image state that we have created here where we have added the products first Image after that in this image tag we will add the class name property and here we will add width full height Auto if I save the changes and open the web browser so in the left side we have four image and here we have the first image after that in this image tag we will add the on
click property and here we will call the set image function and in this one just Provide the item if I save the changes and open the web browser now if I click on any other image so you can see that a small image will be displayed at the main image position so this logic is perfectly working so after this div here we will will display the product information so just add the comment and here let's add the comment text product info here let me add some Dash so that It will be clearly visible and after
this command We'll add one div and in this div we will add the class name property that will be Flex one within this div we will create one H1 tag and in this H1 tag we will display the product's name so just add the craes product data do name property here let's add the class name property and here we will provide font medium text Size then margin top save the changes and open the web browser so here we have the text that is the product title after this H1 tag here we will create one another
div and in this div we will add the class name property and here we will provide Flex item Center gap of one and margin top in this div we will create five Image tags so let's add image into five and for all five images we will add the class name that is width 3.5 let me move it in the new line now in these images tag we will add the SRC so let's add the CES and here we will use the assets dot star icon if I save the changes now here you can see the
five stars now in the last one we will provide the assets Dot star D icon now if I save the changes now you can see the last one is dull after that we will add the paragraph tag and here we will add the number that will be 122 and here in this P tag we will add the class name property and let's add padding left and save the changes so here we have this text after this div we will create one P tag and in this paragraph tag we will Display the currency and price so
we will get the currency data from the context so after this products we will add comma and currency so now in this P tag we will add the cly bres currency here we will add another curly bres and here we will provide product data dot price in this paragraph tag we will add the Class name property and here we will provide margin top text size font medium if I save the changes and open the web browser so here we have the currency symbol and price after that here we will create another P tag and here
we will display the product description for that here we will add the curly brushes product data dot Description in this P tag also we will add the class name property and here we will provide margin top text Gray width 4x5 if I save the changes so so here you can see this description so here one scroll bar is there so we have to hide this scroll bar so to hide this scroll bar we will come back to the index. CSS File and here before this media query we will add double colum web kit a scroll
bar and just provide display none if I save the changes and open the web browser now this scroll bar is hidden and now these images are aligned perfectly now let me close this file and after this paragraph tag here we will create one div and on this day we will add the Class name property and here we will provide Flex Flex column Gap four then margin from Y axis within this div we will create the product size so let's add the P tag and here we will add the text select size after that here we
will create another div and in this div we will add the class name property that will be flex and GAP to to after that here we will use The sizes from this product data so in this sizes add you can see we have multiple size like medium large extra large so we will display these sizes here for that here we will add the curly Braes product data dot sizes dot map method sizes is 1 add a so you can use the map method in this map we will add this add function here we will pass
the individual item and index Number after that here we will return one button tag so in this button tag we will add the key property that will be index number and with that we will add the clys and here we will display the button text that will be item so if I save the changes so here you can see different sizes medium large extra large so you can see the same data here now here we will add the class name property for this button tag we will add The dynamic class so let's add the curly
bres backck and here we will add this class name border padding y padding X then background color if I save the changes so you can see these sizes buttons are looking good now we'll add the logic so that if I select any of these size then that selected size will be highlighted and here we will display some border for that first we will create one state variable so here let's add the Const and the state variable name will be size seter function name will be set size equal to user State and initialize it with mty
string after that scroll down and on this button tag we will add the on click property and here we will call the set size function and here we will provide this item that we will get from this Parameter and with that in this class name we will add the dollar sign curly Braes and here we will use the tary operator so here we will check if our item is equal to our size if this condition is true in that case we will add the class name that will be Border Orange 500 and if this condition
is false then we will add the column and simply Provide empty string now if I save the changes and open the web browser so if I select this medium size so it will be selected if I click on Excel so this Excel is selected so this logic is also working so after this div here we will create one button tag and within this button tag we will add the text add to cart and for this button tag We'll add The class name property and let's add the class name background black text white padding X padding
y texture small active background color and we will save this now if I open the web browser so here we have this add to card button now if I click here it will display some effect that we have added using this active background color after this button Tag here we will create one HR tag and in this HR tag we will add the class name property that will be margin top and for a small and above a screen we will set the width 4 by 5 if I save the changes here we have one horizontal
line let me close this from here so after this horizontal line here we will create one div and in this div will will add the class name property and here we will provide text Small text Gray margin top Flex column and flex and GAP within this div we will create three p tags so here we will add P into three so in this first P tag let's add text 100% original product in the second P tag let's add cash on delivery is available on this product in this third paragraph tag let's add the text easy
return and exchange policy within 7 Days if I save the changes and open the web browser so here we have three text so now our product data is perfectly displayed on this web page and if I click on any small images then the main image will be updated so after creating this product info section here we will create one description and review section for that after this div here we will add one comment and let's add the comment text description and review section And here we will create one div in this div we will add
the class name property and here we will provide the margin top in this div we will create another div in this div we will add the class name property that will be flex and within this div we will create one P tag here we will add the class name property here we will provide border padding texture Small within this B tag we will add the text description after this B tag let's add another tag which is paragraph tag and here we will add the class name property here also we will use the same class name
border padding and texture small in this paragraph tag we will add the text reviews and here let's add the number 122 if I save the changes and open the web browser and if I scroll this so here We have description and reviews after that we will create one description box for that here after this div we'll create another div and in this we will add the class name property and here we will add Flex Flex column Gap border padding text small text color Gray within this div we will add one P tag and in this
P tag we will add this dummy text after that we will create another P tag and here we will add some other text so we have added two static text in this description box if I save the changes and open the web browser so here you can see both text in this description so we have completed the description section also after this description section we'll create another Section that will be related product where we will display some product related to this product page for that let's come back to the vs code editor and here let's
add one comment and here let's add the text display related products so first let's create one new component in this components folder so add the file name related products. jsx here we will use our Afce after that here we will get two props that will be category and subcategory here we have opened this product page so in this related product category we will provide this particular product category and we will also provide the subcategory and using this category and subcategory we will display the related products after that we will get all product data from our
context API so just add con curly Bres product products equal to use context and here we will provide s context after that we will create one state variable with the name related so just add const related set function name will be set related equal to use a state and initialize it with empty add after that here we will execute the use effect and in this one just add the arrow Function and let's add the dependency array within this use effect we will add the logic so that we can filter the product using this category and
subcategory for that first we will check if if products. length is greater than zero then only we will execute the filter if the products do length is less than zero then we will not display any related Product so in this array also we will add products so whenever the products data will be updated then this function will be ex executed so here first we will create the copy of all the products so just add lit products copy equal to products dot slice so it will create one copy of all the products on this products copy
we will Apply the filter method for that let's add products copy equal to products copy dot filter method here we will pass individual item and here we will return category equals item do category if the category that we are getting from the props that is matching with the item category then we'll keep That product and if the category is not matching then we will remove the other products now we will get the filtered product and on this one we will add the another filter using this subcategory so here we will add product copy equal to
product copy dot filter method and here we will pass one Arrow function here we will pass individual item item and here we will check if our Subcategory is equal to item dot subcategory then we will keep that product else we will remove other products after that we will get the filtered product now let me check this product data so just add console log in this console log we will provide products copy and here we will use the dot slice method because we have to display only Five products so just add zero and five now we
will Mount this component in our product page so let's open product. jsx file and after this comment just add related products here we have to pass the props that is category in this category we will pass the product data do category after that we will pass the second props that is subcategory that is product data do subcategory if I save the changes and Open the web browser and let's open the inspect and console reload this web page page so here we don't have any console log so let me check let's come back to the related
products. jsx file here we have added length so let me correct this as spelling products. length correct the spelling and reload the web page now here we have one array where you can see five products if I open the first Product here you can see category is from the main category so this category is matching from this main product if we have opened the top we then all the five products you can see top Vier subcategory so this logic is perfectly working so we are getting the related product in one array related to this main
product category and subcategory now let me remove this console log and here we will call the set related function so that this product data will Be stored in this related state after that we will use this data to map the product here so on this div let me add the class name property and here we will provide margin y within this div we will create another div and here we will add the class name property and here we will provide text Center text 3 XL padding y within this div we will add the title Component
and here we will pass the text one that is related then we will pass the text two that will be products after this div here we will create one another div and here we will add the class name property and here we will provide grid grid columns to then we'll add the grid columns for different screen size so we have added gr columns 3 4 5 Then Gap and GAP from y within this D we will add the curly bres and here we will use the related a state that is one aray and on this
one we can use the do map method in this map method we will pass the Aro function and in this parameter we will get the individual item and index number after that here we will return product item and in this product item component we will add the the key property that Will be index after that here we have to pass the ID name image and price so first we will pass the ID for that just add item doore id after that we will pass the name so here we will add item do name after that
we will provide the price it will be item do price after that we will pass the image so here we will provide item dot image if I save the changes and open the web browser I scroll down so here we Have the related products and here we have total five products if I go to homepage and open any other product like this so this is one of the kits category product and in the related product you can see all the products from the kits category if I come back and open any other product so you
can see it is from the main category and trouser subcategory so you can see the related product here right so you can see four products here because we Have only four product related to this one suppose we have five products available in the data then all five products will be displayed here now we have successfully created this product page where we have the product gallery and if I click on a small images it will update the main image and in the right side we have the product details like product name price description sizes add to
cart button and some other text then we have the description box then we have The related products now our product page is completely ready after that we will add the functionality so that when we click on this add to cart button then this product data will be added in the context file in one state variable so that we can use that data to create our cart page to create the add to cart functionality let's come back to the vs code editor and we will open Contex file Which is s context. jsx file after that here
we will create one state variable with the name cart items so just add con cart items then set function name will be set cart items equal to user State and we will initialize it with empty object after that here we will create one Arrow function with the name add to Cart so let's add const add to cart equal to so it will be one a sync Arrow function in this function we'll create the logic so that when we select any product and select the size then we can add that product in the cart for that
first from the parameter we will get the item ID and we will also get the product Size after that here we will create the copy of this card items so just add let card data equal to since it is one object so to create one copy of this object let's add a structured clone and in this one just provide cart items so it will create one copy of this cart items and we can access it using this cart data variable after that here we will add one if statement and and here we will add The
condition if that card data have any property available with this item ID in that case we will add the another if statement and here we will add the condition if the card data have any product with this item ID and this size then we will increase the product entry by one so just add card data item id size plus equal to 1 after this if statement here we will add the L statement if we have one product entry but we don't have the product entry with the same size then we will create a new entry
for that here we'll add the Elsa statement and in this one we'll add the card data items ID size equal to 1 so using this in our object it will create one new entry where our item id will be the key Name and the size will be available in that value after that we will add the Elsa statement here if in this card data we we don't have any entry with this particular item id then we'll create a new entry so just add card data item id equal to object then we'll add the card data
again here we will add the item id size equal to 1 using this in this object there will be new entry and we Can use that for our cart page now we will save this cart data in this cart items State variable for that here we will add set cart items and here we will provide cart data after that we will pass the cart item and add to cart in this value object so that we can access it in any other component so here we will add cart Items then we will add the add to
cart function after that here we will add the use effect so that when this card items will be modified then we'll add the console log so just add use effect here we will pass one Arrow function here we will add the dependency are and and here just provide the cart items so that whenever the cart items will be modified then this function will be executed here we will add the console log cart items we will save the changes And we will come back to the product. jsx file and after that let's go to the top
and here we will destructure the add to cart function from the context so just add add to cart and after that I scroll down and come here on this button and in this button tag that is add to cart here we will add the onclick property and here we will pass one addo function after that here we will call The add to card function and in this one we have to send our parameters that will be Item ID and size for that here we will provide product data doore ID and with that we will send
the size and we will get this size from the state variable that we have created here now if I save the changes and open the web browser and we will open the console tab let me reload the web page so here this product data is coming from The another another console log so it is here let me remove it save the changes reload the web page so right now here we have the cart items that is empty object if I click on this medium size and click on the add to cart then here we have
a new entry where you can see product ID and if I expand this product ID where we have the object so in this object we have the medium size quantity 1 now if I click on this add to cart Again now you can see here we have the medium size and quantity to similarly if I select the Excel and click on the add to cut so now you can see here we have medium size 2 and Excel size we have one quantity so this logic is perfectly working if I come back to the home home
screen and open another product click on the size click on the add to cut button now you can see in this object we have two entry so you can see this product ID and in this product ID we have the product size and quantity we have selected the a small so you can see for this a small we have one quantity so this add to cart functionality is perfectly working after that we will will create the logic so that when we have not selected any size and click on the add to cart button then that
product will not be added in the cart and with that user will get one notification that Please select the product size so here we have added the product without selecting any size so here you can see one new entry has been created right so we have to prevent this data to be created without this size for that we will use the react toasttify let me search react toasttify open this one here while installing the project we have already installed this package so now we'll set up this so just copy this two Lines and we will
open app.jsx file and in this file just paste this import statement after that within this div here let's add toast container and we have added this toast container tag Now using this toast container we can use the toast notification in our react project after that let's come back to the web page and here we will add the toast notification whenever we have not Selected any size and click on the add to cart button so let's come back to the SOP context. jsx file and here in this add to cart function here we will add the
if statement and let's add the condition if not size it means the size data is not available in this case this block will be executed so here we will display one toast notification for that we will use this toast function that we will get From the react toasttify pack package so you can see this toast has been imported after that we will add the dot then we'll add the toast type that is error and here we will add the message select product size after that here we have to stop the execution of this function so
just add return now if I save the changes and open the web browser and here we have not selected any size and click on the Add to cart button so here you can see we have the notification select product size so this logic is perfectly working after that we'll add the logic so that when we add any product in the cart then the number of quantity will be displayed on this cart icon here you can see we have added the estatic number that is 10 so we will change it dynamically whenever we will add the
product in the cart for that let's come back to the vs code Editor and after this add to cart function here we will create one function with the name get cart count so let me remove this use effect and here we will add const get cut count equal to and it will be one Arrow function after that here we will create one variable with the name total count so just add L total Count equal to 0 after that here we will use the for in loop on this cut items state for that just add for
here let's add const items in cart items within this foreign Loop we will add another foreign Loop so just add for here let's add item In cart items items here here we have to add the const so here we are using two for in Loop so first we will help us to iterate the items and in the second for Loop it will iterate the product size after that we will add the TR catch block and here we will add one if statement in this one we will add the condition that will be if our kite
items Items and here we'll add the item is greater than zero it means in the cart item we have the product with the particular size so in that case we will increase the count for that here we'll add total count plus equal to cart items here we will provide items and here we will provide item so that we'll get the total count of that product with particular size after that here after this for Loop Here we will add the return and here we will provide total count so we have created this logic to get the
total count of the cart items after that we will add this get card count function in the value object so that we can access it in any other component so here we will add get card count we will save this file now we will open never. jsx file after that we will D structure the get card count function from the context API after that we will come here in this link tag and in this link tag we have added this P tag where you can see the number 10 so let me remove this number and
here we will add the curly addes and here just provide get card count function so we will execute this function now if I save the changes and open the web browser so here you can see the card count is zero now if I select any product click On the add to cart then you can see the count one if I click on the button again so you can see the count to if I click again you can see the count is perfectly increasing when we click on the add to cart if I select the different
size and click on the add to cut the count is five if I click again you can see the count is six so this logic is perfectly working after that we will create our cart page Where we will display the products in the cart item we will display the quantity and size for that we will come back to the vs code editor here we will open cart. jsx file first here we will get the products data currency cart items state from the context API so here we will add const cut lies here first we will
add the products data currency and cut items State equal to use Context and here we will provide the S context after that we will get the products data currency and cart items data after that when we will get these data now we will change these data in the aray format where we will add the cart items data and we'll add the products data in one areay for that here we will create one state variable with the name cart data and Setter function name will be Set cart data equal to user State and we will in
a ize it with empty aray after that we will run the use effect in this one we will pass one AR function and here we will add the dependency array in this array we will provide the cart items so that whenever our cart items will be updated then this function will be executed now in this function we will Add the logic so that so whenever the card page will be loaded then the products data and cart items data will be combined together to create one array and we will store that in this cart data state
so here we will create one variable with the name temp data so this will be one temporary variable that's why we have added temp data in this one we will assign the empty object after that here we will run one For in Loop so just add for const items in cart items in this for in Loop we will run another foreign Loop here we will add con item in cart items item in this forign Loop we will get the cart items data and their quantity we will store those data in one object and we will
add that in this Array for that we will add the if statement and here we will check if the cut items items and item quantity is greater than zero in that case we will add that data in this array so just add temp data push method and in this one we'll add the object and in this object we will Define underscore ID property that will be items we will get this product ID from This items variable after that we need the size so here let's add size here we will store the product size so just
add item after that we will add the quantity property and in this quantity property we will store the quantity of this item related to this size so simply add cart items items and here we will add item so using this we will get The quantity of this product ID for this particular size after that we'll console log this variable this is temp data so just add console.log temp data after that if I save the changes and open the web browser and click on the inspect then go to console if I reload this so here you
can see one empty array now if I add any product like this one we will add different sizes of this product and if I open the cart page so Now you can see the console log where we have the three products so you can see we have total three entries here we have the product size quantity and product ID so this logic is perfectly working after that from here we will remove this console log and we will set this temp data in the cart data so just add Set Card data and here we have provided
this temp data after that we will use this data to Display multiple products on this card page for that first in this D we will add the class name property here we will add border top and padding top in this div we will create one title where we will display the cart title so just add one div and in this div we will add the class name property that will be text 2 XL margin bottom Three after that within This Ti we will Mount the title component in this title component we have to provide props
so just add text one that will be y then we'll add the text two that will be cart if I save the changes and open the web browser so here we have the title your cart after that here we will create one Div and in this D we will display our products entry so to display the products entry simply add the curly braces and after that here we will add card data so this is one add a so we can use the do map method here we will pass the individual item and index number after
that in this function first we will find The ID and using that ID we will find the product from this product data and we will store that in this variable so let's add con product data equal to here we will use the products are a DOT find method and here we will provide one Arrow function in this parameter we will pass the individual product here we will check product doore ID is equal to item doore id then that is our product and we have to save that data in this product data so we will get
that product data in this variable after that here we will add the return statement and here we will use this bracket and in this one we will create one div now in this div we will display this Product data for that first we will add the key property that will be index number then we will add the class name property and here we will provide p in y border top border bottom text color Gade gr columns for a small and above a screen we will use this great columns then we'll add the item Center and
GAP and within this Div we will create another div and in this div also we will add the class name property and here we will provide Flex items start and GAP and within this div we will insert one image tag and in this image tag we will display the products image so in this SRC we will add curly bres and provide product data do image array and here we will provide the index Zero after that in this image tag we will add the class name property and here we will provide the width and for small
and above screen we will use this width after this image tag here let's add another div in this div we will add one P tag and in this P tag we will display the product's name so just add the curly veres and just add the product data dot name and in this P tag we will add the class Name property so here we will provide text small text large and font medium if I save the changes and open the web browser so here we have added this product for all three sizes so that's why in
this cart item you can see three entry now if I add at the different sizes of that product then for different size there will be a new entry if I reload the web page so this Data has been removed if I open another product and click on the add to cart then select the another product select the size and add to cart now you can see two entries in this cart page after that here we will create another div and in this div we will add the class name property and here we will provide Flex
item Center Gap margin Top within this div we will display the products price and size so to display the price let's add the P tag where we will add the curly bres and here we will provide currency that we got from the Conta text API after that we'll display the product price so just add curly veres product data do PR if I save the changes and come back to the web browser so here we have the products Price after that we will create another P tag and in that one we will display the product size
so here we will add curly bres item do size in this P tag we will add the class name property and here we will provide padding for different screen size then we'll add the border and background color save the changes and come back to the web page so here we have the product Image product name product price and product size after this D here we will create one input field in this input field type will be number after that here we will add the mean property that will be one after that we will add the
default value and here we will provide item dot quantity after that here we will add the class name property and just provide border Max Width padding we will save the changes now here we have the quantity also if I go to homepage open this product we will select this size and add to card for four times so here you can see the quantity is four because we have added this product for four times so this logic is perfectly working now let's come back to the vs Code editor and after this input field here we will
create one image tag and in this image tag we will provide cly veres and in this image SRC let's add assets. bin icon here we will add the class name property here let's provide width margin cursor pointer if I save the changes and open the web browser so here we have this bin Icon using this icon we will add the functionality so that when we click on this bin icon then the product will be deleted from the card data for that we will come back to the vs code editor and open sop context jsx file
so here we will create One update quantity function using that we can clear the cart data or we can also modify the cart items so just add const update quantity equal to and it will be one Asnc Aro function after that when we have created the add to card function here we are taking the item ID and size so in this update quantity we will take item id size and quantity we will get these parameters and for this item ID for this size we will update the quantity for that first we will create the copy
of this Cart items so here let's add let cart data equal to just use the structured clone cart items after that here we will add the card data item id size and we will set it at this quantity so our card cart data will be modified and we will save this cart data in the cart items state so just add set cart items and here we will provide cart Data so this logic has been created now here in this value object we will add the update quantity function and we will save the changes now let's
open card jsx file here first we have to destructure this function from the so we have added this function name update quantity and here we will come to this image tag where we have added the assets. bin Icon and in this image tag we will add the on click property and here we will provide one Arrow function and here we will call the update quantity function in this one we have to provide the item id then item size and quantity so this icon is for removing the product from the card data so in this parameter
we will add the item id item size and quantity so simply add Item doore id then we'll add the item do size and and here we have to provide the quantity so to remove this product from the card data simply we will provide zero if I save the changes and open the web browser and we will add the product in the cart so let me select the size and add the product in the cart we have added different sizes now if I click on this bin icon for this large product so you can see that
large size product has Been removed from the card so this logic is perfectly working after that we will add the logic so that when we change the quantity from this input field then the cart data will be modified so our cart data is not getting modified because here we have increased the quantity three but still you can see the count is two so now we'll add the logic in this input field so that when we change the Value of this input field then the card data will be updated for that let's come back and in
this input field we will add the onchange property and here we will pass one Arrow function where we will pass the event using that we can get the value of the input field after that here first we will check if our input field value is UT or zero in that case we will not not execute the update quantity function so just add e do Target do value then add the triple equal to and here we will add the empty string and with that we will add the OD operator and we will add e. Target dot
value triple equal to and here we will provide Z so if our value is empty string or zero in that case we will simply return null and if this value is available then in that case we will call the update quantity function so just add Update quantity and in this one we have to provide Item doore ID then item do size then we have to provide the quantity so we will get the quantity from this event so first we need the quantity in the number format and from the input field we are getting the quantity
in a string format so for that we have to convert the string into number for that We will use this number and in this one we will provide the E do target. value so we have created this feature now let's come back to the web browser if I reload this web page and here we'll add the product by selecting this size and add to card button now you can see the quantity is one if I increase this value from this input field you can see this quantity is increasing in the cart icon so this logic
is working fine If I decrease it you can see the cart item number has been decreased and if I try to decrease it less than one it will not decrease it because we have added the minimum property that is [Music] one so we have added the logic for the card data so that we can display the card data on the cart page after that we will add the component where we will display the total cart value For that let's come back to the vs code editor and here we will create a new component so in
this components folder we will add the new file and write the file name cart total do jsx here we will use the rafc snippet in this component we will display the total cart amount so we'll get that from the context file so let's open swap context. jsx file and here we will create one new Aro Function with the name get cut amount so let's add const get cart amount equal to and it will be one snc Arrow function in this one we will add the logic using that we can find the total amount of the
cart so first we'll create one variable that will be total amount and initialize it with Zero after that here we will run one for in Loop so just add for here we'll add the const items in car items in this for in Loop we will get the product using this item ID and we will store that in the variable so just add L item info equal to products do find method here we will pass one Arrow function in this parameter we will get The individual product and here we will compare here if our product ID
is equal to this items ID in that case we will store that product data in this item info variable and using this variable we can find the product price and we will calculate the price based on the quantity so for that we will add one more for in Loop so just add const I item in cart items items here we will add the try catch Block and here we will add the if statement here we will check if the cart items then items and for this item now in this if a statement we will add
the condition cart items items and item if this entry is greater than zero in that case we will calculate the product amount so just add total amount plus equal to item info. price into cart Items items and here we will provide item so from here we will get the product price and here we will get the product quantity so by multiplying it we will add that data in the total amount using that we will get the total amount of the all product added in the card after that we'll add the return statement and return this
total amount variable so we have created this logic Now after this snc we have to add this small braet now we have to pass this function in this value object so that we can access this function in any other components we will add this and save the changes now we will come back to the card total. jsx file here we will get the currency symbol dely fee and get total cart amount function using the SOP context so just add con curly brushes just add currency delivery Fee get cut amount function equal to use context and
here we will provide swap context Now using these three data we will create this card total component so here in this day we will add the class name property that will be W full in this div we will create another div and here we will add the class name property that will be text to Xcel after that here we will add the title component so here we will add title and here we have to provide the props so just add text one that will be cart and here we will add the text two that will
be totals after this div here we will create another div and in this div we will add the class name property and here we will provide Flex Flex column Gap margin top text Size in this div we will create another div and in this div we will add the class name property that will be Flex justify between within this dat we will display the subtotal and subtotal amount so let's create two P tags in the first P tag we will add the text that will be subtotal in the second paragraph tag we will add the
cly bres and here we will add the Currency after that we will add the space and add the cly bres and here we will call the get cart amount function after that here we will add the dot 0 0 after this div we will add one HR tag and after this HR tag let's add another div and this div will add the class name property and here we will use the same class name so just copy and paste it here and after that here we will create two paragraph tags so just add P into two
and in the first paragraph tag We'll Add the that is shipping fee and after that in the second paragraph tag we will add the curly bres and just add the currency after that just add the space and add another curly bres and in this one we will provide delivery fee that we are getting from the context after that here we will add another HR tag and here we will create another div and in this di we will add the class name Property and here also we will use the same class name so just provide flex
and justify between in this D we will create one B tag and in this B tag we will add the text that is total and after this B tag here we will add another B tag and in this one we will add the curly blesses and in this one we will add the currency and after that here we have to add total price so to calculate the total price we will get This cart amount and we will add the delivery fee so simply add if the cart data amount is zero in that case we will
not add any delivery fee simply we will return zero and if the cart amount is greater than zero in that case We'll add colum get part amount plus delivery fee so we have created this component now we will Mount this component on the cart page so let's open cart. jsx file And here after this div we will create another div and in this one we will add the class name property that will be Flex justify end and margin y in this div we will create one another div and in this div we will add the
class name property and here we will provide width full for a small and above a screen we will provide width 450 pixels in this one we will Mount the Component that is cart total if I save the changes and open the web browser if I reload the web page here here we have some error so let me go to console tab so to fix this issue let me come back to the vs code editor and we will open this sop context. jsx file and in this get cart amount function let me remove this as sync
if I save the changes and open the Web browser now this issue has been resolved now if I open any product and click on the add to card button by selecting the size so here we have added total five quantity so you can see three quantity large size and two quantity Excel size so total we have five quantity and the price of five quantity is $1,000 this is displayed here and after that we have the shipping fee $10 and in the total you can see $1,010 so this logic is perfectly working now if I Go
to home screen and reload this web page and here if I select the different product let's add different products in the cart so here you can see we have three products you can see the total that is 480 and here you can see the 480 so this logic is perfectly working so this card total component is perfectly working after that here we have to add the 00 so that it will look better for that let's Come back to the cart total. jsx file and here we will add 00 and here also we will add 00
now if I save the changes and open the web browser so now this component is looking good after that we have completed this card page after that here we will create one button that will be place order button after clicking on that button we will come to the new page where we will display the users data input field and In the right side we will display the payment methods for that we will come back to the vs code editor and here we will open cart. jsx file and after this cart total here let's create create
one div here we will add the class name property here we will add the width full text end in this div we will create one button Tag and in this button tag we will add the text proceed to check out after that here we will add the class name property and here let's provide background color text white text a small margin and padding if I save the changes and open the web browser so here you can see this button proceed to check out on this one we'll add the functionality so that when we click Here
then we will be navigated to the place order page for that let's come back to the vs code editor and we will open sop context. GSX file and here we will create one instance of the use navigate hook so just add const navigate equal to use navigate and here we will pass this navigate in this value object so just add comma navigate now we will save this file and Come back to the cart. jsx file and after that here we will destructure this navigate function from the context and on this button tag we will add
the onclick property in this one we will pass the Aro function and here we will call the navigate function after that here we have to provide the place order page path that is SL place order if I save the changes and open the web browser and if I click on this proceed To check out button now we are at the place order page now we will Design this place order page so we will open place order. jsx file first in this di we will add the class name property and here we will provide the classes
Flex Flex column Flex row justify between Gap padding top then Min height then border top within this div we will create Another div and in this one we will add the class name property so here we will provide Flex Flex column Gap width full and maximum width so we will display this div in the left side of our place order page so let me add one comment here so let me add the comment text left side and within this div we will create a new Div here we will add the class name property here we
will provide text Excel margin y then we will add the title component so just add this title component and in this title component we have to provide the props so we will provide text one that will be delivery then we will add the text two that is information After this div here we will create another div and here we will add the class name property that will be Flex then Gap three if I save the changes and open the web browser so here you can see this title delivery information and here we will create some
input Fields where user can enter their delivery information like name phone number address so let's let's come back to the Vs code editor and within this div we will create one input field the type will be text and from here let me remove this name and ID and in this input field we will add the placeholder property so here let's type first name after that let's add the class name property and we will provide the classes border border gray rounded padding y padding X and width let me create one copy of this Input field and
here we will update the placeholder text it will be last name if I save the changes and open the web browser so in the left side you can see two input fields for first name and last name after this div here we will copy this input field in this input field we will add the type email and here we will add the placeholder text that will be email Address if I save the changes and open the web browser so here we have a new input field for email address and the width for this email input
field is full width similarly we will create other input field here so just copy and paste it here and here we will add the type text and we will update the placeholder and here let's provide placeholder text a straight so in this input field user can Enter their address a street name if I save the changes and open the web browser so here you can see another input field now let me copy this complete div and we will paste it here we will use this input field to get the city and a state information so
in this placeholder we will add the city and in the second placeholder we will add the state if I save the changes and open the web Browser so here we have two other input fields which is for the city and state similarly we will add other input field so just copy this div and paste it here now here in the first one we will set the type number and here we will add the placeholder text zip code and here we will add the placeholder text that is country now if I come back to the web
page so here you can see the zip code and Country input Field now let's create one more copy of this input field just copy and paste it here here we will add the type number and here let's provide the phone if I save the changes and open the web browser so here we have the the input field for the phone number so we have added the input fields for all the delivery details after that we will create the elements for the right side of this place order page so let's come back to the vs code
Editor after this div here let's add one comment and here we will add the text right side here let's create one div and in this div we will add the class name property that will be margin top within this div let's add another div here we will add the class name property and here let's provide margin top and minimum width within this div we will Mount card total component if I save the changes and open The web browser so here in the right side you can see this cart total component using that we can display
the total amount on this place order page after that here we will create another div here we will add the class name property that will be margin top and in this one we will Mount the title component in this title component let let's add the text one here we will add the text payment then we will add the Text two and here we will provide method we have to provide two props in this title component after this title component we will create another div here we will add the class name property and here we will
provide Flex Gap Flex column and flex row if I save the changes and open the web browser so here we have this title component where we have added the text payment Method after that we will use this div to display the different payment method so here we can add one comment where we will add the comment text payment method selection within this div we will create another div here we will add the class name property and here we will provide Flex item Center Gap border padding and cursor pointer within this div we will create One
P tag in this P tag we will use this P tag to display the selections when we will select this option then this paragraph will be green and if we have not selected it then it will be transparent and here we will add the border for that here we will use the dynamic class name so let's add the curly Braes back tick and here we will provide minan width height Border and Border radius we will save the changes and after this P tag let's add one image tag and in this SRC we will add assets
dot stripe logo after that here we will add the class name property and here we will Define height and margin if I save the changes and open the web browser so here we have one payment method after that we will create another copy of this div And here we will use the assets dot Razer pay logo if I save the changes so here we have two options now let's create one more copy of this and here let's remove this image tag and after removing this image tag here we will add one P tag and in
this P tag we will add the text cash on delivery after that here we will add the Class name property and here we will provide text color text size font weight and margin if I save the changes and open the web browser so now this component is looking good after that we have to add the logic so that if I click on any payment method then here you can see this indicator in a small circle so it will become green so first we have to create one state variable so before this return statement let's Add
const method seter function name will be set method equal to user state and we will initialize it with one string where we will add Cod so the cas on delivery will be selected by default so here we have added Cod after that on these three div that is representing three different payment method here we will add the on click property here we will pass the Aro Function and here we will call the set method function after that here we will add the string in the first one we will add the stripe that is for the
stripe button in the second one we will add the string eraser pay and in the third one we will add the a string cood after adding this when we will click on these options our state variable will be Updated now we have to turn this circle into green color so that we will get to know that we have selected which payment method for that in these class name we have added the template literal so here in all three paragraph tag for the class name we will provide template literal so just add dollar sign curly Braes
and here we will check if our method is equal to here we'll provide one string then we'll add the question Mark and here we will provide BG green 400 after that here we will add the colum here we will add one string that will be empty string so in the first method we will check if the method is a stripe in that case the background will become green else we will provide empty string now in the second option we will check if the method is equal to razor Pay in that case the background will become
green for the razor pay method after that we have the third option here we will check if the method is cod in that case we will provide this background color else we will provide this empty string so we have added these code let me save the changes now open the web page so now you can see if I reload the web page by default this cash on delivery will be selected So now if I click on the stripe method this Green Dot is visible on this stripe method if I click on Razer pay this Green
Dot is visible on the Razer pay so this logic is perfectly working after that we will create one button tag so that when we will click on that button then we will be navigated to the orders page so here let's add one div in this div we will add the class name property and here we will provide The width full text end and margin top within this div we will create one button tag and in this button tag we will type place order in this button tag we will provide the class name property and here
we will provide the background color text color then padding X padding Y and text size if I save the changes and open the Web browser so here we have this place order button now we will add the logic so that when we will click on this button we will be navigated to the orders page for that first we will import the navigate function from the context so just add const navigate equal to use context and here we will provide the S context after that on this button tag we will add the Onli property and here
we will provide the arrow function and after that we will call the navigate function and here we have to provide the path of the orders page so let's add/ orders if I save the changes and open the web browser now if I click on this place order button we will be redirected to the orders page after that we will create the UI of this orders Page to create this orders page let's come back to the vs code editor and from here we will open this orders. jsx file and here first we will get the products
data and currency symbol from the context for that let's add const curly bres products comma currency equal to use context and here we will provide the sof context after that in this div we will Add the class name property and here we will provide the Border top and padding top within this div we will create one another div in this div we will add the class name property that will be text to excel within this div we will Mount the title component and in this title component we have to provide the props so we will
provide text one that will be my and now we will add the text two that will be orders if I save the changes and open The web page so you can see the title here my orders after this div here we will create another D and here we will display the orders data so we have not added the logic for the place order so we will get four products from this products data and we will display that as an order for that here we will add the curly blesses products dot slice method here we need
the four products From this products are so just add one to four after that here we will use the dot map method in this one we will pass one add function so we will use this bracket here we will get the parameter that will be individual item and index number after that here we will return one div in this div we will add the key property where here we will provide the index and here we will add the class Name property so here we will provide padding border border bottom text color Flex Flex column Flex
row item Center justify between then Gap after that within this div we will create another div in this div we will add the class name property so here we will provide the Classes Flex items a start Gap and text size that is a small so in this D will display the products image and products other data so for that we will use the IM tag and in this SRC we will provide the products image for that here we will use the item dot image index zero after that we will add the class name property and
here we will provide the width if I save the changes and open the Web browser so here we have three images after this product image here we will create one div and in this div we will add the paragraph tag and in this paragraph tag we will display the product's name so just add the curly bres and here we will provide item do name now in this paragraph tag we will add the class name property and here we will provide text base and font medium after this P tag here we will Create one one div
and in this div we will add the class name property so here we will provide Flex item Center Gap margin top text base and text color within this div we will create three p tags so just add P into three so in the first P tag we will display the price of the product so just add the curly bres and here we will display currency and here we will add Another curly presses and just add item. price after that here we will add the class name property and here let's provide text large now in the
second paragraph tag we will display the quantity so just add the text quantity so for now let me add the a static value let me add one now in the third paragraph tag let's add the size and here let's add the static value so let me add Medium after this D we will add one P tag and here we will display the purchase date when user have purchased this product for that here we'll add the date then add the asan tag and in this asan tag we will add the class name property and here we
will provide the text Gray 400 and in this aspan tag let me add one date so let me add 25 July 2024 now in this P tag also we will add the class name property that will be margin top if I save the changes and open the web browser so here we have the product title then price quantity size and date after this div here we will create another div in this div we will add the class name property and here we will provide width flex and justify between Within this div we will create another
div and in this D we will add the class name property and here we will provide Flex item Center and GAP and in this div we will create two P tag so let's add the P into two so in the first paragraph tag we will display the bullet points so let's add the class name property and here we will provide main bitth height border radius and Background color after this P tag let's add the text in second P tag so let's add the text ready to shape and here let's add the class name property and
here we will provide text a small and text V if I save the changes and open the web browser so here in the center you can see this status that is ready to Shipe after this div we will create one button Tag and in this button tag we will add the text track order and on this button tag we will add the class name property and here we will provide the classes border padding X padding y text size font weight and Border radius if I save the changes and open the web browser so here we
have this track order button so now we have completed the UI part of this order Page when we'll create the logic for the order then we will use this format to display the actual order data so now we have created the order page now we will create the UI for the login page so to create the login page UI first we have to add the link on this profile icon so that when we click here then it will open the login page for that let's come back to the na. jsx file and on this image
tag now we have to wrap this image tag with The link tag for that here let's add link tag and wrap this image tag with this link tag just place it at the end now in this link tag let's add the two property and here we will provide SL login that will be the path of the login page if I save the changes and open the web browser and if I click on this user icon then we are redirected to the login page now we will Design This login page UI so to create this Login
page UI first let's come back to the vs code editor and here we will open login. jsx file in this one first we will create one state variable that will match manage our state like login or sign up so just add const and then we will add the state variable name that will be current state then Setter function name will be Set current state equal to user State initialize it with one string where we will add sign up after that we will convert this div into a form tag after that in this form tag we
will add the class name property and here we will provide Flex Flex column item Center width Max width margin Auto then margin top then Gap and text Color in this form tag let's create one div in this div we will add the class name property and here we will provide inline Flex item Center Gap and margin here we will create one P tag and here we will display the current estate that is sign up correct so let's add clys current state so it will display sign up now in this P tag we will add the
class name property and here let's provide this Class name so we have provided this font and text size after that we will create one HR tag and in this HR tag let's add the class name property and let's provide border none then height width then background color if I save the changes and open the web browser so here we have this sign up text now if I change this estate and make it login Now you can see this login text on this web page let me change it to sign up only after that we will
create the input fields for the name email and password so let's add the input field type will be text and here let's add the class name property and here we will provide width padding border border color and here we will add the placeholder property here we will provide name after that let's copy the input Field and paste it again here we will add the type email then in this placeholder just type email after that let's p P this input field again and here we will add the type password and here in this placeholder let's add
password after that we will add the required attribute in all three input Fields so just added required attribute so that this input Field will be required to submit the form now if I save the changes and open the web browser so here you can see all three input Fields name email and password after that if I change this state from sign up to login and save the changes now here we have the login now in this login State we have to remove this name right because we need this name field while creating a new account
and while login user can login using the Email ID and password only so to hide this one let's come back and before this input field let's add the curly Braes and we will use the turn operator so just check if the current state is equal to login in that case here we will provide one empty string and if it is not equal to login in that case we will provide this input field so let me cut this input field and paste it after this colum if I save the changes and open the Web browser now
you can see in this login form we have only email and password input field if I change it to sign up save the changes now in this sign up form we have the name input field also after this three input field Fields here we will create one div and in this div we will add the class name property and here we will provide width full Flex justify between text size and Margin top after that here we will create one P tag and here we will provide one text that will be forgot your password in this
P tag we will add the class name property that will be cursor pointer if I save the changes and open the web browser so here we have this text forgot your password after that in the right side we will create one option so that when we are on the login Page then in the right side it will display create account and if we are on the sign up form then in the the right side it will display login here for that let's come back to the vs code editor and here after this P tag let's
add the curly Braes and here we will check if our current state is equal to login in that case here we will add the question mark and here we will create one P Tag in this paragraph tag let's add text create account and if the state is not equal to login in that case we will add the another P tag and here we will add the text login here after that in these P tag we will add the class name property that will be cursor pointer with that here in this P tag we will add
the onclick property here we will pass one Arrow Function and here we will call the Set current state function in the first one it says create an account so here we will add the state signup and now in the second one it says login here so in this one we will add the state login if I save the changes and open the web browser now on this sign up form here you can see the option log here and if I click here then it will open the login form and here in the Right side you
can see create account if I click on this create account again it will open the signup form so this functionality is perfectly working after this div we will create one button tag and in this button tag we will display the text dynamically so for that let's add the curly bres and here we will check if our current state is login in that case we will add the text sign in and if the state is not equal to Login then we will provide the text sign up after that here we will add the class name property
and here we will provide BG black text white font light padding X padding Y and margin top if I save the changes and open the web browser so here we have this sign up button on this sign up form if I click here so it will open the login form and here we have the sign in button if I click on this button it is asking to Fill this input field please fill out this field if I fill this email input field so let me add one dumy email ID Dev at gmail.com and here we
have not provided any password then you can see then it is giving the notification please fill out this form and if I add some password here then click on this signin button so it will submit this form and with that it will reload the web page so we have to prevent this page reload for That here we will create one onsubmit Handler function so just add const on submit Handler and it will be one as sync Arrow function and here we have created this on submit Handler function now in this one we will pass the
parameter that will be event so whenever we will submit the form we will get the event from the form submission and using this event we can provide prevent default after using this method it will Prevent the web page from reloading when we will submit the form so now in this form tag we have to link this function so on this form tag we will add the on submit and here just provide onsubmit Handler if I save the change es and open the web browser and now if I add any dummy email ID and any password
and click on this sign in then it will not reload our web page so now we have created this login and sign up Form after that we will create the about page to create the about page we will come back to the vs code editor and from here we will open about. jsx file and here within this div we'll create another div and in this one we will add the class name property so here we will provide text 2 XEL text Center padding and Border top within this day we will Mount our title component in
this title component we Will add the props that will be text one so here we will typee the text about then we'll add the text to here we will add us if I save the changes and open the web page so you can see this text about us after this Title Here we will create one div and in this div we will add the class name property and here we will put wi margin y flex Flex column Flex row Gap within this div we will create one image tag and in this image SRC we will
use assets dot about image after that here we will add the class name property and here we will provide width full Maxim width 450 pixels after this image tag let's add one div and in this div we will add the class name property and here we will provide Flex Flex column justify Center Gap Width and text color now within this St we will create to paragraph tag so just add P into two now in the first P tag let's add some some a static dummy text so we have added this text after that in the
second P tag also we will add some text so we have added another text in the second P tag if I save the changes and open the web browser so in the left side we have this image and in the right side we have Some text after these P tag here we will add one B tag and here we will add the text our mission after that we will add the class name property and here we will provide text Gray 800 after this B tag let's add the another P tag and in this P tag
we will add some dummy text so we have added this text and if I save the changes and open the web browser so now we have Three paragraph tag and one a small text in the right side so now this About Us section is looking good now here we will create another div and here we will add the class name that will be text Excel for text for Excel then padding y now in this D we will add the title component we will pass the props so the first one will be text one in this
one we will pass y in the Second one we will add the text two and here we will provide the text choose us if I save the changes and open the web browser so here you can see this text why choose us here we have provided for Excel so let me make it Excel now it is looking good after this div here we will create another div and in this div we will add the class name Property and let's provide Flex Flex column Flex row texture small and margin [Music] bottom so in this div we
will create another div and here we will add the class name property so here we will provide border padding Flex Flex column and GAP within this div we will create one B tag and in this B tag we will add the text quality assur After this V tag let's add one paragraph tag and just provide this text that is one dummy text now let's copy this div and we will paste it and here we will update the text so in shed of this text We'll add convenience now we will update the text in this paragraph
text so we have added another text here now let's create one more copy of This div and here we will update this text so let me remove this convenience and we will type exceptional customer service similarly in this last P tag we will update the text so let me add a new text here after that in all three P tag we will add the class name property and here we will simply provide text color that will be text Gray 600 now if I save the changes and open the web Browser so here you can see
three columns where we have these text after these text we will display one newsletter subscription box so here we will Mount the newsletter box now if I save the changes and open the web browser so now here you can see we have this newsletter subscription box with the title now we have completed the about us page next we will create the contact page for That we will come back to the contact. jsx file in this component within this div we will create another div and in this one we will add the class name property and
here we will provide text Center text to excel padding top and Border top after that we will add the title component in this title we will pass the props that is text one and in the text one we will type contact then we will Pass the text to and here we will pass us if I save the changes and open the web browser so here we have the contact us title on this page so after this div we will create another div and in this one we will add the class name property and here we
will provide margin y flex Flex column justify Center Flex row Gap and margin bottom in this div we will create one image tag in this image tag we will Use assets do contact image after that we will add the class name property and here we will provide width Max width if I save the changes and open the web browser so here we have one image on this contact page after this image tag let's create one div tag and in this div tag we will add the class name property and here we will provide Flex Flex
column justify center items start And GAP six within this D we will create five paragraph tag so just add P into five so in the first one we will add the text that is our store now in the first one we will add the class name property and let's add the class name font semi bold text Excel text color gray if I save the changes and open the we browser so here we have this text our Stored after that in the second P tag let's add the address so we will add any dummy address we
have added VR tag to add a line break if I save the changes and open the web browser so so here you can see this address now in this one we'll add the class name property and here we will provide text Gray 500 so now the text color has been changed after that in the next P Tag we will add this text where we will display one dummy phone number then line break and here we will display the email ID this is also one dummy email ID then we will add the class name property and
here let's add the class name text Gray 500 if I save the changes and open the we browser so now here you can see this phone number and email ID now in the next P tag we will add the text carriers at forever Here we will add the class name property and in this class name we will provide font semi bolt text Excel and text color gray 600 if I save the changes and here you can see this text after that let me create one copy of this P tag and we will paste it here
from here let me remove this text and here we will Pro provide another text learn more about our teams and job Openings after this P tag here we will create one button tag so let me remove this p and here we will add the button tag in this button tag we will add explore jobs and here we will add the class name property and here we will provide border border black padding text size hover effect so we'll add the hover background Hover text then we'll add the transition and duration we will save the changes after
that we will open the web browser so here we have this text and this explore jobs button and if I move cursor over this button you can see see this transition and the background color is changing so now we have created this layout for the contact us page and below this one we will add one newsletter subscription box for that let's come back to the vs code editor here we will Simply Mount the newsletter box component we will save the changes so here we have this newsletter subscription box on this contact us page if I
open this web page in a smaller screen so you can see in a smaller screen also this contact us page is looking good so now we have created all the pages of our project we have created the homepage where we can display the latest collections best sellers and these policies then we have the Newsletter box and footer then we have created The Collection page where we have created these category and subcategory filter then we have created the about us page then contact us page then we have created this search bar then login page then card
page product page we can add the product in the cart and you can see this product has been added in this cart page and we can click on this proed to check out so it will Open the place order page after that we have created the my orders page page so here we have created all the pages of our e-commerce website now we have completed the front end of our website next we will create the back end for our project to create the back end first we will come back to the vs code editor and
we will close all these files so here in the left side bar within this e common app folder we will Create a new folder with the name backend we will right click on this backend folder and select open in integrated terminal now here in the right side of this terminal you can see we have two terminals in the first one it is running the front end and this is the second terminal where you can see the path e-commerce app SL backend now in this backend folder we will create a new file and write the file
name Server.js so here we have created one server.js file in this backend folder now in this terminal we will add the command npm in it here we have to provide the package name that will be backend so just press enter Then just click enter to use the default value here it is already taking the server.js as entry point so just click enter just press enter for all these things now here we have one package.json File in this backend folder if I open this package.json file here we have the project name version in this main we
have the server.js file that is our main file of This Server then we have some scripts that is autogenerated so here we have one test and one start command from here let me remove this test after that in this back end we will install some Dependencies so to install the dependencies here we will type npm I then we'll add the package name course space do EnV space Express then Json web token then molter node Monon razor pay stripe validator cloud in then we will add by so here we are installing CS using that We can
allow the front end IP to access the backend after that we will install the EnV package using that we can use the involvement variables in our project then we will use the Express package using that we can create the apis after that we will use the Json B token using that we can enable the user authentication and the user will be logged in on our website then we will install the that will manage our database Connectivity then we will install the molter that will allow us to store the images on our Cloud Nary storage here
we are using nodemon that will restart the back end whenever we will make any changes in the code after that we will install the razor pay and stripe to set up the online payment integration then we will use the validator using this validator we will check the data that is coming from the User is valid or not after that we have the bcrypt package using this package we can encrypt the users password and stored in our database now we will install these packages so you can see the installation has been started so we have installed
all the packages and here we have the nodecore modules folder in which we have all the dependencies after that we will create the folder structure for our backend so In this backend folder we will create a new folder and provide the folder name config in this folder we will store store all the configurations after that in this backend folder let's add a new folder and provide the folder name middleware in this folder we will store all the backend middleware then create a new folder in this back end and write the folder name models in this
models folder we will Store the models of our mongos where we will Define the schema after that we'll create another folder in this back end and write the folder name controllers in this controllers folder we will manage all the Logics of our backend after that we'll create another folder and write the folder name routes in this routes folder we will manage the express servers route so we have created the folder structure for the backend after that we Will open package.json file and here we will add the script so let's add the script name server so
whenever we will type npm run server then this script will be executed so here we will use nodemon server.js here we have to add the comma so whenever we will type npm Run start it will start the node server and we will use this start command while deployment but at the local server we Will use this script npm run server where it will start the server using this node Monon and whenever we will make changes in any code in the backend then it will reart the server after that here we will add one type property
that will be module so in this backend type we have added module so after adding this module we can use the import statements in our Project now let's open open server.js file and here we will create a basic server so to create This Server here we will import Express from Express package after that we will import course from course package after that we will import do envc config after importing this we will get The support of EnV file in our project now in this backend folder we will create a new file and write the file
name Dov in this EnV file we can store the secret key or API Keys now in this server.js file here we will add the comment and let's add the command text app config so here we will use this Express package to create the instance of the express server so let's add const app Equal to express after that here we will Define one port number so just add const Port equal to and here we will use the environment variable so let's add process. e pnv dot Port if the port number is available in this envirment variable
then it will be used if it is not available then we will provide the OD operator and here we will provide the Port number 4,000 so now the back end will start on this port number which is 4,000 after that will create the middleware so let's add the comment let's add the comment middle Wares to add the middleware we will use the app. use and in this we will add the express do Json after providing this whatever request we will get that will be passed Using the Json after that in this middleware we will add
CES so just add app. use cor after adding this we can access the backend from any IP now we will create the API endpoints so just add the comment and here let's add API endpoints and here we will create one API endpoint so just add app do get Method here we will add the path of API endpoint that will be slash then we will pass one Arrow function and here in this parameter we will take request and response and here we will generate one response so just add response. send so it will be API working
so we have created one endpoint so whenever we will open Local Host Port 4,000 then it should display API working message after that we have to start the Express server so just add app. listen and here we have to provide the port number that we have declared here the then then add the comma and arrow function and here we will add the console log and let's add the message server started on Port and here we will add Plus Port variable save this changes Now run this server.js file so to run this project just add the
script that is npm run server so in this terminal we will add npm run server so now it will start the express server and here we have one message in the terminal which is server started on Port 4000 now if I open the web browser and if I open open the new tab Local Host Port 4,000 so here we are getting the message Api working we are getting the API working because from this browser we have hit this endpoint and when we hit the endpoint from the browser then that will be executed as a get
request to test our apis we will use this extension which is thunder client so using this thunder client we will teste our apis so you can install this extension from this extensions List you can see the extension name Thunder client so to test the API here just click on the new request from here we will select type so it will be get then we will provide the HTT TP colum // Local Host Port 4,000 and click on the send button so if I click on this send button in this response you can see We are
getting API working status 200 size and time so our Express server is perfectly working after that we will add the configurations in our backend project so first we will add the configuration for the database connectivity for that we will open the web browser and here we will open a new tab and let's search For mongodb Atlas let's open this website then click on the try free after that we will click on the sign up with Google so we are logged in in this mongodb Atlas then click on the new project here we will provide the
project name so let's add projects then click on the next button then click on this button create project So we have created this project you can see the name projects after that we have to create one cluster so just click here on this create button from here we will use this m0 server which is free and in this one we will get the 512 MB of a storage so we have selected this m0 free here here we have the cluster name which is cluster zero after that we will select the provider so you can select
any of these Provider so let me select AWS from here you can select the nearest reason then click on this button create deployment after that we have to create one database user using that we can access the database so here we'll add the name great stack which is the username and here we will add the password so let me add one password here after that we'll click on this Button create user after that here we have connect to Cluster so let me select this driver here we will select node js select this version after that
here in the right side we have this connection string from here let me copy this connection string we have to copy this part up to mongod v.net let me copy this and we will open the vs code Editor and in this EnV file here we will create one envirment variable that's name will be mongod dvu equal to and here we will add the string and paste it from the end remove this slash after that here we have the username then password and the address of our cluster using this string we can connect the Mongo's package
with the mongod DV now let's click on this close and in The left side bar click on this network access if I open this network access so here we have our own IP address so we can access the database from this IP address only but we have to access the database from the any IP address for that here we will click on this one add IP address then click on this button all allow access from anywhere after that just click on this confirm button so it will add a new entry with the 000000 so after
adding this entry we can access the database from any IP address now let me close this mongod DB and now using this string we will configure our mongod DB database for that in this config folder we will create a new file and provide the name mongod dev. JS in this file first we will import from the package after that here we will create one Arrow function with the name connect DB that will be one a sync Aro function so just add con connect DB equal to snc and we have created this Aro function after that
we will export this function so just add export default connect DV within this function we will add the logic using that we can connect our Mong package from the mongod DV Atlas server For that we will use await do connect function and here we have to provide the mongod DBU for that we will use the template literals so just add back ticks dollar sign curly bres and here we will add process. EnV Dot variable name that is mongod dvore U so just copy and paste it here after that in this cluster we have to create
one database for this project for that here we will provide slash and Just provide the project name that will be e-commerce so here we have added e-commerce project name after that here we will add do connection Doon and here we will add the event name that is connected after that here we will pass one Arrow function so whenever the mongod DB connection will be established then this Function will be executed and here we will add one console log and let's add the message DB connected so now we have created this connect DB function whenever we
will execute this function then the mongod DV database will be connected to the project here we have to remember one thing whenever we are creating the mongod DV database then in this password do not use the add rate symbol so while creating the password Avoid this at theate symbol in your password else you will get the error in this function now let's come back to the server.js file and in this one here after this port let's add connect DB so we will get this connect DV from the config SL mongodb file so after clicking here
this function has been imported in this Line and here we will call this function and here we have to provide the full name mongod db. JS if I save the changes and if you see in this terminal here we have two message server started on Port 4,000 then we have the message DB connected we are getting this message from this console log that is written in this function that is executed whenever the mongod DB connection is established so we have Successfully connected with the database after that let's create one more configuration so add a new
file in this config folder and it will be for the cloud NY cloud storage where we will store the images so just add Cloud ny. JS so to configure This Cloud NY first we have to get the API key from the cloud NY website so just open the web browser and here we will open new tab and let's search for cloud Un then let's open this website here I already have one account so I'll click on this login button and I'll click on login with Google after that we will open dashboard then click on go
to API keys so here we have created one API key so here let me create another one let's click on this button after that we will get one confirmation code on the email so let me Open the email ID let me copy this code and paste it here so let me add the name for this API key so it will be e-commerce let me copy this API key from here and come back to the vs code editor we will open EnV file and here we will create a new environment variable with the name cloudin API
key here we will add the API key in Double code after that from here we will copy this API secret key just click on this copy icon and here we will create the another environment variable with the name Cloud NY secret key and in this double code just paste the secret key after that from here we will copy the cloud name and here we will create another Environment variable with the name cloudinary name and paste it in double quote so we have provided the cloud NY API key secret key and name we will save the
changes and open the cloudy. JS file here we have to configure the cloud NY so first we will import we will import V2 as cloud nuty From here we will use the cloud NY package after that we will create the asnc Aro function so let's add the const connect Cloud NY this is the function name equal to async and we have created this Arrow function now just export this function so just add export default connect cloud function here in this function we will configure our Cloud n so just add Cloud Dot configure and in this
function we have to provide one object where we will Define Cloud name and here we will use process. EnV Dot here we will use this Cloud Ny name so let me copy and paste it here after that we will add the comma and let's add API key property here we will provide process. EnV Dot and from here let's copy this Cloud NY API key variable let's copy and paste it here then add the comma and here let's add API secret here also we will provide process.env do then copy this variable Cloud n secret key and
paste it here so we have provided these things save the changes and now let's open Server.js file and after the this connect DV function here we will call the connect Cloud NY function so this file has been imported we will save the changes now we have successfully configured the cloud n storage now we will create the model using that we can store the data in the database so in this models folder let's create a new file and write the file name product model. JS in this file first we will import mongus from package after that
we will create the schema for our product so a schema is a structure using that we we can create the data in the database so let's add const product schema equal to here we will use new keyword then we will use do schema Constructor in this one we will add one Object and here we will Define the objects property and their type so in the product schema the first thing will be name where we will store the product's name and in this one we'll add the object and let's define type that will be a string
then we will set required true so when we add required true then it is mandatory to provide the name If we don't provide the name then this data will not be saved in this database after that let's add the comma here we have added the name property after that we will create the description property so let me copy and paste it here and instead of this name let's add description after that here we will add price property here we will add the type it Will be number and Here Also let's add required true after that
let's copy and paste it next property will be image where we can store the multiple images so let's add the type array here also we will add required true let me copy and paste again and write the property name category here we will add the type string and it is also required true let me copy and paste it again here We will add the property subcategory here also the type will be string required true after that let's create another copy of this here we will add next property which is sizes here we will store the
sizes of the product so the type is aray and it is also required true after that we'll create another property that will be best seller here we will add the Type it is Boolean after that we will create the date property and here we will add the type it will be number and here we will set the required true here we have to provide one comma so here we have declared the type and property and now using this schema we will create one model so to create the model simply add const product model Equal to
and here we will add do model and in this model let's add the name that is product then we will provide the schema that is product schema so using this schema we have created the model and we have a stored in this product model whenever we will run this project then the model will be created created multiple times so we can create the model only once so we will get one error so to Solve this error here we will use dot models do product and provide the or operator so what will happen here when the
product model is already available then that model will be used that product model will be assigned in this product model variable and if it is not available then it will create a new model using this schema using this our model will be Created for the product after that we have to export this product model so just add export default product model using this our model will be exported so we have created the product model similarly we will create the model for the user so just create a new file and write the file name user model.
JS here we will add the import statement so just add import mongus from Mongo's package after that here we will create One user schem schema so just add const user schema equal to new do schema and in this schema we will define the properties of the user so in the user we will add the name then we will declare the type that will be a string and here we will add required true let me copy and paste it again and In the second one we'll add the email here also We'll add the type string and
required true and with that we will add the unique property and let's add true so we have added the unique true it means if we have created the account using one email ID and trying to create another account with that same email ID then it will not create the another account so in that case we will provide one error message that this email ID is Already used in another account that's why we have added the unique true after that let's copy and paste it again and here we will add the property name password Here the
type will be a string required true after that we will add cart data property and in this property we will store the cart data of the user so let's add the type so the type will be object and here we will add the default property that will be Object so whenever the new user will be created then their cart will be one empty object after that here we will add the comma and let's add the minimize property that will be false here we have added minimize false because whenever we will create the card data by
default we have provided the value empty object so in the so whenever we create the user Using the then the user will be created in this data this card data will be unavailable because neglect the property where we have one empty object so if we create one card data with empty object then that data will not be displayed in the mongodb so we want to create the card data also when the user is created that's why we have added this minimize property False using that it will create the card data using the empty object so
we have created the user schema after that we will create the model using this schema so just add const user model equal to do models do user or do model provide the name user then provide the schema which is user Schema so it will create the user model after that we have to export this user model so just add export default user model and we have exported this user model now we have created the user model and product model after that in this controllers we will create a new file and here we will add the
name user Controller.js here we will add the logic using that we can allow user to create an account or login on the website so here we will create two Arrow function with the name login user and register user so just add const login user equal to S sync Aro function here let's add one comment let's add the text route for user login after that here we will add another Comment let's add route for user registration here we will create one Arrow function with the name register user so just add con register user equal to snc
and here let's create the Aro function we are going to use this function for routes so here we will get request and response here also we will add request And response now we will export these functions for that here let's add export curly addes login user register user with that we will add one more endpoint for the admin login so let's add comment and let's add route out for admin login Here Also let's create one add a Function so just add const admin login equal to async here we will get request and response and we
have created this Aro function after that let's EXP report this function also which is admin login so here we have created three controller functions and now using this controller function we will create multiple routes so to create the routes in this routes folder let's create a new file with the Name user route. JS here first we will import the express from Express package after that here we will import these functions that we have created here so just add curly Braes login user register user and admin login function let's add JS after this user Controller after
that we will create one router using this Express router so the router name will be user router so just add const user router equal to Express dot router so it will create one user router and using this router we will create the get or post method so first we'll create user router. poost method and we will mount it On/ register endpoint and whenever we will call this then we will execute the register user controller function let's copy and paste it again in the second one we will add the endpoints / login and here we will
call the login user function let's copy and paste again and here we will add/ admin and here we will add admin login Function so we have added three routes after that we have to export this user router so just add export default user router Now using this router we will create the endpoints so let's open server.js file and here after this API endpoints comment let's add app.use and here we will provide endpoint address that is/ API SL user and let's add the comma then add User router that we will get from the user router.js file
so after clicking here this file has been imported if I save the changes and if I open this user controller.js file here if in this register user function we will add the response. jsn and let's add the message that will be API Working so let me update the text it will be registered API working now if I come back to the Thunder client and here if I test it let's select post method SL API sluser slash register and if I click on the send button then you can see one object in the response where we
have the message registered API working that we have sent in this controller function that is register User so first we have added this function in the doubts where the Endo is/ register and we have added this router in this server.js file where the endpoint is/ API user so if we have to call the login API where you can see the controller function so for this here we will use SL API SL user SL login if we hit that API endpoint then This login user controller function will be executed so here we have created these three
controller function now we'll add the loging using that we can allow the users to create an account or login on the web page so just open this user controller.js file from here let me remove this response so in this function first We'll add the TR catch block and in this TR block first we will Get the name email and password from the requestbody so just add const name email password equal to request. body so after adding this if anyone will hit the API endpoint with the name email and password property then we'll receive that name
email and password after that we will check if any user is already available with this Email ID then we will display one message so just add comment here we will add the text checking user already exists or not here here we will add cost exist equal to a wait here we will add the user model so after adding this user model here this user model has been imported now let's add user model dot Find one and in this method let's provide one object where we will add email property so we have provided this email now
if any user is available with this email ID then that user will be stored in this variable that is exist and if the user is not available then this exist variable will be undefined so after that here we will add one if statement and here we will check If exist has any data in that case we will generate one response so to generate the response just add return response. Json and here let's add success property that will be false after that we will add one message property and here we will add user already exist after
adding this it will terminate this function here only and it Will generate one response where the success will be false and in the message it will add user already exist and if any user is not available with this email ID then it will execute the function further so after that here we will check if the users's email and the password is valid or not so to check that let's add one comment and here we'll add validating email format and strong Password after that here we will add the if statement and and here we will use
the validator so first we will import the validator for that just type import validator from validator package after that from here let me remove this condition and here let's add not validator do is email and in this one we will provide the email that we will get from the request. Body if our email is not validated in that case we will generate one response so just copy and paste it here here we will add the message and in this message let's provide please enter a valid email if the user's email is invalid then this message
will be displayed on the website after that we will create another copy of this if statement and here we will check if our Password. length is less than eight character in that case we will generate one response so let's add please enter uh a strong password if the password's length is less than 8 character then this will execute the function termination at this point and it will generate one response where the message will be please enter a strong password now if the email is valid and The password is also strong in that case we will
create the account for that user so before creating the account we have to Hash this password and we will store the hashed password in the database for that here we will use the bcrypt package so first we will import the B Crypt package so just add import by Crypt from byp we will add import bcrypt from B Crypt package after that here we will add one Comment that will be hasing user password Here we will generate One Salt so just add const salt equal to await here we will use by Crypt do generate salt function
after that in this function we have to provide the number we can set it from 5 to 15 if we provide larger number it will take more time to encrypt the password so let's add 10 so after that it will create one salt And using this salt we can has the users's password so to has the password let's add cons has password equal to await and here we will use bcrypt dot has function and in this one we have to provide the password and we have to provide the salt that we have created here so
if we provide Salt then we'll get the hashed password in this variable that we can store in our database now we have the has password user's email and user's name now using these properties we can create the user so to create the user just add const new user equal to here we will use the new keyword then we will add the user model and in this one we will add one object where we will provide name Property email property and password property here we will not use the original password Here we will use the hashed
password so in this password property we will provide hased password after that we will see save this user in our database so just add const user equal to await and here we'll add new user do save method using this Method so after adding this our new user will be stored in the database after storing the user in the database we will provide one token using that we can user can login in the application so for that here we will create one variable where we will add the name token and in this one we will store
one token that we will create using the ID property of this user so whenever the user will be created then in their Property onecore ID property will be generated by default so using this ID we will generate one token so to generate the token we will create one add function so here we'll add const create token equal to here we will pass the user ID and in this function we will add return and here we'll return the token That will be generated using the JWT package so first we have to import the JWT so just
add import JWT from Json web token package after this return statement just add JWT DOT sign method and here we will provide one object where we will store the users ID after that we have to provide one JWT secret key that we will create Manually so the JWT secret should be one a string using that JWT will sign the data and create the token so let's open EnV file and here we'll declare one variable with the name JWT Secret so here we will create this JW tore secret equal to greatest stack and we will use
this string as zwt secret after that we will come back to the user controller.js file and here let's provide process. EnV do JWT Secret after that we will use this function to create the token so here simply add create token and while calling this function we will provide user doore ID that is autogenerated in the mongod DB database so after creating this token we have to set this token as a response so just add response. Json let's add the curly bres and here we will provide success property that is True then we will provide token
that we have created here so if we get any error in this process then this cat block will be executed so in that case here we will add console log and log this error with that we will generate one response also using the Json method and here we will pass one object where we will add the success Falls and here we will pass one Message that will be error. message so we have created the controller function for the user registration now we will test this API so to test this API let's open Thunder client click
on new request here we will select the type post and here we will provide HTTP Local Host Port 4,000 SL API SL user SL register after that in this body we have To send the users name email ID and password so we will send this property as a Json so just add cly bres here we will add the name property so in this name let me add great stack then we will add the email property so here let's add user. great stack at gmail.com then we have to provide the password so let's add Password and
here we will provide any password like 1 2 3 4 5 6 7 8 and if I click on the send button so now in this response you can see success true and here we have one token so this API is perfectly working now if I click on this send button again so now we are getting the Eder message you can see success Falls and in this message we have user already exist now we have already created the user using this email ID now we cannot Create the another account using the same email ID now
if I change the email ID let me update it like demo gmail.com and click on this send button then another account has been created with this email ID and here we have the success true and we have another token here suppose we will create another account using demo buun at Gmail and reduce the password length less than 8 so if I click on the send Button here it is creating the account so let's check this user controller here we have added password. length so here we have to correct this spelling l n th save the
changes and if I add another email ID like demo 2 and here we have the password from 1 to7 and click on the send button now you can see the success Falls and now we have the message please enter a strong password so this logic is also working and if I set the the password up to 8 Digit then click on the send button then it will create the account so this registration API is perfectly working and now if I open the web browser open new tab and we will open mongodb let's open this after
that we will log in on this website login with Google after that we'll click on browse collections so here we have one entry called e-commerce and in this one we have this Users collection and in this collection we have total four users here we have created the account using this email ID user. grest atgmailcom so this account has been created then we have the demo at gmail then you can see we have total four users in this user we have the name email ID and in this password we have the hashed Password then we have
the cart data that is one object and in this object there is no data now we will delete other users after that we will come back to the vs code editor and here we will create the login user controller function using that we can get the users email ID and password and if the user is genuine then we'll generate one token so here first We'll add the TR catch Block and in this Tri block first we will get the email and password from the request. body so just add const email password equal to request. body
after that we will check if an user is not available with this email ID then we will generate one response so to check that just add const user equal to await then we will use the user model do find one and in this one we will add the object where we will provide email Address if any user is available with this email ID then that user will be stored in this variable here we'll add one if statement and here we'll add not user if the user is not available in that case we will generate one
response so let me copy this return statement and paste it here and here we will add the message user does not exist if the user is available then this Function will be executed further and it will match the user's password so just add con is match equal to a wait and here we will use the bcrypt dot compare function and here we have to provide password that we are getting from the login form and here we'll add user password so this is the password that is saved in our Database if it is matching then this
each match variable will be true and if it is not matching then this each match will be false so here we will check if and let's add each match if it is true let's generate one token and we will send that token to the user so to generate the token simply add con token equal to create token and here we have to send the users ID so just add user doore ID that we will get from the database after that here we will generate one response with here we will provide one object where we'll add
the success property true and here we will add token if these passwords are not matching it means the user is trying to login with incorrect password so in that Case we will add the Elsa statement and if the password is not matching we will simply generate one response so just add response. Json here we will add the object where we will add the success false and here we will add the message property that will be invalid credentials if we get any error in this process then this catch block will be executed so in that case
we will console Log the error and will send one response also so just copy it and paste it here now we have created the controller function for the login user now just test it so let's come to thunder client here we will select the post method and here we will add the API endpoint that is Local Host Port 4000 API user SL login here we have to provide email ID and password from this body so we have provided the email ID here user. grest Gmail.com and if I click on the send button so now you
can see success true and here we are getting one token if I click on the send button multiple times it is generating the token because we can log on the website multiple times and if I provide the incorrect password like 789 click on the send button here we have the message success Falls and in the message we have the invalid Credentials and if I provide any incorrect email ID like Gmail dodev then click on the send button now we have the message user does not exist so this login API is also working fine so here
we have created the user login and user registration feature after that we will create the controller function to add the products for that in this controllers folder we will create a new file and Write the file name product controller.js in this file we will create four controller function first one will be add product second will be total product list third will be remove product and the fourth one will be for getting the single product details so here we'll create four controller functions so first We'll add one comment and here we will Type function for add
product here we will create one Arrow function so just add const add product equal to and it will be one asnc Arrow function in the parameter we will add request and response then create this AR function similarly we will create one copy of it here we will add the comment function For list product and the function name will be list products so just add list products after that let's paste it again here we'll add the name remove product and in this comment let's add function for removing product now paste it again and here we will
add the comment function for single Product info and here we will add the function name single product so here we have created four functions now we will export these functions from this file so just add export curly brushes and here we will add list products add product remove product single product function after that using these functions we will create the route for That in this routes folder we will create a new file and here we will add the name product route. JS here first we will import the express so just add import Express from Express
package after that we will import all four functions that we have created in this product controller.js file so let me copy this we will come back to the product Route. JS we will add import from double do/ controllers folder SL product controller.js file so we have imported all four functions after that we will use this Express package to create one router so to create the router let's add const product router equal to Express dot Router after that using this product router we will create multiple routes so first we'll create the route for the product add
so just add product router dot it will be one post method here we'll add the endpoint path so that will be slash add and here we will add the controller function that is ADD product now let's create the copy of this code and here we'll add the endpoint SL Remove and here we'll add the remove product function now let's create another copy here we will add slash single and here we will add the function single product next we have to create the route for this list products and for that one we'll use the get method
so just add product router Dog and here we'll add the endpoint /list and here we will use list products function so we have created four routes using these controller function after that we have to export the product router and we will use that in the the express server so just add export default and we will export this product router now we will save this file and come back to the server.js file and after this user inpoint let's add one more inpoint so just add App.use here we will add/ API SL PL product and here we
will use comma then write product router we will select it from this suggestion so this product router has been imported from this routes folder we will save the changes now we have created this routes and here we have the product controllers for the adding product list product remove product and single product info so we have to add the logic in these Controller function so first we will add the logic for the add product function to add a product we will create a middleware using molter so that if we send any file as form data then
that file will be passed using molter for that in this middleware folder we will create create a new file with the name m. JS here first we will import molter from molter Package after that here we will create the storage configuration for that we will use disk storage so just add con storage equal to multer dot disk storage and here we will pass one object where we will Define the file name property in this file name property we will store one function so let's create one function in this parameter we will get request file And
one callback function so in this function simply call this call back function and in the first parameter we will add null in the second one we will return our file name so just add file do original name now using this disc storage we will create one upload middleware so simply add const then create one variable with the name upload here we will use the molter package and in this one simply provide One object and here we will provide our storage so we will type A Storage that we have created here here we have to keep
the file name storage else this middleware will not work now we have to export this upload middleware so just add export default upload so we have created the middleware now we will use this in our product route so we have to use this middleware In this add product route because on this route we have to send multiple images that will be passed using the multiple middleware so we have to provide this middleware in this route which is/ add here we will add the comma and Within These two comma we will add upload middleware that we
have created here so after adding it you can see this file has been imported here we will add Dot Fields Method using that we will process the multi-art form data so we have to add the multiple images in the route so let's add one aray and here we will Define one object where we will add the name property and here we have to provide the field name where we will send the images so first We'll add the image one after that we will Define Max count property that will be what [Music] one now we have
to copy this object and let's add the comma and paste it in the second image we will add the field name image two and here also the max count will be one then add comma and paste it again here we will provide the image 3 provide the comma and paste this object again and here we will add the image 4 this is the field name so we have Added this multer middleware that will process the multi-art form data after that we will come back to the product controller.js file and here we will add the logic
using that we can add the product in the database so here let's add the TR catch block in this Tri block first we will get the product details like name description prices from the request. body for that Let's add const curly Braes and here we will get the name description price category subcategory sizes and best seller property from request. body after that we have to get the products image that we will get from the request do files so we will store the files in variables so first here we will Create one variable with the name
image one so just add const image 1 equal to and we will get the image from request. files dot image 1 and here we will use the first element this image one will be one aray and from this aray we have to get the first element so the first element will be at the index zero similarly we will create three other copy of this code here we will add Image two image two here image three and image three then image 4 and image 4 after that from the body we will get the product details and
here we will get the images after that here we will add the console log to check these details so let's add log and in this console log first we will display the details that is name description so Let me copy all these things and paste it here after that here we will add one more console log and here we will display these images so let's add image 1 image 2 image 3 and image for after that here we will generate one response so for now let me send one empty object and if we get any
issue in This Tri block then the catch block will be executed so just add response. Json we will will where we will add the property success false and here we will add the message property where we will display error do message after that we will add the console log where we will log this error now we will test this API whether these product details and Imes are coming in this function or not so let's Open the Thunder client we will click on new request we will select the type post and here we will use HTTP
Local Host Port 4,000 SL API SL product slash add here we will send the data in body where we will send the form data and here we'll select this field files so that we can send the files also in this form Data so first we will add the field name that is name description price category subcategory sizes and best seller here we will add the name let's add the name testing name here we will add description testing description then we will add the price 10 then we will add the best seller we will set it
true then we have to add the category Subcategory and sizes here we will add category subcategory and sizes in this category let's add Main in the subcategory we will add top Vier in the sizes we will send one array here we will add one thing that is medium so we have added these details next we have to send the images for that here we will add the field name that is image One we have to use the same field name because we have added the same thing in the middle wear then we have to add
image 2 image 3 and image four after that we have to select the images so let's go to the front end folder SRC assets folder and let me select these images so let me select the first one then we'll select the second image let's select the third Image now select the fourth image so we have added one image in all field name and here we have provided the product details after that if I click on this send button here we have one response where you can see the empty object and in this terminal here the
back end is running so in this terminal you can see we are getting testing name testing disc description price category subcategory sizes and best seller value true and After that we have all the images right we have detail of all four Images field name original name encoding mine type destination file path and size after that if I don't send any image like un check this image 3 and click on this send button here we are getting one error cannot read the property of undefined so to solve this error we will come back to the product
controller.js File and here when we are getting the error from file here we have not sent the third image and we are trying to access that file that's why we are getting this error so to solve this error here in all four Images tag let's add request dot files dot image and here we will add the and operator now let me update the name image 1 image 2 image 3 and image 4 here what we are doing we are checking if the image one is available in the request files then we will store that image
in this image one variable similarly here also we are doing the same thing if the image two property is available then from that property we will get the image and store it in this image two variable so after adding this we should not get the same error if I save the changes and let's Click on this send button again so now here we are getting one object and if I expand this terminal so here we have the product name that we have sent then we have three images details you can see we have sent only
three image so we have not provided the third image that's why here we are getting undefined from here if I uncheck this image 2 and image 4 we are sending only one image now here we don't have any error and Here we have the first image and for other image we have undefined so this logic is perfectly working now we have to store these data and images in the database but in the database we cannot store the image so first we have to upload these images on the cloud NY and from the cloud NY we
will get the URL and we will store that URL in our data way so to do that here we will create one array so let's add const and the AR name will be Images and here we will create this aray and in this aray we will store image 1 image 2 image 3 and image 4 so let me copy this and paste it here in this array so in this array we have a stored all all the images after that we will add do filter method and here we will pass one add function where we
will pass the individual item and here we will check if the Item is not equal to undefined then only we will store that image in the array so we have added this logic now from this console log remove these images 1 2 3 4 and just provide this images so just add console log images now if I save the changes so then the server will be restarted after that here if we select two image click on the send button now here we Have product details then one array and in this array we have only two
image and other two image that was undefined has been removed because here we have added the filter method now we have one array and in that array we have images that we will send from the admin panel so like if we have only one image then we will upload only one image and if we have three image or four image Then we will upload all four images on the cloud NY now we have created this array next we have to upload all these images on the cloud Nadia storage and from there we will get the
URL and we will store that URL in our database for that here we will create one variable with the name images URL here we will add let images URL is equal to a wait then we will use promise.all Method and in this one we will return our images URL and we will store that in this images URL aray so for that just add images. map method so on this images we have added map method here we will pass one async Aro function and in this parameter we will send the individual item after that here we
will create one variable with the name Result and here we will add a weight and here we will use the cloud NY so first we have to import the cloud NY package so to import that just add import Cly bres is V2 as cloud nudy from cloud NY package after that scroll down and here we will add let result equal to await and here we will use cloud NY dot uploader Method here we will use dot upload function after that here we have to provide the path of our image so to get the path of
the image simply add item do path as you can see in this terminal we have the path right so we have to provide this Path property here after that here we have to define the resource type for that just add curly brushes resource _ type and it will be Image after that we will get the result and in this result we will get one secure URL that will be our image URL so we have to store that URL in this image URL areay so simply add return result Dot secure URL after adding this all these
image 1 2 3 4 will be uploaded on the cloud n storage and we will get the URL and all these URL will be stored in this images URL aray now we will check it so here in this console log let's add images URL now if I save the changes it will restart the ser now after restart we'll select all four images and click on this send button so here you can see all images has been uploaded and here we are getting the URL of all images if I check this one let's open this URL
in web Browser so you can see the same image that we have sent it has been uploaded on the cloud Nadia storage and we can access it using these URL now if I send only one image click on the send button so now you can see the product details and in this aray we have only one URL so this logic is perfectly working after that we have to save all these data in the mongod DB database so To save these data in the mongod DB let me remove these console log and here we will create
one object with the name product data so just add con product data equal to it will be one object here we will add the name property description category then we will add the price the price will be number but here we will get the price as a string from the form data so we have to convert it so just Add number and here we have to add the price property and here we will add the price after that we will add the subcategory then we'll add the Bas seller property here we'll get the best seller
we have to store the best seller details as true or false but from the form data we will get the best seller as a a string so here also we have to convert The string as Boolean so to convert it just add tary operator here we will check if our best seller is true in that case we will simply return true that is the Boolean data and if this best seller is not equal to True string then we will return false so using this turn operator this data will be converted in the Boolean after that
we have to add the sizes sizes will be one aray so that when we send this aray using form data So before sending that we have to convert these sizes using json. stringify method into string when we'll get this string we have to again pass it and convert it in one aray so for that just add Json dot parts and here we will add sizes here we are adding this because we cannot send the array directly as form data so from the front end we will send the sizes and that will be converted in the
string and here we are converting it From a string to array using json. pars after that we will add the image property where we will store the products image so here we will store this array where we have the public URL of the image for that simply add images URL after that we will add the date here we will add the current date for that just add date dot now that will return one Tim Stamp and the type will be number so before adding this product let me console log this product data so just add
product data to add the product we will use the product model that we have created here so here we will add con product equal to new then we will use the product model so first we have to import the product model here so just add Import product model from and here we will use double dot SL models folder SL product model. JS using this our product model will be imported and here we will use this product model in this product model we have to provide the product data and here we have added this format where
you can see name description Category prices size images this format should match with the product model so it will create one project now we will save this product in the database for that just add await product do save after that here we are generating the response so in this response we will add the success property that will be true and after that we will add the messages property and here we will add one Message that is product added now we will save this file now let's come back to the Thunder client here we have added
these product details and here we have added the images let me send all images and click on the send button so here you can see processing and after that you can see the response success true and in the message product added and here in this terminal you can see The product details where you can see the name description category price subcategory best seller sizes then image array then date property so our product will be saved in the database let me verify it so let's come back to the mongodb database again and here we will click
on browse collection here if I open this first we have the users collection now we have one more collection which is products where you can see one product that we Have just added using the API so here we have the image array here we have product size date best seller property and other details so this add to product feature is perfectly working and we have created this add product route also right now this API which is ADD product is publicly open anyone can access this API and add a new product so later we will add
the Authentication on this route so that only admin can add the product using the admin email ID and password after that we have completed this add product feature now we'll create the feature for list products before creating that let me come back to this thunder client and we will upload the same product multiple times so here let's add the testing name to click on the send button then add testing name three then Send button so here we have added product for three times now we'll create the API for this list products if I come to
database click on the refresh now here we have three products available now we will return all these three product in one aray using that we can display the product on our front end so to create the feature of this list products first we'll create one try Catch block so just add try catch Block in this try block we will create one variable with the name products in this one we will store the products data for that simply add a weight here we will use product model dot find method and in this one simply add one
object in this one we will add success true here we will provide this products Aray if we get any eror in this process in that case this catch block will be executed so simply we will add this console log in this catch block and we'll also display the success false message error so we have created the functionality for the list products now we will test it so for that let's go to Thunder client close this request and create a new request we have created this endpoint at Get method and here we will provide the URL
HTTP Local Host Port 4,000 SL API SL product/ list if we hit this API then here you can see success true and here we are getting products property and in this one you can see one aray and in this aray we have three products because in our database we have only three products so you can see this is the first product data this is the second product data data and this is the product Three so this API is also working after that we'll add the logic for removing the product for that here we will add
the TR catch Block in this Tri block we will use a weit and here we will use the product model Dot find y ID and delete method we will select it find y ID and delete after that we have to provide the product ID so simply add request. body. ID when we will call this API then in the body we will send this ID where we will send the products ID after executing this product our product will be removed from the database after that here we will create one response do Json where we will add
success true and here we will add the message property that will be product removed after that Let me copy this a statement from catch block and past it here in this catch block if we get any error in this TR block then this catch block will be executed and it will add response success false and we will get the error message so we have created the API for the remove product we will test it so to test it first create a new request and here we'll select the type post and here we will add the
end Point API / product/ remove then we'll select the body and in this body we have to provide the product ID for that we'll add the CES and here we'll add the ID property and here we have to provide the ID so we will get the ID from from this response and you can also copy it from this mongod DV database suppose we have to delete this testing name three so we will copy this ID And in this request we will paste this ID in double quote then click on the send button here we have
the response success true and the message product remove mov D now if I open the database and click on the refresh now we have only two products so the third product has been removed we have only two products here now if I want to delete this one let me copy this ID and provide this ID here then click on the button again you can see the message product removed and if I click on the refresh button now we will get only one product in this database so you can see we have only one product the
second product has been removed so we have created this logic to remove the product so this API is also open so that anyone can open this API link and delete The product so later we will add the authentication so that only admin can delete the product after that we will create this function using that we can get the information of the single product for that here we will add the TR catch Block in this Tri block we will get the product ID from the request. body so simply add const curly bres here we will get
the Product ID we will get it from request. body when we will hit this API we have to provide the product ID in the body after that using this product ID we can find the product and we will send that data as a response for that here just add const product equal to a weight and here also we will use product model dot find y ID after that we have to provide the Product ID that we will get from the request. body after that our product will be stored in this variable now we have to
send this variable as response so just add response. Json here we will add the object where we will define success true then comma provide the product if we get any error in this process suppose we don't get any product Using this product ID so this cat block will be executed so let me copy this and paste it here in this catch block so in this response you can see success Falls so we have created this API for single product we will test it so click on the new request select the type post here we will
add the API endpoint HTTP Local Host Port 4000 SL API SL product/ single here in this body we have to send The product ID so let's add product ID and here we will add the ID so let me copy the product ID from this database let me copy it and paste it here after that we will click on the send button so you can see the same product details in this response if I send any incorrect ID click on the send button so here we have the message success falls in the message you can see
This error message after that we will collect it and click on the send button so now we are getting the detail of particular product so now we have created the functionality for single product API so now we have created all four apis using that we can add the product we can list the product we can remove the product and we can get the info of The Single product after that we will create the Admin authentication system to create the admin authentication we will open user controller.js file and in this admin login function We'll add the
functionality so so to create that first let's go to environment variable and here we will add the admin email and password for that let's add the admin email equal to and here we will add one dummy email ID after that we will add admin Password so let's add the variable name admin uncore password equal to let's add any random password we will save the changes so we have created two envirment variable that is admin email and admin password using these admin email and password we will create the admin authentication so first we will open user
controller.js file and in this function we will add one try catch Block in this try block first we will get users email ID and password so just add const curly bres email password we will get it from request. body after that here we will check if email is matching with the environments variable email ID so just add process. EnV Do admin email if it is matching and with that we will add the end operator and here we will provide password equal to process. EnV do admin password if both email and password is matching with the
email ID and password that we will get from the request. body in that case we will create one token and we will send that token to the admin user so just add Const token equal to here we will use JWT do sign method in this assign method we have to provide one string so let me create the string email plus password and with that we have to provide the JWT secret so we will get it from process. EnV dot JWT secret variable that we have stored here after adding this the token will be Generated now
we'll send this token to admin user so just add response. Json here we will add CES where we will add success true then we will add our token after that we will create one elsea statement here if the email ID or password is not matching then this else block will be executed and here we will generate one response So just add response. Json here we will add the object where we will add success Falls and here we will add the message property that will be invalid credentials after that if I get any error in this
try then catch block will be executed so just copy it from here and paste it here in this catch block so we have added the functionality for this admin login that we have mounted here at/ Admin now we will check this admin authentication for that let's go to Thunder client create new request here we will select post here we will use HTTP Local Host Port 4,000 SL API SL user SL admin and in this body we have to provide the email ID and password so here we'll add the email then we'll add the password so
we have to provide the email ID and password so we will add the same email ID and password that we have stored in the envirment variable so let me copy this email let me close other request so there will be no confusion so here we have the request for admin user so in this one we'll add this email ID then we'll add this password after that we'll click on the send button so this login is perfectly Working we are getting the success true and here we are getting one token if we decode this token then
we will get admin email plus password so using this token we can authenticate our admin so to authenticate the admin we will create one middleware so we'll create the middleware in this middleware folder so let's create a new file and here we will add the name admin .js so let's add admin .js we will add this middleware for those API where we need the admin permission like adding product removing product to display the orders and some other apis so to create the admin authentication first we'll import the JWT so just add import JWT from Json
web token after that we will create one Arrow function with the name admin o so just add con admin O equal to it will be one asnc Aro function here in this parameter we will get request response and next function that will be our call back function after that here we will create one function in this function we will create one TR catch Block in this triy block first we will get the token from the users request header so just add con token equal to here we will get it from request Do headers so whenever
we will call the API from the admin Au then in the headers we will add the token that we are getting from the admin login after getting the token now we will check if the token is available in that case we will continue else we will generate one response that our user is not authorized to access this API so for that just add one if statement and here we will add if the Token is not available so just add not token and here we will add return that is response. Json here we are using return
because when we return return this response then this execution will stopped here because here we are using return and returning this response then it will stop executing this function here so in this Jon We'll add the curly Braes and define success property that will be False after that we will add the message property and in this message property we will add not authorized login again if the token is available then we will decode that token so to decode that token we'll add cost we will create one variable with the name token decode and in this
one we will store our decoded string So to decode the token we will use JWT do verify method in this one first we will add the token that we are getting from the user then we have to provide the JWT secret so to get the JWT secret we will add process.env do JWT Dore secret using this we will get the string and it will be stored in this token decode and now we will verify this decoded token if I open user controller so while creating the token we have used Email plus password right we have
created one string while by adding email and password and we have stored in our data so here we will check if the dec token is equal to admin email plus admin password then we will be verified and this token will be genuine so let's add the if statement and here we will add token decode is not equal to here we will add process do EnV Dot admin email we will concat process. EnV dot admin password Here we have to collect it it will be decode if this decoded token is not matching with this string it
means the user is not authorized in that case we will generate one response so let me copy this return statement and paste it here and if it is not authorized then We'll get this return in response and if this token is matching with the email ID and password so in that case we will call our call back function that is next if we get any error in this process then we will console log the error and we will create one response so we will add this console log error then response. Json success false and error
message so we have created the admin of middleware now we will export this Middleware so just add export default and here we will add admin or now we will save this file and after that we will add this middle wear in our product route so while adding the product we have to authenticate the admin we have to add the authentication while removing the product so in these route we will add our middleware so simply add one comma and Within These commas we we will provide admin Or after selecting it this file has been imported from
middle bear folder similarly here also we will add admin or so we will test this admin authentication middleware so to test it we will open the Thunder L here we will find our product add API here it is it has been saved and after that this is the product at API endpoint Here we have the product detail and here we have the images that we have selected earlier when we used to click on the send button these products will get added in the database but now if I click on the send button here we are
getting the message not authorized login again so now we have to provide the token in this headers that we will get from the admin login now if I open this request we are loging the admin so let me copy this Token from this response and paste it here in this token property in the header now if I click on this send button now this API will work and here we are getting the message product added so now the admin middleware is perfectly working now what this middleware is doing when we are sending the token it
will check the token and if the token is valid then it will continue the process of adding the product or deleting the Product so till now we have created the apis for the add product remove product list product and single product data after that here we have created the API for the admin login then normal user login and user registration and user login then we have created the middleware admin Au and we have added the molter so now we have created the N apis using that we can build our admin Panel so to build the
admin panel we will close all these files so right click and select close saved so it will close all the saved file now in this e-commerce app folder we have back end and front end next we will create another folder with the name admin in this folder we'll create a react project so right click on this admin folder and select open in integrated Terminal and here we will type the command npm create V at latest then provide dot so it will create the project within this admin folder let's press enter here we will type y
then we will select react then JavaScript and now in this admin folder you can see the react project has has been created next we have to install the dependencies so let me copy this command Npm install paste it here so it will install the dependencies now we have this node unod modules folder in this admin folder next we have to install some other dependencies so we will type npm install and we will install the exos package then react router Dom and react to We will install these packages using the AOS we will make the API
call using this react router Dom we will create the routes and using this react toy we will Display the toast notifications after that we have to run this project so to run this project we will type npm run Dev now it will start the project on this Local Host Port 5174 right now our back end is running at Port 4,000 and front end is running at 5173 and this admin panel is running at 5174 now we will fix this port in our project so that when we run the project In any order then the port
number will be same for the admin panel Port will be 5174 and for the front end port will be 5173 so that when we stop the project and first we will start the admin panel then it will start the admin panel on 5173 and it will start the front end and 5173 so to prevent that we will come here in this v. config file so in this admin panel with do config file we will add server property and here we will add one object where we will Define Port and add the port number 5174 if
I save the changes so it will Dart the server similarly we will open front end and in this front end we will open V.C config and here we will add server property then one object and in this one we will add port 5173 now if I start our project in any order then the front end port will be 5173 and the admin panel Port will be 5174 to check this let's stop this Project using contrl C and yes and in the admin also we will add crl C and yes now if we start the admin
panel first so you can see the URL for the admin panel is 5174 and if I start the front end here the front end port is 5173 it is perfectly working now we will open the admin panel project in the web browser so you can see this default V react project is running in the web Browser now we will clear this default project and in this admin project we will add the telin CSS so let's open SRC folder and assets and remove this image after that we will open app.jsx file and clear this file now
we will type RFC snippet we will save the changes remove this app now let's delete this app. CSS File let's open index.css and clear it and here we will open index.html file and in this title we will provide forever admin panel now if I save the changes and open the web browser now our default react project is cleared and in the title you can see for admin panel now in this project we will add the support of telin CSS for that let's open a new tab and here we will search for tnd Wheat let's open
this link so the first work is to create a project that we have already created then we have to install these packages so let me copy this command let's come to vs code editor and here we are in the admin terminal we will stop the project using control C and Y and here we will paste the command then press enter so it is installing the dependencies after that again come back To the browser and copy this second command and paste it here after that in this admin folder you can see telin doc config file after
that we have to copy this code from this web page and we will open this T.C config.js file and paste it here so let me remove old config file and paste it here now save the changes open the web page next we have to add these three lines in index.css file so just copy it open the index. CSS file and paste it Here and now save the changes now we have to run our project so simply we will type npm run Dev now our project has been started and in this project we have the support
of Telvin CSS after that we will create the folder structure for our admin panel and we will insert the Assets in this assets folder so in this SRC folder let's create a new folder with the name Pages here we will create multiple Pages For the admin panel after that we will create one new folder here we will add the name components in this one we will store the multiple components like navigation bar sidebar next we have to insert the Assets in this assets folder for admin project for that let's come back to the desktop screen
and here we have one folder called assets admin and in this folder we have some Files you will find this file download link in the video description let me copy all these files and open our project folder go to admin then go to SRC then assets and paste it here let me close these tabs now we have this front end and admin panel and here all three project is running which is admin front end and back end let me minimize the terminal after that In this Pages folder we will create three pages that will be
add list and orders so right click on this Pages folder create a new file and the file name is add. jsx here we will use RFC similarly we will create another file and write the file name list. jsx here also we will use rafc we will remove this list now create another page that is orders so write the file name orders. Jsx and here also we will use rafc remove this text orders and save the changes here we have created three pages after that we will add these pages in the app component for that we
will use the react router Dom so to use the react router Dom we will open main. jsx file and here we will use the browser router tag from react router Dom after clicking here this browser router has been Imported here we will close this tag and let's wrap this app component using this browser router let me remove this react a strict mode so we have added the app component within this browser router let me save this file now we will get the support of react router Dom in our project after that we will open app.jsx
file and let me remove this div here we will use Fragments in this app component we have to add one navigation bar so to create the navigation bar we will create a new file within this components folder write the file name Navar do jsx here we will use RFC let me REM move this Navar text and now in this Navar we will add one image tag and one button tag so let me add the image and one button in this button tag let's add the Text log out and in this image SRC we will use
the logo for the admin panel so to get the logo we will use the assets we will get this assets from this assets folder assets. JS file so we have to imported so just add import C assets assets from double do/ assets folder SL Assets Now we can use assets dot logo if I I save the changes and let me Mount this component in app.jsx so let's add the nabard after adding this this nabar file has been imported now if I open the browser so here we have this logo for the admin panel and here
we have the log out link next we will add the CSS properties for our navigation bar so let me open navb Bar. jsx file first in this image tag we will add the class name property and here we will provide width where we will use the max property 10% and 80 pixel if I save the changes and open the web browser now the logo size is perfect after that we have to add the classes in this button tag here we will add the background color text Color padding we will add the padding for different screen
size then rounded full then text size if I save the changes and open the web browser so now you can see this logout button is looking good after that in this div we will add the class name property and here we will add Flex item Center padding justify Between now if I save the changes and open the web browser so now you can see the navigation bar is looking good after that we will create one sidebar component so to create the sidebar component we will create a new file within this components folder and write the
file name sidebar. jsx here we will use our afce after that we have to mount this sidebar component in this app Component so here in this fragment let's add div we will convert this fragment in div and we will provide the class name property and here we will add PG gray 50 then we will Define the minimum height screen in this one we will add the fragment and in this fragment we will add the navigation bar and after this navigation bar we will add the HR tag if I save the changes so here we have
one horizontal Line after that we will create one div and and in this one we will add the class name property and here we will add flex and width full and within this div we will Mount the sidebar component so we have added this sidebar component now let's open sidebar. jsx file in this div let's create another div and in this one we will use the naving tag for that we will use nav link we Will select it from this react router Dom so this nav link has been imported in this nav link tag we
will add the two property and here we will provide the path that will be/ add so whenever anyone will click on this link it will open slash add in this tag we will add one image tag in this image SRC we will use assets dot add icon so this assets file has been imported after that we will add one P Tag and here we will add the text add items then save the changes and open the web browser so here we have this add items if I click here we will be redirected to the/ add
path so it is perfectly working so first we will add the CSS properties for this P tag so let's add the class name property and here we will add hidden so by default it will be hidden and for the medium and above a screen size we will add display block so It will be visible then we will add the CSS in this image tag so let's add the class name we will find the width and height now we will add the CSS properties in this nav link tag so here we will add the class name
property and here we will provide Flex item Center Gap border border gray then border right zero padding and B radius if I save the changes and open the web browser so now You can see the changes in this link now we will add the CSS properties in this div so let's add the class name property and here we will provide Flex Flex column Gap padding and text size if I save the changes so now you can see some changes here so let me add CSS in this div here we will add the class name and
let's provide Width minimum height border radius if I save the changes and open the web browser now you can see this sideward and this link is looking good after that we will create one copy of this nav link let me create two copy we will copy and paste it here we will update the icon so let's add assets. order icon and in the third one we will add order icon here we will add the text list Items and in the third one we will add orders if I save the changes and open the web browser
so here we have this sidebar with three items now if I open it in phone View so right now it will only display the icon it will hide the text so now the side word is perfectly working after that we will add the logic so that when we click here and open the add Route here we have to update the route also so in the second one we will add the two property SL list and in the third one we will add two SL orders we will save the changes now we will add the logic
so that when we are at the add route then the side item will be highlighted when we are at the list then this list items will be highlighted if we are on the orders page then this orders item will be highlighted for that we will use this nav links active Property here we have added the nav links so using this nav link we can add the active property so if I inspect this web page and we are at the orders page and if I expand it so here we have three anchor links in the last
one you can see we have one extra class name which is active and in other two links we don't have the active class it is coming because of nav links so if we change the route we will come to add route now you can See this active class name has been added in the first anchor link now we will use this active class name to apply the CSS properties so let's open index. CSS file and here we will add active class name and here we will just provide background color and provide this color code after
that we have to add the Border color and provide this color code if I save the changes and open the web Browser so now you can see the first item has been highlighted if I click on the second one now this list items has been highlighted if I click on orders this orders has been highlighted so this logic is perfectly working and it is also updating the route after that we will add the support of custom font in our project for that open new tab and search for outfit font from here we will open Google
fonts website we will click on get Font get imit code click on import and just copy this statement and paste it in our index. CSS file at the top after that here will add the CSS properties for all the elements here we will use the font family outfit if I save the changes and open the web browser so now all the fonts has been updated now we can close this Tab after that we will set up the routes using these pages that we have created here we have created three pages so to set up the
route we will open app.jsx file and after this sidebar component we will create one div and in this div tag let's add the class name property and here we will provide width 70% margin left margin by then text colored then text size that is base within this div we will set up our route so before setting up route we have To import the routes and Route tag from the react router Dom package so just add import curly brasses routes comma route and we will get it from react router Dom package after that in this div
we will create one routes tag so let's use this routes tag and Within These routes tag we will create multiple route so simply use the route tag close this tag and here we Will add the Path property that will be SL add on this path we will add one element and in this element we will provide the page component which is ADD add. jsx so to load this component here we will add the opening Arrow WR add here we are getting the S add component from the pages after selecting it this file has been imported
and just close this tag so like this we can set up the Out now let's create one copy of this route tag and here we will add the path list and insteed of add we will add list we will select it from the suggestion so this file has been imported now let's create one more copy this will be/ orders and in this element we will use the orders component let's click here so this orders has been imported now if I save the changes now we have completed the route setup now if I click on this
add item so in this right side it will load the page that we have created here at. jsx if I click on orders then it will load this orders page after that we will add the authentication in our admin panel so to add the authentication in the admin panel first we will create a new component in this components folder let's create a new file with the name login. jsx so whenever we are not authenticated Then this login page will be displayed if we have successfully authenticated then we will display other UI so here we will
use the rafc command let me remove this text from this div after that we will open app.jsx file and here we will implement the logic so that when we are not authenticated then we will display the login component for that here we have to create one state variable the name will be token so just Add cost token seter function name will be set token equal to user State and initialize it with empty string after that using this token State here we will use the tary operator when the token is available then this component will be
displayed and if the token is not available then the login component will be displayed for that here we will use The Turner operator so let's add the curly bres we will add token and we will check if the token is equal to one empty string in that case we will return login component when we clicked here this login component has been imported if the token is available in that case we will add the colum and after this column we will place these code so it is in this Fragment so just cut this and paste it
here after this colon we will right click and select format document so now it will be formatted now if I save the changes and open the browser so right now the UI is clear because we don't have token right now if I type something in this then this UI will be displayed so this logic is perfectly working so let me add the empty string here after that we will Design our login Page so we will open login. jsx file in this component file we will create another div and in this day we will add one
H1 tag and here we will add the admin panel after this H1 tag let's create one form tag let me remove this accent property within this form tag we will create One D in this div we will add the P tag and let's add the text email address after this P tag we will insert One input tag and the type will be email then we will add the placeholder and in this placeholder we will type your at theate email.com then we will add the required attribute now let's create one copy of this div and here
we will add the type password and in this placeholder let's add enter your password after that here also we will type Password after this D tag here we will create one button tag and the button type will be submit now let's add the button text login so we have created the HTML structure for this form let's open the web browser so here you can see we have this input Fields now we will add the CSS properties so first we will add the CSS property for this input field so in both input field let let me
add the class Name here we will provide rounded width full padding border border color outline none if I save the changes and open the web browser so now you can see the changes in this input field now we will add the CSS properties in these P tag so in both P tag let's add the class name property here we will provide text a small font Medium text color margin bottom if I save the changes and open the web browser so now you can see the changes in this paragraph text after that we will add the
class name property in this div so in both both div let's add the class name and here we will provide margin bottom Min width if I save the changes and open the web Browser so now we have some space at the bottom now we will add the CSS properties in this H1 tag so here let's add the class name property and let's provide text to excel f f w margin bottom we will save the changes so you can see the changes in this title now we will add the CSS properties in this div so here
we will add the class name property here we will Provide background white sadow border radius padding and maximum width if I save the changes and open the web browser so now you can see this form in one container now we will move this in the center so to move it in the center in this div we will add the class name property and here we will provide mean height screen Flex item Center justify Center and width full if I save the ch and open the web browser so now you can see this container in the
center after that we will add the CSS properties for this login button for that we will open the vs code editor and in this button tag we will add the class name property that will be margin top width full padding Y and padding X then border radius text white and background black if I save the changes and open the web browser so this Login button is also looking good so now we have designed the login page now in this component we will call the API where we will authenticate the user admin for that here we
will create one Arrow function with the name on submit Handler and that function will be executed when we will submit this form so just add const on submit Handler equal to and it will be one asnc Aro function here we will add one TR catch block and after that we will link this function with our [Music] form for that in this form tag we will add the onsubmit property and here we will add onsubmit Handler function after that if I save the changes and click on this login then it is asking please fill out this
field so here if I add demog Gmail.com and click on the login then it will reload the web page so to prevent this reload we will come back and in this Tri block let's add e do prevent default after adding this when we will submit this form it will not reload the web page after that we will create two State variable that will be email and password for that we will add const email set a function name will be set Email equal to user State and initialize it with empty string similarly let's create one copy
of this and the state variable name will be password and set function name is set password and it is also empty string now we will link this state variable with our input Fields so that when we add any changes in this input field then it will update the email and password in the estate variable so in The input tag let's add the on change property here we will pass one Arrow function where we will pass the event and here we will call the set email function and here we will provide e. target. value after that
for both input field we will add the value property and here we will add the email so now in this second input field we have to update set password and the value will be Password after that we will verify if our email ID and password is getting saved or not so simply we will add console log where we will log the email and password so here if I add any email ID demo gmail.com and write any password and let's click on inspect open console and click on this login button so here we are getting email
ID and password now our email ID and password Is getting saved in these State variable and using these State variable we can access the email ID and password in this function let me reload this web page now let's come back and remove this console log and here we will make one API call so before making the API call let me open app.jsx file and before this app function we will create some variables so the first variable will be backend URL so just add const backend URL and in this one we will store our Backend address
we will we will get this backend URL from the environment variable so here in this admin project we will create the envirment variable so in this admin folder we will create a new file that is EnV file and here we will create one environment variable with the name V backend URL here we will store our backend URL so just add HTT GP column sl/ Local Host Port 4,000 so this is our backend URL we have saved here now in this variable backend URL we will provide this envirment variable so just copy it and to use
the envirment variable simply add import. meta do EnV do variable name that is V vacant URL after that we will export this variable so that we can use it in any component after that we will come back to the login. jsx file and here we will make the API call and using this email ID and password we will authenticate the admin for that here let's create one variable with the name response equal to await and here we will use the AOS after clicking here the AOS package has been imported automatically and here we have to
add the type that is post and then we will use the backend URL so here we have the option of Backend URL if I click here then this backend URL has been imported from the app.jsx file after that in this backend URL we have to concatenate the API endpoint so just add plus and we will use one a string so just at/ API SL user SL admin after that here we will send email and password in this bracket we have provided email and password that will be added in the request Body after that we will
add console log and we will log this response if I save the changes and open the web browser and if I open inspect go to console and if we provide any email ID admin at forever.com and here we will provide password and click on on the login so here we have this response where we have one data dat success true and we have one token so we have used the correct email ID and password that we have provided in the involment variable of the backend project you can see we have added admin email and password
if we use this then the admin will be authenticated now we will store this token in our token state so we will come back to the vs code editor and remove this console log and here we will add the if statement here we will check if our response. data do Success is true it means our authentication is successful and we are getting one token so we have to save the token in this estate variable that we have created in the app component for that first we have to pass this set token seter function as props
in this login component so just add set token equal to CES set token after that we will destructure it in this login. jsx file so to Destructure it we will add the cly SS and provide set token after that here we will call the set token function and here we will pass response. dat. token if the response.data do success is false in that case here we will add the elsea statement and here we will display one toast notification so to display the toast notification we will use the react Toasttify so we will search for react
toasttify now let's open this website here we have installed this package while creating the project after that we have to set up it so to set up this one let me copy this line from here after that we will open app.jsx file and after this import a statement just paste these two lines after that let me remove this toast from here we need only toast Container after this div here we will add this toast container tag now we have completely set up the react toasttify now to display the toast notification let's open login. jsx file
and here we can can display the toast notification using toast function here we will use the dot error option so just add toast. eror and just pass the response. data do message if the response data is false Then we'll get one message and we will display that message in the notification if we get any error in the dry block then this cat block will be executed so here will add the console log and error and with that we will display one toast notification where we will provide error. message if I save the changes and open
the web browser if I reload the web Page if I add our email ID that is admin atate forever this is one dummy email ID then we will add the correct password and click on login button now we will be logged in and now our token will be saved in this token state after that if I reload the web page again we will be logged out automatically so to solve this problem we will use the local storage For that here we will add one use effect in this one we will pass one Aro function and
here we will add the dependency array that is token so whenever this token will be updated then this function will be executed and we will store that token in the local storage so just add local storage do set item then provide the key name token after that we will add the token so whenever the token will be Updated in the local storage also it will store the data after that from this user State remove this empty string and here we will use the local storage do get item and here we will check if we have
the token available in the local EST days in that case we will provide that token in this token State variable so after this question mark we will paste this one local storage. getet Item token and if it is not available in that case simply add one empty string so now whenever the state variable will be initialized it will check the local storage and if the token is available in the local estage then it will store the token in this state variable and if the token is not available in the local storage then it will store
empty string now we'll save The changes and open the web browser and if I reload the web page now we are logged out and here we will add the email ID and password so let's add admin at forever.com and let's add the password click on the login button now we are logged in and if I reload the web page still we are logged in now we have to create the functionality for the log out button for that in this navard let's add the props that is set Token and here in this add list and order
we will pass the props that is token so whenever we will make the API call for the product ad list product and list the order then we have to provide this token after that we have to save this file and we will open na. jsx file here we will D structure set token after that in this button tag we will add the on click property here we will provide one addo Function after that we will add the sit token function here simply provide one empty string if I save the changes and open the web browser
before we log out let me save this password now if I click on this log out button now we are logged out from our website and here again we have this login form and if I click on this login button now we are logged in on the admin panel so this functionality is perfectly working now we will create the I to add The product for that we will open add. jsx file we will convert this div into form tag in this form tag we will create one div in this div we will create one paragraph
tag and here we will add the text upload image after this P tag here we will create one div and in this div tag we will create one label tag in this label tag let's add one Image tag and in this image SRC we will use assets. upload area image so to use this assets we have to import it so just add import import curly assets from double do/ assets folder SL assets file after that we will provide do upload area after this image tag we will create one input tag and the type will be
file after that we will remove this name Property and here we will add the ID property that will be image 1 after that in this HTML for we will provide this ID so here we will type image one after that we will make this field hidden so just add hidden if I save the changes and open the web browser we will open our admin panel that is running on Local Host Port 5174 now click on this add items so here We have one upload image and one upload area image after that let's create one copy
of this label tag so we will add total four label tags after that we have to update the ID it will be ID 2 ID3 and ID 4 that is image 4 now in these HTML 4 Also let's add image 2 image 3 image 4 if I save the changes and open the web browser so here we have total four upload Icons now we will use this label tag while uploading the image if I click here it will open the window to upload any file now we will add the CSS properties for this section so
just come back so first We'll add the CSS properties in these image tag so let me select all four images and in this image we will add the class name property that will be width if I save the changes and open the web browser so now you can see the width Has been reduced after that we will add the CSS properties in this div tag so let's add the class name property here we will provide flex and GAP two if I save the changes now this section is looking good after that we will add the
CSS properties in this P tag so here let's add the class name property here we will provide margin Bottom after that let's add the CSS properties in this form tag so here let's add class name Flex Flex column width full items are start then provide Gap three we will save the changes after that we will create multiple input Fields using that we can add the product data so before this closing form tag we Will create one div tag and in this one we will create one p tag and here we will add the text product
name after this P tag here we will create one input field here we will add the type text then add the placeholder property that will be type here we will set it as required and here if I save the changes and open the web browser so so here we are getting The product name and one input field after that we will add the CSS properties for this input field so here let's add the class name property here let's provide width full Max width padding save the changes after that we will add the Border in this
input field for that let's open this index. CSS file and here let's add the select tag input Tag and text area for these items let's add the Border one pixel solid and add this color code then we will add the outline color then provide this color code then provide the B radius so the B radius will be 4 pixel if I save the changes and open the web browser now we have this border and when we select it we have this outline now in all project we will get This Border in all the input Fields
text area and select box now close this file and now in this P tag let's add the class name property and here we will provide the margin Bottom now in this D we will add the class name property and here we will provide withd full if I save the changes and open the web browser now this input field and this B Tag is looking perfect after that let's create one copy of this div here we will add the text so it will be product description after that let's remove this input field and here we will
add text area after that let's change this placeholder here we will provide right content here if I save the changes and open the web browser so here we have one text Area after that here we will create one div in this div tag we will create another div in this div we will add one P tag and here we will add the text product cat after that here let's add the select tag let me remove this name and ID and here we will add the three options tag so just add option into Three in the
first option tag we will add the text Main and and in the value also we will add men similarly in the second one we will add wom and in the value also we will add women in the third option tag let's add kids and here also we will add kids if I save the changes and open the web browser so here we have one drop- down select button similarly let's create one copy Of this div here we will add the text product in this P tag we will add the text subcategory now we will update
this value and text in this first option here we will type top Vier now in the second one we will type bottom Vier in the third one we will add winter wear if I save the changes here we have one one more select Tag after this diff tag let's add another diff tag and here we will add the paragraph tag and here we will add the product price after this P tag we will create one input field and here we will add the type number after that here we will add placeholder property here we will
add any number like 25 if I save the changes and open the Web browser now here we have added the category subcategory and price field next we will add the CSS properties for these elements for that here we will use this select tag and in these select tag we will add the class name property and here let's provide the width full PX3 py2 save the changes now the select tag is looking Good after that we will add the CSS properties in these P tag so here we will add the class name property let's provide margin
bottom to so we have some space now we will add the CSS properties in this div so here let's add Flex Flex column for the small and above screen size we will add Flex row then we will provide Gap Two then we will provide width full for the small and above screen we will add Gap 8 if I save the changes and open the web browser now these elements are aligned horizontally now we will add the CSS properties for this P tag and this input field for that in this P tag let's add the class
name property and here we will provide margin bottom two and in this input Field we will add the class name property and here we will add width full PX3 py2 for the small and above a screen we will provide width that is 120 pixel if I save the changes and open the web browser now this section is looking good after that come here and before this form tag we will create one div here before this closing form tag we will create one div and within this div We will create one P tag here we will
provide product sizes after this paragraph tag let's create one more de in this div tag we will create one more div tag and in this one we will create one P tag in this P tag we will display multiple sizes so in this P tag let's add s means a small let me copy this div and paste it here will paste it four Times we will paste it again now the second one will be medium third will be large next one is Excel and the last one is double XEL if I save the changes so
here we are getting all the size vertically now we will add the CSS properties for this product sizes for that in these P tag let's add the class name property and here we will provide background color that will be BG Slate 200 then we will add the padding X and Y then cursor pointer after that in this D we will add the class name property and here we will provide flex and GAP three if I save the changes and open the web browser now you can see these elements are aligned horizontally now in this P
tag let's add the class name property it Will be margin bottom two save the changes so now we have a space now this section is looking good now using this section we can select this size while adding the product now before this closing form tag let's add another div here we will create one input field and the type will be checkbox in this input field we will add the ID property and here we will add best Seller whenever we will select this checkbox then that product will be added in the best seller category so after
this input field we will add one label tag and here we will add the text best seller so we have provided this ID here in this HTML F now here let's add the text add to best seller if I save the changes now here you can see see this checkbox and text in this one we will Add the CSS properties so first we will add the CSS properties in this label tag so let's add the class name we will add the cursor pointer after that in this div tag we will add the class name property
and just provide Flex Gap two and margin top two now this checkbox and this text is looking good next we will create one button tag using that we can submit this form so let's create one button with the Type submit in this button text we will add the text add then add the class name property and here we will provide width padding mark margin background and text color if I save the changes and open the web browser this button is looking good if I click on this button then it is asking to add the name
in this product name field because here we have added required now we will create the St Variable and in that a state variable we will store the product data for that let's come back to the vs code editor and here we will create the state variables first we'll create four state variables to store all four Images so just add const image 1 seter function name will be set image 1 equal to user state and initialize it with bullan data False now we will create three other copy of this statement here we will add the name
image 2 set image 2 then image 3 set image 3 then image 4 set image 4 here we have created four state variables to store all four Images now we'll create the state variable to store the product name description price category subcategory best seller and Sizes so just add con name set name equal to user State and initialize it with empty string similarly create create another state variable for description so just so just add con description set description equal to user State and initialize it with empty string after that we will create one more State
variable for the product price so just add cost price set price equal to user State and it will be empty String after that we will create the state variable for category and subcategory so just add con category set category equal to user State here we will use the string men now create another state variable that is subcategory set subcategory equal to user state it will be by default top Vier after that we will create the state variable for best seller so just con best seller set best Seller equal to user State and by default it
will be false if we have to add any product in the best seller then we will make it true then product will be stored in the best seller category now we'll create the state variable where we will store multiple sizes so just add const sizes set sizes equal to user State and initialize it with empty aray so we have created multiple State Variables now we have to link these State variable with our UI so to add this variables in UI first in these input Fields where we are getting the images in this input field we
will add the onchange property here we will pass one Arrow function after that in this Arrow function we will get the parameter that will be event and here we will Call set image function here we will provide e. Target do files and here we will provide the index zero we will rename it it will be image 2 image 3 and image 4 we will save the changes and open the web browser if I click on this icon so it will open this window to upload any image so let me select this image that image will
be selected but while selecting the image It should display the image here so we'll add the functionality so that when we select an image then that image will be displayed here here instead of this upload icon so in this image tag within this SRC we will add the turn operator so to add the turn operator first we will check if image 1 is not available in that case we will use this assets. upload area if image when is available then we will Create one URL of that image and we will use that URL in this
SRC so to create the URL simply we will add URL dot create object URL here we will provide image 1 so in the first one we have to provide the image one now in other tag we will up date the name so here we will add image 2 and image two in the third one we'll add image three and image Three now in the fourth one we'll add image 4 and image for Save the changes and open the web browser here we have selected the image that is displayed here if I reload the web page
now you can see only upload icon and if I click here and select any image so that image has been added here now if I upload another image in another upload icon so all the images Has been added on this page so now we have stored these images in this state variable and that image is previewed here now we'll add the now we'll convert these input fields and this select option into control input field so the controlled input field is that input field where we will add any changes that will update the value in the
state variable so first in this input field we will add the on change property and here we will add one Arrow function where we will pass the event and here we will call the set name name function and in this function we will provide the value of this input field so to get the value we'll add e. target. value after that here we will add the value property and here we will provide name State now we'll copy this on change and value property and paste it in this text Area here we will update it will
be set description similarly in this value property let's add the CES and here instead of name we will add description after adding this in the text area now we'll add it in the select option so here let's add onchange property here we will add the function where we will add the event and call the set category Setter function and in this one we'll add e. target. value so whenever we'll select any option then The option value will be stored in the category state in this select tag also let's add on change property here we will
pass the add function we will call the set subcategory and provide e. target. value after that after that in this div we have the input field so in this one we'll add the onchange property here we will add the arrow function event set price e. Target. value then provide the value price if I save the changes and open the web browser so here we have converted this name description category subcategory and price field into controlled input field after that we have to add the logic so that if I select these sizes it will be stored
in one array for that here in this div we will add the on click property and here we will pass one Arrow function where we will call the Set sizes here first we will get the previous data and here we will check if in our previous array this a small size is already included in that case it will remove that character from the aray so if this size is already available then that size will be removed when we select this div and if the size Is not available in the array then it will add this
size in the array so here let's add previous do filter and here we will get individual item here we will check if our item is not equal to the this character which is a small in that case we will filter that and if this size is not included in that case we will add it so to add that simply add a spread operator so what we are doing here we Are checking if in this array this string is available then we will remove it and if it is not available then we will add it using
this a spread operator previous and our size now we will copy this on click function and paste it in this second div and in other div also so let me paste in all div here we have to update the size for different div here we will provide medium here also we will set Medium here also we will set medium similarly in the third one in these three places we will add large now in the fourth one we will add excel in the last one let's add double XEL if I save the changes and come back
to to the web page now if I click on these sizes then this size is getting selected but we cannot see whether this Size has been selected or not so now we'll add the logic to highlight the selected size so we'll change the background color and using that we can get to know that this size has been selected for that in this P tag we will use Dynamic class name to add the dynamic class name we will add this string in the curly Braes and here remove this single quote and we will use the back
tick now in this one we can use the turn Operator or template literal so here we have added the background slate 200 so let me remove it and here we will add the dollar sign craes here we will check if sizes dot includes and we will add this a string small so if the sizes includes this size then we'll get the true so here we'll add different background color and if we Get false then we will add different background color so we will use the Turner operator and here if this is true in that case
we will add the background pink 100 we have to wrap it as string then we'll add the column and here we'll provide the background slate 200 it is also a string now let me copy this whole class name and paste it here let me remove old Class name and paste it and here we will update the character it will be size medium similarly update it in the third one paste this one and update the size it will be large now paste it in the fourth one paste it the size will be Excel now in the
last one remove this class name paste this one and here we will add the size double XL if I save the changes and open the web browser so here when we click on any product size that background color will be changed and if I click again it it will be unchecked so it will be removed from the array so this functionality is working now we have to add the onchange property on this checkbox so let's come back to the vs code in this input field we will add the on change Property here we will call
the set bestseller here we will get the previous data and we will add not previous so if the previous data is true we will get false and if the previous data is false then it will make it true after that we'll add the checked property and here we will add the best seller if the best seller is true then this checked will be true and if the best seller is false then this checked Will be be unchecked so we have added all the Logics after that for this form tag we will create onsubmit function so
that when we submit this form then that function will be executed for that here we will create one Arrow function so the function name will be on submit Handler so just add const on submit hand handled equal to it will be one a sync Aro Function after that we will link this function with this form tag so here we will add onsubmit property and here we will add the onsubmit Handler function after that here we will get the event and here we'll add e do prevent default so that when we submit the form our page
will not be reloaded in this onsubmit Handler function We'll add the TR catch Block in this Tri block we will create one variable with the name form data here we will create a new form data so we will select this form data we will add this form data in the body when we will add the API call for that we have to add all the images and product details in this form data so to add that simply add form data do append and first first we'll add the product name so we'll add the product name
in the name field for That we'll add the name here we have to provide the field name and here we have to provide the value that we will get from the name State similarly we will create another copy and instead of name we will add description here we will add description let's create another copy here here we will add the price here we have to provide the price after that create another copy here we will add the Category and here we will provide the category after that we have to add the subcategory so let's create
one copy here we will add subcategory and here we will provide subcategory let's create one more copy and here we will send best seller property so just add the best seller and here we will add the best seller estate so we have added the product Details let me create create one more copy and here we have to add the sizes so we are getting the sizes as array so we cannot send the AR in form data so to send it first we have to convert it into string for that we will add Json do a
stringify and here we will provide sizes array so using this our areay will be converted in one string and when we'll access that in the back end we will again convert that in The array now we have added all the details of the product after that we have to send these images that is are stored in these State variable image 1 2 3 4 so here we will add form data do append here we have four images so we will append all images one by one so the first one will be image one here we
will add the image one let's create three other copy of this here we will add the field name Image two then image two here we will add the field name image three here we will add three here we'll add the image four and image four so using this all four Images will be added in the form data here we have one error suppose we have selected only one image and click on the add button then we don't have to add other images in the form data for that here we'll add the end operator so before
all these form data For images we will check if image 1 is available then we will append this image one else we will not append this one here we will add image two then image three and four now this logic will work if we select two image then it will only add two image in the form data till now we have added all the product data in the form data now we have to send this form data using The API on our back end for that we will use the AOS so first we have to
import the AOS so just add import AOS from exos package after that here we will create one variable response equal to here we will add the await and here we will use the exos do Post method to make the API call we need the backend URL so to get the backend URL we Will come to app.jsx file and here we have created this backend URL variable that we have exported now we can use this variable in this add. jsx file so first we have to import this variable so just add import backend URL after selecting
it this backend URL has been imported from the app.jsx file now in this post method we will add the backend URL and in this one we will concatenate The product add end point so let's add this SL API SL product/ add after that here we have to provide the form data in the body now if I add console log where will will console log the response dot data we will save the changes and open the web browser if I reload the web page and we will open the Console now this console is clear after that
here we will click on this upload icon and from here we will select any product image we will add the product name testing product here we will add the description so let me add some text here then we will select the product category by default the product category will be M and top we here we will add the price after that we will select the Product size so let's select these sizes and click on the check box now click on the add button so here we are getting one message success false not authorized login again
so we are trying to add the product directly then it will not add the product because here we have added the authentication in our back end to add the product so when we logged in here here in this token estate we have one Token so now we'll send this token with the API then only we can authenticate the request so we have already sent this token as a props in these component now in these component we will destructure this token and we will send it as header in the API request so let's open add. jsx
file and here we will add the curlys and here we will D structure the token after that after this form data we will add the comma and CES and here we will add the Headers and in this headers we will add one object where we will add token so we have provided this token now if I save the changes and open the web browser and click on this button again now it will hit the API and here we have the message product added now if I open mongod DB website and click on the refresh now
here we have this product that we have just added using the admin panel so here we have total three Product this is the product that we have just added testing product description then price then image array here we have uploaded only one image let me open this image URL in the web browser so you can see the same product image that we have just uploaded here we have the category subcategory sizes where we have selected small medium large and Excel then we have Selected the best seller also so you can see best seller true and
this is the time stamp when we have added this product so here this add product API is perfectly working if I select four images like I'll select image two image three image 4 let me change the first image so here we have selected four images and here we will add the product name testing Products with multiple image now click on the add button now it is processing and now you can see the response success true product added now if I refresh the mongod DB database now we have total four products and here we have the
new product testing product with multiple images and in this image areay we have four image URL that we have just added Using the admin panel so our product add feature is perfectly working next we will add the logic so that when we add these product then we'll clear these images and input field for that we will come back to the vs code editor after this response let me remove this console log and here we will add the if statement and here we will check if the response. data do success is true in That case we
will display one toast notification so just add toast after selecting it this toast has been imported from react toy package after that here we will add do success and here we will provide response dot data do message after adding this here we will add set name and we will reset it with empty string similarly let's create copy and we'll add set description after that we will add set Image 1 set it as false let's create three other copies here also we will add add image 2 image 3 image 4 after that we will add set
price and provide empty string so that this form will be reset after that we'll add the Elsa statement if the response.data do success is not true it means our product is not added in that case we will will display one toast notification where We'll add toast. error and provide response. dat. message if we get any error in this process then this cat block will be executed so in that case here we will log this error and we will also display one toast notification with the type error here we will provide error. message after that we
will save this file and we will open the web browser here if I click on this add Button now the product has been added here we have the toast notification product added and the image is reset and it will reset the input fields name description and PR we are not going to reset these things product category subcategory and product size after that we will create the list items page where we will display all the products that we have added in the database and we will display that here In this list items page so let's open
the vs code editor and we will open list. jsx file and here first we'll get the data from the API that we have to display here so first we have to get the data from the API and store it in one state variable so just add const list seter function name is set list equal to user State and initialize it with m T add after that we will create one Function with the name fetch list so just add con fetch list it will be a sync Ado function then we will create this Aro function and
we will run this function whenever this page will be loaded for that we will use the use effect hook in this one we will pass one AR function here we will add the dependency aray and in this function we will call This fetch list function for that add fetch list and call this one after that we will add the logic using that we can call the API and get the list of all the products for that first we will add the tri catch block and here we will add the variable with the name response in
this one we will store the API response here we will add a Weight then we will use the exos dot get method so here we have provided the G method because we have used the get method to create the end point of product list now in this we have to provide the backend URL so just type backend URL here we have the suggestion just click here so this backend URL has been imported from the app.jsx file after that we have to concatenate the end point of the API that is/ API SL Product/ list here we
have to add this after that it will call the API and it will store the response in this response variable after that we will add the console log we will add response. data if I save the changes and open the web browser and reload this web page so here we are getting success true and here in this product we have total five products that we have added while [Music] Testing we are getting this products in this products property so we will store this products are a in this list estate for that let me remove this
console log and here we will add set list and we will add response. data dot products we will add it whenever the response success is true so for that we'll add the if statement and hit here we will check if the response. data. success is true then we will add this product in this List and if this response. data. success is false then we will use the else statement and here will display one toast notification so just add toast the type will be error and here we will display response.data do message if we get any
error in this triy block then this catch block will be executed and when the catch block will be executed we will console log this error and with that here we will add the Toast notification where the type will be error and here we will add error. message we will save the changes now all the product details has been added in this list now using this we can display all the products in this list component to display the product let me remove this div and here we will add the fragment and in this fragment we will
add the paragraph tag and here we will Add all products list after that in this P tag we will add the class name property and here we will provide margin bottom after this paragraph tag here we will create one div and in this div here we will add one comment here we will add list table Title Here we will will create one table So after this comment we will create the title of the table so to create the title simply add one div in this div we will add five b tag so just add B
into five so we have total five b tag in the first B tag we will add the image in the second second one we will add name in the third one we will add category in the fourth one we'll add the price in the fifth one we'll add the action after that if I save the changes And open the web browser so here we have the text all product list and here we have all these title now we'll add the CSS properties so first we'll add the CSS properties in this div so let's add the
class name property here we will provide Flex Flex column Gap two after that here we will provide the CSS properties so in this div let's provide hidden so by default this div will be hidden and for medium and above A screen size it will be displayed as grid so just add MD grid grid columns here we will use this fraction then we'll add the item Center padding then border then background then texture small if I save the changes and open the web browser now this title is looking good after that in this B tag we
will add the class name property and here we will provide text Center we will save the changes now this acction button will be in the center of last column now we'll display all products one by one for that here we will add the comment here we will type product list after this comment here we will add the curly bres and here we will use list add this is one are so we can use one map method so let's add map and in this Map method we will pass the Aro function and here we will use
this bracket after that here we will pass the individual item and index number after that here we will create one div and in this div tag we will add the key property where we will add the index in this div first we will create the image tag so first we have to display the image name category price and action Button so in this image tag we have have to provide the product image so to get the product image we will use the image array simply add item dot image index 0 that will give the first
image of the product after this image tag we will create four paragraph tag so let's add B into four in the first P tag we will display the product's Name so to get the product name we will add the curly bres item do name in the second one we'll add the category so just add item. category in the third one we will add the price so to get the product price we have to add the the currency also so we will declare the currency in this app.jsx file so here we have created the backend URL
so after that we'll create export const Currency and it will be one a string and here we will add the dollar sign we will save this file and now let's open list. jsx file first We'll add the currency so just add the curlys currency we will select it from this suggestion so this will be imported from the app file so you can see it has been imported after adding this currency we will provide the price so let's add item. price after that in this P tag simply Add this x so that we can use this
x to remove the product if I save the changes and open the web browser so here we have the product image product name category price and this cross so total we have five product that we have added while testing and all five products is getting displayed here now we'll add the CSS properties to align these product details horizontally so let's come back to the vs code editor And in this image tag let's add the class name property that will V width here we will provide the width W2 after that we'll add the class name property
in this P tag and here we will provide text right text Center cursor pointer text large after that we'll add the CSS properties in this D tag here we will add the class name property Here let's provide Grid in this grid we will create two template column first one for the phone screen and the second one for the desktop screen so let's add the grid grid columns this fraction after that for medium and above screen size We'll add this fraction then we will provide the item Center Gap padding border and Textra small if I save
the changes and open the web Browser now all the product list is looking good after that we'll add the functionality so that when we click on this cross icon then this product will be deleted from the database for that we have created the API that we will call here so we'll come back to the web browser and here after this fetch list function here we will create another Function with the name remove product so just add const remove product it will be one asnc Arrow function so just add asnc and create the arrow function now
in this p parameter we will get the product ID that we will get from this mapping so whenever this function will be executed we will remove that product from the database using this ID so just Add the TR catch block and in this Tri block we will call the API for that we will create one variable with the name response equal to await and here we will use the exos do Post method here we will add the back end URL and in this one we'll concatenate the product remove API so just add/ API SL product
slash remove after that we'll add the comma And in the body we have to send the product ID we will get the ID from this this parameter for that simply add the object and in this one we will add this ID this is one of the admin feature so in this headers we have to provide the token so let's add the curly bres here we will Define the headers where we will add the object and in this one we'll add the token we will get this token from the props so here we will add the
curly bres Token now it will call the API after that we will check if response. data do success is true in that case our product will be deleted from the database so here we will display one toast notification so just at toast. success we will add the message response.data do Message with that our product will be removed so we have to update this list again after deleting the product our list will be updated so again we have to display the new list so simply we have to call this fetch list function so so here after
this toast notification call this function for that let's add a wait fetch list function so if the response. data. success is false in that case we will add the Elsa Statement and here we will display the toast notification the type will be error and here we will provide response.data do message and after that if we get any error in this Tri block then this catch block will be executed so in this case We'll add the console log and display one toast notifications so just copy these two line from this catch and paste it here now
we have created the function for this remove product next we have to Link this function with our cross icon for that we will come here in this P tag and here we will add the on click property after that here we will add the Aro function and here we will call remove product function after that in this function we have to add the product ID we will get the product ID from item doore id we will save this file file and We will open the web browser so if I reload this web page and click
on this cross icon so you can see that product has been removed and here we have the notification product removed from here we can remove these test products after that we will add all the products one by one then that we have added here in the front end using the assets so we have to add all the Products one by one using this admin panels so it will be uploaded in the database so to upload the product simply we have to select the product image then we have to get the product name so let me
go to front end SRC assets and in this asset. JS file we have all the product details from here let me copy this product name so we are adding this product so let me copy this product name then we'll Copy this product description we will select the category we will select the subcategory we will add the price so here let's add the price 34 after that we have to select the sizes we will select all five size and click on the add button so now that product has been added and if I refresh this database
so here we have only one Product and in this sizes we have all five sizes and here we have uploaded only one image so you can see in this image aray we have only one image URL now if I come back to the admin panel and list item so here we have the product list that we have just uploaded similarly let me add one more product so let me add this product image after adding the image we will add the product name so let me copy the product Name from here we will add the product
description we will select the category main top VI then we will add the price we will select the sizes we'll click on the add button so our product has been added if I go to list so here we have another product similarly we will add all the products one by one so here we have added all the Products one by one using the admin panel and the product has been added in the database so we have total 52 products now we will display these products on our front end now we will come back to our
vs code editor and here we have added two functionality to add the product and to display the product next we will connect the front end with our back End so let me close all these files so right click and select close all now we will open front end folder then in this SRC let's create do EnV file here we will add the envirment variable where we will store the URL of our backend so just add Vore back endore URL equal to Local Host Port 4000 that is our backend URL save the changes and close the
file now we will open context then sop Context here we have this delivery fee so after that let's create one variable with the name backend URL and in this variable we will store the backend URL that we will get from the envirment variable so here let's add import do meta do EnV Dot and here we will add the Vore back endore URL now in this now we will add this backend URL variable in this value object so that we can access it in any component so here we will add the backend URL right now we
are displaying these products from this products data that we have imported from from the assets file so now we will get the product data from the API so let me remove this product import and after that we will create one function in this sop context so here Before this value let's create one function with the name get products data and we need to create one state variable also so before that here we will create one estate variable so just add const the estate variable name will be products seter function name will be set products equal
to user State and initialize it with empty aray now scroll down and before this value let's create a function with the name get products Data it will be a sync Arrow function after that here let's add the TR catch block within this Tri block we will call the API to call the API we will use the exos so we have not installed the exos package in the front end let me open this package.json so you can see we have only four packages so first we have to install the exos in the front end so let's
open the terminal here we have the front end back end and admin panel right so we will open the frontend Terminal here we will add here we will type contrl c yes here we will add npm install exos so it will install the EXO package now we will run the project again so just add npm run de and our project is running now let me hide this terminal again now within this Tri block let's create one variable with the name response so just at const response equal To await and then we will use the exos
to use the exos first we have to import the exos package so let's add import exos from exos package our product list API type is get so let's add exos doget now in this method we will provide the backend URL and after that we will concatenate the product list API endpoint that is/ API SL product slash List after adding this we will get one response so now let's check that response so just add console log and add this response then add response. data now let's come back to the web browser right now we don't have
any product because we have removed the local products now right click and select inspect then click on console soul and let me reload the web page here we are not getting any product Data because we have not called this function so we have to call this function so here let's add use effect after that here we will add the Aro function and here we will add the dependency array in this function we will call the get products data function now save the changes and come back to the web browser so here in this console you
can see we have one object and here we have The success true then product data so here we have total 52 products in this products property now we have to store these products in the product State variable so here we will remove this console log and here we will add one if statement here we will add if response. data. success is true in that case we will call the seter function that is set Products and in this one let's provide response. data. products and if the response. data. success is false then we will add the
else statement and here we will display one toast notification so just add toast post. error and here let's provide response.data do message after that if we get any error in this Tri block then this cat block will be executed so here we will console Log this error and with that we will display one toast notification so just add toast. error and here we will display error. message now in this products data we have all the products if I come back to the web browser and reload the web page if I reload the web page you
can see the product is not displayed and if I open the collection page it is displaying the product but if I refresh this web page Then again products are hidden now to solve this eror let let me come back to the vs code editor and we will open components folder then open bestas seller. jsx file and in this dependency aray we will add products so whenever the products will be updated then this function will be executed and it will display the best seller product now if I reload the web page so here you can see
in this best seller we Have these products here we have only those product where we have added this best seller property using this checkbox so whichever product have the best seller property that is displayed here after that we will collect this latest collection so let me open latest collection. jsx and in this dependency areay we will add products so now you can see the products in this latest collection now let's open the collection Page and and if I refresh it so the product is hidden now let me collect it we will open the collection. jsx
file that is in this Pages folder scroll down and here you can see we have this use effect where we are calling this apply filter in this dependency are let's add products now save the change and if I reload this web page you can see it is working now we have all the products data on this collection Page let me come back to the homepage and open any product so here we have all the images of this product if we select any image from the small image it is updating the main image and here the
product URL is/ product and its product ID that is autogenerated in the mongod DB while we add the product here we have the product details and here we have the related products now if I open any kit product So here you can see in the related product we have the kits product now if I add the product in the card so you can see the product has been added in the cart so this logic is perfectly working after that let's close all these files so right click and select close saved now we have added the
API in the front end using that we can display the product that we have added using the admin Panel now if I open the backend folder here we have created user controller and here we have the function user login for user registration so now we will add these functionality in the front end so let's open the front end folder from here we will open the pages login. jsx file to add the login API first in the context file we will create one state variable so let's open context file and here we will add the State
variable called token so when we will be authenticated then we will get the token and we will store that token in this estate variable so just add const token set token equal to user State and initialize it with empty string after that we will pass this token and set token in the value object so let's add set token and token now save this File after that come back to the login. jsx file and here we will get the token and set token navigate function and backend URL from the context so just add const curly here
we will add token set token navigate and backend URL equal to here we will use the use context hook in this one we will provide sop Context we will select it so the use context and sop context has been imported after that on this onsubmit Handler function we will add the TR catch Block in this Tri block we will call the API before calling the API we will create three state variable where we will store these input field value for that here we will add con name set Name equal to user state and initialize it
with empty string now we will create two other copy of this statement and in the second state variable we will add the name password Setter function name is set password it is also empty string now in the third one we will add the email and Setter function name is set email and it is also one empty string so we have created three state variables now We will link these State variable with the input field so we will come here in this text input field and here we have the placeholder so in this input field we
will add the onchange property and we will pass one Arrow function where we will add the event and here we will call the set name in this one let's provide e. Target do value after that let's add the value property that will be Name now let me copy this on change and value and add it in the second and third input field in the second one we will call the set email and in the next one we will call the set password and here in this value we will add email and here we will add
the password now if we update these input field it will update the value in this state variable now we can do the API call because we have the name email and Password so before calling the API let's add the if statement and here we will check if our current state is equal to sign up in that case within this if statement we will call the sign up API else in this else statement we will call the login API let me tell you again if the state is sign up then we will call the Registration API
and if it is login then we will call the the login API so to call the sign up API here let's add const response equal to await here we will use the exos package selected from the suggestions so this package has been imported the sign up API type is post and here let's add xos dopost now in this one let's add the back end URL and In this one we will concatenate the end point so let's add/ API SL users SL register then we have to pass the body where we will pass the users name
email and password after that we will get one response so we will check this response so just at console.log response.data if I save the changes and open the web browser so right now the state is sign up and we will open the inspect Tab console let me reload the web page now it is clear here let's add one name so let's add greatest tack in the email I will add user. greatest stack at gmail.com after that we will add one password now if I click on this sign up here we have the message success false
user already exist Because we have already created One account using this email ID while testing our API using the Thunder client so let me change this email here I will use another email user to. greatest gmail.com now click on this sign up button so you can see this success is true and here we have one token now we have to store this token in this token state so to restore that let me remove this console log And here we will add one if statement in this one we will check if response. data do success if
it is true in that case we will get one token and we will restore that token in this token State variable so for that simply call this Setter function set token and here let's provide response resp. dat. token so it will store the token in this estate Variable now we will store the same token in the local storage so just add local stor do set item here we will provide the key name token after that let's add the response. data do token so if the response. data. success is true then these two line will be
executed and if it is false in that case we will add the Elsa statement and here we will display one toast notification so just add toast. Eror here let's provide response. dat. message so here we have created the API call for the sign up now if the estate is not sign up it means the state is login so here we will add the code in this Elsa statement in this Elsa statement we will call the login API for that let's add con response equal to await here we we will use the exos dopost Method here
we will add the backend URL then we will concatenate the login API endpoint that is SL API sluser SL login after that we will add one object before that we have to add one comma and in this object we will send the email and password because we have to send only email and password to login in the existing account so now we'll get one response so let me add the console log to check the response so just at console Log. response do data if I save the changes and come back to the web browser click
on the login here now the state has been changed it is login now if I click on the signin here we have to connect it it will be it response dot data save the changes and click the signin button again now we are getting the success true and here we are getting the token now if I change the user user Doest tack now for this user we are getting the token now if I enter any incorrect password and click on the signin now you can see success Falls and here we have the message invalid credence
so let me remove this console log and here we will add the if statement and here we will check if the response. data. success is true in that case we will set the token in the token state so just add Set token response. dat. token and after that we will save the token in the local storage here we have have to collect it so it is so it is response. dat. token now let me copy this statement and paste it here after that if the response. data. success is false for that we will add the
Elsa statement and here we will display one toast notification so let me copy this and paste it here If we get any error in this Tri block then this cash block will be executed and in this case we will add the console log and log the error and with that we will display one toast notification so just add toast. error and here we will provide error. message now save the changes and now if I click on this sign in here we are getting the notification invalid credent sales because we have added the incorrect Password and
if we provide the correct password and click on the sign in now we don't have any error now if I create the new account with the same email ID then we are getting the notification user already exist because we already have one user with this email ID so till now we have created the token and stored that token in the local storage so let me check that we'll click on this application then storage local Storage click the local URL which is Local Host so you can see the token has been stored in this local storage
after that we will add the functionality so that when we click on the login and when the token will be saved in the state variable then we will redirect the user on the homepage for that let's come back and here we will create one use effect and in this one we will pass one Aro function after that we will add the Dependency aray and in this aray we will add token so whenever the token will be updated then this function will be executed in that case we will check if token so if the token is
available in that case we will navigate to the Home Path so just add slash now if I save the changes and come back to the web browser now we are automatically navigated to our homepage now if I try to go to login Page that is linked in this icon so we are not able to go to the login page because in this token estate we have the token available now if I load the web page then the token will be removed and now we are come back to the login page so here we have one
issue like when we refresh this web page it will remove the token from the estate variable that's why it is opening the login page so now we will add the logic so that we will check if the local storage Have this token Now using that token we will update the state variable so that when whenever we will refresh this web page then again we will be logged in so let's come back to the SOP context. jsx file and after this use effect let's create one more use effect and here we will add one Arrow function
and provide one dependency array here we will add one if statement here we will add the condition if the token is not available and in the Local storage token token is available in that case we will store the local storage token in the token state for that let's add not of token then we will add the end operator and here we will use local storage dog item and here we will add the key name where we have stored the token so the key name is token now in this one we will call the set token
function and provide the token from the local Storage for that let me copy this statement and paste it here now if I save the changes and come back to the web browser now if I reload the web page and try to open the login page the login page is not opening because we are logged in and here we have the token available in the local storage now we will add the log out functionality if I hover this and click on this log out it should log out from The website so let's open the napb bar.
jsx file that is inside this components folder so first we will get the navigate token and set token then set cart items function from the context after after that here we will create one function with the name log out so here let's add con log out equal to this Arrow Function in this function first we will remove the token from the local storage so just add local storage. remove item and here we will add the key name token after that we will clear the state variable which is token so just add set token and empty
string now when we will be logged out we will clear the cart item so just add Set Card items and in this one just add the curly addes now we will navigate the user on the login page so just add Navigate SL login now we will add this logout function in this paragraph tag where we have added the text called log out so just add the on click property and here we will add log out function now if I save the changes and come back to the web browser now if I reload this we are
logged in that's why it is not opening the login page now if I click on on this log out link now the token has been removed from The local storage and if I click on this icon it is opening this login page but it is not redirecting us to the login page so let me check it if I save the changes and come back to the signup page let's click on the login here we will add the user dot great L tag at gmail.com here we will add the password now we are logged In now
if I click on log out we are logged out but it is not redirecting us to the login page so we have to fix it so to solve this issue let me remove this navigate function from here and we will paste it here in this first line now save the changes and come back to the web browser now if I click on this login and login with one account I will provide the email ID and Password click on this signin button now we are logged in and now if I click on this log out now
we are redirected to the login page so this functionality is perfectly working now whenever we are back to this page then this sign up form is open so here we will set the login form by default so let's open login. jsx file and here we will set the type login now whenever we will open this page the by default login form will be Visible after that now we will add the functionality that you can see when we are logged out still we are getting these my profile orders and log out option so we have to
hide it it will be visible whenever we are logged in for that let's come back and open na. jsx file we will come here in this image tag and let me remove this link we have removed this link tag that we used to trap this image now in This image tag let's add the on click property in this one let's pass the arrow function and here we will use the turn operator here we will check if the token is available in that case we will return null and if the token is not available then we
will call the navigate function and and here we will add/ login path now if I save the changes and come back to the web browser and come back to the home screen now if I click on this One it will open the login page now when we are logged in and we will click on this then it will not execute this statement after that here we have this drop down so before that let me add one comment so that we can easily find where we have added the code for the dropdown so now we will
display this div whenever we are logged in so let me cut this div from here here let's add the Curly bites we will add token and operator after that just paste that div let's me move it in the new line so whenever the token is available then only this div will be displayed now let's test it save the changes and come back to the web browser now if i h on this one now we don't have that drop down now if I log on this website now we are logged in and now if I hover
on this one you can see it is displaying the drop down so this functionality is perfectly working now on this orders also we will add the onclick property so that it will navigate us to the orders page so here in this P tag we will add the on click property and here we will call add function and in this one we will call the navigate function and provide the path that is slash Orders now if I save the changes and come back to the web browser and click on this orders now we are at the
orders page so here we have added the login log out functionality now user can log in and log out on this website next we will create the API so that when we add any product in the card whenever we are logged in then that product will be saved in our database for That we will come back to the vs code editor and here let's close these tab now we will open the backend folder and here we will open controllers folder and in this controllers folder we will create card controller.js file so just add cart controller.
.js in this file we will create three function that is add to cart update cart and get user cart so first let's add one Comment add products to user cart here let's create one add of function so just add const add to cut it will be one a sync Arrow function from this parameter we will take response from this parameter we will take request and response after that we will copy the same code for two times the second function name will be update card here we will change the comment it Will be update products update
user card after that here we have the third function so here we will add the comment get user card data and provide the function name get user cart so we have created three functions now let's export all these three functions so just add export curly Bres add to cut update cart get user cart now save this file and for these functions we will create the doubt so to create the routes let's open the routes folder and in this one we will create a new file with the name cart route. JS in this file first we
will import Express from Express package after that we will import the Function that we have created in the card controller so just add import add to cart get user cart and update cart we have imported it from this card controller.js now using this Express server we will create the router so just add const cart router equal to Express dot router interface Now using these functions we will create multiple end points so first we'll create cart router dot post method here we will add/ getet so when we hit this endpoint we will send the cart data
through API so just add get user cart let's create two other copy of this second one will be/ add here we will add the add to card function and the third one is Update and here we will call the update card function now we have to export this router so just add export default cart router and save this file after that let's open server.js file and here we will add app.use SL and for this router the endpoint will be SL API SL Cart and after that we will add the cart router after selecting it the
cart router file has been imported now save the changes after that we will create the middleware using the middleware we will authenticate the user so to create the middleware in this middleware folder let's create a new file that will be .js in this middleware we will Authenticate the user whenever user will add the product in the cart or update the card data or user will place the order then we will use this middleware so this middleware will convert the users token in the users ID so to create this middleware here we will add import JWT
from Json B token here we will create one Arrow function with the name O user so just add Const out user equal to it will be asnc Ado function after that in this parameter we will get the request and response and call back function called next after that we will get the users token from the headers so just add const token equal to request do headers we will get the token from the headers after that we will check if the Token is not available in that case we will return one response so simply add return
response. Json success Falls message not authorized login again suppose someone hit the cart API and the token is not available then this response will be returned if the token is available then the next code will be executed so here let's add the try catch block and in this triy block we will decode that token so to decode that Token just add const token uncore decode equal to JWT do verify here we have to provide our token and with that we have to provide the JWT secret so just add process. EnV do JWT secret using that
it will decode the token now in this decoded token we will get the users ID If I come back to the user controller.js file so when we have created the token then we have added one object and in that object we have the users ID so now we will get that user ID from this token and we will set that in the request. body. user ID property so just add request do body dot user ID equal to token decode do ID using that in the body of request it will add the user ID property that
we will get from this token and using that we can update the cart or place the order after that we will call the next function and if we we get any error in this process then this catch block will be executed and in that case we will log the error and here we will generate one response where the success will be False and in the message we will get error. message so we have created this function now we have to export this Au user so just add export default Au user now we will add this
middle we in the cart route so whenever any user get the cart or update the cart or add the product in the cart then we will add this middleware so let's Add Au user so here we have the option to select the Au user so it will be automatically imported now we will add the comma Now suppose anyone hit this API endpoint then the token will be verified and using that token in the body we will get the user ID and after that this function that we have created here add to card in that request.
body we will get the user ID and we will use the other request body property to update The product data in the users cart so now we will add the logic in this add to cart function so just add the TR cat Block in this Tri block first we will get the user ID from the request body we will also get the item ID and size so just add cons curly bres user ID we will get this user ID from the token decode it will be added in the body after that we will add the
item ID so the item ID is basically the product ID that we are trying to add in the cart after that we will add this size so we need the information about the product size equal to request do body after that using this user ID from that user model we will find that user and we will modify that card data and we will add this item ID and this size in their cart data so just add Const user data equal to a wait and here we will use the user model dot find by ID method
here we have to provide the user ID that we will get from the request. body using that we will get that particular user data in this variable now from this user data variable we will extract the card data so just add const cart data equal to Await user data. card data so we will perform the operation on this card data so just add let after that we will add the if statement and here we will check if the card data has this item id available and with that we will add one more if statement and
here we will add if in the card data for this item ID and for this size already entry is available in that case we will add Quantity 1 so we will increase the quantity one so just add card data item id size plus equal to 1 so so if in the cut data this item ID is available and the size is not available then we'll add the ELA statement and here we will add card data Item ID and we will set this size equal to [Music] 1 and if in the card data we don't have
Any product with this product ID in that case we will add the else statement and here we will add card data then Item ID and for this item id we will create one object and in this object we will create the size so just add card data item id size equal to 1 so we have added the logic for the add to Card now we have to add this updated card data in the user card data for that we will use the user model so just add await user model here we will use dot findy
ID and update method in in this method we have to provide the first parameter that is our user ID so just add user ID and the second parameter will be one object where we have to update the card Data so we have selected the card data so this is the card data that we are getting from the users data card data then we have updated that and we are sending the updated card data so for this user ID it will update the card data in the database after that we will generate one response so just
add response. Json success true and in the message we will add added to Cart after that if we get any error in this Tri block then in this catch block let's add console.log error and with that we will add response response. Json success Falls and in the message we will add error. message so we have added the logic for the add to cart similarly we will create the logic for the update cart so to create this update card logic let's add the TR cat block here we will get the user ID item size And quantity
from the requestbody so just add one object here we will add the user ID item id size with that we have to update the quantity for that we will get the quantity so whenever we will do the API call we have to provide these three items because the user ID will be automatically added by the middleware that we have created here in This aujs so here we will add request. body now here we are getting the user ID and getting the card data so let me copy this statement and we will paste it here now
we have the card data now we have to update the card data so simply add cart data item id size equal to quantity using that it will update the product quantity in the card Data now we have to save this updated card data in the database so again let me copy this statement from the previous logic let's copy and paste it here so using this statement it will update the card data and it will generate the response and here we will update the message here let's add cart updated if we get any error in the
process then this catch block will be Executed so let me copy this statement from catch and paste it here now we have added the logic for the update cart now we will add the logic to get the users cart data for that here simply add the TR catch Block in this Tri block we will get the user ID from request. body so just add con curly presses user ID equal to request. Body using this user ID we will find the user and their card data and we will store the card data in the variable so
let me copy this statement and paste it here now we have the card data and we have to send this card data as a response so simply add response. Json Success Through card data and we will provide user data do cart data we can directly add the cart data also so let me add this cart data after that if we get any error in This Tri block then this cat block will be executed so let me copy this and paste it here now we have added the logic for the product add to card then update
card and get user card data here we have created this middle bear that will take our token and it will verify that and using that token it will generate the ID and it will provide the ID in the request. body so now the cart API is ready now we will link this API directly with our front end so in this front end folder we will open SRC folder context sop context. jsx file here we have created one function called add to cart where in this cart items object we are adding all the cart data so
now whenever we will call this function here we will check if we are logged in then in the database also we will update The cart for that let's add the if statement and here we will check if the token is available in that case we are logged in so in that case we will call the API so before that let's add the trach block and here we will add the await exos do Post method after that we will provide the back end URL and here in this one we will concatenate the API for the add
to cut So just add/ API SL cut slash add after that we have to provide the product ID and size so here we are getting the item ID and size so let me send this property in the body so here in this exos we will add the object and in this one provide Item ID and size after that in this header we have to add the token so just add headers we will add one object and we will provide The token using that our product will be be added in the database whenever we are logged
in if we get any error in this process so here we will add the console log in this catch block so just add console log error we will display one toast notification so the type will be error so just add toast. error error. message we will save this file and we Will teste this logic so so let's come back to the web browser here we are getting one error if I reload the web page here we are getting one error so let's check that why we are getting this error so let's come back to the
vs code editor and open the terminal so our back end has been crashed so here we are getting the message cannot find Module user model so when we have created the back end and here we have added card controller here we have imported the user model so here we have to add JS if I save the changes now the server has been started again and the error has been solved now let me hide this terminal we will close this file and save this file and come back to the web browser Here now we are logged
in and the cart is empty now if I open this product select this size a small and click on the add to cart so it has been added in the cart now if I open the database then go to users here we have this account and will open the card data and here we have one new entry here we have the item ID that is this product ID and we have added the small size and added in the card so here in this one you can see in this object we have the as small and
quantity one so this logic is perfectly working now if I select the medium size and large size also now we have the quantity three and if I refresh it and here we will open this card data so here we have this quantity one for a small medium and Large so this add to cart function is perfectly working it is updating the cart in the database after that we will add the API in this update quantity so that when we are add the card page and update any quantity then that quantity will be updated in the
database for that after this Set Card items we will add the if statement and here we will add the Token so if the token is available it means we are logged in so here we will call the AP API so before calling the API we will add the TR catch block and in this Tri block we will use the await exos do Post method here we will add the back end URL and in this one we will add the product update cart update Endo so the Endo is SL API SL cart SL update after that
here we will add one object where we will provide item id size and quantity so just copy and paste it here after that here we have to add the headers so we will add the C say then add the headers and in this headers we have to send the object where we will add the token so we have added the headers also so whenever we will call this API It will update the cart if we get any error then this catch block will be executed so let me add this console log and toast notification so
just copy and paste it here save the changes now if I come back to the web browser after that whenever we are reloading the web page then the card data is clear so here we will add the logic so that whenever we reload the web page then the card data will be updated From the database and it will display that in the card data for that here here we will create one Arrow function with the name get user card it will be a sync AR function in this parameter we will take token and after that
here we will add the TR catch block here we will create one variable that is Response where we will store the API response so just add await exos dot post method and here we will call Api endpoint to get the cart data so just add the back end URL and here we will add the endpoint / API SL cart /g here we don't have to send anything in the body so just add the curly Braes and then we have to add the headers so let's add The object where we will Define headers and in this
headers we will add one object where we will provide token that we will get from the parameter so using this we will get one response and here we will add if response. data. success if it is true it means we have received the card data and we will store that card data in the state variable so just add set cart Items response. data do cart data if we get any error in this process then catch block will be executed so just copy and paste it so we will display the error in console log and notification
now we have to run this function whenever we will reload the web page for that let me copy this function and here in this if statement We will call get user card function so this if statement will be executed whenever we have the token and we will send the token so to send the token we will use this statement local stage. get item token if I save the changes and come back to the web browser and reload the web page here we are getting the card data you can see quantity three now here you can
see if we update the quantity from the database we will Set the quantity two for the small size and click on the update and reload this web page here we are getting some error so let me check here we have cannot read the property of undefined we are getting it from the cart. jsx line 46 so let's come back we will open cart page we will open the pages cart. jsx file So here whenever we are reloading this web page then initially the product is not loading before loading the data it is executing this function
that's why we are getting this error so to solve this in this dependency aray we will add products and with that here we will add one if statement and here we will check if the products. length is greater than zero then only we will execute these statement so let me cut it from here and Move it in this if statement now right click and select format document save the changes now if I reload the web page now the error has been solved now here we have the quantity 2 that we have updated from the database
now we are getting the card data from the mongod DB database now if I delete it and reload the web page now this Product has been removed now if I try to update it from here if I change the quantity 10 and refresh our database and let's open the card data so here in this medium size you you can see the quantity tin that we have updated from this cart page so this update card functionality is also working now we have integrated the cart API with our front End now we can fish the users cart
data when we reload the web page and with that we can add the product in the cart and that product will be added in the database and if I update the product or delete the product that is also updated in the database now we have completed the logic for our cart next we'll create the logic for the orders so that when we fill this form and select the cash on delivery and Click on place order then the order will be placed and we will get the order details in this database for that first we have
to create one API in the back end so let me close this file and in the backend folder in this controllers folder we will create a new file that will be order controller.js to create the order API first we have to create a new model in this models folder and the name will be order model so write the file name order Model. JS here we will create the order model so first we will import from Mongo's package after that we will create the schema for order so just add const order schema equal to new do
schema we are using this es schema Constructor in this one we will add the object here we will add the user ID the Type will be a string and the required will be true after that we will create another copy of this the second property will be items in this items property the type will be add and it is also required true in this items we will store the product data that we have ordered now let's create one more copy here we will add the amount property the type will be Number it is also required
true now create one more copy here we will add the property name address and here we will add the type object and it is also required true now let's create one more copy and our next property is a status here we will add the type string and it is also required true now let's create one more property then name will be payment method here we will add the type A String required true now let's create one more copy of this and here we will add the property name payment the type will be bullan and it
is also required true and here we will add the default property that will be false so whenever the New Order will be placed the by default payment will be false and whenever we will add the payment Gateway and make the payment online then we will make the status True after that we will add the date property and here we will add the type number we will make it required true after that here we have this status so in this one we will add the default property and by default the status will be order placed so
whenever the New Order will be placed the status will be order placed after that we can also update the status from the admin panel so now we Have cre the schema for our order now using this schema we will create one order model for that let's add const order model equal to do models dot order after that we will add the or operator then we will use do model order and here we will provide our order schema after that we have to export this order model so just add Export default order model so here we
have created the order model in this property first we have the user ID in this user ID we will store the user ID who has placed the order then we have the items where we will store the product that is the items then we have the amount where we will store the order amount then we have the address and here we will store the status after that we have the payment Method that is a string if we select the cash on delivery then the payment method will be cash on delivery if we select the stripe
then the payment method will be a stripe if we will use the Razer pay then we will save razor Pay Here we will make the payment true whenever User make the payment online using the stripe or razor pay then we have this date property so we will store the date whenever the order will be placed here We have added the type number because here we will use date. now that returns a time stamp so we have created the order model now we will create the order controllers in this order controller first we will create one
Arrow function using that we can place the Cod order so let's add the comment placing orders using Cod method that is cashon delivery method here we will create the arrow function with the name place order so Just add cons place order equal to a sync and in this parameter we will get request and response so we have created this place order function after that we will create one more copy of this and here we will update the comment placing orders using a stripe method and here we will add the fun name place order Stripe now
let's paste it again and here we will add the placing orders using razor pay method and here we will add the name that is the function name place order razor pay so here we have created three function after that here let's add one more commment and here we will create One controller function using that we can display all the orders on our admin panel so here let's add the Comment all orders data for admin panel so let me copy this function and here we will update the function name so let's add all orders after that
let's create one more copy of this here we will add the comment that is user order data for front end here we will add the function name user orders so using this function we can display the orders for the particular User and we will display it in in the my orders page here we will add one more comment and here let's add update order status let me copy this function from here paste it here here we will add update a status in this model you can see we have added the status and the default value
is order place so to change this status we will use this controller Function so let me add the comment update order status from admin panel only admin can update the order status so here we have created the controller function for place order place order stripe place order razor pay all orders user orders and update a status after that we will export these functions so simply add export CS and in this object we will provide all functions one by one so first one is place order place it here then we will Add the place order stripe
then place order razor pay then all orders then user orders then update a status now using this controller function we will create the routes so in this routes folder let's create create a new file with the name order route. JS so we will type order route. JS and this one first we will import the express so we will type import Express from Express Package after that we will import these controller functions 1 by one so let me copy this object from here and here we will type import then these functions and we will type from
double do/ controllers folder SL order controller.js using this all the controller functions will be imported here after that we will create one order router so just add Const order router equal to here we will use the express. router interface after that we will use these controller functions and Order router to create multiple end points so here we will add order router. poost method and in this endpoint we will add list here we will add all orders controller function so this route is for the admin Panel using that we can get the all orders detail and
we will display the all orders in the admin panel so this is the admin panel functionality so here we will add the authentication so let's add admin o so we have to import this admin o so just just add import admin o from Double do/ middleware SL admin .js so we have added this admin o after that we'll create one copy of it here we have to add slash so the second end point will be status and it is also admin feature only admin can update the order status so we will add the admin or
and here we will provide the function name which is update a status here we can add one comment so that we can differentiate which route is for the admin so let's add the admin Features after that here let let add one more comment here we will add payment features here we will add the place order place order strike place order resor pay to create the API endpoint so just add order router. post method and the end point will be slpl and here let's add place order so we will use this place order controller function for
cash on delivery So whenever we have to place one order using the cash on delivery we will use this Endo here also we have to add the authentication so that it will send the users ID so for that we will use this middleware which is .js and the function name is au user so first we will import this file so just add import Au user we will select it so this Au user function has been imported after that Here we will add the comma and here we will provide Au user so whenever we will hit
this API we have to provide the token in the header after that let's create one more copy here the end point will be/ a stripe and here we will use the place order stripe controller function and here also we have this Au user middleware now let's create one more copy and here we will add the endpoint SL Razer pay and and here we will use the controller function called place order resor pay now let's add one more comment let's add the comment user feature here we will add order router do Post method here we will
add the endpoint SL user orders here we will add the Au User we are using this middleware then we will add the controller function that is user orders so using all these controller function we have created multiple end points now we have to export this order router so just add export default order router we will save this file after that we will come back to the server.js file and after this end point we will Add order router so just add app.use then we will set the endpoint / API SL order and here we will add
order router we will select this order router from here so this file has been imported now save these changes now we will add the logic for this place order using Cod method so in this function first we will add the TR catch block and in this try block we will get the user ID amount Address items from the request body for that let's add con curly bres user ID items amount and address we will get it from request. body whenever we will create the request then this items amount and address will be sent from the
body and we will also send the token in the headers using that we can get the user ID Using this .js middleware after that we will create one order data so just add cost order data equal to it will be one object where we will add the user ID items amount then we will add the payment method so this payment method is for cash on delivery so simply add Cod after that we will add the payment property since it is a Cod so we will make the payment false after that we will add date where
we will store date. now so that we will get the current date and time Tim stamp so it will create one order data as you can see in this order schema we have the user ID items amount address then we have the status by default order placed then we have the payment method payment and Date now using this order data we will create a new order so for that we have to import the order model in this file so just add import order model from Models folder order model do JS so we have imported this
order model after that we will use this order model to create a new model so just add cost new order equal to new and here we will use order model Now in this order model simply provide the order data that we have just created here here we have missed one thing which is address so let me add the address also so using this one new order has been created next we have to save this order in the database so just add await New Order do save method using this the order will be saved in the
database now whenever the order will be saved we have to clear the cart data of This user because using this cart data we have already placed the order so to clear the cart data simply add await we will use the user model dot find by ID and update method after that here we have to provide the user ID so simply add user ID after that here we have to provide the object where we will add the card data and we will set it with empty Object so that the cart data will be reset after that
the order has been placed and it is saved in the database then we have have cleared the card data after that we will generate one response for that let's add response. Json here we will add the curly Braes where we will add success property it will be true after that we will add the message property here we will add the m message order Placed if we get any error in this process then this catch block will be executed in that case we will add the console log we will log this error and with that we
will generate one response where we will add one object and here we'll add success fals then we'll add the message property in this one let's provide error. message so the place order logic has been created using that we can place a new Order after that we will integrate this API with our front end so to integrate this API with the front end first we will open this front end folder and in this front end we will open SRC then pages and here we will open place order. jsx file here first we have to create one
state variable and we will link them with this input field so that we can update the state variable whenever the input field data is getting changed for that here Let's create one state variable with the name form data so just add const form data set form data equal to user State and this form data will be one object in this one we will add multiple properties like first name last name and we will update them whenever the input field gets changed so the first one is first Name then the second property is last name then
the next property is email where we will store the users's email then we'll add the a stet after that we will add the city then we will add a state then we will create zip code then we will add the country then we will add phone so here we have added these properties first name where we will store the users first name then the last Name to store the last name of the user then we will store the email then a street address City a state ZIP code country and phone number so we will store
these data in this object to store the value in this object here we will add one onchange Handler function so just add const onchange Handler it will be one AR function in this function we will get the Event from this event we can find the name and value property of the input field and we will store them in a variable so just at con name equal to event. target. name so using that we will get the name property of the input field and it will be stored in this name variable now we have to get
the value of that input field so just add const value equal to event dot Target dot Value after that we will get the input field name and value and we will provide this name property for different input field so for the first one we will provide this first name as a name using that we can update this object so to update this object using this name and value property here we will add set form data and in this one we will pass the previous data after that we will return One object here we will use
the spread operator and here we will update name field with value so using this onchange Handler function will update these properties if we update different input field now we will link this form data and onchange Handler with each input field but before that we will convert this div into a form tag so that we can add the required Property in the input field so just add form and after that in this input field where you can see the type is text and the placeholder is first name we will add the on change property in this
one we will add the onchange Handler after that we will add the name property we will we use this for first name of the user so in this name property let's provide this first name so just Copy and paste it here after that here we will add the value property and in this value property we will provide form data DOT first name now what we will do we will just copy this on change name and value and paste it in the second input field here the function will be same here we have to change the
name property it will be last name and here in this value we will Provide form data do last name similarly we will paste it in the next input field here we are using to get the users email ID so the name property will be email so in this name property we will provide email and in the value we will add form dat. email now in the next one paste these properties and here we are using this for a street address so let's add form data. a street and in the name we will use a Straight
so we are using the same name in this name and value here also we will add these three properties we are using it for the city so just add form data. City and in this name we will provide City similarly in this next input field we will add the same three properties and this input field is for the state so just add form data. estate and the name will be State now in the next input field at the same property here we will update zip code so just add form data.zip code name property will be
zip code now in the next input field add the same property here we are adding the country details so just add form data. country and the name property will be country after that we will come to this last input field here also we will add Three properties we are using it for the phone number so let's add form dat. phone and in the name property let's add phone so in these input field we have added the on change name and value after that we will set required for all input field so that if we are
not providing the data in this input field then we cannot place the order for that we will select all these input field we will add required and after that scroll down and Here we have this button right so in this button type we will add submit after adding this type submit we can remove this on click we will save this file now let's come back to the web browser open the card page then click on proceed to check out now if I click on this place order button here we are getting the message please fill
out this form so we have to fill these input field to Place the order so here we have created this form now for this form we have to create one onsubmit function for that let me arrange it so let me cut it and we will paste it here after that here we will create one onsubmit Handler function so just add const on submit Handler equal to and it will be a sync Arrow function now we will link this function With this form tag so just add on submit property and here we will add this on
submit Handler function after that whenever we will submit the form it will reload the web page so to prevent that action here we will add the event in this parameter and here we will use event do prevent default after that we will add the logic so that whenever we will place the order using the Cod then the order will be placed so first in this on submit Handler function we will add the TR catch block and after that here we are getting the navigate from the context so with that we will get back end URL
also and we will get the token cart items set cart items get cart amount delivery fee and products data here we are getting all these State variables and functions from the context and we will use it while placing the Order so within this triy block first we will create one variable with the name order items so just add let order items equal to it will be one aray so we will create this aray in this aray we will add all the product from our cart item so for that we will use one for in Loop
so just add for con items in cart Items and we will create this for in Loop now we'll create another F in Loop just add const item in cart items and items after that in this one we will check here we have to collect it it will be const now in this for in Loop we will add one if statement and here we will check if our cart Items items item is greater than zero it means that product is added in the cart and the quantity is greater than zero so we have to use this
product ID to find the product and using the product data we will add the size and quantity and add it in this aray as an object so just add const item info equal to here we will use the A structured clone using this a structured clone we can create one copy of any object in different variable here we will add products. find method here we will pass the individual product here we will check if our product doore ID is equal to items in that case we will get that product data in this variable which is
item info after that we will add one check so we'll add the if condition we Will add item info so if this item info is available in that case in this product data we will add the size and quantity for that simply add item info do size equal to item now in this item info we will add quantity property and here we will store that product quantity so to get the quantity simply add cart items items Item so just copy and paste it here after that we have to add this item info object in this
this are a so here we will add order items do push and here we will add the item info so we have created this for Loop now we'll check this logic is perfectly working or not so just add console log and here we will add order items if I save the changes and come back to the web browser now let me clear Our cart and here let me open this product select the medium size and click on add to cart for two times so you can see this product with quantity two after that we will
click on proceed to check out and we will right click and select inspect we will open the console now we are in the console now we have to provide this first name last name email ID and Address so let me type greatest tack email ID will be user. grest attack at gmail.com main stet we will fill the city estate zip code country and phone so we have filled the form then click on place order now here we have the console log where you can see one aray and in this aray we have one object and
in this object we have the product detail that we have added in the cart and with that we have this size Property so you can see we have selected the medium size and here we have the quantity so we have selected the two quantity now we will send this data on the API and store them in the orders data now you can see the order model we have to get the amount also so we will get the get card amount and delivery fee and with that we will get the address from this form data then
the status will be created by Default then we'll add the payment method from the back end and we are adding this payment from the back end so from the user we have to send the items amount and address so we have to send these three items from the request so to place the order after this for Loop let me remove this console log and here we will create one order data so to create the order data let's add let order data equal to object and In this object we will add the address property where simply
add the form data after that we will add the items in this items we have to add the order items that we have created here using this variable and for Loop so simply add order items after that we will add the amount property in this amount we will use the get cart amount function and with that we will add the delivery fee So using this our order data will be created Now using this order data we can place the order so after creating this order data we will add the switch case using that we can
choose the different payment method so here let's add switch and in this one we will add the method after that here we will create one comment and let's add API calls for cash on delivery Order after that we will create one case that is cood so you can see the by default payment method is cod so we have created the case Cod here we will add the column let's add the breaker statement after that let's create one default case in this one we will use the break statement now in this Cod case we will add
the logic using that we will do the API call for that let's add const response equal to await here we will use the exos dopost method here we will add the backend URL and in this one we will concatenate the API endpoint that is/ API SL order SL place so we have selected this endpoint to create the cash on delivery function so here we have to provide the order data after that we Have to add the header so let's add the object and in this one we will Define the headers property where we will add
one object and in this one we will add the token after that we will check this response so just add the if statement and here we will check response. data do success so if it is true in that case we will add the Set Card items and we will provide the empty object it means the Order will be placed in the front end also we are clearing the cart data using this set cart items and empty object then we will navigate the users on the orders page so just add navigate SL orders now if the
response. data. success is false it means the order is not placed so let's add the else statement and here we will add toast dot error and here we will add response dot data Dot message now if I save the changes and Open the web browser now if I reload this web page now here if I fill this form then click on place order button so this statement is not executed so let me check it let me open the network tab here we have the place order API so here we are getting success true and the
message order placed so the response is true but our Cart is not cleared and we are not navigated to the orders page so let me check that so simply we will add the console log here here we will add response. data if I save the changes and open the web browser and click on place order here we are getting Success Through message order placed so this if statement is not working so this error Is coming from the SOP context if I open this sop context. jsx file and here we have to add set cart items
that we have not added if I save the changes and come back to the web browser now if I reload the web page and if I add one product in the card then click on proceed to check out then fill this form with name email ID address and phone number and click on this place order button by selecting the cash on delivery now our Order has been placed here we are getting the true in the response that we have added here you can see we have added console log that's why we are getting the true
let me remove it when it is true then this card items will be set as empty object so it will clear the card data and we will be navigated to the orders page now if I open the database and if I refresh this database so here we have one orders collection if I open it so here you can See the order has been placed where we have this user ID who has placed this order in this items we have one array where we have one object where we have the order detail so you can see
the product detail that we have added and you can see the size so the size is medium and the quantity is three then we have the address where we have the users address then we have the amount payment method payment and date When this order was placed if we get any error in this process then this cash block will be executed so just add console log we will log this error and with that we will display one toast notification so the type will be error in this one let's provide error. message so we have created
the logic for the cash on delivery and the order is getting Placed now in this my order section we will display the order that user has placed so right now this order page have some dummy orders so we will remove this dummy order and here we will display the users actual order so let's come back to the order controller.js file and here we have to create this user orders controller function so to create it simply add the TR catch block we have added this order in this Route in this route you can see we have
added user order and here we have the user authentication right that provide the user ID when we provide the token and using that user ID we can find the orders of the particular user and we will return it as response so just come back to the order controller.js file and here in this user ERS function within this Tri block we will get the user ID from request. body So so just add con curly bres user ID equal to request. body after that using this user ID we can find all the orders so simply add con
orders equal to await here we will use the order model do find method here if I go to the database when we are placing the order here we have added the user idid property right and here we have the user ID who has placed the order so we have to use this user ID property to find the user data so simply add one object and in this one we will Define user ID property after that we will get the orders in this orders aray and we will send this aray as a response so just add
response. Json in this one we will add one object where we will define success true and with that we will set this ERS are after that if we get any error in This process then this catch block will be executed so let me copy the error so just paste this console. logor and response we will save the changes now we have added this user orders controller function at this route which is user orders so this is the endpoint user orders and we will use this endpoint to display the orders on our front end so let's
come back to the front end and from here let's open orders. jsx File in this file from this context we will remove this products that we are using to dis playay the orders and here we will get the backend URL with that we will get the token using this backend URL and token we will Fitch the orders and after fing the order we will store them in the state variable so let's create one state variable so just add const order data seter function name Will be set order data equal to user State and initialize it
with empty array after that instead of this products. slice here we will use order data order data will be one at a so we can use the map method after that if I save the changes and come back to the order page now the order page is cleared after that we will fit the users Order and store them in this state variable so let's create one Arrow function with the name load order data so just add const load order data equal to it will be as sync Aro function so just create the as sync Ado
function in this function we have to add the TR catch block we have to run this function whenever our page gets loaded for that we have to create one use effect in this one we will pass the Aro Function and here we will add the dependency aray so in this dependency aray we will add token so whenever the token will be updated it will run this function in this one we will call load order data function in this triy block first we add the if statement and here we will check if the token is not
available then we are using not of token then simply return Null and when the token is available then we can use the token and F the order details and if the token is not available we will terminate the function here after that here we will do the API call so let's add con response equal to await here we will use the exos do Post method and here we will add the backend URL in this one we will concatenate the End point of the user order API so just add/ API SL order SL user order after
that in the body we don't have to send anything so simply add the empty object then we have to send the headers so let's add the object in this one we will Define the headers and in this headers we will add one object where we will add token after that we will add the console log and in this one just add response do data if I save the changes and come Back to the web browser and reload the web page so in this console you can see we are getting success true and here we have
the array and in this aray we have one order and in this orders we have one object where you can see the particular user order that is logged in right now so now we will display this order detail on our website for that in this order you can see we have the items here we have only one item suppose Let's add one more order we will select the medium and large size then let's add the other product we'll add the medium size at to cart so now we have two other product and different size let's
click on proceed to check out and provide the delivery details like name address phone number email ID and click on place order now the order has been placed and here we have one response and In this one we have two orders and if I go to second order in this items we have three items now instead of displaying single order we will display all these items on the order page to display the items we will store different it items in one aray and we will add that aray in this order data for that here let's
remove it and we'll add if statement and here we will check if our response. data. Success if it is true in that case we will create one variable with the name all orders item so just add let all orders item equal to it will be one aray after that here we will add response. data dot orders on this orders we will use the do map method and in this one we will pass one Arrow Function and in this parameter let's pass the individual order since this order is single object and in this one we have
the items property so this items is also one aray so in this mapping we will add one more mapping so just add order do items do map method here we will pass one Arrow function in this one we will pass the individual Item and here in this item we will add some properties like a status payment payment method and date that we will get from this ordered object so basically what we are doing we are adding the payment method order date payment and a status property for that simply add item status equal to order. status
let's create one copy of it here We will add payment and here we will store order do payment after that let's create one more copy and it will be payment method here we will add method now let's create one more copy and here we will add date and here also we will add date after that in this item we have added all these four properties now we will save this item in this aray for that here let's add all orders item. Push and here we will use this item that we will get from this map
where we have added this property after this mapping here we will add the console log all orders item if I come back to the web browser reload it so here we have one array where we have four objects available so we are getting this for object from this database let me refresh this Database and we are getting this for object from this two orders so in the first order you can see we have one item and in the second order we have three items so we have added all four items in one aray now let
me remove this console log and here we will add the set order data then we'll add dot reverse method so that the latest order will be displayed on the top if I save the changes and come back to the web browser now you can see all Orders are visible that we have just played from the website so here we are getting this size quantity and here we have the status now we have to update it right now these data is hardcoded so we have to display this data using this object data so scroll down here
you can see the quantity 1 size M that is the hardcoded data and this date is also hardcoded so we will change it so first in this P tag let me remove This class name so that these things are looking good after that in this quantity remove this one and here we will add the object and here here let's add item do quantity if I save the changes so now you can see we have added the three quantity for this product so we are getting three similarly in the sizes we will add the curly presses
let me remove this medium size and in this curly addes we Will add item do size if I save the changes now you can see it is displaying the correct size you can see the large medium medium and medium after that we have to display the date from our data for that let me remove this hardcoded date here we will add the curlys here we will use new date and in this one we will add the item do date Property after that we will use dot two date string method if I save the changes now
here we have this date that is coming from this data after this P tag where we are displaying the date here we will create one more P tag so let me copy and paste it and in this paragraph tag we will display the payment and here let's add item dot payment method If I save the changes so here we have the payment cood which is cash on delivery that is coming from the database after that we have to update this status also for that here let's remove this text and here we will add the curlys
we will add item. status if I save the changes so now here we have the order placed that is by default created whenever we place a new order after that we have this track Button so on this one we will add the on click property and in this one let's provide load order data so whenever we change the status let me change the status from the database I'll click here and here we will add out for delivery we will click on update now if I click on this track order button then this status will be
updated so now you can see when I Clicked here this order has been updated and with that you can see the status has been updated out for delivery so this logic is perfectly working working we can update this order status from our admin panel after that from here let me change the margin top we will make it one and here also we will make it one if I save the changes and come back to the web browser now this order list is looking good after that we have to display this Orders in our admin panel
so if I click on orders right now this orders page is clear in the admin panel so now we'll add the in the admin panel so that we can display all the users order in this admin panel for that we will come back to the order controllers.js file and here we will create this controller function which is all orders to create this controller function here we will add one TR catch block and in this Tri block we will Create one variable with the name orders so just add con orders equal to here here we will
use await order model dot find method here I want all orders from all users so simply add one object after that we will get all orders data in this variable these orders will be stored in one aray so here let's generate one response in this one we will add the cly success true and here we will add this Orders if we get any error in this process then cat block will be executed so just copy this statement from here and paste it in this catch block so we have added the logic for this order controllers
function we have added this controller function at this end point which is/ list so whenever we will hit / API SL orders /list then this controller function will be executed and before that we have added this admin o Middleware so first we have to send the token of the admin then only we will receive all orders data for that let me close all these files so right click and select close saved and here we will open the admin folder from here let's open pages folder then go to orders. jsx file now we are at the
orders page of the admin panel so in this one we have to get the all orders data and we have to store them in one state variable for That here we will get the token from props and with that we will create one state variable with the name orders seter function function name will be set orders equal to user State and initialize it with empty array after that we will create one Arrow function with the name Fitch all orders so let's add con fch all orders equal to and it will be a sync Aro function
we have to call this function whenever Our web page gets loaded so let's add one use effect and in this one we will pass one Arrow function and here we will add the dependency array where we will add the token and here we will call Fitch all orders function now within this function we will add one if statement and here we will check if we don't have the token it means token is not available then we will terminate this function so just add return Null now when the token is available then this function will continue
execution and here we will add one try catch block and in this Tri block we will call the API so to make the API call just add const response equal to await and here we will use the exos package so we have to import the exos package so just add import exos From exos package after that the request type will be post so just add request. post here I want backend URL so to get the backend URL let's open app.jsx file here we have created this backend URL so simply in this order. jsx file let's
add import backend URL and select it so this backend URL variable has been imported from the app file now in this post method we can use this backend URL and in this one we will concatenate the end Point of our API that is/ API SL order /list after that we don't have to send anything in the body so simply add one empty object and after that we have to add another object and in this one we will Define headers and in this headers we will add one object and here we will provide our token after
that we have to add one console log and let's add the response. data now if I save the changes and come back to the orders Page and from here let's right click and select inspect then open console then here we have one object and in this one you can see we have two orders so now we are getting the orders areay we will save this orders in this a state variable that is orders for that let me remove this console log and here we will add one if statement after that we will check response.data dot
Success if it is true it means we will get the orders detail so just add set orders and just provide response. data. orders and if this response.data do success is false it means we have some error we are not getting the ERS data so let's add the else statement and here we will display one toast notification so to display the toast notification we have to import the toast So just add import toast from react toasttify package now we can use toast do error and here let's provide response. dat do message if we get any error
in this process then this catch block will be executed so here also let's add one toast notification with the type error and provide error. message now save the Changes now the orders will be stored in this orders State variable now we will use this state variable to display the orders on the admin panel for that we will come back to this return statement and within this div we will create one H3 tag and here let's type order page after this S3 tag let's add one div and within this div let's add the curly braces and
here We will use orders. map method after that here we have to pass one Arrow function and here we will use this bracket now in this parameter we will pass individual order and index number in this return bracket let's add one div in this div we will add add the key property and here let's add index now this div will be displayed on the web page based on number of orders now in this div we will add the image Tag here we will use assets dot parcel icon after this image tag here let's create one
D and in this div tag we will display the order item name so let me come back to the console log here we will get this type of object where we have the items and each items have one name property where you can see the product name so we will display these names so to display that here let's add the curly Braes and here we will use order do items dot map method and in this one let's pass the Aro function where we will pass the individual item and index number after that in this function
let's add the if statement and here we will check if our index is equal to order dot items Do length it means that item is the last item so in the last item we will display the product name in different format and we will display other items in different format so here in this if statement we will add the return statement and we will add one P tag and in this P tag let's add the key property where we will add index after that first we will display the product's name so just add item do
Name after that here we will add this x icon then we will add the curly bres and here we will add the quantity of that item so just add add item do quantity after that here we will add one aspan tag in this aspan tag we will display the size of the product so let's add curly bres item do size now if I save the changes and come Back to the web browser here we have the image but we are not getting the product name so here we have to add minus one after that we
will get the last product if I save the changes and come back to the web browser so in both orders we can see the last product name and the other product name is not displayed so we will display that in this as statement so just copy and paste it here if I save the changes and come back To the web browser so in the first order we have added one item and in the second order we have added three items so it is also visible after that here in this else statement we will just add
one comma Now if I save the changes and come back to the web browser so in the first and second product we are getting one comma and in the last one we don't have the comma Now this format is looking Perfect now after this div let's create one P tag and in this P tag we will display the users's name to display the users's name let's add the curly Braes and here we will use order Dot address DOT first name after that we will concatenate this a string with one space and then we will concatenate
the last name so just add order do address do last name after adding the last name if I Save the changes so here we have the users's name where we have the first name and last name after that we will add one div and in this div we will display the users address so to display the users address simply add one P tag and here we will add the curly presses here we will display user do address dot straight after that we will concatenate One string where we will just add one comma now let's create
one more copy of it and here we will display city name after this comma we will concatenate the order do address do state then we will concatenate one comma and here we will add concatenate and we will add the country details so just add order. address. country after that let's add one comma In double quote then we'll concatenate the order dot address dot zip code now if I save the changes and come back to the web browser so after this name we have this a street address then city state country and zip code so after
this comma let me add one space so this address will look good now it is looking good after that we will display the phone number of the user so after this Dip tag let's create one P tag curly presses and here just add order. address. phone now if I save the changes so here we have this phone number after that let me add all these div within a div so let's create one div here and move this closing tag here now we will select format document and after this div here we will create one more
Div and within this div we will display order details like order quantity method payment method payment status and date for that here we will add four P tags so let's add P into four in the first P tag we will display number of items so let's add items colum we will add the curly Braes here let's provide order dot items dot length now in the P tag we will display the payment Method so let's add method here we will add one object here let's provide order dot payment method now in the third P tag simply
add payment and here we will add one tary operator here we will check if order. payment is true in that case we will add one string which is done and if the payment is false then we Will add pending now in this P tag we will add date and here we will add one C Braes here we will use new keyword and date Constructor in this one we will add the order. date after that here we will use two local date a string we will save the changes now if we come back to the web
browser so now here we have the users detail and then We have the order detail like item method p and date in this one we have added three items so you can see items three and this is the date when we placed this order so after this div we will create one paragraph tag and in this paragraph tag we will display order amount for that simply add one curly Braes and we will display currency after selecting this currency this currency has been imported from This app file after that here we will add the curly Braes
and in this one we will add order do amount now if I save the changes so here we have the amount $250 and $240 after this P tag we will create one select tag in this select tag let me remove this name and ID property in this select tag we will Create five options tag so just add option into five in the first option tag we will add the value and text so in the first one let's add the order status that is order placed so whenever New Order will be placed the status will be
order placed now in this second option tag let's add the another status that is packing now in the third option let's add the order status Shipped now in the fourth one let's add out for delivery and in the last option let's add the value and text that is delivered so we have created one input select box if I come back to the web page you can see here we have this select box right now it is not working right now if I deess it then again it is displaying order placed and the database is not
updated so now we'll add the logic so that when we Update it then it will update the status in the database before adding that let me add the CSS properties for this page for that let's come back and in this div let's add the class name property here let's add the class name and we will provide grade and we will use the template column so we'll use the different template column for the phone screen and medium and above screen size we'll use different column so simply add Grid grid columns 1 grid columns and this fraction
now for the larger screen we will use this fraction then we will provide the Gap items start border border color padding margin then provide the text size and text color now if I save the changes and come back to the web browser now these list Is looking good after that we will add the CSS properties for this image tag so here let's add the class name we will provide width now it is looking good after that we will add the CSS properties in these P tag so here let's add the class name property and here
we will provide padding y 0.5 save the changes now we have the gap between these product name after that we will add the CSS Properties in this P tag so let's add the class name property in this one we will add the margin top margin bottom font medium if I save the changes so here this name is displayed in bold style now we will add the CSS properties in this P tag so let's add the class name property and here let's provide text as small and for small and above a screen We will use text
size 15 pixel after that in this P tag let's add the class name property and here we will add the margin top three if I save the changes now here we have this Gap after that we will come here in this P tag and in this one we will add the class name property and here let's provide text a small and for a small and above screen we will use text 15 Pixel if I save the changes so you can see the changes in this amount it is displayed in 15 pixel next we will add
the CSS properties for this select menu so in this one let's add the class name property and here let's provide padding font semi bold save the changes now this select tag is also looking good so we have provided the CSS Properties for this udit page after that we will create this functionality so that when we change the status of any order then that status will be saved in the database and when user will click on the track button then it will refresh this order status on the users my order page for that here we will
add the value property and here we will provide order do status so after adding this in this Select tag it will display the current status if iess it right now this output delivery status is not displaying here because we have made mistake in this delivery spelling so let me colnect it now save the changes and Here Also let's update it we will use a small D we will click on update now if I refresh it so here you you can see the text is out for Delivery but right now if I change it and set
other status then it will not update this so to change this status from the admin panel we have to create One controller function so we will come back to the backend folder controller and Order controller.js file and here we will create this controller function with the name update a status so in this function first we will add one TR cach block and in this Tri block We will get the order ID and their status from the user so just add const cly Braes we will add order ID and a status and we have to send
this order ID and status when we will hit the API so let's add the request. body now we will use the order model to find the order and we will update the status for that simply add a weit here we will use order model Dot find by ID and update method then we will provide the order ID then we will add one object where we will add a status that we will get from the request do body so after adding this whatever status we will send here that will be saved for this order ID and
it will be saved in the database after that we will generate one response so just add response. Json and here we will add one object where we will Define the success Property that is true after that we will add the message and here we will add a status updated now if we get any error in this triy block then catch block will be executed so let me copy this statement and paste it here in this catch block so now we have added this update status in this order route. JS file at this end point which
is/ status and here Also we have added admin o so only admin can update this status so now let's come back to the orders. jsx file in the admin and here we will create one Arrow function with the name a status Handler so here let's add const status Handler and it will be a sync Arrow function here we will get the event from the select tag and with that we will get the order ID whenever we will call this function Then we will get the event and Order ID and here we will add the TR
catch block and in this Tri block we will add the variable with the name response and here we will use the await then we will call the API using exos dopost method here we will provide the backend URL and in this one we will concatenate the end point that is/ API SL order SL a status here we will add one object and in this body we have to add the order ID and after that we will add the status to get the status property we will use event dot Target dot value so after adding this
if we select any option from the select tag then that option will be added in the estatus property so it is one admin feature so here we will pass the headers so in this headers we will add the object where we will provide the token so we have added the logic for the API call after that we will get the response so let's add the if statement and here in this condition we will check if the response. dat do success is true it means the status has been updated so in that case here we will
use a wait and we will call the fch all orders function so that it will update the status here so we will call this function now if we get any error in this process then the catch block will be executed so just As console log and error and with that we will display one toast notification also so the type will be error and here we will provide response. data. message after creating this function we have to link this function with our select tag so to link that simply add on change property and in this one
we will pass one Aro function here we will take this select tag Event and here we will call a status Handler function in this function we have to provide the event and Order ID so for the event simply add event that we will get from this AR function after that we have to provide the order ID so to get the order ID ID here we will use order doore ID so we will get the order ID now if I Save the changes and come back to the web browser so here we have selected out for
delivery let me select delivered so now this status has been updated and if I delad the web page still you can see the status is delivered and if I come back to the database refresh it so here in the second order you can see the status is delivered similarly if I come back to the front end and click on the track order now you can see the a Status has been changed it is delivered now if I update the first one let me select packing and click on the track button for the front end so
you can see the status has been updated to packing so this status update feature is perfectly working we can place the order we can display the orders in the admin panel and with that we can also update the order status so it is updating the order status on the users my order page also after that we have to add the Payment gateways in our project first we will add the stripe payment Gateway so to add the stripe payment gway we will open a stripe website which is a stripe.com let me open this link here first
we have to create one account for that we will click on sign up after coming to this website we have to create one stripe account if the stripe is not available in your country then you can select different country also and create The test account after creating the account we directly come to the a stripe dashboard and in the dashboard you will get the a stripe secret key so I have already created the secret key that I will use in my project so after creating the a stripe secret key let's come back to the vs
code editor and from here in this backend folder we will open EnV file and here we will create one environment Variable with the name a stripe secret key so let's add a stripe underscore secretor key it will be one string and here we will paste our a stripe secret key so we have added the stripe secret key here after that let's come back to the order control controller.js file and we will use this a stripe secret key to create the instance of a stripe so to create the a stripe Instance first we have to add
one comment so let me add the comment gway initialize now let's import the Stripe from here we will use the stripe package that we have already installed while creating the backend project so just add a stripe so we have imported the stripe using this capital S to declare this stripe now here we will create one variable with the name stripe so just Add const stripe so here we are using the a small s in the lower case right a stripe equal to new and here we will use this stripe that we have imported after that
here we have to provide secret key so we will get it from the process do EnV dot a stripe secret key so we will get it from the environment varable table now it will Initialize the stripe and we can use this stripe in our project after that we have to create this place order a stripe controller function using that we can place the order with a stripe payment method so first here we will add one TR catch block and and here we will get the products data from request. body as we have already received from
body in this code so let me copy this and paste it Here here we will get the user ID item amount and address after that we need the Orin URL from where user has initiated the payment so just add cons curly bres origin and we will get this origin from header so just add request do headers so whenever we create any request then in the header this origin Property will be created where it includes the front end URL Suppose we are placing the order from this website then this origin will be Lo Local Host Port
5173 after that here we have to create the order data so you can see here we have created the order data so let me just copy it and paste it here after that in this payment method let's add a stripe and initialize the payment as false so the order data has been created next we will create the order using this Order data and the method will be same so let me just copy it and paste it here after placing the order we will create one line items using that we can execute the stripe payment so
to create the line items here we will create one variable with the name line item so just add const line uncore items equal To and here we will use items that we will get from the body and here we will use the dot map method since item is one aray so we can use the map method now in this map method we will use this Aro function and here we will use this small bracket here in this parameter we will add the individual item and in this return bracket we will add one object where we
will Define price data Property where we will store one object where we will use the currency and here let's provide currency next we will add the product data here let's add the product data like product name unit price so let's add the object and in this object we will add the name property here we will provide the item. name after that here we will add the unit Amount and the unit amount will be item dot price multiplied by 100 after this object let's add the comma and we will add the quantity property and in this
quantity let's provide item do quantity so we have created this line items after that in this line line items will add the delivery charges so let's add line items do push in this one we will add one object Where we will Define same price data and quantity so let me just copy this and paste it here in the currency the currency will be same and in this name we will provide delivery fee or delivery charges after that in this item do prices we will use the delivery charges so here we have to create two variables
so let's add one comment and Here we will create Global variables here we will create the variable for currency and delivery charges so just add con currency while creating the stripe account we have used the currency India and currency INR so that's why I'm using INR if you have created the a stripe account in another country where the currency is different so write your currency code here like USD or Anything after that here we will add the cost and we'll add the delivery charges and it will be 10 so we have added the delivery charge
charges and currency after that in our controller function in place of this item. quantity we will provide the quantity one because we are just adding the delivery charges and in this unit amount let's add delivery charge so we have created the line items Now using this line items we can create A new session so to create a new session simply add const session equal to await and here we will use the stripe dot checkout dot sessions do create after that here we will add one object where we have to define the success URL and cancel
URL if the payment is successful then we will be redirected to the success page and if The payment is failed or cancelled then we will be redirected to the cancel URL so here we have to define success URL in this URL we will use the template Lal so just add the back Tex dollar and cly Braes and here we will provide origin that will be the front end URL after that just add slash verify then we will add the parameters that will be success equal to True then we will use the end and here we
will add the order ID in this order ID we will add our orders ID so to get the order ID simply add dollar sign curly Braes and we will provide New Order doore ID so we have created the success URL after that we will add the comma and here we will Define the cancel URL if the order is cancelled then we will come back to this URL and let me just copy and paste it Here here the success will be false after that here we will add the line items that we have just created after
that we will add the payment mode that is payment so here we have created the session so whenever the session will be created then in this session there will be one URL and using that URL we can send the user users on the payment Gateway so in that case just add one Response using the Json method and here let's add one object where we will define success true and after that we will add session uncore URL in this one we will store session. URL so here the controller function for the place order stripe has been
created now if we get any error in this TR block then catch block will be executed so we will just copy this error from this catch and we will paste it Here so we have added this console log and error response in this catch block now save the changes and we will implement this API in our front end so for that let's open the front end folder then we will open the pages Place order. jsx f in this file after this break a statement here we will add one more case and this case will be
a stripe here we will add the column then let's add one break a Statement now if I go to the front end and select any product here we are getting some error so let me check it so the back end has been crashed here we are getting currency has already been declared we are getting this error in the order controller.js line number 7 so let me check it here we have defined the currency INR so here you can see we have already imported the currency from app.jsx so Let me just remove this import statement and
here we will use the currency from this Global variables now we will save the changes so it will reart the back end after that we will hide this terminal and come back to the front end now if I reload this web page and we will select the size and add the product in the card so here if I click on proed to check out and fill this Form and click on a stripe then the payment method will be changed to a stripe so that the switch case will not execute this Cod code it will execute
the code written in this a stripe case because in this on click we have added the set method a stripe so here we have to add one API call to our a stripe endpoint so just add const it is sponsor stripe equal To here we will use a weight exos do Post method in this post method we will add the backend URL and in this one we will concatenate the API end point that is/ API SL order SL stripe after that we have to send the order data that we have created here before this switch
method so we will use the same order data here after that we will add the curly say and here we will Define Headers so here we will add the object and in this one just add the token after that here we will add one if statement and here we will check if our response a stripe do data do success is true it means we will get the session URL so just add const curly braces and here we will add session URL so we will extract the session URL from the response stripe. dat Property and on
this session URL we will send the users so to send the users on this session URL simply add window dot location dot replace and provide this session URL and if the response. dat. success is not true in that case we will add the else statement and here we will provide one toast notification with the error so just add response stripe. dat. Message now we will save the changes and we will select the stripe and click on place order button so it will open the a stripe payment Gateway so here we have the product name quantity
and this price then we have this delivery charges here we have to add the email ID and card information to place this order so to get the dummy card number let me open a new tab and here we will search For dummy payment a stripe from here let's open this first link and in the right side we will select cards by country and in this filter I will type India because we have created the stripe account in India and after that let me just copy this dummy card number after that we will open the estri
payment page here we will add the email ID then we will paste the card number And here we have to select the future date simply add this date after that we have to add the CVV number so just add three-digit number then we will add the name and click on the p P button so when we clicked the pay button here we are getting two option to fail the payment and complete the payment now when we click on complete payment then the payment will be completed successfully and we are Redirected to Our Success URL so
as we have created here in the order controller.js file if the payment is successful then we will be redirected to this success true and Order ID and if the payment will be cancelled then we will be redirected to this URL so the payment is successful that's why you can see the success is true now we will use this URL to verify Our payment so to verify the payment first we have to create One controller function so after this controller function let me add one more controller function with the name verify a stripe and here we
will create One controller function with the name verify a stripe and it will be a sync Arrow function here we will get the request And response after that in this function we will get the users ID then users order ID and success property for that just add const curly say order ID success and user ID we will get these three items from request. body in this one we will add the TR catch block And we will verify if the success is true in that case we will change the payment status to true for this order
ID so let's add the if statement and here we will check if our success is equal to true so in that case we will add a wait and here we will use order model do find by ID and update and in this function we will provide the order ID and here we will add the object where We will Define payment property and we will make it true so if the success is true then the payment status will be true and after that we will clear the cart data of the user so to clear the cart
data here let's add the await user model dot find by ID and update and here we will add the user ID after that we will add one object Where we will add the card data property and here we will set one empty object so we have verified the order and made the payment status true then we have cleared the cart data of the user after that we will generate one response so to generate the response just add response. Json and here we will add one object where we will define success property so this property will
be true so here we have just added success true after that we will add the else Statement if the success property is not true it means the payment is failed so in that case we will add the await order model and we will delete that order so just add find by ID and delete method here we will add the order ID so if the success is false then the order will be deleted and here we will generate the response where the success will be false if we get any error in this Tri Block then catch
block will be executed so just copy this statement from this catch statement and paste it here so we have added this statement in this catch block now we have to link this controller function verify stripe with the route so let's open order route. JS file and here we will add the comment that will be verify payment here we will use the order router do Post method and our end point will be/ verify a Stripe after that here we will add the Au user middleware after that we will add the controller function that we have created
here so first we have to export it so let's add verify a stripe we will save the changes and here we will add the comma then verify a stripe if I select it from the suggestion so this controller function has been imported which is verify a stripe now we will save the Changes and let's come back to the front end and go to Pages folder and here we will create a new page called verify. jsx and we will use that to verify the payment so in this Pages folder in the front end we will create
a new file with the name verify. jsx here we will use rafc snippit first we have to mount this verify page in the app.jsx file so here let's create one copy of this route and here we will add the path SL verify and here we will use verify page so we will select it from here so this page has been imported now we will save this changes and come back to the verify. jsx file now if I go to the web page so you can see the page has been mounted at this/ verify path so
you can see the text verify that is coming from this div so let me clear this text now here we will add the logic using that we can verify our payment for that here we will add The navigate token and Set Card item function from the SOP context so just add const navigate token and Set Card items equal to use context and in this one we will provide the S context after that here we will create one Arrow function with the name verify payment so just add const verify payment equal to and it will be
one asnc Arrow function so we have created this Arrow Function after that from this parameter you can see we have success true and Order ID so from this parameter we have to get these patterms so to get the parameters from the URL we will use use search padams so simply add const search padams set search patterms equal to here we will use use search patterms after that we have to extract the success property and Order ID from the pams so just add Con success equal to search padams dog and here we will add the key
name that is Success now let's create one copy of this and here we will add the order ID and in this one we will add the order ID so after adding this in this success we will get the true or false and here we will get the order ID after that we will get the backend URL also from the SOP context so now we have The backend URL after that we will create this verify payment function so that we can verify the payment we have to execute this function whenever we will open this page for
that let's add the use effect and here we will pass one add function after that we will add the dependency aray and in this aray we will place the token after that in this function we Will call the verify payment function so in this function we will add the tri catch block and within this Tri block let's add the if statement and here we will check if the token is not available in that case we will return null so that it will stop the execution of this function here and if the token is available then
we will continue the execution and here we will call the API To verify the stripe so just add con response equal to await and here we will use the exos do Post method after that we will add the back end URL where we will concatenate the endpoint address that is SL API SL order SL verify stripe after that we will add one object where we will send this success and Order ID so here let's add the success and Order ID after that we have to add the token in the headers so let's add one another
object where we will add the headers property and here we will Define one object and in this one we will provide token so now we'll get one response now let's check this response so just add the if condition here we will check response. data. success is true it means we have Verified the payment so in that case simply add set cart items and provide the empty object so the cart data will be cleared then we will use the navigate and here we will send the users on orders page and if the response. data. success is
false it means the payment is is failed so in that case we will send the users on the homepage so just add navigate Slash and we will send the users on the homepage or we can also send the user on the cart page so that user can try the payment again so we can send the users on cart page using this/ cart so here we have added this logic after that if we get any error in this triy block then catch block will be executed so here let's add the console log and provide this error
and with that let's add one toast notification also for that let's add Toast so first we have to import the toast so just add import cly veres toast from here we will use react toasttify package after that here we will add the toast. error which is the type and here let's add the error. message now if I save the changes here we are getting exos is not defined so we have to import the exos so just add import exos [Music] From here we will provide exos package now if I save the changes so now the
payment has been verified and we are redirected to the my orders page so as you can see the order has been placed and you can see the payment type is a stripe now if I open the database go to orders and refresh it and here if I open this order so you can see the payment method is a stripe And payment is true and now let's suppose we place a new order so let me select another product we will select the medium size and come back to the card page proceed to check out they will
provide the delivery information like name email ID address ZIP code and phone B will select the stripe and click on place order and here we will click on the back Icon then the verify is false and we are redirected to the card page and here you can see the product is available on the card page if I go to orders here you can see the order is not placed and the card is not cleared if the payment is failed then we will be redirected to the card page so the stripe logic is perfectly working but
this is not a secure method to verify the strip payment to verify the a Strip payment we should use the web hooks but if we go through the web hooks method that will be very long process and that's why we have created this temporary verification method after that we will add the integration for razor pay payment gateway to integrate the razor pay payment Gateway let's come back to the browser and open a new tab and here we will search for Reser pay now let's open this Website and from here just click on sign up now
button here you have to provide your email ID or phone number to create a new account and after creating the account you will come to the razor pay dashboard and from the dashboard you can get the razor pay key secret and razor pay key ID and we have to use that ID and secret key in our so I have already created the Razer pay account and I already have the razor pay secret key and secret ID so After getting the razor pay key ID and secret just come back to the vs code editor then in
this backend folder just open. EnV file and here we have to create two environment variables the first one is Razor pay key secret and the second one is Razor pay key ID you will get this key secret and key ID from the Razer pay dashboard so here I will paste my own Key so let me just paste the key ID now I will paste my key secret now just save the changes and close this EnV file Now using this we can create the instance of Razor pay and we will use that in this place order
razor pay controller function so here you can see we have already created the Gateway initialize and here we have initialized the stripe so here only we will initialize the Razer pay so to Initialize the Reser pay we will create one variable with the name rer pay instance so just add cost razor pay instance equal to here we will use the new keyword and here we will use the razor pay Library so first we have to import the razor pay from here we will provide the razor pay package after that here after this new we can
use this razor Pay and in this one we will add one object and here we will Define our key ID and key secret for that simply add key _ ID column and here just provide process. EnV dot we will use this razor pay key ID just copy and paste it after that let's add the comma and here we will Define key Secret and here we have this Razer pay key secret so just copy and paste it here with process. Env. razerpay key secret so we have created the instance of Razor pay now we can use
this in our project so using this instance we will create our razor pay payment controller function for that I scroll down and here you can see we have created this function place order Razer pay so here we will add the tri catch Block in this one first we will D structure the order details as we have already done here so let me just copy The statement from here and paste it here in this Tri block from here let let me remove this line because here we don't need the origin and in the payment method we
will type RoR pay and here it will save the order in the database after that we will create one option using that we can execute the payment of Reser pay so we will add cost options equal to and it will be one object in this one we have to add the Amount so let's add amount that we will get from request. body so in this amount just add amount into 100 after that we will add the currency so in this file we have already defined the currency so here you can see the currency is in
a smaller case but for the Reser pay we need the currency in upper case for that here we will add Currency dot to uppercase and using this method we can provide the currency in uppercase after that we will provide the receipt so just just type re here we will add new order doore ID that we will get after we save this order in mongodb after that we will add do two string property so we have created this Options now using this options we will create a new order of Razor pay so just add await here
we will use razor pay instance. orders dot create method and in this one we will add the options that we have created here after adding it here we will pass one Arrow function and in this parameter we will send error and orders after that here we will check if error so if we have any error so we Will just add console.log eror and with that we will add the return statement where we will send the response that will be success false and here we will add the message property that will be error after that if
we don't have any error then we will generate one response with the Json and here we will send one object with success property true after that we will add the order that we will get from this Parameter if we get any error in this process then catch block will be executed so in that case here we will log the error in console and we will also generate one response so simply copy this statement from here and paste it in this cach block after that save the changes and now let's come back to the front end
we will open open this front end folder then SRC then Pages then Place order. jsx File so here we will create one more case here we will add the case raser pay then add the column and after that here we will add the break statement and here we will call the API before calling the API let's come back to the index.html file and in this file after this script here we have to add one more a script tag and in this one we will add the SRC property and in this SRC just provide this URL
that is https checkout. Riser Pay.com slv1 checkout. JS now we will save the changes and close this file after that here we will call the razor pay API so first will create one variable with the name response Reser pay so just add const response Reser P here we will add a wait then we will use the exos do Post method for the API call After that we will add the backend URL and in this one we will concatenate the end point that is/ API SL order slash razor pay after that we have to send the
order data in the body so simply add order data after that we have to add the headers so just add the object and Define the headers property and here we will add one object and in this one just provide the token so after that it will call the API and we will get one Response so here we will check if response Razer pay. data do success is true so if this data. success is true it means we will get the order data in the response so let's add the console log to check that so just
just add respon Razer pay. dat. order now if I save the changes and come back to the web browser now let me open the place order page and here we will add the first name last name email a state address City a state country zip code and phone number then select this Reser pay option and click on place order button so here we have one object in the console where you can see the amount amount due amount paid attempts created at currency entity order ID noes offer ID receip and Status so we will use these
options to create a function and using that we can execute the razor pay payment in our Front end for that here we will create one Arrow function with the name init pay and in this init pay we will take this order details and execute our Reser pay payment so just add const the function name will be init pay and it will be one Ado function so just create this Aro function and in this parameter we will write the order so we will send this object as a parameter in this init pay Function after that here
we will create the options so simply type const options equal to curly Braes and here first we have to add the razor pay key ID so in the front end we have to add the razor pay key ID so if we open the EnV file of our backend here we have added the secret key and key ID for the back end but in the front end we need only key ID this one so let me just copy this and open the EnV file of our front end project just paste it here Here we will update
it we will write Vore now save the changes and close this file now here in this option first we will Define the key that will be the key ID of the Reser pay so to provide the key ID from the environment variable simply add import do met. EnV dot then provide the key name that is V razor pay key ID so just type V razor pay key ID After that we have to add the amount property so just add amount and here simplified this order do amount we will get this amount from the RoR pay
after that we will add the currency and we will get the currency from order. currency after that we have to add the product name so simply add a order payment now let's create one more copy here we will add description after adding the description We will provide the order ID so just add order uncore ID and here we will provide order. ID so this ID will be generated from the back end after that we have to add receip and here we will provide order. reip after that here we will create the Handler function in that
one we will call the payment integration API so simply add Handler and here let's add one as sync Aro function so just add asnc and we will create this Aro function so in this add a function parameter we will add response now we will check this response so just add console log and add this response now we will save these changes and here we will create one variable that will be razor pay R zp here we will use equal to new window. Reser a And in this one just provide this options that we have just
created here so just add the options after that we will open this razor pay so just add Reser pay. openen so after adding this it will create one popup where we can execute our payment and after executing the payment it will execute this Handler function now we will check this Logic for that let's come here in this razor pay Case and here let's remove this console log and here we will add init pay and in this one we are providing response. dat. order that we have provided here now if I save the changes and come
back to the web browser Let me refresh this web page and here we will add the delivery information like name email address ZIP code and phone number then select the Reser pay option And click on place order button so after that you can see it is opening the payment form here we have to add the phone number so let me add one temporary phone number then click on process proed then select the card and here let's open a new tab and search for raor pay dummy card let's open this web page and scroll down so
here we have the dummy card number so just copy this and paste it Here here we will add any future date we will add any card holder name we can add any name because it's a dummy card number here we will add the CBB and now click on pay now now just select this pay without saving card here we can skip the OTP just click here complete on Bank page then just click on success here we are getting this option because it's a test mode so now you can see the payment is Successful and now
you can see in this console one response has been generated and in this response we have the reserve pay order ID then Reserve pay payment ID and Razer pay signature so now we will use these three items to verify the payment so to verify the payment we will create one more new controller function with the name verify Reser pay so here we will create that function in this order controller.js file so just add Con verifi iser pay and it will be a sync Arrow function so just add a sync and create one Arrow function in
this parameter we will take request and response now in this function we will add the TR catch block now from the front end we will send the reserve pay order ID from front end to back end and using this order ID we will check the payment so just add const curly addes here we will get the user ID and after that from the body we have to get the reserve pay order ID equal to request. body after after that from this Reser pay order ID we have to find the order so for that just type
const order info equal to a wait here we will use razor pay instance do orders do Fetch and in this method we will provide our razor pay order ID so just add Razer Pay underscore order ID after adding this this order ID's order detail will be saved in this order info now let's log it in the console so just add console log and provide order info after that we will export this function from this file so in this this export just provide this verify Reser pay so we have exported this function Now using this controller
function we will create a new route so To create the route just come to routes folder order route. JS file and just create one copy of this and here we'll add the text verify Reserve pay here also we need the Au user and here we will add the function verify Reser pay now we will save the changes and we will check this route to check this route simply open the Thunder client we will click on new request select the post Method here we will provide HTTP Local Host Port 4000 SL API SL order slash and
here we will provide verify razor pay after that in this body we have to provide the order ID so we will get the order ID from here so let me just copy this order ID property and add the column and here we will paste the order ID value so just Copy and paste it here after that in this headers we have to add the authentication token so just open the application then go to local storage and here we have the token right so let's copy the token value and in this header just add token and
paste the value then click on the send button so here you can see processing and let's open the terminal of this backend project now just click On this cancel option to cancel this request because we have not created any response from our controller function so let me cancel it for now and in this terminal you can see we have the order details so you can see the order amount and here you can see the amount paid then we have the amount due which is zero so whatever we have paid in the last transaction that is
successful that is reflecting here so you can see the amount due is zero now we will use this Detail to verify the payment so in this verify isert pay function here we will check if our status is paid it means the total payment is complete so in that case we will use this receipt where we have used the order ID so for this order ID we will change the payment true and we will clear the users card for that let me hide this terminal and here let's remove this console log and here we will add
one if statement where we will check if our Order info. status is equal to paid it means our payment is successful so now we will make the payment property two for our order so just add await order model dot find by ID and update after that we have to provide the order ID that we have saved in this reip you can see we have the order ID in The reip so simply provide order info do re so we will get the order ID and after that here we have to add one object where we will
add the payment property and we will make it true so it will update the payment in the database after that we have to clear the users card data so just add await user model do find by ID and update and in this one simply provide User ID then add one object where we will Define the cart data property and here we will provide one empty object so it will clear the users cart data so we have changed the payment status to true and cleared the card data of the user after that we will generate one
response so just add response. Json in this one we will add one object and here we will add the success true in the message we will add payment successful after that if the order Status is not paid then we will add the elsea statement and here we will generate one response so let's add response. Json success Falls and and here we will add the message payment failed if we get any error in the tri block then this catch block will be executed so here let's add the error in console so just copy this statement from
this catch block and paste it Here now we will save the changes now if we send this request again so here we have success true payment successful so now the payment is verified now if I come back to the web page and open the order page so here we have a new order where you can see the payment razor pay and date so this razor pay payment functionality is also working fine after that let's come back to the Vs code and now we will link the verified pay API with our Handler function so let's come
back to the place order. jsx file we will come back to the init pay function and here we have created one Handler function where we have one response and in this response we have the order ID now we will send this order ID in our back end and there we will verify the payment for that here we will add the try catch block and in this TR block we will add const and here We will add response equal to a wait here we will use exos dopost method after that here we will add the backend
URL and in this one we will concatenate our end point that is/ API SL order slash verify rasor pay after that here we have to add this response so let me change this name response to something else so let me add clys data so now we can directly extract the data from this Response now in this body we have to provide this response where we have the razor pay order ID so simply add response and after that we have to add the hitter so just add headers and in this one we will store one object
and provide one token so after that it will call the API and it will verify the payment that we have made through Razer pay and here we will check if the data do success is true it means our payment Is successful and it is verified so in that case we will navigate the users on the orders page and with that we will clear the cart so just add set cart items and provide one empty object and if we get any error in this process then this cash block will be executed so just add console log
and log this error and with that we will add one toast notification with the type error and here we will provide this error Now we will save this changes and hide this terminal after that we will come back to the web browser and let me close this now let me clear this cart and come back to the homepage and refresh this web page now let me delete all the orders so you can see we have created these orders by testing so let me delete the order data we will come back to the mongod DB and
here simply delete this orders Collection so all orders has been deleted now we will check it so if I open the orders page you can see we don't have any order and if I open the admin panel you can see all the orders has been removed now we will place new orders and check all three payment method so let me add this product and select proceed to check out then we will add the delivery information so we have filled this Delivery Information Form then we'll select cash on delivery and click on place order so you
can see the order is placed so it is reflecting on the my order space and it is reflecting in the admin panel also you can see the method cood payment pending after that let's come back to the homepage and let me add another product in the cart and click on proceed to check out here we will fill the form After that we will select the raser pay click on place order so it will open the payment gway here we have to provide the card details so let me add the dummy card number then we will
add the expiry this is the future date here we will add the card holder name and any 3dit CBB number then click on the pay now button then click on this button continue without saving card then click on this button complete on Bank Page then click on success so now the payment is successful so after successful payment it will redirect the users on the my orders page so you can see here we have the payment method Reser pay after that let's taste the stripe also so let's add this product in the cart click on proced
to check out here we will fill this form from here we will select this Stripe and click on place order after that here we will add the email ID then we will add the AR Stripes test card number so just search AR stripe dummy card open this website click on cards by country write the country name India and we will copy this taste card number so just paste the card number add any future date provide the CBB card holder name and click on pay button Then click on complete so the payment is successful now we
have placed the order using this payment a stripe and if I come back to the admin panel refresh this so here we have total three orders so this last order is placed using the stripe here we have used the razor pay and here we have used cash on delivery so you can see the order is displayed in different order the oldest order is displayed on the top and the New Order is displayed at the Bottom so we will reverse it for that let's come back to the admin panel SRC folder Pages then order. jsx file
here we are using the set orders so in this one just provide Dot reverse save the changes so now you can see the new order that we have placed using the stripe is displayed on the top and the cood order is displayed at the bottom so now we have created all the functionality of our e-commerce website so finally we have completed our E-commerce project here we have added two payment integration which is a stripe and Reser pay and we have also added the cash on delivery and here we have added this product filter option so
that we can filter the product based on the category after completing this project next we are going to learn how to deploy this project on versal so here we have this project folder where you can see admin backend and front end now here we Have to create one versal dojon file so first let's open this backend folder right click on this back endend here we will create a new file and here we will add the file name versal do Json now in this versal do Json we have to paste one configuration code so just come
back to the web page and you have to copy the code from this link I will provide this link in the video description so here you can see versal do Json and this is for Express backend Right so we have to copy the code for Express backend so this is the code just select and copy or you can also click here to copy this one now just come back and paste it here so we have added this configuration in the versal dojon file in the back end just close this and now let's open the front
end so we will right click on this front end create a new file and the file name will be versal do Json and here also we will paste the Configuration so just come back and here you can see we have another configuration that is for front end right so this versal Json configuration will help to support react router in the front end so we have to copy this code just copy and paste it here that's it so we we have added the versal dojon in the front end also backend also and now we will add
this in the admin panel so here right click on this admin create a new file write the file Name versal do Json and paste it here the same code that we have used in the front end that's it now let me close all these folder and here in this project folder which is forever full stack here we will create one git ignore file so right click create a new file dot git ignore in this git ignore let's add the folder name that is nodecore modules because we don't have to upload This nodecore modules folder on
GitHub after that we will add one more file that will be envirment variable file so just add star do EnV that's it we have added these things in the GI ignore now we can upload this code on the GitHub so I'll click here click on initialize repository so you can see here it is displaying total number of files 159 correct now let's add one message Then click on this commit now just click on publish Branch now here it is asking to choose the repository either private or public so let me select this private repository that
will be/ forever full stack let's select this one so now our project has been uploaded on GitHub you can use any method to upload your project on GitHub right now you can see here we have this repository in my GitHub account let me open this One so here we have the admin back end and front end right next we have to deploy this on versal so let me go to versal account so this is wal.com you have to create one account here and after that you will see this button add new right just click here
and select project let me select the project after that you have to link your GitHub account with this versal you can see this account is already linked or you can click here to add a new GitHub Account after that it will display all your repository here so I'm going to use this forever full stack so let me click here on import so first I'm going to deploy the back end so here let me add the text forever backend write the project name this is forever back end and here the framework will be other let it
be here we have to select the root directory so just click on this edit Button and from here we will select this back end that's it just click on continue after that here we have this invo M variables so let's open it and here we have to provide our environment variables so let me come back to the vs code here if I go to back end and open our EnV file so here you can see we have these environment variables so just copy all these environment variables and paste it here so we have added all
these envirment variables then click on this Deploy button now you can see some progress here just wait for it now you can see the message congratulation you just deployed a new project on versal and you can see the message Api working right now let's click on this button continue to dashboard now here you can see the domain so let me open this in new tab so here you can see this message Api Working correct so it means our back end is successfully deployed now we can deploy our front end and admin panel so let me
just copy this backend URL copy and come back to the dashboard after that let's click on this projects and here we will click on new project then again click on this import button for this repository and here we have to add the project name so this will be our front End so I will write forever front end then here the framework will be other and after that here we have to use the root directory so just click on this edit select this one front end and click on continue after that here we have to provide
the envirment variables so if I come back to the vs code and in this one go to front end and in this front end I'll open this involment variable so here you can see We have this involment variables so let me just copy it and paste it here and in this one we have two place this backend URL so we will copy the backend URL from here and paste it here make sure to remove this forward slash so we have added the backend URL and then this razor pay key ID if you are using the
online payment of rer pay then click on this deploy button it is deploying our front End now you can see the message congratul and our website is live let's click here continue to dashboard then click on this link so it will open our frontend in new tab so now you can see our website is live on this versal URL right next we have to deploy our admin panel so just come back click on projects Let me refresh it so now we have two projects forever front end forever back end now we will add the Admin
so just click on this one select project select the repository click on import then write the project name I will write admin panel or let's write forever admin and here we will select the directory it will be admin this one then click on continue after that let's come back to the vs code and open this admin and and in this SRC you can see here we have this backend URL right so just copy and paste it in this environment Variable we have added this and here we have to replace the backend URL so let me
copy the backend URL from here and paste it in this envirment variable remove this forward slash then click on deploy so now it is deploying our admin panel so finally we have deployed our admin panel Also let's click on this continue to dashboard then click on this domains so it will open our admin panel in new Tab here we will enter the admin email ID and password click on login button so now we are logged in in the admin channel here we have the upload form then we have the all items list then we have
all orders list correct and if I go to front end let's select this product select this size click on add to cart then go to cart page proceed to check out so here you have to provide the delivery Information select any payment method and click on place order so you can place one order also so finally we have deployed our website on ver veral so using this method you can deploy any fullstack project on versal if you want to deploy this project on VPS hosting or any Cloud hosting then you can follow another video that
I have already published on my channel you will find that video link in the description using that you can deploy this project on VPS So I hope this video will be helpful for you if you have any question you can ask me in the comment section please like and share this video and also subscribe my channel greatest attack to watch more videos like this one thank you so much for watching this video