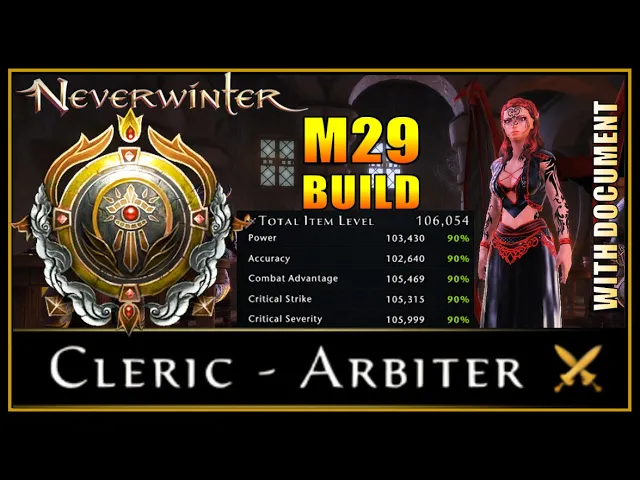
hey and welcome to never win with Aragon so here I want to cover my module 29 cleric Arbiter build keep in mind this is something to work towards and it will give you maxed out 90% in all of your damage stats along with over 106,000 item level there'll be a link to this document in the video description below But ultimately it is designed to serve as a solid Baseline which you will then tweak and optimize depending on pafic content and groups to play with if you go to end game particularly you'll want to be checking
out the optimization section because other team members can give you bonuses and working around those will be to your benefit to improve your damage by for example switching these weapons over to damage boost ones and similarly this ring there'll be time stamps on the play bar below where you can skip to any section you're most interested in we begin with race and ability scores and I recommend wood elf here for the crit strike as for the ability scores be sure to choose dexterity and intelligence and then while leveling up you'll also choose just dexterity and
intelligence from here we go to the most important part your power setups we're going to cover first multi-target and then single Target now starting with multi-target this is what power setup I would use to maximize your damage against multiple enemies you will be using searing Javelin and daunting light with the light Speedy defeat there and then also chains of Blazing light this is more of an optional one but it will give you a damage boost if you do get it cast some people I'm sure hate the cast time out it and myself included and so
can refrain from not bothering to use it you might just be better off having say Forge Master flame here instead of it and whenever you run into some tanky enemy who's left after you've killed most of the enemies you can go ahead and use that on him what you want to be careful of is your Stacks up here you have radiant shift and you have burning shift and each of your encounter Powers give those your searing Javelin will give you burning and your daunting light radiant so here we can use our searing Javelin that gives
us 2 two now we can use a daunting we're now two three we then need to use another Javelin before we use another radiant and now we're at 34 if we just use a javelin even into the air not hitting anything we trigger our Perfect Balance which is disability which fills up our Divinity and that's going to be very important while you're using your abilities to then stagger them and make sure that you can get that benefit to be able to restore all of that Divinity otherwise you're going to run into issues and just you
miss out on an absolute ton of damage you're going to to be stuck with basically no Divinity and having to use at wheels and what you would use is conflagrate and when you go and cast this you obtain three of these Pips and then you just Channel Divinity to consume those Pips to get Divinity back and then you'll be able to cast your abilities like here we had to cast either daunting light or my chains again because we need to pay attention to these Pips up here here we can cast like chains and we're at
44 back to full Divinity just be aware the way Javelin works is it's going to shoot towards where you're you're looking basically but it's just going to go horizontally out from you so it's not necessarily going to aim very well if you're like on like rough terrain like here we not might not be able to hit those dudes cuz it just goes flying up in the air but yes again do mess around with the abilities yourself and just make sure to make use of all what you have now using chains first can be advised I
to trigger doomsayer as you will gain that benefit when casting it as you see here just a 10% damage buff then to all of our abilities and so it doesn't really matter what we hit everything will deal 10% more damage it is definitely a class to get used to as it plays very differently to other classes in the way that you really just have to be careful on what abilities you're using and when you have to be taking advantage of perfect B balance to get that Divinity back you can't just Spam everything out carelessly and
expect to do good damage as for your daily power you generally just use flame strike and you can use that after you've obtained like your radiant judgment after casting like a searing Javelin as that radiant judgment will increase the damage of that power so again just pay attention what Stacks you have and which ability you need to use next but that is ultimately it for multi-target experiment around for yourself and just practice from here we go to our single power setup and it's a super simple switch you're just going to use Forge Master's flame instead
of searing Javelin and prophecy of Doom instead of chains and then you also depending on your build will want to switch to expanded Faith instead of doomsayer however it all relies upon one bonus These Arms they can give you 25% more divinity you want to either have the ultraviolet ones the star Forge ones from the Moon Dancer or even the depth Forge ones you can just about make work not as ideal though and so there are three locations you can get them all master content though the ultraviolet ones from the Imperial Citadel with that increased
Divinity you can have a different rotation and so you would use expanded Faith you can see here exactly what I mean one rotation is just going to be a, Divinity and with that you're going to use your doomsayer and your Divine equilibrium as you really won't make much benefit with expanded Faith by itself you need the arms and you can see what rotation you would follow and you have to follow this strictly in order to take advantage of perfect balance and to time your abilities to maximize their damage output and then the artifact call when
you do have the arms and the exra Divinity will allow you to Output basically another full set of en counter Powers allowing you to Output even more damage and then outside of the artifact call you could see the rotation is as follows you'll do that full set and then repeat it again before going to the next artifact call and you can see the massive difference between having a th000 Divinity and having 1,400 Divinity you'll be able to cast an awful lot more encounter Powers you'll need to practice this you cannot really change in this rotation
as it revolves so much around perfect balance and triggering that at the right time in order to maintain your Divinity to be able to keep casting en counter Powers so back to the artifact call let's give you a bit of a demonstration we start with our daily power then we go our prophecy of Doom artifact Forge Masters daunting Forge Masters then we use our belt item and mount power then we use that daunting we get our perfect balance and then we use three sets of each encounter power and we're at the stacks as you see
in the the top left 3 three and then you get a bit more Divinity and then you get back to perfect balance triggering and you get to 1 one and then you're using your prophecy of doom again and that full rotation of five sets of each and encounter power in between here you do need to channel Divinity slightly but other than that you can keep spamming all of your encounter powers to pretty much keep outputting a lot of damage you'll have to do like one config rate there and that's about it and again you can
see that full rotation here this is the artifact call and then this is outside of the artifact call and you just follow that very strictly and you'll again need to practice that in the document you'll see the power setup and you'll see the rotation sheets here and tables now I definitely need to give some credit to Pro goofy who streams on Twitch you can follow his channel I'll have a link in the video description below he plays Arbiter on an endgame level completing all of the latest content and does super well there on Xbox outputting
a ton of damage on his Arbiter and he follows very similar rotation to this and he helped me analyze and set up this rotation for myself for my testings which now I'm putting in this build for you guys so yes there is a lot to learn and it's quite a challenge here on Arbiter but you can do very well when you have all these right conditions and follow these steps accordingly but from here we're going to go to the rest of the build how can you set it up to get all of those maxed out
damage stats along with some good damage bonuses be aware again it's for solo damage and be sure to check out later on the group optimization section for when you go and play with endgame groups so we begin with our gear here and you can see in the document exactly where it's all coming from again be aware you can get away with using the arms that come from the latest dungeon the ones that give you extra 20% maximum Divinity if you do run the dungeon on advanced mode you will get instead of this Mythic gear this
legendary stuff and it's very similar These Arms will also give you maximum Divinity you will be able to nearly follow the same rotation but you will have to like Channel Divinity once in between before you can get your perfect balance so you can still keep casting and counter Powers but once you go outside of fire themed Maps because we are using these boots and this uh shirt you can just simply switch the boots out to other damage bonus ones so for example if you go in Wild space there are Pacific boots for there and I
would just keep the shirt because you've no real use of like the cooldown shirt here potentially maybe use the combat Advantage bonus shirt like this one if you need still stats and otherwise you can switch your head piece over to like the dark Maiden ones for action point gain if you think you might make use of using your daily power a bit more then we go to the modifications and these are your armor kits and jewels you'll see them right here so we just have accuracy on all of those and then power here and then
just combat advantage on all of these slots nothing goes in your shirt and pants for now then we go to our enchantments this is the setup we use you've got two Jades there two citrines doesn't matter what you have in defense it can just be filler but garnets would be ideal of course utility you have Garnet as well for Forte then you want to have an overload here for bonus damage you can use depending on the content ones for damage against dragons against fiends against Undead completely depends what content you're playing and then one here
just for the stats don't bother using overloads if you're just running easy content combat enchantment you definitely want the lightning Flash and the bonus enchantment you want the recharge speed however you can use the movement speed if you feel that will suit you better particularly in multi-target to keep up when you're going from group to group but now let's jump to artifacts first of all your primary artifact will want to be one that will cause a debuff on the target will cause the target to take increased damage like this one right here keep in mind
there's a lot of different ones you can use but just make sure you're using a different one from your other teammates for those artifact calls everybody will use the artifact at once cause the enemy to take a ton of extra damage and that's when you do your set rotation here for that 10 seconds artifact call as for the secondary artifacts these are just filler for giving item level and stats don't be afraid to use alternative ones but these are exactly where the ones I have come from then we go to our Boons and for our
campaigns we use these right here be sure to get like blessed resilience and lingering medicine for some survivability most definitely get demonic Mastery for damage against fiends when running the latest dungeon the lir of the Mad dragon and then also in like demon web pits and depends on the content and there are other Bo here against specific enemies be sure to use them if you're running that type of content for your guild you want to be having the accuracy defense and like revive sickness when you might die Mount speed and zones movement speed and dungeons
that are easy then we go to our companions this is what we use for single Target any summon companion you can use there that performs fairly well just be aware of support companions that increase the whole team's Effectiveness by increasing their stats or just raw damage output they can be better used while within endgame groups but when you are running multi-target there's like the minor you can use but there are of course a good few Alternatives as well as you can check in this table the companion equipment just comes from the new campaign mountain of
flame we've got enduring Precision here but that comes from a specific companion The zorian Defector so you might not have a and if you don't just use Precision here instead then we've got the golden cat the Neverwinter Knight the beri which when you go in multitarget I do recommend having the spine devil and then Minsk which when you're in multi-target I do recommend having ignia skin as that will boost your damage of your searing Javelin and your daunting light but again prioritize the single Target damage bonuses first and then we just have our storf here
you will want to have like the tamed Velociraptor if you're running end game groups from there we go to our mounts and in our current page you want to have a combat power like golden touch tunnel vision legendary giant toad even big B's hand is okay but not ideal you can see them right here Big B is physical versus the others which are magical and you will generally have a greater magical damage boost than you have physical for multi-target I do recommend having like the schools in session from the space scubby Mount or even the
Pegasus just do prioritize your single typ power then we have dominant Force here I would recommend having like ferocity at hand for endgame groups and then we go to our stable we just have one tacticians one executioner Covenant and three Warlords motivation you could have one extra tacticians but I haven't found it very necessary or even an artificers enticement but again it's only really going to affect your prophecy of Doom which you should be able to get back quick enough at least if you have enough recharge speed to after the artifact call use it again
at this set time otherwise we just have some dominant insignias two skill insignias and the rest brutality and you can see the exact count here for the colar we just have these five there but what is important is the encounter power damage and the crit severity then we have our consumables and belt items we just have flasa potencies from crafting squash soup as event food solor gift Elixir from invoking and ratou Guild food for our belt items we have a stone of Health the alar figurine here however you can alternatively have like the Dragon Fire
or the hawk or even the to hickey but the AL bear is best and then the other one we could have like a bell of empowerment just to increase the damage of our companion I don't currently have one here and that's pretty much it for the entirety of this build the last thing to touch on is optimization when you're going into those endgame groups you will be able to obtain a lot of boosts you can see them just there for an example these are the different things I would switch around depending on what the group
actually gives you so like Mystic or or ricora definitely switch dominant force over to ferocity if you get like Porter Bellow and Flapjack and tutor you can switch like one of your companion bonuses that give you combat Advantage here over to like power instead and then you very simply switch which the weapons which give you power boost over to like damage bonus ones like void touch salarium Weaver and or switch out your ring which also gives you power over to like a damage boost one like there'll be ones against dragons against spe holders against Undead
and then there's very simply en counter power damage one which is somewhat useful as well and you can see the different things I recommend you switching around depending on what you gain also if you get like the tamed rapture you also want to switch out one of your companions to use that as it's a massive power boost which lets you switch off both your ring and your weapons for then gaining all the power and then gaining damage boosts there instead so that is pretty much it for the build again it's a solid Baseline gives you
max out 90% stats and ultimately I hope this helps also to show you how to play it it's pretty much the most complex class of any you can't just Spam out your abilities you have a super strict order that you really need to follow in order to make use of Perfect Balance so that you're gaining that Divinity back so you're not just left stranded not being able to cast your abilities as these good damage abilities have no cool down pretty much and they just have that Divinity cost so you got to be using those you
can't rely on these ones which do have cooldowns which are just far far inferior so again if you want to get good on Arbiter you can it's a lot of work a lot of practice but it is possible there are a few players who do manage it for example Pro goofy again you can follow them on Twitch Link in the video description below so once again thank you for watching a special thank you to all of these channel members for your extra support and we see you guys around goodbye for now