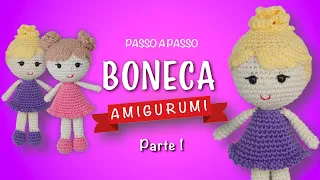
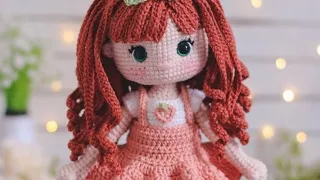
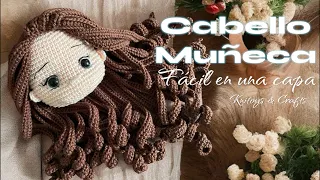
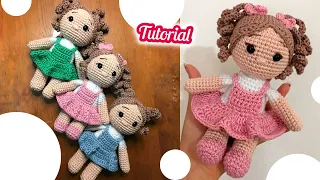
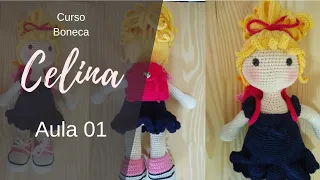
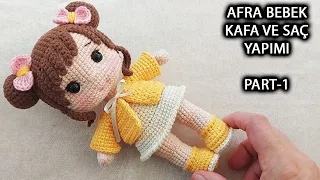
Hello my loves, how are you in this class? In this first class, we will be making Angelina's head and the hair is good and to do this class we are going to use eyes with an 11 MM lock, an eye lock, the Tec, a 3 mm needle, a stitch marker, or eyelashes. adult portio eyelashes same pin needle number 02 for finishing filling I use Santafé silicone fiber filling ok and I'm going to use [Music] the color whipped cream 7583 ok Now we're going to make the head and the rest of the material I'll leave in the video description Okay my loves Let's go to class in this class we are going to make the head and we are going to use the whipped cream thread Okay let's start with the magic [Music] ring let's start with the ring six double crochets inside the ring 1 2 3 4 5 and if six double crochets inside of the magic ring , give it a little pull, I don't like using that plastic marking, so I'm going to add a little thread here , okay ?
base stitch okay girls Look, I'm just getting here at the end 5 and six six increases of two double crochets each at the end of this row two there will be 12 double crochets okay Now let's do one stitch [Music] low one double crochet and one increase per all the way around do yours then I'll do mine here and I'll be right back at the end of row three we finish with 18 double crochets let's go to the next row which is row four, row four starts with a single crochet and one [Music ] increase and the sequence of two low [Music] stitches and an increase five times at the end there will be a little dot left, I'll be right back at the end of the row when we did one stitch and an increase and two stitches and an increase five times and at At the end, let's make that little stitch that 's left, this row ends with 24 stitches in row C , let's make three single crochets, 1 2 3 and an increase. do mine here in the CCO row we did three double crochets and an increase all the way around six times and this row ended with 30 stitches let's go to the row if in the row if we are going to do two double crochets and an increase and the sequence of four double crochets and an increase by five times here an increase o two double crochets and an increase and the sequence of four double crochets and an increase by five times at the end here there will be two dots left on row six we made two double crochets and an increase and the sequence of four double crochets and an increase five times and at the very end here the two dots that were missing and this row ends with 36 stitches Let's go to row seven which is five double crochets and an increase six times 2 3 4 and 5 ce one increase, you will repeat this sequence six times, ok And this row seven ends with 42 stitches, on row number S we did CCO five double crochets and an increase five times and the row ended with 42 stitches, ok now let's go to row eight which it's three double crochets in an increase and the sequence of six double crochets and an increase five times at the end of the row there will be three dots left, let's go a double crochet 2 and 3 and an increase an increase and now we're going to do the sequence of six single crochets and an increase for five times 2 3 4 5 and 6 and an increase you will repeat this sequence, right now I did the first sequence now I will repeat for four more and there will be three dots left here on row eight we did three single crochets in one increase and the sequence of six double crochets and an increase five times and at the end the three missing dots and this row eight ends with 48 stitches Let's go to row nine which is seven double crochets and an increase six times 1 2 3 4 5 6 7 and an increase you will repeat the sequence of seven double crochets and an increase six times I have already done one I will do five more on round nine we did seven single crochets increase six times at the end of the round 54 stitches now let's do the row 10 which is four double crochets 1 2 3 when oops and an increase the sequence will be as follows four double crochets and an increase and now the sequence of eight double crochets and an increase five times at the end of the row will leave the four dots and we'll complete it OK, so let's go, I'm going to do a sequence here one of three 4 5 6 7 and eight an increase now you're going to do your sequence there that is of four double crochets the increase and eight double crochets and an increase by five times at the end of the row four double crochets, I'll be right back recapping round 10 here which were four double crochets and an increase eight double crochets and an increase by five times and at end of the row we will complete those four dots 1 2 3 and 4 on row 11 we will do the following nine double crochets and an increase for six times two 3S 4 5 6 7 eight double crochets and nine and an increase you will repeat this sequence for six times of nine stitches, an increase and this row 11 is the last row of increases at the end of it you will have to give 66 stitches, ok on row 11 we did nine double crochets and an increase six times and the row ended with 66 double crochets Now on row 12 to 24 we are going to do 13 rows of 66 double crochets, it will not increase, it will not decrease, just do 13 straight rows of 66 double crochets. row 24 ok, do your 13 rows there with single crochets over single crochet and I'll be right back, after doing the 13 rows now let's put on the eyes and we'll need 11 MM eyes, pin to make the marking, take the cap of the head, fold it in half, adjust it well so that the points are straight Then fold it once more, adjusting it well here, and you will count the eyes.
Between row 21 and 22 of the magic ring, you start counting 1 2 3 4 5 6 7 8 9 9 10 11 12 13 14 15 16 17 18 19 20 21 between 21 and 22 so this is the eyes you will put a pin here marking the middle here is the middle and you will count here seven points here and seven here, look 1 2 3 4 5 6 7 drill here and place the pin there are 12 points of separation from one eye to the other visible, it's again 1 2 3 4 5 6 7 here here you put the other pin, it's ready, you did the demarcation now let's put the eyes let's measure well because it has to be 12 of a distance, right let me pierce here with the needle ready here now let's put the other one here you can see P of work to push but it ends up working out right It's because it's very hard, ok See, let me see 1 2 3 4 5 6 7 8 9 10 11 12 here, 12 there are 12 points of separation from one another now we can remove this pin Now let's take the eye catch with this black part up let's fit the lock here see here and here, ready we put an eye now the same thing on the other side the black part up top we will fit the bar here fit it here in the eye and we will tighten the eyes placed row 25 I did here it is nine single crochets and I will make one decrease this row 25 we will work nine single crochets and a decrease six times we will do another sequence here 1 two I had already done one here it is 2 3 4 5 6 7 8 nine the decrease I take the front strap of the next stitch and the back strap of the next stitch and pull it, this row 25 is nine double crochets and a decrease of six times, okay And this row will end with 60 stitches, it's nine double crochets and a decrease of six times the row ends with 60 stitches I'll be right back round 26 is single crochets and a decrease then the sequence of eight double crochets and a decrease five times at the end there will be those four stitches left I will do the first sequence with you I have already done one stitch two single crochets 3 and 4 a decrease a decrease and now the sequence of eight double crochets 2 3 4 5 6 7 and 8 and a decrease makes your sequence so I'm going to do mine here and I'll be back so we can do those four dots at the end, let's finish those four dots that were missing from row 26 and now we're going to row 27 and we're going to do seven double crochets and a decrease for six times 2 3 4 5 6 and seven double crochets and a decrease do your sequence for six times and I'm going to do mine here and I'm back seven double crochets and a decrease and this row will end with 48 stitches row 28 now girls let's do three double crochets and one decrease and the sequence of six single crochets and a decrease five times at the end there will be those three dots left, okay I'm going to do the first sequence here a single crochet of 3 4 5 and six and a decrease front stitch double stitch of the other back stitch come on and that's it now you do what I do here okay three double crochets and a decrease six double crochets and a decrease by C times at the end the three dots girls let's finish the three dots here at the end and let's go to row 29 the row 29 is five double crochets and a decrease of six times one Oh wait , a single crochet of 3 4 5 and a decrease you will repeat this sequence six times it's five double crochets and a decrease girls, round 29 ended with 36 stitches, ok Now let's do row 30 which is two double crochets and a decrease and the sequence of four double crochets and a decrease five times and at the end there are those two dots left there, I'm doing a sequence here I've already done three double crochets four and a decrease let me recap here two double crochets and a decrease four double crochets and a decrease five times and at the end under those two dots here okay I'll be right back so we can complete it together girls, let's finish row 30 by making those two dots that were missing row 30 ended with 30 double crochets let's go to row 31 row 31 is three double crochets and a decrease six times [Music] 1 2 and three double crochets and a decrease and you will repeat this sequence six times and at the end of the row there will be 24 do yours and I'll be right back there are three double crochets and a decrease six times girls on the row 31 we end with 24 stitches now let's fill it take the filling and place it at the bottom with your fingers little by little, no rush spreading it well at the bottom, ok, it releases the filling like this, so that there are no acorns left, you know, and it fills slowly, then I use this little tool here, you use it with the best one that you think is appropriate and that fits best, ok, I'll use the bottom one. I'm going to fill it with my hands, you see, you have to fill the bottom well so that it doesn't make a mistake, so that it doesn't stay and if it fails, you fill it well here, with the iron to make it very round, you fill it in, then I fill it in. mine here I'll be right back, it's very full on row 32 Now let's do one stitch and a decrease and two stitches and a decrease for five times and at the end that little dot here is I filled my head a little I still haven't filled in all the spaces oh because I'm going to close it a little more so it doesn't end up with that melon head, right guys, so let's close it a little more And as we do it, we'll fill it in slowly because otherwise this head will be too open, let me finish it here, wait a minute now on row 32 Let's do a double crochet very slowly a [Music] decrease and now two double crochets and a decrease for five times 1 2 and a decrease and you will repeat this sequence of two double crochets and a decrease for five times now let's go make that little stitch that was left, ok and in row 33 we will do four double crochets and a decrease three times, four double crochets and a decrease three times 1 2 3 4 and a decrease, you do this sequence three times, four stitches low and four single crochets and a decrease three times and the end of this row will end with 15 single crochets in a little while I'll come back so we can define this head better, okay, before doing row 34 we're going to fill in those cheeks a little, ok In fact, you can place the cheeks here, fill in the missing spaces but without puffing out the stitches, okay, define the cheeks, okay , before we continue here, but without exaggerating, the little cheek here, you can see now, let's go here on the other side, it's very little even just to give it a protrusion and not look like a doll with no neck and no chin, right, that's ugly, but then you give her a little protrusion on her cheeks later.
fill calmly finish filling calmly so as not to overwhelm the stitches ok and that's it let's continue with row 34 which is in blo ok it's 15 double crochets in blo In other words, taking the loop loop from the inside you see there's the first the second loop you will take the second one and you will do 15 double crochets in a crochet, that is, the back loop, no mistake, no rush, take it slow, okay, 15 stitches taking the back loop, girls, now here's the thing, we've done the row in Bloc 15 double crochets in Bloc, which is the back strap, you're taking the back strap now from row 35 to row 44, from here we're going to do 10 rows of 15 double crochets, you're normally taking single crochet over single crochet, okay, it's not to take the back strap anymore. back, you're going to do 10 rows with 15 double crochets, I'll be right back with my 10 rows, do yours, girls, after doing the 10 rows, now we're going to do row 45, which is a double crochet and a decrease, I've already done it so far. there is a low [Music] stitch all around and a [Song] decrease all around one single crochet and one decrease all the way around five times ok And this row ends with 10 double crochets girls in row 46 let's do five decreases okay And at the end of the row five double crochets I've already done one here I'm going to do one more here okay that's two I'm going to do one more here that's three decreases I'm going to do one more here here and that's four decreases I'm going to do one more oops wait here It's getting more difficult, right here, five, OK, now you're going to close with a slip stitch here and cut the thread, slip stitch, just make a little knot and cut the thread, cut a slightly long thread that I'm going to try to pull with the big needle, OK, now pull it now I'll be back girls, I was going to pull the tube with that thread that I asked you to leave with for me to use that needle but I changed my mind Okay then, let's go the traditional way which I know how to do, although it takes a little more work but it's more practical too It doesn't damage much , you're going to take something that isn't a sharp bridge so that it doesn't get punctured and you push it like this, you push it slowly, you push it, you'll be able to insert everything here, this tube has to go all the way inside the head, okay, and stay there.
go a little free , take the handle of the needle and then uncrumple the head, that's it, take something like this and push the tube in. Okay, I think mine was uncrumpled the head, which is quite dented after doing that, you see, you have to leaving this little gap all unwrinkled inside, you can see it, see it right here from my angle, see, now I'm going to unwrinkle the head and come back to us, I'm tired of embroidering the nose, ok girls, now let's embroider the nose last time eye line you will count 1 2 3 4 you will count four stitches and in the next hole you put the pin the same thing on this side 1 2 3 4 in the next hole you put the pin see you will take a needle put the thread in the same tone as the head, put a Little Knot on the tip, choose a place to insert it, I'm going to choose this one and I'm going to leave it in the same little hole here as the pin, you see, I came out here, take the pin out, pull it, it's going to lock the Little Knot inside the head, ready and now you're going to come out here, where is this pin , can you see, pull the pin and it's going to come out, where is the thread coming out ? and to fill it, let's do it like this , until the very end, without pressing, just push it like this , until it's completely filled so there's no space left, okay, this is Angelina's little nose, so look here in the corner [Music] and pull without pressing one more time as long as you have the space, see, let's see, let's go one more time here, see now [Music] let's Insert the needle here, let me see if one more fits here, I think it fits here in the corner, it fits without pulling, you see how It looks cute now you will Insert the needle here and it will come out, for example below In this little hole, go and pull without pulling too much so as not to damage the nose, see now, give it a little tweak so that it looks harmonious, okay, and let's finish off the thread, OK, I'm going to put the needle here and come out here so I can dive between the stitches and cut the thread is here , you see, and then we cut the thread ready Ready now Let's unknead the head, which is the dough, right ?
so it doesn't get too long, I'm going to get these portio lashes here for adults , this one I had already used on Angelina, right? In this case, I'm going to take a dot, oh, I took a dot, I'm going to measure here on the side of the eye, right here, right here, on the curve, you know, on the eyes, oh, here, let me see this, oh, let me see if it's right before I put glue on, right? I think it needs to be slightly reduced here but it's a slight one, if it becomes disproportionate then you also reduce it then you take this glue, apply a little bit here on the But it's very little, even in the corner of the eye, okay And let's glue the eyelashes, I applied it very lightly Same, on the side here, you can see it, I glued it on, now we're going to remove a little dot, a slight dot, just to make it very delicate, just look at Angelina's, here you can see it again, PR M, glue an SOS broom, ok, it's great, you see, look at the dog It started barking now but that's ok, let's continue, you can see eyelashes on, I'll be right back so we can apply the blush, girls, I got a head start here on the cheeks But I'm not finished yet so I'm still going to make it more Pinky, you can get A Blush, this blush, I paid R 10 in a cosmetics store, look, don't be afraid, look, you just don't need to be afraid, if it stays longer we can remove it with a damp cloth or a wet wipe, something else I want to teach you, this one I did but I'll teach you the other way always side of the eyes to the back, never the eyes to the front, the demarcation of the Blush is from here to here, never from here to here, otherwise the doll looks like a clown, OK, I like using blush, it's bronze because it doesn't leave that redness, you know, and I think It looks very pretty, let's give you more here, yes, if it stays longer, like I said, you can remove it perfectly with a damp tissue or a cloth or even a dry cloth, okay, Angelina, she has very pink cheeks, okay, her nose got dirty on her finger.
Your finger got dirty, it's always above your nose, you see, you can see, I'm going to remove a little bit of the excess here, let me get a cloth here and I'll be right back, okay, but can you see, I'm going to come back here so we can remove the excess together, look. I came back here with the cloth, it's not even wet, so it's well penetrated into the cheek, you can see the excess I removed and that's it, don't be afraid, always from the back of the eye, never from the eyes towards the nose, it's going to be very ugly. Oh, I removed the excess, how it looks like it penetrates the fiber like the cotton in the thread, you know, from the thread.
Look, you saw that you added too much, oh my God, I ruined my work . It's very red, if you want to shade the nose more, you can just leave it well penetrated, penetrated into the fiber, to give it that shade, you see, and that's it, girls, the head class is ready, now let's go to the hair class, right, I'll be right back.