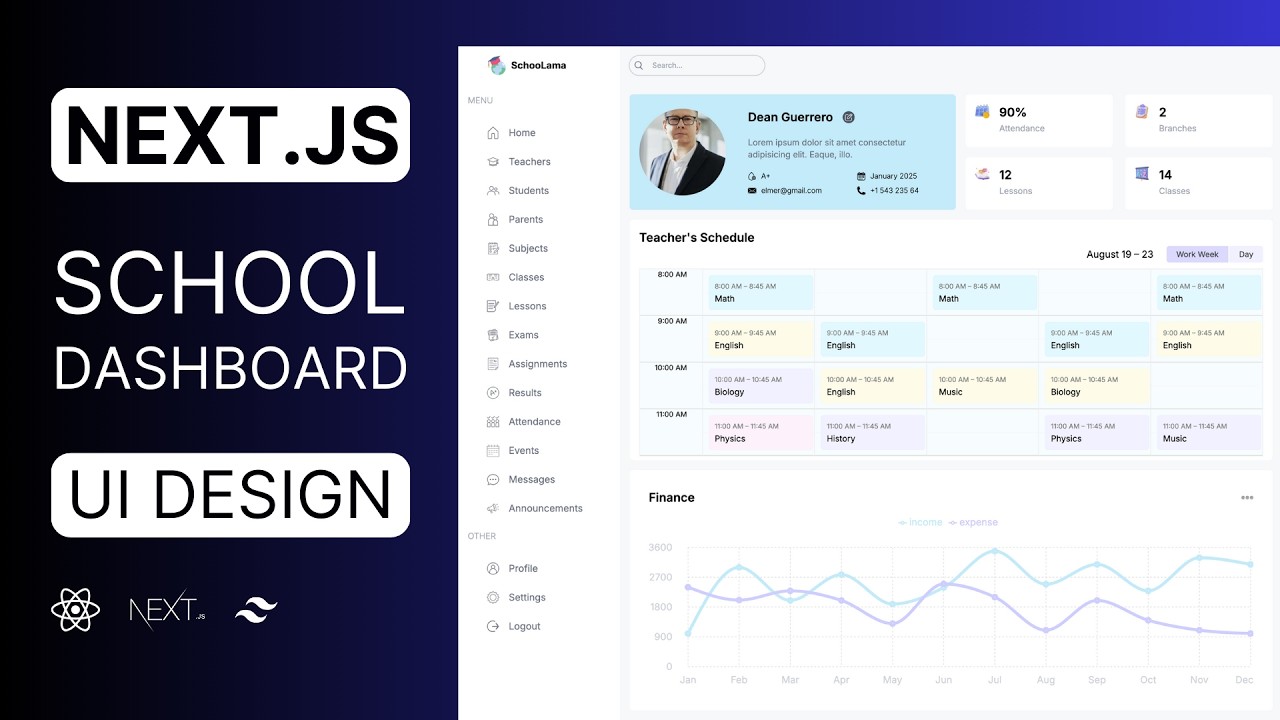
Hello friends today we are going to complete the fullstack school management application using nextjs when we first visit the website we have to log in otherwise we won't be able to access the dashboard because all these pages are protected in the application we have four different user roles admin teacher student and parent for each role there are different dashboards and limitations let's log in as an admin this is the Admin dashboard and we'll fatch all these data from the database using this component we can change the date and we can see the event scheduled for
that specific day here we have the announcements and on the menu we can see all the list Pages teachers students parents and for the list Pages we'll Implement pagination which will improve the page speed and decrease the number of database requests we'll also Implement a search Functionality and for each table we'll be able to search through different columns we can search for the subject name the teacher name or the class name as an admin we can see all the pages we can delete items update them or we can create a new item in the form
components we'll be using react hook form and you'll see how easy it is to validate inputs without causing unnecessary Reenders let's create a teacher we also have a single teacher page where we can see all the details and teachers lessons we can update the user information and here there are some some shortcuts that open the related list page with custom filters applied so you'll learn how to patch data using search params let's log out and log in as a teacher on the dashboard we can see all Our lessons as you realize we don't have all
the items on the menu and even if I try to reach them I'll be redirected to the homepage because we'll be using nextjs middleware to protect routs based on user roles there are no action buttons anymore and we cannot add or change the items except for the exams assignments and results because we can see here only our items not other teachers let's log in as a student we can see here the class Schedule and right now we have only a few items here and on the list Pages we we'll see only our data and as
a parent again we'll be able to see the children's schedules their exams results and events for this tutorial we'll be using postr but you can choose any database you want because we'll be using Prisma orm so it doesn't matter which database you are using the syntax will be the same we'll also use Ducker and you'll learn how to create Create and deploy any database or any application in just 5 minutes after creating our application we'll deploy it using hostinger as you know it's the hosting sponsor of the channel and I create applications with different Technologies
every month using hostinger and for this project we'll be using VPS hosting but don't worry you won't have to deal with any configuration hostinger installs everything you need in a minute and all these servers are super fast Because they use the latest mvme ssds and one of the most powerful CPUs so you can deploy all your applications and websites on a single server let's choose the most popular one and if you use the link in the description and lamad Dev coupon code here you'll get an extra discount after purchasing you are ready to set up
your server let's choose a location you can install any of these control panels but for this tutorial I'll just install Ducker because I also Want to deploy my database server let's give the server password and finish the setup it's going to take a while and after that it will be ready to deploy your applications so if you are ready let's create our app and database and deploy them here okay this is our previous nextjs application which has all the UI designs and in this tutorial we are going to build the back end if you didn't
watch the previous tutorial I highly recommend You watch it first because it's not only HTML and CSS we created here reusable table we use this calendar library and we created all these animated charts and most importantly we created this form component that shows different forms for each list and inside the forms we used react hook form and the validation of course we are going to take care of here from scratch because we will have the database schema but anyway we learned Tons of different things in the previous lesson but if you still want to skip
that video you can find the entire source code in the last video description just visit this GitHub repos story copy this link and clone this project after cloning just install the libraries by writing mpm install and after installing dependencies you can run your application mpm run Dev okay but before creating the back end let me show you the main structure of the application I'm going to create here my next ja application and inside our application we have three main elements we have the app rouder the components and server actions in the previous lesson we designed
our Pages inside the app Folder and we designed our form components inside the components folder and right now using these pages and forms we'll be able to fetch or change the data to do that we are going to need a database let me create somewhere here I'll say database and using the pages we will fatch data from the database for example on the admin page we will fatch all these chart data and for the list Pages We'll fatch all these items so let's say data fetching which means get requests and when we want to delete
any item or when we want to add a new item we are going to be using these forms and we are going to call the server actions and it's going to connect to our database and mutate the data so it can be a post update or delete request this is important because I see some people try to fetch data in the Server actions but just don't do that server actions are for the mutation if you want to fetch data use your server components and for all these database operations we'll be using Prisma orm so first
we are going to connect to Prisma and we will make the requests and it will take the requests and send them to our database it will get the answers and return the the responses in this case doesn't matter which database you are using the syntax will be the same so You can use here your favorite database but for this tutorial we'll be using post grass because it was the most desired database in the previous video's comments so you can write what projects you want to see in the next tutorial I'm going to read all of
your comments okay here is going to be CR operations and right now we can design our database schema to do that let's use this AI tool so it's going to be easier let's move this here choose the Relationship and right here what we want to create create a school management app database schema there will be admin and teachers each teacher can have multiple subjects lessons and class and in each class there will be students a student has a parent grade class exam or assignment results and attendance parents can have multiple children each grade has multiple
Students and classes each class has a grade a supervisor which is a teach teacher multiple students and lessons a lesson has a class subject teacher multiple exams and assignments and each exam and assignment as a result in the attendance table the student will be present or absent for the given lesson okay you can give more details But let's generate it's creating our schema and it's ready let's see what we have as you can see a same subject can belong to different teachers and using those subjects we'll be able to create different lessons here is important
because for different classes we'll give different lessons about the same subject let's say Jane and John are history teachers but Jan is going to class 1 a and John is going to class let's say 2B For example and inside the class we'll have the supervisor which is a teacher we'll have the students each student has a parent but a parent can have different children in the same School attendance list the status will be absent or present so we can keep track of this student for each l lesson and also we can create exams and assignments
for different lessons and they are going to have this result table which includes the exam or assignment ID user ID and The score so this was pretty accurate of course we are going to add some more Fields like student surname email phone but they are not our concern right now because the important part is the relationships if you want to enter something different just double click choose the code and add here whatever you want to add and it's type this is how it works and you can check the Relationships and this is the main structure
of our application so let's install Prisma and create our database and after that I'm going to show you the Authentication part firstly I'm going to open Prisma doio let's get started let me zoom in and let's choose our database these are just examples you can choose pretty much everything and we already have our application let's install Prisma I will open my terminal and mpm install Prisma and after that we are going to initialize using MPX Prisma in it and as you realize it created here a new folder called Prisma and inside we have the schema
provider is the database provider and here we are going to have the connection URL let's check the EMV file and as you can see it added this database URL for now we don't have any database but we are going to create it Can stay like that so let's see how to create tables using Prisma I'm going to close here and connect to database okay we are going to take care of this later and this is how we are creating our database tables we'll say model the table name and inside we will write our Fields ID
title description or whatever it might be and here is going to be their types can be integer string bolum or any other table type and finally if There is any specific requirements we are going to write them here for example if we say ID it's going to assign this as a unique primary key and by default it's going to use Auto increment that means when we create a post we don't have to specify any ID it's going to increase automatically or if you say default now it's going to get the current date you can give
here any limit you can say it will be unique or required when we create you are going to Understand better so let's come back and create our first table I'm going to close this menu let's also close here and I will say model and the first one will be admin I'm going to create an ID string and I will say ID and also we are going to have the username which is string and it's going to be unique because we are going to be using this Usern name when we login and after that let's create
student actually I'm going to create all my models here I'll say teacher parent grade class subject lesson exam assignment Result and attendance let's see if we have something else okay I forgot events and announcements let's create them okay I can delete them and let's create our Fields again we are going to have the ID and username let's copy this additionally I'm going to add here the student name which is a string surname email but it's not going to be required so I'm going to put here a Question mark and it's going to be the same
I will add address it's going to be required let's create image again not required we can add this later we'll have the blot type string and I'm going to add the user sex but we are going to have only two options male or female so instead of writing here string let's create anom and I will say it's going to be Male or female let's use this here okay by the way okay let's comment them out for now to prevent any error what else we are going to need we are going to need the created ad
date its type will be a date time and by default we are going to get the current date so I will say now and finally we can write our relationships the first One will be parent let's create our parent here I'll say ID username actually we are going to need all of them and created at time we don't need these and remember each student has a parent but a parent can have multiple students so I will say students and it's going to be student array so we'll be able to add here multiple students in this
case we are going to Pass here the parent and its type will be parent but we have to add here our relationship it's going to check the fields find the parent ID and this ID will be exactly the same ID in the parent model so I will say references and and here is going to be ID let's create this parent ID here it's going to be string and that's all this is how we are creating relationships what about Teacher I'm going to open we are going to need all of them I will just copy and
paste and inside remember we can have multiple subjects it's going to be subject array that's let's open here and let's say ID for users I'm going to be using ID string but for the others I'm going to be using integer because we are going to need this string after the authentication but for the other items we don't need that I'll say ID and by Default it's going to be autoincrement let's write the subject name like history math or whatever it might be and it's going to be unique and as I said each subject can have
multiple teachers so I will say teachers teacher array and as you can see there is no error anymore and also each subject has different lessons let's create again ID and name but this time it doesn't have to be unique and if you remember our application let's open the student page we have the lesson schedule here we are going to have 5 days from Monday to Friday and also each lesson has the starting time and the ending time so let's see day but again I'm going to create my options here let's say day and it's going
to be Monday to Friday okay let's use it here and they are going to have the start time it's going to be date time and end time let's write our relationships I will say subject ID and let's say subject the subject model and I'm going to write my relation we are going to check the fields find the subject ID and it's going to be exactly the same ID in the subject model just like that and also they are going to have the class ID let's open This I'm going to give the name and an ID
actually it's going to be unique and I'm going to add the capacity it's going to be integer and let's write the relations I'll say lessons lesson array and here let's do exactly the same thing for the class so I'll say class ID class will be class table and the field will be class ID and also each lesson has a teacher Because remember in the subject we are going to have multiple teachers but for the lesson we are going to have different teachers again the same thing let's select all of them and say teacher and here's
going to be teacher table let's add our lessons okay and if you remember we have the supervisor for each class let's Say supervisor ID is going to be string and supervisor is going to be a teacher and I'm going to add my relation we are going to get this ID and compare this with this ID in this case I can use my classes here and that's all I think for the teacher let's add the class for the student stent because each student belongs to a specific class so let's see class ID Integer and the class
will be class and let's write relation you know how to do that we are going to check this ID and compare this with the class ID let's add the student here in the class students student list of course it's a table and by the way there is something wrong here because I said integer it's going To be string remember for the users we are using string and let's open this grade each grade has an ID and level it depends on the school in our example we are going to have grades from 1 to six if
you want to do it for the high school you can increase the level and we are going to have here the students and classes Let's add them quickly it's going to be great let's copy this and paste for the class here okay what else we are going to need we are going to need the exam and assignments let's give the ID and they are going to have the title which is a string and for the exam we are going to have the start And end time and for the assignment we are going to have the
start date and the due date because the duration of the exam is just one hour or two but for assignments it can be one week two weeks and each exam and assignment as a lesson Fields lesson ID and the lesson ID in the lesson table let's do the same thing here and add them inside the Lesson exams and assignments and each exam and assignment as a result let's go Cy this and I'll say score it's going to be integer and let's add this here and here just like that I'm going to add my relation and
I will do the same thing for the assignment okay what about Here we are going to have a unique ID and the date and remember for each lesson we are going to check this table of the student so let's say status and it's going to be volum so if it's true it's going to be present if it's not it's going to be absent actually let's write here present it will be easier to understand and I'm going to add here my student and lesson remember this is a user so I'm Going to be using string and
one more and it's going to be lesson let's add this to student and lesson I will copy this and paste inside the student and also we are going to have the results when we get an exam or assignment we will be able to see the results and I'm going to add it here and again there is a warning Because here is going to be string and here is going to be integer and let's create ENT and announcement let's copy this yeah we're going to have the title string they are going to have a descript again
string let's remember again as you can see this is our event this is our announcement they all have the titles descriptions for the announcement we are going to have this date and for events we are going to have the starting And ending dates and there is something important here we can have General events and announcements but also specific events and announcement to a class so when we log in as a student we are going to see all the general events and also our class events let's come back I'll say class ID I will say relation
Fields will be class ID and here is going to be ID but as I said it can be General also so I will Say not required let's add them into class events okay and I'm going to add here the start date and end date and here is going to be only date okay let me check again by the way we can remove here admin ID username all the these fields teacher by the way we can add here Unique email and phone and for the student and same thing here actually it's going to be required so
we can call the parent grade level here is going to be integer by the way for the result I'm going to add here question mark because it can belong to an exam or assignment events and announcements okay we can save and if there is something Wrong we can come back and fix it so right now we can save the changes into our database to do that you have many options like creating a local database or you using a cloud database provider but since you have to pay for those providers or even if they have free
options they are really limited let's build our own database using Docker I'm using Docker because it's easy to use on a local machine and also it's really easy to deploy applications and Databases to Virtual servers I know some of you are hesitating to use Tucker because you think it's difficult or has a big learning curve but that's not true it's easy it's consistent secure so if you don't have Ducker installed on your device just visit decker.com and download it here and after that you're going to need to create an account and finally you are ready
to build your first container let's come here and search for postgress And as you can see this is the default po grass image which has been downloaded over 1 billion times so we can trust this image let's run I'm going to open my settings and let's give a name for this container postgress the port number will be 5432 since we run Docker on our computer it's going to run on Local Host and this port number but when we deploy our application it's going to run on the Server part and we are going to add here
our variables firstly I'm going to add the database user postore user let's say ladv here is going to be password that's right anything and one more and it's going to be the database name and let's say school I'm going to run but before I'm going to check again pul user password and DB okay let's run and as you can see it's running on This port number right now we can use our connection string remember it's inside the EMV file so I'm going to come here and say the username which is lad Lama from 1 to
six here is going to be Local Host and let's say the database name which is school I'm going to save and let's see how to save our changes into this database I'm going to open up the Prisma Documentation and as you can see to map your data to database schema you you need to run Prisma migrate and you can give it a name here so whenever you make any changes you can see your migration I'm going to copy this open my terminal and paste here and that's all let's open our menu and inside the Prisma
folder it created another folder and inside there's an ES file and as you can see it created all our Tables their relationships so when you don't use a schema like Prisma you have to write all these Cod from scratch but thanks to Prisma we don't have to and also it has an awesome interface that we can see our tables I will say MPX Prisma Studio let's visit this Local Host page and as you can see all these tables are here so whenever we add an item inside our models we are going to see them here
and also we can add a new item Here just like that right now we have one item inside the admin table and also you can come here and delete so you can see all the changes here it's going to be really useful and right now let me show you how to fatch data using Prisma to do that you can come here and create some data for each table but it's going to take really long to prevent this you can use my seed file let me copy and paste inside Prisma and as you can see when
we run this main Function it's going to create two admins six grades six classes there's an error here because we don't have the Prisma client we are going to create don't worry about that as you can see we are going to have some example subjects teachers and other items but how we are going to run this file let's come back and search for seat and as you can see we can run it manually by Writing Prisma DB seat and if we say Prisma migrate reset it's going to reset our database and after it's going to
run our seat this is the example but there is something important here inside the pack at Json we have to add this part and also we are going to need this dependency let's open packet Json add this somewhere here and Also we already have typescript and types not I'm just going to copy this let's terminate this studio for now and I will say mpm install development and TS note and after that then using nextjs we should add it just like that so let's change it okay of course there is a problem because I try to
edit this page after installing this Dependency let's add it again and after that I'm going to use this command but before let's come back and let's see how to create Prisma client we are going to need this Library basically when we make any request like patching data adding new item updating or deleting we are going to be using Prisma client do the model name and here is going to be create delete update find or whatever it might be And inside we are going to add the data or the requirements let's create this and after you
are going to understand better I'm going to install this dependency and after that we are going to initialize this Prisma client and using this Prisma we'll be able to make the crot operations I'm going to add it here and inside the source folder remember we have the library and inside let's say Prisma dots and I will say export const Prisma new Prisma client but if you do that whenever you call Prisma it's going to generate a new Prisma client in the development mode to prevent this we are going to change our file as you can
see in development it initialize Prisma client for each H reloading to prevent this we are going to create only one Prisma client and save it to Global disc and if we want to connect again we are going to check if The Prisma client already exists or not if we already have we are going to use it if we don't have we are going to create a new one but again this is only for the development for the production we are not going to have any problem so let's change here we set export default Prisma so
we can use it anywhere we want so let's use the seat I'll say MPX Prisma DB seat by the way there is something wrong okay Okay we don't have here the supervisor ID let's check our schema and as you can see supervisor is required if I make this question mark and reset my database MPX Prisma migrate reset I'll say yes and seat command has been executed if you have any problem here you can delete this next folder and reset your application because nexj caching system Is a big problem as you know time to time you
have to delete this folder and if you don't have any problem you are going to see this text and after let's open up the studio PR mous Studio I'm going to refresh and all our items are here as you can see we have 50 students each has different parents and lessons Subjects and teachers they all are here so right now now let's see how to fetch data using Prisma and after learning how to fetch data we can reset our database and create our own data using the forms okay let's start with these teachers I'm going
to come here close everything and here and I will open my my teachers page it's inside list teachers and Page and if you remember we created here a teacher type but since we have the teacher table in the schema we don't need this anymore instead we are going to take our types using this schema let's move this here I'm going to make this smaller okay teacher model is here I'm going to scroll down and change this type as you can see it comes from Prisma Client let me show you it's here but there's a problem
here firstly let me fix this small problem it's going to be image and if it doesn't exist I'll say use no avatar.png let me check by the way if we have or not okay we didn't use this in the previous tutorial let me just copy and paste again you can find it in the GitHub repository if you remember our image is not required so if we don't have any Image we are going to be using this PNG file let me close this menu and here is going to be username okay there is no problem with
phone or address but as you can see subjects doesn't exist in teacher because the subject is another table this line just represents the relationship between teacher and subject it doesn't mean that we have a subject array in the teacher table this is just a relation so when we use the type teacher it's going to take Only those items if you want to add additional informations you have to add it here like take the teacher and also add subjects and its type will be subject array as you can see we don't have any problem anymore and
I can do the same thing for the classes but instead of writing them here let's create our type I'll say teacher list is going to be teacher type and also Subjects and also classes and again I'm going to import this from Prisma client let's use it right now and we don't have any problem anymore I'm going to save and we can also move this render row to outside of our component just like that so it's going to be much clear and right now we can fatch our data I'll say const Teachers we are going to
be using Prisma that comes from our library and I'll say the teacher table and we can find all the teachers we have there are many options here we can find the first item you can find a specific teacher or here if you say find many it's going to fatch multiple teachers of course we are fetching data it should be await in this case our server component should be Asing function and let's see what we have Inside I'll say console lock and T teachers of course it's going to be multiple so let's say teachers let's open
our terminal I'll refresh the page and as you can see all teachers are here so we can change our data if you remember we were using here this temporary data right now we are going to be using teachers let's actually say data and I'm going to pass this here Right now we are going to have a problem as you can see because inside subjects and classes because as I said the teacher table includes only these fields these are the relationships if you want to add the related tables you can come here and write your condition
I will say include subjects will be true and classes will be true let's open our terminal again I will scroll down right now we have the subjects and Classes but in our table we want to show their names here let's remember what's inside the subjects as you can see there is a name we can use it and also inside class again there is a name so let's use them here so I will say teacher subjects do map and for each item Insight we are going to return the subject name actually let's say subject and after
returning names finally I can separate them using join So I can do the same thing for the classes map for each class return the class name and join of course this name is reserved so we shouldn't use class let's say class item okay let's see right now and perfect as you can see teacher name email teacher ID which is username they subjects and some of them don't have classes but it doesn't mean they don't have any lessons remember it just Represents the classes that the teacher is a supervisor but since we have six classes and
they already have supervisors they are going to be empty so this is how we are fetching data so what about the pagination let's say we want to see here only 10 items in this case we are going to see only first 10 items here and those items will be on the second page if you remember we have the pagination component let me close here and here and Right now using this component we are going to show here the page number we will be able to change the page but to do that we are going to
need the current page number by default it's going to be one if we have more items when I click here the page number will be two and to store this number you don't need to use use State hook or any State Management tool you can directly store it in the URL so in this case the page will be one and when I click here it's going to be Two and using this page ID we are going to patch different items firstly I'm going to take first 10 items so I can come here and say take
only 10 items as you can see there are 10 items right now but if I make it page two we are going to fatch the second 10 items but how we are going to reach to this number it's really easy if you are using next CHS you can directly get your search params let's write the Type it's going to be an object that includes the key and the value which is a string again but it's not required it can be also undefined let's see what's inside I'll say console lock and let's comment this out open
our terminal and as you can see our search param is here so whatever you add here will be visible on this params let's try I will also say for Example teacher ID let's say one you can say phone for example if I enter you are going to see that all these items are here so let's D structure this page I'll say page and other params that comes from search params of course const of course our object should end here okay right now if we don't have any page number here by default it's going to be
one so let's say const P if page exists take it if it doesn't exist it's going to be one and right now using this number we can patch the other Pages items to do that we are going to be using skip method and right here how many items we want to see it was 10 multip by page number minus one and there is a problem here that because the type of the page is string but here it should be number so I will say if page exists transform this into an Integer if it doesn't exist
use one okay so at the beginning the page number will be 1 1 - 1 is going to be Z 0 multip by any number doesn't matter it's going to be zero so we are not going to skip any item at the beginning we are going to take the first 10 items but if the page number is two 2 - 1 will be 1 * 10 = 10 that means we are going to skip the first 10 items and we are going to take the other 10 and if The number is three here is going
to be two multiply by 10 it's going to be 20 so it's going to skip the first 20 items that means the first two pages and it's going to show the next 10 items this is how it works but if you want to instead of writing this number again and again for each list page here let's import this from our library folder I'm going to create a new file settings or whatever you want and I will say export const item Per page and it's going to be 10 let's import this okay it's not coming let
let's import this here Library folder and settings okay it's still the same let's make this five okay it works so right now we can use our pagination component but to decide how many pages we have we are going to need the total number of the Teachers so if we have 10 teachers we are going to have here two pages let's get the number of the teachers it's really easy I'm going to close here and I will say const count AIT Prisma do teer and count let's console look I'm going to Save open my console and
as you can see 15 items we can also fatch them in a single function let me show you how to do That so instead of this data we are going to return data and also count await and we are going to be using Prisma transaction method and inside this method we can call multiple requests the first one will be find many and the second one will be discount I'm going to delete here and since we are using a weight here we don't need to write them here and that's all right now we have The data
and the count so let's pass this count and this page number to pagination component I'll say page is going to be p and the count will be count let's open our component and Define our type we are going to have the page and the count they are going to be number right now I can delete all these buttons I'm going to leave only one and I'm going to calculate the total page number and for each page I'm going To create this button here to do that we can use the array function array from basically we
are going to create an array here and we are going to map that array and for each item we are going to return this button firstly we are going to add here the length of the array let's calculate the page number count divided by item per page I'm going to import 15 items item per page is five we are going to see three items but if we Have 16 items for example here is going to be more than three in this case it's going to be four this is why we are using this math function
and we are going to get the each item it's not important so I'm going to be using underscore but we are going to need the index number and since it starts from zero but the minimum page should be one let's say con page index is going to be index + 1 and after That I'm going to return my button just like that and if you are using map you need here a unique key and it's going to be the index number or page index and I'm going to also use this here we have three pages
but all of them are active so let's write here a condition I'm going to wrap my class name just like that so we can use JavaScript insight and I'll will say if the page Equals page index it's going to be L Sky if it's not it's going to be empty and right now only the current page is one but how we are going to change the page number when I click here we are going to decrease when I click here we are going to increase the number and when I click any of these numbers we
are going to directly pass this number to the URL params to do that we are going to be using use rouer hook const Rouer use rouer hook that comes from navigation and since we are using here a hook our component should be a client component and also we are going to be using here click events so we have to use a client component and right now I'm going to create here a function const change page we are going to get the new page is going to be a number so we are going to pass this
number to our search params but before I'm going to fetch the existing params con params new URL search params and we are going to pass here window location do search so it's going to return all the existing params like again page two teacher one this phone number we are using this because when we change the page we are going to keep the other items we are going to change only this number so I will save it Set the page params will be new page but it should be a string because we are taking here a
number but we are using it in our URL string so we have to transform this and after that we are going to push to new params so I will say rather do push but we are not going to change the page we are going to take the existing one so I'm going to be using window. location do path name and we are going to pass here our new Params just like that let's try I'm going to use this function here and we click on this button we are going to call this function and we are
going to pass this page index and right now when I click here as you can see page is three but even if we have here different items when I click as you can see it just changes the page this is what we want so we can do the same thing for Other buttons I'm going to copy this paste here and we click on this button we are going to decrease the page number and when we click on this next button it's going to be + one just like that but there's a problem here if I
click one more it's going to page four or if I click here five times it's going to be minus one to prevent this we should use this disable Attribute so let's come back and I'll say const has as previous item per page multiply by Page minus one and if it's bigger than zero let me write the second one and after I'm going to explain const has next item per page again page minus one plus item per page and it should be smaller than the count so let's say we are on the page one here is
going to be 0 0 multip by item per page here is going to be zero And this is not bigger than zero in this case this button will be disabled so I can write here my condition if we don't have previous if we are on the page two here is going to be 1 multiply by 5 is going to be five and it's bigger than zero so we can turn back and what about here if the number is one here is going to be zero and we are adding this item per page because if the
existing items plus five more items smaller than the total number that means We have more page to see but if we are on the page three here is going to be two multiply by 5 is going to be 10 10 + 5 15 but the total number is already 15 that means we cannot see you the next page this is how it works so again I'll say disabled and if you don't have the next page let's come back as you can see this is disabled when I click here it's going to be page two three
and right now this is disabled And we can turn back okay this is what we want but what about other search query let's open up the student page okay here it should be student let's fix that quickly I'm going to open students page and when we click on this button we are going to open up the students and the student number okay anyway if you remember we have here some shortcuts and when I Click on this link it's going to open up the teachers page but we should see the teachers only belong to this student
let's remember our schema again I'll scroll up and each student has lessons and each lesson has a class and each class has students by the way here should be students it's an array let's reset our database MX pisma DB push Force Reset I'm going to use my seat again let's open the studio and inside class okay we have the students so basically if I pass here the class ID of this student and find all the lessons of that class I can reach the all teachers of that student let me show you and you are going
to understand better so when I click on this button I'm going to update my params let's open up the single student page and find our Link here so I'll will say when you click here open up the list page teachers and the class ID will be the students class ID but we don't have yet for now let's say two just like that and right now using this query I can find a specific group of teachers to do that we are going to be using where condition inside our request I'll say where and you can use
here any teacher field for example if I say teacher ID Equals 1 of course it's going to be a string let's choose here any teacher for example teacher 12 let's see only this teacher is here so you can write here any condition you want I'm going to open up my schema again it's going to be easier to understand so I'm going to find all the lessons of this teacher and all the classes of those lessons and the class ID should be this Class ID let's say lessons and I will say some class ID and it
should be this class ID and it's going to come from query params do class ID of course it should be integer of course it can be undefined for now I'll say we are sure that it exists I'm going to enter and that means all these teachers have lesson in this Class of course we can update here also just like that as you can see only five items if I say class number any non-exist distinct number we are not going to have any teacher this is how it works but of course we can have different queries
here so instead of writing them like that you might think that just pass here query perams but it's not a good idea because to protect requests we need some rules we cannot accept any given query Params and also in our application we have different rols if we are the admin you'll be able to see all the exams we can write any query we want but if we are the teacher or student we are supposed to see only our exams not other students or other teachers and also when we implement this search component when we write
any text and enter we are going to update our URL and it's going to be search and a text but using this search Cor we are going to search for different Fields for example for the exams page we are going to search for subject name if we are on the teachers page we are going to search for the teacher name the class name and also we can search for the teacher name so basically we are going to need different roles for each list item here so instead of directly passing our query params let's write our
rules so I will say URL conditions and after we are going to Also add the roll conditions but for now I'll say if query params exists for each item inside this params we are going to create different we condition so let's say for each item and since it's an object we can use object entries let's say const key value of object entries and we are going to pass here query params and it's going to return us all the items inside the params and we can Use here the if blog or switch case I prefer using
switch case because we have certain rules it cannot be something else I'll say key and if the key is class ID we are going to return our work condition remember it was lessons sum class ID parse integer and the value and of course it can be undefined to prevent this at the beginning that's right here an if block I'll say value shouldn't be Undefined and to use this expression inside the where condition we should assign this to somewhere let's say const query at the beginning it's going to be an mty object and we can change
its lessons field and to prevent any possible mistake we can write here our type and it's going to come from Prisma our table name and it's where condition Fields let me show you I'm Going to import Prisma that comes from Prisma client and if I say teacher where input will be able to use all these fields in the Weare condition and it's awesome because we cannot make any mistake here if I say something unexisting it's going to give me an error and also it's going to be be much easier to write our conditions because if
I say query dot we can see all our options here this is why we are using Prisma everything is much Easier let's take this back and let's use this query here and here let's come back and write our condition class ID 2 and perfect class ID three different teaches but if I say 10 for example it's going to be empty because we don't have a class number 10 okay so this is how we are writing where conditions and how we are Protecting our query params because if we pass here directly query params without any filtering
here we can reach any data that should be private like wage or whatever it might be so this is why we are using this structure and let's do the same thing for the search component when I write anything here and enter we are going to update our search params we are going to do exactly the same thing remember how we are changing This page number so I'm going to copy here open my search component table search here is going to be use client because we are going to be using a hook and click events I
will quickly import my rouer use rouer hook and here is going to be a form and when we enter it's going to run this on submit function let's say Handle Sub submit that's create it here I'm going to paste my previous Items and this time we are going to update the search params and its value will be whatever we write inside this input to do that we can use event react form event and it's going to be HTML form element you don't have to memorize this just hover over and as you can see HTML form
element let's take this value firstly I will say event prevent default because when we submit by default it's going to refresh the page To prevent this we are using this function so I will say const value event current Target the first item and its value so prent this type error let's say as HTML input element and I'm going to pass this here let's try I'll say test I'll will enter nothing has changed because I didn't save let's try again and perfect okay right now using this value We can search for let's say the teacher name
let's remember again we have the teacher name let's open up the teacher page and I'm going to add here another case let's say break and create different case and here is going to be search query do name as you can see it's here and this name will contain whatever we write here so it doesn't have to start with this word even if I write m is going to fatch this Item to do that we are going to be using the contains method we are going to pass here the value and also I will say insensitive
so you can use also capital letters let's say me as you can see all these teachers are here because they all have me if I say me1 this is how it works it's really easy you can also search for different fields for example teacher name or the subject name but we don't need this for this Page I'm going to explain this for the other Pages don't worry so right now let's do the same thing for the other Pages I'm going to open my student page it's here I can move this random row to outside of
my component here is going to be async and let's fetch all the students we have I'm going to close here and again I'm going to get the search PMS let's copy everything here and paste we are going to have the page query pars here is going to be Prisma student we input and when we search for anything we are going to check the student name so it can stay like that but we can change here in the teachers page and the single teacher so when I click here it's going to open up the students list
and we are Going to pass the teacher ID as a param and to fetch all students of that teacher again we can use the class because inside the class we have lessons and for each lesson we have the teacher ID so let's say teacher ID we are going to check the student class its lessons and it's going to include the teacher ID and it's going to be value remember it's a string so we can use it like that and finally I'm going to import my Prisma that comes from library Prisma we are going to patch
all the students and which table we are going to need as you can see there is a class name here in this case we need to add the user class it's going to be True here and I'm going to import item per page and student okay let's use this data here and pass our page number and the count number page will be P count will be count we need to change our type we don't need this anymore let's say student list we are going to get the student Table type and also we are going to
add the user class let's use it just like that let's open this row and see if there's a mistake it's going to be image we don't have student ID it's going to be username that is going to be student ID and also we can use the grade table for this column but since we are using the class name and the first item of this class name includes the grade we don't Need that we don't need to fatch Extra table so I will say class do name and take the first item and here is going to
be name and of course if there is no image we are going to be using no avatar.png and there is something wrong with this form model because as you can see we are using number number let's say number or string because users are string and the others are Integer so we don't have any problem anymore let's see okay we have 50 items we can see the other students we can also use our page buttons let's search for any item uh perfect let's take care of our teacher link then we click here we are going to
add the teacher ID so I'm going to open up the single teacher page here and when we click on this link I'll say list students I'm going to Close this menu and we are going to pass here teacher ID and here is going to be dynamic but for now let's say teacher two just like that let's write here something else and this teacher doesn't exist okay so what about parents let's do the same thing quickly here when we search for any text we are going to check the parent name let's copy here Again open parents
page we are going to change here let's move this row to outside of the component and here I'm going to paste my code let's import Prisma here is going to be parent where input we are going to search the parent name and we don't need anything else here and I'll will say Break by the way after each case you should use Break and also we can use the default so if we have some other params instead of teacher ID or search it's not going to do anything let's do the same thing here I'm going to
save and let's see what types we are going to need as as you can see we are going to need the student names that means we are going to use the student table so I will say parent List the parent table type and also students and it's going to be the student type and of course it's going to be an array because a single parent can have multiple children I'm going to copy this past P here and of course we are going to be using student names so let's say map for each student return the
student name and separate them using Join and let's import Prisma here is going to be Prisma parents students will be included and let's import item per page let's pass our data and here is going to be page and count and perfect let's search for any name okay it doesn't exist because there's a space here okay okay right now we have three Pages if I say 11 this is what we want and the next list is subjects let's copy here we are going to do exactly the same thing subjects page we are going to change the
type but before let's move this render and WR here our functions here is going to be Prisma subject where input when we search we are going to check the subject Name let's import this subject table and which related table we are going to need as you can see we are going to need teachers inside the subjects we have the teachers so let's say teachers and let's import this pass our data and after that we are going to change our type so I will say subject List it's going to be the the subject type and also
add the teachers and here is going to be teacher array and again we are going to be using teacher names map for each teacher return teacher name and separate them it's that easy let's see okay we have all our items here actually we are sure that our pagination Works let's make this 10 again and if I search for any item we are going to see those subjects and our teacher names are here okay what about classes again we are going to search for the name but also in the single teacher page as you can see
we have the teacher classes so when I click here again I'm going to add the teacher ID and using that teacher ID we can fch our classes actually let's Say supervisor ID I open the single teacher page and I'm going to change here list classes supervisor ID again let's say teacher 2 after fetching this single teacher we are going to change this data various classes let's move our row and I'm going to paste my search params and data fetching functions let's copy This here is going to be class where input I'm not going to change
here but I'm going to add one more and it's going to be supervisor ID and the query supervisor ID will be this value let's import this here is going to be class and which table we are going to include okay this is the teachers we are going to include the teacher name so we will need the teacher Table and again instead of adding the grade table we can use this first letter supervisor I'll import item per page let's pass our data and page and I'm going to change my type class list the Class Type and
also supervisor and it's going to be teacher here is going to be name and the first item and here is going to be Supervisor name let's change our type class list if you want to you can add here also the surname let's give a space here name and surname just like that let's click on our teacher link teachers classes as you can see it doesn't exist let's come back and let's choose one of them let's say 12 and perfect and what about lessons again in the teacher page we can find all the lessons of the
teacher so we are going to pass here the teacher ID cles students here list page lessons and the teacher ID will be any teacher ID again let's say two I'm going to do exactly the same thing if you want to you can create a common function for all these items but it's Going to make it more complicated and it will be hard to understand that's why I'm doing this again and again because as I said we are going to need different rules and requirements so let's open up the lessons page move our row here paste
our function import them here is going to be lesson and let's see which table we Should include as you can see we need the subject name the class name and the teacher name so we are going to need three tables the first one will be subject class and teacher I'm going to import this by the way when we include all these items it's going to PCH all the fields of the subject class and teacher but we don't need all these Information we are just going to need the teacher name the class name and the subject
name maybe we can also add here the teacher surname so to increase the speed instead of hatching every single thing we can use select and I'm going to write the field name again we are going to need the class name and here we are going to need the teacher name and also teacher surname so we are not going to fetch Unnecessary data let's pass this here and let's change the type lesson list it's going to be the lesson table type and also we'll need the subject we'll need the class and we'll need the teacher okay
let's use it here and here is going to be subject. name class. Name and teacher. name and also the serame okay perfect and when we click on this link it will fetch the lessons belong to that teacher let's come back I'm going to import this and here is going to be teacher ID and of course let's change the type lesson where input and perfect okay and I can do the same thing for the Student link because here as you can see we have the student lessons so what we can do here we can pass the
class ID the students class and using that class we can fetch all the lessons belong to that class let's do that I will open my single student page and change here class ID and again let's say two let's take this as you can see there's an error Because here should be a number so I'm going to be using parse integer and pass my value here let's click students lessons and perfect it's exactly the same class and what about this search input this time let's try to search two different things the subject name and also the
teacher name to do that I'm going to change here let's copy this but this time we are going to be Using query. or because we are going to have two different conditions the first one will be subject its name and it should contain this value and also teacher and again name contains this value I'm going to save let's remove this class ID so we can see all the lessons let's write here some lesson name just like that and also we can search for any teacher let's say name one so It's going to fetch this one
and this one and of course the other items that include mi1 okay what about exams let's quickly paste our code I'll open up exams move my row here and paste my code let's import Prisma here is going to be exam what else we are going to need as you can see we have three different tables subject Class and teacher but if you check the exam table you are going to see that we have only lesson so firstly I'm going to fetch the lesson and inside the lesson we can fetch the subject the teacher and the
class so I will say include lesson and we are just going to need subject teacher and class so let's select them we don't need anything else I'll say subject and in this table We are just going to need this name nothing else so again I'll say select name will be true and for the others teacher I'll say name and surname and here is going to be class let's import this and change our type exam list the exam type and and also inside we are going to have the Lesson and inside we will have the subject
class and teacher okay let's use it of course those items are inside the lesson lesson subject. name item lesson. class. name teacher and also surname and we are going to need here the date but we cannot directly use it As string we have to transform this and I want to see the day the month and the year to do that I'm going to be using the time format you can pass here any location let's say us format and here we are going to pass item do start time let's pass our data I'm going to import
this Prisma here is going to be exam whereare input we are going to change here but Before when we search any item we are going to check the subject names lesson so I will say subject its name and it's going to contain our value and the m will be insensitive and what about here let's see the teacher page we can fetch the teachers exams and also the students exams so again we can Pass our class ID and the teacher ID ID so query do lesson not class ID of course it's going to give an error
because here can be undefined to prevent this you can move it into an object just like that and here again lesson and the teacher ID will be this value let's try this is the single student page let's copy This paste here here is going to be exams actually we can do the same thing for others let's don't waste time here is going to be assignments and results and for the single teacher page here we are going to pass the teacher ID so let's copy this paste for the others here is going to be Exams and
assignments okay let's close them and pass our data okay let's search for something it works if I open up the single teacher page and click here it doesn't have any exam let's say three as you can see this is what we want and same thing for the student and perfect after the exams let's check the assignments it's pretty much the same instead of this start date We are going to be using due date let's come back copy here open assignments move this row and paste it here that's import them here is going to be assignments
I'm going to quickly pass my data and again we are going to need exactly the same Thing I'm going to change change here assignment type subject type class and teacher let's move this here and again let's say lesson the item and the name and also I'm going to add here the surname just like that and let's use this Date at this time it's going to be due date and what about our conditions here is going to be assignment wear type there are going to be a exactly the same if you want to you can add
here also the teacher name but it can stay like that you know how to do that you're just going to add here or and here is going to be teacher name let's see okay I'm going to search for Bio perfect teacher ID let's change this okay and the student okay it was easy what about results let's copy this results page who are rander row paste our code import our Prisma client item per Page and let's see what we are going to have we have the subject student and teacher let's see our table as you can
see we can directly at the students but for the teacher and also for this class we are going to need the exam or assignment because remember the result can belong to an exam or assignment and inside them we have the lesson and inside the Lesson we have the teacher and the class so let's fetch them by the way here is going to be title not subject name let's change here so it's going to be exam or assignment title of course we are going to change our type but before I want to import this Prisma change
here pass my data since we have two different types here exam or assignment we should do the Same thing for each of them let's remove here firstly I'm going to fatch my student but we are just going to need its name and surname so I will say select name will be true so name will be true and after that I will say exam and it's going to include the lesson and inside the lesson you're going to get the class and Teacher and again only need their names of course here is going to be select and
teacher I'm going to also fetch the surname and I'll do exactly the same thing for the assignment if it's exam here is going to be empty if it's assignment here is going to be empty and right now instead of data I'll say data response and I'm going to Define my data here cons Data data response and for each item Insight we are going to take the exam type it's going to be exam or assignment let's say assessment actually it's going to be either the exam or assignment okay there is something wrong here let's comment this
out for now and as you can see there's no problem and I will say const is exam and how we can know that it's an exam as you can see we have the start time Here but in this case it's start date so if I say start time in assessment that means this result belongs to an exam by the way to prevent this type error I will write my condition here if it doesn't exist we are just going to return null and and after that I'll will say return ID will be item. ID title yeah
are going to need the student Name and surname and the same thing for the teacher but of course here is going to be assessment do lesson and what else we are going to need the score we are going to need the class name lesson do class. name and let's say start time and if it's exam here is going to be start time if Not it's going to be start date okay I hope you understood why we are doing this that because we have two different options if you don't create here a common data you have
to write different conditions for each item here like if item and assignment exists take the item assignment and start date if it's exam take the item exam and start time so it's going to be more complex to prevent this we are using this data response and passing those Items to our data did I pass them here okay and right now we can change our type I'll say result list in this case instead of calling the result type I have to write my own actually let's copy them here is going to be string Again by the
way here is going to be semicolon not comma it's a type teacher name surname score will be Number class name will be a string and the start time will be a date okay let's use it here and right now I can say item do student name teacher name and surname I can do the same thing here here is going to be class name and for the date again we are going to be using our date function Here and here is going to be item do start time and finally I'm going to change here Prisma result
sofware input when we write any search input we can check the exam title or the student name so let's say query or and inside this array I'm going to write my options the first one will be exam and we are going to check its title and it's going to contain our value and of course don't forget to Write your mode insensitive and one more and this is going to be student and its name and what about here we are going to need only one item by the way where is default let's check the others why
I didn't add this I remember I did but oh it's here I just added for students and teachers but anyway let's continue for the single student page we Can see all the student results as you can see we are passing class ID but inside the result we already have the student ID we can directly take it let's open up the student page here and for the result here is going to be student ID and let's say student 2 I'm not sure if it exists or not if not we are going to change it and let's
say student ID query. student ID and that's all let's see okay all the results are here let's search for exam five okay it doesn't work because we are not using this query here and perfect let's say two okay and right now we can take care of the events and announcements they are going to be similar so it will be easy as you can see we have the event Title and we are going to need this table class table and that's all only class table let's do this I'm not going to copy from here let's copy
from here I will open events move my row paste my Cod import them quickly here is going to be EV want we just going to need the class and let's pass them Here Data Page and the count let's change the type event list is going to be the event type and also we are going to add our class just like that let's use it here and here is going to be class. name again I'm going to change this date just like that it's going to be start time but for Those items it's going to be
like 800 a.m. 9:00 a.m. or whatever it might be as you can see start time and end time so here is going to be the full date out here is going to be only hour to do that we can use to local time string and again location here and I will say R will be two digit minut will be again two digit and our R 12 will be false I can do the same thing for the End time let's take care of our rare input I'm going to import Prisma ENT where input when we search
we are going to check the title we don't need anything else I can delete here and that's all I think let's see okay I'll say two and perfect as you can see start time and end time and this is the full date let's do the same thing for the Announcements I will copy here open my announcements this is not the list here I'm going to move my row Prisma announcement where input again we are going to search for the title but this time we are just going to need the date we don't need any hour
or minute let's import Prisma here is going to be Announcement includes class let's pass our data and I will change my type announcement type and also a class of course for the consistency let's say announcement list here is going to be class name and again we are going to be using our time and what was the name okay just wait let's search for any item okay it Works and that's all guys this is how we are fetching data but there is one thing important here if we are not an ADD admin we shouldn't update or
delete this announcement only admin can create or if we are the student or teacher we are supposed to see only our exams or results or assignments and in the previous lesson we were using this temporary data as you can see role is admin we can make it teacher this time we are going to see Last items student only exams result and other items here but even if we are the student and there is no teacher list here I can still see the teachers or students or any other list I can even see here the single
teacher all these information that I'm not supposed to see so basically we should protect our routes to do that we should be authenticated first let me close Everything here and let's see how to handle authentication I'm going to create here the authentication section and in our application there won't be a classic login and register logic because in a school management application students teachers and parents are not supposed to create accounts only the admin can create and delete users so if there's a new teacher they go to the principal's office and the admin Registers and give
them the username and password or if there's a new student they come with the parents and again make the registration in the office so we will have the user creation process and of course the admin can delete the users and we are going to have the login process when we create a new user we will get the user ID and using forms will'll enter all the user details like address phone number Or any other field and send them to database using server actions so all the user details will be on our database so I will
say admin and all users and when a user wants to login they are going to use the login page but there is something important here after the login process we need to get the user role and protect our routes for example example if the user is a student they won't be allowed to see the teachers list or any other Users homepage to do that we are going to be using nextjs middleware it will allow us to intercept page requests so whenever we want to visit any page the middleware will check the authentication and the user
role and if they meet all the requirements it will allow the user to re reach that page so let's create our authentication and create our first user to do that we'll be using clerk you Can find the link in the description if you click on that link you'll see this page and after creating an account you'll be ready to build authentication why are we using clerk because it's really easy to implement authentication it just takes 5 minutes and you don't have to worry about the sessions tokens cookies security or social logins clerk does everything for
you and if you have less than 10,000 monthly active users it's Completely free and for a school management application it's more than enough because you will probably have a maximum of 1,000 students and parents okay let's open the documentation and see how to implement I'm going to choose next xjs we are going to need this Clark Library let's install I will open my terminal mpm install Clark nextjs and after that we are going to set our environment variables let's copy here but before doing that I recommend You open your dashboard and create an application as
you can see this is our previous application I will create a new one let's say school and in our application we are not going to use any social login we are just going to have the username and the password let's create and our environment variables are here let's copy open. EMV file and paste them here after that We'll create the middleware and add here our configuration but as I said we are going to have different rules but for now I will just copy here and after creating our users and roles we are going to add
here different rules let's open the menu and if you are using the source folder create your middleware Insight and paste this Cod and finally we shall trap our application with this prog provider so We can reach the user data in all our pages and components I will open up my layout and wrap my application just like that let's import that comes from Clark nextjs and right now we can create our login page but for the test purpose let's create here for users and after testing we are going to create our own users using the dashboard
I'll say admin admin I'm going to ignore these rules Because the password is too short but as I said it's just a test as you can see the password is too weak but it can stay let's create the others or actually we can just use this one because later we are going to be using the user roles that's come here we wrap our application and right now we can create our signin page as I said we are not going to have any sign up page only the admin will be Able to create users but we
can create the signin page as you can see it's really easy I'm just going to copy here and create my page just like that in the example it uses this signin path but in our application we are going to be using the homepage if you remember in our application we have an m to homepage right now we will create our login component here so let's come back and create our page inside the app directory let's Close everything here oh in the previous lesson we created this signin page it's empty but we are not going to
be using this I will delete and I will delete this page and inside the app directory I will say sign in and Page TSX I will say home page let's write here test so you can see the difference and as you can see it's here nothing has changed right now I'm going To add my signin component our component is here if I say admin and write here any random password you can see the error here but if I write admin as you can see we are authenticated but by default after the login process it's going
to redirect us to the homepage and since we are using our homepage as a login page there will will be a conflict here what we can do we can redirect users to different Pages as you can see there's a redirect URL here so you can use different pages but if you use this signin component you are going to always see the same design if you want to create your custom component you can use clerk elements it's better right now but I think it will be stable soon let's see how to use it firstly we are
going to need clork elements let's open up the terminal and install our library and if You are using typescript make sure that the module resolution is bundler let's open up as you can see it's already bundler I'm going to close here and here and and after that we are ready to create our custom flow let's see the examples this is a really simple one firstly we are going to be using the signning component and we are going to start with root and after that we will create our first step in our application We are going
to have only one step we will just ask username and password and we will sign in that's all so inside the stab we'll have two Fields the first one will be the username which includes the label and the input and the second one will be our password and finally we are going to create signin action which is our button and if there is an error it shows it here using clor Global error let's create and after you Are going to understand better firstly I'm going to import my components and make sure that your component is
a client component and I will create my component here using my shortcut let's say login page and after I'm going to Center everything firstly let's say h screen I'll say Flex align item Center justy content Center and the background will be llama skylight let me close this Menu and inside I'm going to create my root sign in do root and inside I'll create my step its name will be start uh you can give here any specific style let's say background white I'm going to give some padding rounded MD that will give some shadow let's say
2 x large and I'm going to Center everything vertically so let's say Flex Flex column and gap between each item will be two so basically we Are going to have here our container and inside let's write our title I'll say H1 tag and the name of the application and I'm going to create h2 tag and let's say sign into to your account and to see our changes let's create our other components firstly if there is any error we are going to show it here Clark Global error and I'm going to create my first field clerk.
Field and I'm going to give its name it's going to be identifier because it's going to represent our username let's create the label it's going to be username and I'm going to create the input and it's going to be like the regular input I'm going to give the type a text I'll say required I'm going to give this style later and if there's an error related to username we are going to show It here so I will say clark. field error and let's create the other one one its name will be password label and the
type will be password and finally I will create my action signin do action I'll say sign in and it's going to be a submit button let's see okay it's not visible because we are already authenticated that we shouldn't see the login page to prevent this let's Use the clerk's user component here and log out if you remember in the dashboard layout we have the NAB bar let's see what we have inside we have the user AAR here but for now let's comment this out and use user button here let's see the admin page and as
you can see we have the user button if I click here I can see my user information and I can sign out and right now we can see the login page if I write something Different as you can see this is the field error if I write this correct but the wrong password you are going to see this error and if there's something else we are going to see the global error here here let's give a style firstly for this H1 tag I want to also add here my logo so let's say image The Source
will be logo. PNG I'm going to give my size which is 24 and after the name of the application let's give a style text will be x large font will be bolt Flex item Center and gap between items will be two and what about H2 I'm just going to change the color just like that let's take care of our field firstly if there is an error I'm going to make this small and red and for this field the label and Input will be vertical and gap between them will be two and for the label it's
going to be X small and the text color will be gray let's give a style for the input I'm going to give padding round it will be MD I will give a ring and its color will be gray let's do the same thing for the others here field Label and input and for field errors again Tex will be X small and the color will be red and finally our button is going to be blue color text will be white margin y will be one rounded and the text will be small we can also give padding
but it's going to be small let's say 10 pixels and perfect it looks pretty nice And right now after the login process we can redr users to the related dashboard if it's an admin we are going to redirect that user to the admin dashboard if it's a teacher it's going to be teacher dashboard but how we are going to get this data if you remember when we created a user we added here the username and the password but also you can add the first name and the last name and there is one more thing here
And its user metadata so we can add our custom roles here if you are using the pro version of Clark you can use organizations to do that for each role you can create different organizations but if you are using the free version you can do this using metadata so I'm going to edit here and the role will be admin I'm going to save and let's see how to get the user information after the login process I'm Going to come back create user and session data and as you can see on the server components we can
use off and current user and if you are using client components you can use use off hook and as you can see it returns is looted the user ID session ID and the talk and also we have one more hook here and it's called use user and it's going to return all the user information let's try I'm going to come Here paste it here and import this hook and let's see what we have inside I'll say user open my console and as you can see we don't have any user if I say admin admin and
as you can see the user information is here we have the user ID user image and inside the public metad data as you can see there is a role so using that Ro I can redirect my user to the admin page so let's get this Data and redirect our user to do that we are going to be using use effect so whenever the user changes we are going to run this effect and check the user role const roll if there is a user yeah are going to check the public data and roll and if there's
a roll we are going to redirect our user to do that we will be using use rou hook const rather remember it comes from next now we Ation I'll say push and the r name here admin teacher student or parent of course I should add rather here and let's see as you can see it opened the admin page if I try to reach the login page it's going to open the admin page let's create other users and test it by the way we couldn't save the first name and last name but it's not important let's
see teacher Teacher I'm going to ignore the password rules student and parents let's give the rolls and the others okay let's test it I'm going to log out let's say teacher uh we are on the teacher page let's see one more time and after we can protect our routes and perfect it works so what about Middleware let's open up the documentation I will come back and let's click here protect routes and as you can see by default our middleware is not protecting a route so if I log out and try to reach the admin page
as you can see it's visible to prevent this we are going to be using Create route matcher so you can basically add here your protected routes like admin page teacher page and create Your own rule here you can say if it's protected route just use the authentication and it's protect method and it will automatically redirect users to the signin page let's try I'll open my middleware I can delete this let's import this matcher and I will say admin and teacher I'm going to refresh the page and since we didn't Define our sign In URL it's
going to redirect us to preil clerk page to prevent this I will open my EMV file and I will say next public clerk signin URL and it's going to be the homepage let's see again I'll say admin and as you can see we are not allowed to see the admin page or teacher we are not allowed but we didn't add the student page so we can see here so this is how middleware works but in our application we are going to need more Than that we have to check the user role and also we have
here different list Pages if we are the student we can see only these Pages if we are the admin we can see all the lists so basically for each page we are going to need different rules if you remember in our application we created here the settings file and inside this file I'm going to create a list that includes all the pages and the user roles as you can see if we are on the announcements page even if we are The student or parent we will be able to see this page but if we are
on the teachers list for example we can see that page if we are an admin or teacher and those are our homepages only related roles can see those pages so using this access map I'm going to Define different rules and remember this is an object so I cannot use array map instead I'm going to be using object Keys let's say const matches object. keys by the way you can Find this in the GitHub repository you don't have to write from scratch and I'm going to pass here route access map and right now we can use
map and for each route we are going to return to matcher and right now we can use this function and pass here our route and also I'll say allout rols route access map and Route let's see what we have inside I'm going to comment this out for Now if I refresh the Page open my console you are going to see that we are on the exams page that means every user can see this page and right now we can get the user role to do that we are going to be using this off function and
it includes session claims oops there's a typo session claims let's see what's inside I'm going to log in as a teacher open up my terminal and as you can see it includes Bunch of items here that is related to session but also I want to add here the metad data so we can reach user role to do that I'm going to open up my dashboard choose sessions and I'm going to customize my token and as you can see there are many options here you can add different fields but in our case I'm going to add
the public metad data let's say metad Data and it's going to be user public meta data okay let's save and right now we can see the role because it's inside the public metadata let's try again I'm going to refresh the page and this time we have here the metadata and that includes our user Ro let's take that role cons Stoll equals session claims do metadata of course if it exists and Roll of course it's going to give an error typescript error because it doesn't sure if we have the r inside metadata to prevent this I
will say it's an object it includes the rooll and it's a string and if our role is inside this allowed rols array we'll be able to see that page let's do that I'll say const get all the mature and allow rolls from our Array and I'll say if matcher request and if all rols doesn't include our r and I will say we are sure that it exists we are going to redirect the user because it's not allowed to do that we can use next response I will say redirect new URL and we are going to
redact user to the roll page let's see I'm going to try to reach the admin page and as you can see it all opens teacher I can see Assignments events announcements but if I try to see subjects for example as you can see I'm not allowed this is how it works and of course you don't have to use this map field you can just create every single route using Create route matcher but in this case case you are going to create almost 20 route to prevent this I just created this access Map we are going
to map through our items and check the user role for each one right now we are authenticated we have the user role so let's change our data in the list Pages according to user rooll and also in the menu we don't have to use this temporary data anymore instead let's use the current user I'll say const user await current user in this case our Component will be async and it includes our user role I'll say user public met data do roll let's say s string and right now as you can see there are more items
and also I can fix here I will open the now bar and I will do exactly the same thing here current user and here is going to be user public metadata and roll okay and as a Teacher we can see all the teachers we can see all the students and parents but when it comes to exams we should see only our exams not other teachers and also as a teacher we should be able to create a new exam so let's handle those buttons first and after we are going to make changes in the fetching function
I will come here close them so let's start with the first list announcements as you can see only admin can update or delete the announcements I'm going to delete here and inside the HTML again only admin can create an announcement so we will not have any changes here but we are going to take this role from the authentication not this temporary data I'm going to delete here and here let's say const session claims that comes from all I'm going to take the roll and I'm going to copy Here let's open the page as you can
see nothing has changed by the way since we don't have any actions we don't have to see this actions column so I will say If the roll equals admin the structure this array in this case we are going to have this field nothing will be changed but if we are not the admin we are going to structure this empty array that means we are not going to have anything I'm going to Save and as you can see it's gone okay so let let's take care of the assignment again I'm going to paste this here import
this we don't need this R anymore actually instead of doing same thing again and again let's come here and inside Library I'm going to create a new file and I'm going to paste it here import and I'll say export con Strol let's remove this and here and let's import our Ro I can do the same thing here that comes from library and utils I can delete here and for the assignment page as you can see admin and teacher can create an assignment by the way there is something wrong here it should be like That let's
see okay as you can see the button is here and also we can see the update and delete buttons but there's something important here as you can see those assignments don't belong to us we should see here only our assignments so let's change our query and if you remember we have here the URL perms condition and I'm going to add one more condition here and it's going to be roll Condition let's say conditions and again I'm going to be using switch case this time time we are going to check our role and again that comes
from library and utils and I will say if the role is admin we are not going to have any rule if the role is teacher we are going to update our query and if you remember inside the assignment table let me actually open my schema And close this menu and here we have the lesson and inside lesson we have the teacher ID so we can use our ID here in this case we are going to also need our user ID so let's say export const current user ID equals user ID okay we can use it
here do lesson. teer ID and it's going to be current user ID and there's a type error here to prevent This we can Define our lesson actually let's define this at the beginning here query lesson will be empty at the beginning so we can directly update this just like that it's going to be shorter not subject and here I'm going to say we are sure that it exists I'm doing that because to see This page we have to be logged in and we have to have the user role and if we are logged in that
means we have the user ID I will say break and we don't have any assignment that because in our database the user IDs are different let's change one of them teacher 6 will be our user ID let's get this from the Clark users I'm going to copy this ID and update Here and for student I'm going to copy this ID and let's update student 8 and a parent let's say parent for and it's going to be this ID now let's see again okay and right now if I refresh the page you are going to see
that our assignment is here and the teacher name is teacher number Six just like that and right now we can update our assignments we can delete it or we can create a new one what about if we are the student inside the assignments again we are going to be using lesson but this time we have to check the class because inside the class we have the students and inside this student list we are going to search for our user ID so let's create one more more case Here if it's a student I'll say query do
lesson. class and let's say it's students should include our ID so I will say sum ID will be current user ID so let's open assignments and as you can see we are going to have only two items and our class is 3A let's check student this is our user and its class Is as you can see 3A okay and I can do the same thing for the parent I'm going to copy this and paste if it's parent lesson class students sum but here is going to be the parent ID because inside student we can reach
the parent ID so we will be able to see all our children's assignments by the way don't forget to add break okay it can look a little bit complex But we are not actually making here any expensive calculation we already have the role and according to that role we are going to run only one case and even if you have nasted tables it's not a problem because in our database we will not have millions of Records or something it's just a school management application so you don't have to worry about them and again if we
are not the teacher or admin we don't have to see Actions I will do exactly the same thing here if the RO equals admin or teacher we are going to spread this array in this case we are not going to have the actions column okay and what's next let's open our menu and open up the classes I can delete this data and Roll and import my roll here and in this case we can create a new class if we are the admin it can stay like that and here it's going to be the same but
as a teacher we can see the classes so we can delete this action column I will say if roll equals admin okay and the next one is events again only admin can create a new event delete or Update and I'm going to remove this role and import my RO from the library and utils okay but if you remember an event can have a class so if we are the teacher we are going to see all the general events and also the events that belong to our classes and again if we are the student or parent
we will be able to see all the general events or that students classes Events so let's write our conditions here I'll say roll conditions again you can use switch case we are going to check the role if it's the admin we are not going to have anything if it's the teacher the query and I'm going to be using or that because as I said if there is no class ID that means it's a general event So we can see them in this case I will say if the class ID is null patch them and also
if the class it's lessons and I'm going to be using sum and the teacher ID will be the current user ID and we are sure that it exists and you can do the same thing for the others but since we are using exactly the same again and again let's do something Different here I'm going to remove this and I will say const roll conditions I will say teacher lessons some teacher ID will be current user ID if it's student we are going to check students directly and some of them will be our student ID and
if we are the parent again class students and some of them Will have our parent ID so right now I can use this inside my query I'll say or and right now I can say if the class ID equals null or if the class table meets our condition here so I will say R conditions and we are going to pass our rooll here and if it doesn't exist that means if we are the admin it's going to be an EMP object let's write here A type To get rid of this typescript error type of roll
conditions okay so our query will be here let's see and right now we can see only ENT two because it belongs to our class let's create a general event I will say add recards General event one test and we are not going to have any class I'm going to save refresh the page and as you can see We didn't put here a question mark and you can say if it doesn't exist right here just Dash just like that and we are a little bit late to join this event okay so let's do the same thing
for the announcements I'm going to come here copy these roll conditions and paste here let's import current user ID and let's see again and right now we can see the announcement two that belongs to 3A and again I can update my class name here because it's not required and if it doesn't exist it's going to be this Dash okay so what's the next one actually let's close everything here open my menu and we have the exams first here I'm going to delete This exams data and roll and update my action If the roll equals admin
or teacher will be able to update or delete the exam we'll be able to create a new exam and let's fix here just like that but as I said we should see only our exams or if We are the student or parent again we are going to see only students exams let's see it's here we are going to be using lessons and it's teach ID and classes by the way instead of doing this like that let's create an empty object because if we do that each time we are updating the lesson but we are just
going to update the related field and Here lesson. subject just like that okay and let's create our R conditions I'll say switch case we are going to check the role if it's admin we are not going to do anything if it's teacher query do lesson. teer ID will be current user ID if we are the student lesson Class students and some students ID will be the current user ID and finally again class students some and the parent ID will be the current users ID and here is going to be parent Let's see we have two
exams 3 a 3 A and the next one is lessons teachers and admins can see all the lessons but only admin can add a new one by the way let's remove this roll and update with this one here is okay and here so I'm going to save and what about parents let's quick quickly delete here and again admins and teachers can see The parents but only admin can create delete or update I'm going to import let's check one more time update delete and new one by the way the table name will be parent here is
correct let's check this one okay this is correct okay and let's fix here Okay and what about results I'm going to delete this only admin and teacher can update or delete the result admin or teacher and here just like that and here okay let's write our roll condition after this param condition I will say roll conditions so which Case yeah are going to check the roll if it's the teacher let's see our table as you can see we have the exam or assignment here so I will say query. or exam lesson teacher and it's going
to be current current user ID and I will do the same thing for the assignment just like That and if the user is a student we are going to directly check the student ID and it's going to be the current user ID and finally if the case is parent query dot student and its parent ID will be the current user ID let's see the results and we have just one assignment And the student name is eight let's check okay we have here different class because it's a random generated data don't worry about here and what
else we have the students and and only admin can delete or update the students R equals admin and let's change this Ro and I'm not going to add here any additional Condition because teacher can see all the students and we are going to do exactly the same thing for the teachers page teachers list let's remove here and import and there is only one more and it's going to be subjects and I'm not going to add here a condition because only admin can see this page but we don't actually need here but It can stay it
doesn't matter and that's all I think this is how we create R base rout protection and data patching right now we can add our own data but before let's take care of the homages firstly I want to fatch my admin data to do that I'm going to log in as admin and firstly let's fch all these user counts I'm going to close everything here open my admin page and if you Remember we have some user cards here and since we don't have stuff I'm going to change this to admin admin teacher student and parent and
inside those cards we are going to patch our user counts to do that I will say async and I'm not going to say string it's going to be admin teacher student student or parent so for each type we are going to Patch different data for example for the admin we will say data await Prisma do admin and count let's see I'll open my terminal and as you can see we have two admins but how we are going to make here Dynamic we cannot use this just like that so what we can do here is we
can create an object map let's say const model map and it's going to include admin in this case it's going to be Prisma do admin here is going to be teacher student and parent so right now I can use use my model map and it's type and to prevent this error let's write our type here I will create a record and the first element will be this type so let's say type of type and here is going to be Any and right now I can use my data here just like that what about here I
will close them and if you remember inside the components we have this count chart but since we are using this animated chart our component should be a client component but we have to fetch the data to do that I'm going to create a container here count chart container I'm going to create my component I will fetch my data here so I will say Asing Function and after fetching data I'm going to pass this here so let's get all this container here and paste and inside I'm going to call my component count chart it ends here
let's cut this and paste here or actually we can use this here because we can change this size if we want To okay right now I'm going to get my data from the parent and it's going to include the boys and girls and they are going to be number according to those numbers we can update our data of course I have to move this here and the total number will be boys plus girls here is going to be the girls number and here is going to be the boys number so let's fetch our data and
pass It here let let's open the container firstly I'm going to import this image and there's a warning here because we didn't pass the props let's fatch the data first I'll say const data await Prisma I will check the student and I'm going to be using here Group by because we are going to need only the number of the girls and boys I'll say Group by sex and I'm going to get the count inside our schema we have only two items so it's Going to group them by male and female and it's going to send
the total number of each group let's see console log data of course we should change our admin page instead of count chart we are going to be using count chart container let's remove this open our terminal and as you can see 25 female 25 male so let's send this I'm going to close here voice is going to be actually let's Filter our data here I'll say const boys data. findind for each item we are going to check the XX if it's male we are going to take the count if it doesn't exist it's going to
be zero I will do the same thing for the other one and here is going to be girls and perfect let's change this number and the percentage I will say boys and girls and we are going to need a calculation here to do that I'm going to be using the Math Library I will say round Bo divided by the total number which means boys plus girls and If I multiply this by 100 it's going to give me the percentage we are using round because I just want to see here a flat number and if we
have just one boy and Nine Girls the total number will be 10 1 ided by 10 it's going to be 0.1 If I multiply this by 100 it's going to be 10% but in our case the 50% will be boys the other 50% will be girls let's copy this and paste here and this time here is going to be girls and of course I'm going to multiply here not only here so let's wrap this like that and R will end here okay I'll do the same thing let's see and perfect 50% and 50% % so
right now we can take care of this chart again We are going to fatch data so let's create our container I will come back close everything here open my attendance chart and create one more component container I will say async We'll fetch our data here but before I'm going to copy here and paste here is going to be attendance chart and I'm going to close this De and I will remove this one and we are going to get the data from the parent and it's going to be this data array that includes some objects and
each object includes the name present and absent so let's say name will be a string present the number and absent and of course it's going to be an array and after that we are not going to need this data anymore instead we are Going to be using this data from the parent let's fetch our data first see I'm going to import this and fatch data I will say await Prisma do attendance I'll say find many and we are going to need here a condition because in our application we are going to fatch the list only
belong to this week in this case we are going to need the date value but there is something important here let me Actually put this data back I'm going to change here for now as you can see it includes only current week so if we are on the Monday we are going to see here only one item if today is Friday we are going to see five items in this case we are going to need the latest Monday if you find this date we can fetch data after this date so firstly I'll say const today
and it's going to be new Date and const day of the week it's going to be today. get day it basically return us the number representation of the date for example today is Thursday the week starts from Sunday so it's going to be the item zero 1 2 3 4 so if I say get day this is going to be for let's see I'm going to comment this out and here open my admin page and use my container Here in this case we don't need this anymore I will open my terminal and as you can
see it's four so using this number we can reach the previous Monday so I will say const day since Monday and I will say if day of the week equals zero which is Sunday the number will be six because six day before the Sunday will be Monday but if it's not Sunday if it's Tuesday for example the day of week will be 01 2 2 - 1 will be Monday or 3 - 2 will be Monday or 4 - 3 will be Monday so I will say if it's not Sunday I can directly use day
of week minus one and it's going to give me the days since Monday so using this value we can reach the last Monday so I will say const last Monday let's create a new date we can pass here today and I will say last Monday set a new date today do G dat minus day since Monday right now I can use it here I will say where the date will be greater than the last Monday and I will say select we are just going to need the date and present but remember in any any case
we are going to need all these items so even if we are on the Thursday we are going to see the Friday data and it's going to be zero so basically we are going to create five Items for each day here let's create and you are going to understand better first here I will say console lock data of course it's empty right now because I'm recording this video couple days after when I use the seat let's use it again firstly I'm going to be using MPX Prisma DB push and force reset and after MPX Prisma
DB seat let's refresh the page and right now we have some items here that includes the date and present I cannot use directly Group by date because each date is different even if they are the same date our minute or second will be different so instead let's create here our attendance map and for each weekday we are going to use the data item which has the same day let me create const days of the week so we are going to be using exactly the same names the short names of the weekday and I will say
const attendance map it's Going to be an object and basically it's going to be exactly the same data here but instead of this name here I will use them just like that present for now it's going to be zero absent uh for the others and for each item inside our data we are going to update our map so let's say data actually I'll say response data because we are going to update it Here I say for each we are going to get the data of the item const item date I'll say new date pass here
item. date again I'm going to be using this day of week and I will write my condition if day of week bigger than one which is Monday and smaller than five which is Friday actually let's say equal because Monday is the day number one and in this condition we are sure That we are in the day weeks from Monday to Friday and use using this object I'm going to update my items but there's something important here the Monday is the item zero but here the Monday is item one so I will say const day name
days of week day of week minus one so today is Thursday which means the number four if I say minus one we are going to reach exactly the same name because 0 1 2 and three so let's update our map I will say If item. present attendance map the day name present will be plus equal 1 so we are going to increase this number and otherwise we are going to increase the absent of course there's a warning here that because we don't have any type let's come here I'll say the key will be a string
and the value will be present number absent number okay let's see it right Now just like that as you can see we don't have from Monday to Wednesday because we are using this seat but once we start creating our own data we are going to have all of them so it will not look weird because in this case we are going to have only Thursday here but anyway it works so let's transform our map because remember it should be name the day name present and absent but here the name of the day is here So
I will say cons data days of the week do map I will get each day of course not day days the name will be the day present will be attendance map day do present and here is going to be absent of course that's turn them just like that and pass our data here so let's remove this right now and change this data name just like that okay right now we can take care of this event list and Again we are going to fatch data but our component is a client component because we can change our
date in this case we can use a container let's close them open our component here and I'm going to create one more calendar container I'll say async we are going to fatch our data here and pass this to event calendar let's copy here And paste and this one but actually we are going to need one more component because here we also have the event list and whenever we change the date of this calendar we are going to list different events so basically we are going to have a container and and inside we will have this
client component and This Server component and when we change the data Here we can update our URL and inside this list component we can take date and fch our data so inside components I'm going to create event list and I'm going to use it here and here is going to be event calendar let's import this image and inside this component we will not have these lists I'm going to copy this and remove and we are going to return the calendar Component that comes from react calendar you don't need this anymore and these data and I'm
going to paste my list here of course we don't have events but we are going to fetch it can stay like that for now and whenever we change our date we are going to update the URL remember how we are doing that I'll will say const router that comes from use router hook and I will create here a user Fact and whenever our date changes that includes our date we are going to update our URL using the rouer so let's say push the date will be the value in this case we are going to need
here rather actually we can add here the type condition so I will say value instance of a date okay let's use this onchange Here and value okay let's see I'm going to click here and the date is here of course it looks a little bit ugly if you want to you can just do it it like the month and the year but anyway it can stay like that basically using this date we are going to patch different events so let's use it here I will say date parum to get this remember we are using search
params and that includes the keys which Are strings and the values are string or undefined in our case we are going to need this date I'm going to get the date from search params and use it here let's open our component and get this as a prop date param it's going to be a string or undefined so let's get the date count date if there's a date param I'm going to Transform this into a date because here is going to be a string I will paste it here and if it doesn't exist we are going
to get the today's date and using this dates we can fatch our data con data wait Prisma R table I'll say find mini and I will write here my condition if you remember it includes the start time and it's going to be greater than The beginning of this date and less than the end of this date to do that we are going to be using new date and we are going to change the hours and it's going to be the beginning of the date and one more and this time it's going to be less than
new date set hours but this time the end of the day let's say 9999 and right now we can map through our data here we don't have to rra this anymore just like That event ID title here is description but there is something wrong here we are going to be using start time but we are going to get only hours not the complete date remember how we are doing this I'll say to local time string you can write here any location the r will be two digit the minute will be the same and R 12
will be false so we are going to see only hour And minute and there is something wrong here because it should be acing we are fetching data and I will save here okay let's open our admin page and this time I'm going to change my container and pass here the search params just like that because remember we can reach the search pars only on the pages not Components and since this is a page we have to get this params here and pass it to our component let's see all these events are here if I click
here there will be no events because in our studio all events belong to today because of the seat okay it works and finally let's take care of the announcements we don't need any Container we are not using client site let's open our component I will say async cons data await prma do announcement I'll say find many but we are going to need here a condition because we can see all the general announcements and also if we are the student parent or teacher we should should see all the announcements belong To us to do that again
we are going to need our role and user ID I will say const user ID and session claims that comes from clerk off and I'm going to get the rooll remember how we are doing this session claims do metadata and it includes a role that is a string let's get that roll just like that and for each user type I'm going to Add different conditions so let's say roll conditions if it's an admin we will not have any condition we can see all the announcements if if it's a teacher let's remember our schema as you
can see each announcement can include a class of course it's optional if you don't have any class that means it's a general announcement so I can write here a Condition I will say where or and the first condition will be the class ID doesn't exist and if there's a class ID we are going to use our conditions so I will say roll conditions and our user role let right our first condition we are going to check the class and its lessons and it's going to include our teacher ID so I will say user ID two
more if it's a student this time we are going to check the class students and it's going to include our ID of course we are sure that it exists and if it's a parent again we are going to check the students and here is going to be be parent ID okay let's write our type here to prevent this error type of roll Conditions or empty object and in our application we can see here three announcements if you want to you can see all of them but let's take three of them so I will say take
three items and order by the date will be descending so we are going to see the latest announcements so using this data you can map through each item here But if you remember we gave here different colors and since we have only three items let's use them like that data the first item and the title I will copy this here is going to be description second item and the third one which is item number two what about those dates I'm going to format them remember how we are doing This format I'm going to add here
the data do date here is going to be zero 1 and two let's see and there's a problem here okay there is no data I think by the way we have to write a condition if it exists uh we don't have any it's because of this admin condition I think because here is going to be an empty object actually let's remove This and I will copy this and I will use spread and my condition here if roll doesn't equal admin use these conditions so if we are an admin we are not going to have any
condition but if we are we are going to destructure this object just like that okay so we finished our admin page let's take care of the teacher page I'm going to sign out and teacher And as you can see there is no announcement here because they don't belong any of our classes let's add here a general announcement and let's copy this date paste here we are not going to have any class ID I'm going to save refresh the page and as you can see it's here okay if you want to you can add here the
event container but it can stay like that let's take care of our Schedule I'm going to come here close everything open my teacher page and right now instead of this big calendar again I'm going to create a container because it can be the teacher's calendar or the students calendar for each user type you are going to f different data so I will say B calendar container I will say Async and let's call this container here remember it includes the lessons and in our schema each lesson has a teacher ID so we can use it directly
but if it's the student we can use this student class ID so basically we are going to get two types let's open our big calendar container and I will say type and it can be either teacher ID or the class ID and in any case we are going to need the ID and it's going to be a string or number because if it's the teacher ID it's going to be string if it's the class ID it's going to be number so let's fetch our data here con data with Prisma do lesson find Min and I'm
going to write my condition here here and I will say if the type is teacher ID teacher ID will be ID if it's not the class ID will be ID of course it's going to be number and here is going to be string so we can call our calendar component here big and pass our data let's get this as a prop but if you remember let's check our temporary data we are passing here the title start and end dates so we should pass exactly the Same structure here so instead of sending this data directly let's
format this first so I will say con data data response. map for each lesson Insight we are going to return the title which is lon name start which is the start time and end time okay in this case it's going to be an object array which includes the Title start it's going to be a date and end right now I can use it here okay let's come here and get our user ID user ID that comes from off the type will be teacher ID and the ID will be this user ID I'm going to remove
this okay let's see it's not here because in our studio and lessons as you can see all these teachers IDs are different so let's change this one per see I'm going To need my user id remember we did this before but since we used the seed file again we have to do it from scratch I'm going to copy let's open teachers this is going to be our teacher ID let's actually change the others so we can see the schedule in the student page also and finally the parent okay I'm going to refresh the page and
as you can see our lessons are Here of course the starting times and ending times are exactly the same that's why we see them together here but when we add our lessons of course we are going to give different dates or hours but anyway it works but there is something important here inside the lessons the start time is today that means if we check this page next week we are not going to see them here because the date will be different to prevent This before sending the data to our big calendar we should change this
date First hours and the day of the week will be the same but we are going to change the day and the month so even if we visit in the future we are going to see exactly the same lessons in exactly the same place but the date will be different to do that firstly I'm going to find the current week from Monday to Friday and apply all the previous lessons inside those dates but if we Visit page on Saturday or Sunday the current week should be the next week I know these date things are a
little bit complicated but let me show you how to do that firstly I'm going to create here a new file actually we have utils here we can make the calculation let's get the current work week work week I'll will say count today new date and again I'm going to get the day of the week remember how to Do that today dotg day and let's try to find the start of the Week start of week for now I'll say today and right now I'm going to update it so I will say if today is Sunday which
means day of week equals zero the start of the week will be next Monday that means the next day so I will say start of week do set date today's Date plus one so I can do the same thing for the Saturday if the number is six in this casee I'm going to add two so again we are going to get the next Monday and I'll say else start of week do set date today's date minus day of week minus one so in this case if we are on the Monday the day of week will
be 1 1 - 1 will be zero so we are not going to change the date it's going to be still Monday if we are On Tuesday here is going to be two 2 - 1 will be 1 Tuesday minus one will be Monday again so in any case we are going to find the Monday and also I'm going to set the hour just like that and using this Monday we can also find the Friday const end of week new date let's see start of week we are going to add four more days G Date
plus 4 so this is going to be Friday and again I can set hour but this time it's going to be the end of the day okay I'm writing them in a long way because I want you to understand of course you can make it shorter but I'm trying to do this step by step and right now we have the start of the week and end of the week let's return them just like that and right now I'm going to create a new function let's say Export const adjust schedule to current week so we are
going to get the lessons which includes the title start date and the end date and of course it's going to be an array and the output of this function will be exactly the same but this time we are just going to change the date Firstly I'm going to get the start of the week and end of the week current work week and I'm going to return my lessons but I'm going to make some changes for each item inside I'll say lesson firstly I'm going to find the lesson day of week lesson do start date and
get day so in this case here is Thursday so it's going to be 4 here and I'm going to Find the difference between Monday const this from Monday and I will say if the lesson of week equals zero the difference will be six if it's not as suay of week minus one remember we did this before and right now I'm going to change the dates let's say adjust start date for now it's going to be a new date let's pass here start of week and I'm going to change its Date let's get the date and
I will say plus days from Monday so let's calculate again lesson of the week it's on Thursday that means it's 4 days from Monday will be 4 minus 1 which is three and I'm going to add this number to start of the week which is Monday plus 3 again it's going to be Thursday so in any case we are going to see our lessons and I can do the same thing for the end date so let's create One more and this is going to be and date and I'm going to pass this here so they
are going to be exactly the same date but I'm going to change the hours this is the start date this is the end date so I will say adjust end date actually let's say adjust and I'm just going to set ours lesson do end and I'm going to get the hours so we are not going to change anything I can do the same thing for the Minute and second and that's all right now we can return our new date title lesson do title start will be at just start date and here is going to be
and let's add here a comma and that's all so let's use it in our component I will say const schedule adjust schedule to current week and I'm going to pass here my data let import And let's use it here okay there is an error because we are using clerk server here but our application is a client application so instead of doing this here let's do it in our calendar container I'm going to take this back I will delete here and perfect But it includes the entire day it should start from 2:00 P.m. not because we
didn't just our start date here here is going to be start hours just like that okay it works by the way we don't need this end of week let's directly return it like that okay I'm going to refresh my page they are still here so if we are the student let's sign out student student and right now we are going to Pass our class ID let's open the student page it's the student list here is the student page and I'm going to call Big calendar container and pass here my class name I will say async
I'll get my user id first from Clark and using this ID I'm going to patch my class name Prisma class of of course I should Change this name we cannot use class I'll say class item find unique and students some will be user ID of course it should be find mini and it's going to return an array let's see okay it's a promise because I forgot wait here okay as you can see it's an array we are going to take the first item and It's ID so I will say type class ID and the ID
will be class item do ID okay I'm going to close this terminal and this menu let's see and perfect and again all these lessons are in exactly the same date but anyway it works if you want to you can change your Seat uh for each lesson you can give different hours each lesson has exactly the same start time and end time this is why we see them together but anyway so we finished our hom Pages we finished our list pages right now let's take care of the forms as a student we cannot create update or
delete anything so I'm going to sign out and login as admin firstly I'm going to start with the subject because it's easier by the Way our buttons are are not here let's close everything open up subjects let me check this role as you can see it comes from library data it should come from utils I think we forgot this page okay they are here and actually I don't have to say admin because only admins can see this page but anyway it can stay right now when I click on this button we are going to see
This form and of course we are using exactly the same form that we use for the teacher let's scroll down as you can see it's teacher it's going to be subject but if you remember inside the form model we just have the student and the teacher form let's open our menu and forms as you can see we have only two so let's create one more I will say subject Form uh whenever we call subject here we are going to import the subject form let's move this here of course we are going to need the request
pass type create an update and again I want to warn you if you didn't watch the previous video here can be a little bit complicated for you because we created bunch of nested components and inside this form we just handled the deleting operation but when it comes to create or Update we are going to be using different forms and also we are using these laser loadings otherwise it's going to loose all of these forms to prevent this we are going to import them only when we need them I can delete here I'm going to add
a comma and of course we don't have the type and data let's remember our teacher form I will open up the teacher Form as you can see type can be create or up update and if we are updating we need to get the previous data so we can show them inside the inputs so let's get exactly the same thing here just like that so we are not going to have any warning okay we have the layser looing by the way for the list Pages you can show here a loading indicator first so during the data
patching instead of Showing the blank page blank white page you can show a skeleton or a spinner or whatever it might be to do that inside the list I'm going to create a new file and it's going to be loading. TSX let's just say loading and I'm going to Center this Flex item Center justify Center of course you can show here different things but for now it can stay like that let's open other page as you can see it was loading okay this is how It works so right now let's create our subject form I'm
going to close this this menu and let's open up the teacher form and if you remember in our forms we are using react hook form and Z for the validation and we are creating our schema here and after this schema and input we will create our form and we are going to be using react hook form on submit event and it's going to validate our inputs and send us this data and since we learned them in the previous Tutorial I'm not going to explain it again if you didn't watch the previous video at least just
watch this part I'm not going to repeat again actually copy everything here and paste I'm going to change the name it's going to be subject form and I'm going to create my type here actually instead of doing this here let's cut this and create a new file inside the library and I will say form validations keyas I'm going to Paste let's say subject schema I'm going to import s and I'm going to paste it here and it's going to be subject schema but with the capital letter okay let's open our schema Prisma schema and let's
see what we have inside the subject as you can see we have the name and also when we create any subject we'll be able to choose the existing teachers actually let's do without this first we are just going to Have the name input it's going to be really easy after understanding how it works we are going to fatch the teachers and add them as inputs I'm going to change here we'll just have the name I will not give maximum let's say minimum one and subject name is required and that's all let's export them and use
inside our form we don't need this anymore I'm going to paste My subject schema here and import and Z schema here if you want to you can change the names you can say subject inputs but I prefer using them like that and let's change this title it's going to be create a new subject but remember the type can be update also so let's write here a condition I'll say if type equals create you're going to write here create a new subject If not let's say update the subject and inside we are just going to have
one input let's delete here all these items and this is going to be subject name here is going to be name and name let's see I'm going to click and as you can see our form is here let's try I'm going to click as you can see Subject name is required because minimum one and if I say test and create there is no warning let's open our terminal click here and as you can see name is test right now we can send it to our server and save it inside the database using Prisma to do
that we are going to be using nexj server actions so let's come back inside the Library I'm going to create a new file so we ac or directly let's say Actions to use server actions you should add here the use server directive so everything inside this file will be running on the server and we will do all the data mutations inside this file it can be create update and delete requests so let's create our first action I'll say expert const create subject is going to be an async function and we are going to get the
data which is a form Data and let's say console lock data in the server or server action let's open our terminal and let's use this action inside our form but of course we are using react hook form here so I'm going to call my action just like that let's Import in this case instead of form data we should get our subject schema because after the validation it's going to send this Validated data so let's come back and I will say subject schema I will save let's create again and as you can see it's here of
course it's an object and this is how it looks in the server terminal but if I say data do name we can see it here this is how server actions work right now we can get this name and add it to our database so I will say try catch I will say console lock and let's say await Prisma subject table and create method and inside we are going to pass our new data and it's going to be data. name as you can see thanks to validation we don't have to validate them again and again and
we don't have in a typescript error because we sure that our name exists here okay and after adding this new item We can revalidate our path so it's going to return the fresh data I will say re dat path that comes from next cache and I'm going to write the path name which is list subjects let's see I will say part subject I will create and as you can see it added here one more page let's see I'm going to open and it's here let's create one more I will create and it's immediately Here but
if we have any problem let's write here subject let's write something and create and as you can see we don't have any answer and even if it's successful we don't know that it's successful or not but how we are going to keep track of our form State it's really easy let's take this back open our form close this menu and right now we are going to be using use form State hook If you check the official documentation of NEX jazz in the server action section you are going to see this use form State hook action
after react 19 it's going to be use action state but since we are using NEX js14 we are going to be using use form State actually let me write here after react 19 it will be use action state but for now we are going to be using use form State hook let me import it comes from react Dom here by the way we don't need this image and let me explain how it works we have a form here and whenever we click on this sign up button it's going to call this action before use form
state we were calling our form action directly remember but in this case instead of calling this action directly we are going to call this form action and we are going to pass our actual action here which is create subject and inside this Form State you can store any state you want it can be a number string whatever you want to return let's say we want to return two items success which is false at the beginning and error State and again false at the beginning so whenever we run our form action it's going to call our
create subject action we are going to add this subject to database if there's an error we are going to change our state like Success is going to be false but error will be true I will say return but if everything is okay if it's successful the success will be true and the error will be false and to use this state inside our action we have to Define this here so I will say current state and it's going to be success bullan and error actually let's create our type Here just like that and I'm going to
use it here okay right now if there is any error we can show it somewhere here and also you don't have to write success and error bullion you can also send the message whatever you want I'm just showing you how to use server actions I'm going to save and I'll say if state do error create here a span and let's say something went Wrong as I said you can store your error message and show it here let's give a class name it's going to be red just like that and let's make this mistake again I'm
going to try to add something and create and as you can see something went wrong and if it's successful we can show here a notification to do that we are going to be using a library called react toastify as you can see we can show all these Colorful notifications let's install I will open my terminal mpm install react tusy and after that we are going to need this container and whenever we call this function it's going to show our notification of course you can change the position let's copy this close here open our layout and
after this children I'm going to add my container I'm not using inside this form Because it's going to be Global we will be able to use it in any page or component by the way let's import this CSS just like that and I'm going to change the position I want to see it on the bottom right as you can see there are many options here you can also change the theme by default it's white I'm going to change it to dark and right now we can use it I'm going to close Here and inside my
subject form I'm going to create a user effect here user fact and I will say whenever State changes fire this use fact and if the state do success called the toast function and right here your message and remember again we have two types for each type we are going to return different text so I will say subject has been and I'm going to write my condition here if type Equals create here is going to be created if not updated just like that let's see right now I'm going to remove this mistake open my subject form
here test and create okay it's not here because if you are using Revol dat and trying to return anything it gives this weird reaction let's comment this out test again I'll create and as you Can see it's here if you check the documentation you are going to see that there is a problem with the client side cache but they say it will be updated in the future so to prevent this bug instead of Ral date path let's use use rou hook and refresh our path manually so I will say const router use router hook that
that comes from next navigation don't use rou and if it's Successful I will say rou do refresh we can also close this model if it's successful as you can see by the way our subject is here and if it's successful I'm going to close this model if you remember inside the form model we have this open State and we can change the state using this button but also I want to change it after the successful action to do that let's pass this to our Form just like that and let's write it here let's see its
type as you can see this patch set State action and bulling let's copy this and paste here I will import them that comes from react and this is also and let's use this here of course it's at the beginning here and let's change the order here Okay of course there's a warning because it's not in our form I will add it here again this type just like that and if it's successful I will say set open will be false let's see again last one I will create and perfect this is how it works so what
about the update when I Click on this button as you can see our previous tab text is here because inside our input field we are using data. name right now when I click on this button we are going to call a different action let's come here and create one more it's going to be update subject in this case we are going to be using the update method I will write my condition the ID will be data. ID but if you remember in our validation we don't have the ID let's add if it's the update mode
we are going to be using this ID which is a number and it's going to be optional but if you are using a primitive type except for string I highly recommend you use here CSE because when when you pass this object it's going to return a string to prevent this we are using this field here okay so I will come back as you can See there is no error anymore again it's going to be successful if there is an error here is going to be true let's try I will say updated and perfect and finally
I'm going to create create one more action and it's going to be delete subject in this case Prisma subject delete and we are going to pass our ID here let's remove this and let's remember our form Model here if the type is delete we are using this form right now let's do exactly the same thing here I'll say con State form action use form State hook we are going to call the lead subject and the initial State success false error false and again if it's successful we are going to be using re brother and use
effect and let's say subject has been Deleted of course this action will be dynamic if it's teacher it's going to be delete teacher if it's student delete student so let's create here our delete action map I'm going to use it here and if it's subject we are going to call delete subject and that's right for the others okay for each table we are going to return different delete action but we have only one so they can stay like that For now so I will come here and I will say delete action map and the table
name here so for subject it's going call this function so let's call it here and let's add our input here it can be a text or a number because for the users it's going to be a string and for the others it's going to be number let's give the name ID and value will be the ID and I will say hidden so we are not going to see this Input and since it can be text or number let's say con ID data dot get ID as string of course it's not going to be subject schema
anymore it's going to be form data and I will say parse integer and the ID let's see I will click here and delete and Perfect it's gone but what about other data as you can see we have the teachers field so when I click on this button we should also be able to choose teachers there will be maximum 20 need teachers so we can show them here if you have more items like students parents I don't recommend you to fetch them but in this situation for teachers we are going to fetch and show here and
since it's a client component let's create a Container so I will come here open my menu and I will say Farm container we are going to get exactly the same types because right now instead of form model we are going to be using form container let's take them just like that actually we are using exactly the same type so let's export I will say say export type form container props and I'm going to paste it here let's use It and here and right now I'm going to call my form model I'm going to pass everything
here and also we are going to fetch here the related data and pass here for example for the subject we are going to fetch all the teachers by the way there is something wrong here because I didn't save okay let's fetch all the teachers and pass it to our Model so I will say async and firstly I will create related data it's going to be empty and for each table we are going to have different related data and if the type is delete we don't have to fetch anything so let's say if type doesn't equal
delete I'm going to be using switch case get the table and if it's subject we are going to fetch the teachers Prisma teacher find Mini and we are just going to need the teacher ID the teacher name and surname let's update our data I will say teachers will be subject teachers so let's pass this here just like that and get our related data here just like that in this case I'm going to extend this type related data will be any because we Don't know which tables we are going to fatch okay let's pass this to
our forms just like that and I'm going to get them here and let's paste them here let's open our form it's here and update our types just like that let's update our subject type I will open form validation schema and I'm going to add here teachers it's going to be an array which includes Strings because we are going to add here our teacher IDs so let's come here and add here one more input but it's going to be select by the way we don't have our ID here of course we didn't add this here okay
there is no error we have warnings here because in the teacher and student form we don't have those types we are going to update them let's click Here if I update nothing is happening because in our action we don't have the ID let's create one more here and I will say if there is a data because that means we are in the update mode in this case here is going to be ID just like that actually it can be hidden let's update our type hiden will be ban and if it's hidden I'm going to change
my class Name I will say if it's hidden it's going to be class name hidden which means display none if it's not it's going to be flexbox and let's say optional so but we don't have to pass let's move this here and save here okay if I say two okay it's still not updated because we didn't use this action name in our form I will come here and I will write a Condition I will say if type equals create call this function if not update subject function let's also add our teachers after this data we
are going to be using select let's remember from the teacher form if you remember we were adding our selects like this let's copy this and paste I'm going to change the title teachers select element and we can Choose multiple teachers I'm going to change these names and we are going to be using this related data which includes our teachers let's actually D structure this and for each teacher we are going to return an option let's write our type here it includes ID name and S name let's use the name and S name here Teacher. name
space teacher dot surname and the value will be teacher ID and also we are going to need here our unique key teacher. ID and let's use it in our action parly when we create a new subject we are going to pass here here teachers and I will say connect data. teers remember it includes Our teacher IDs and for each teacher ID the ID will be teacher ID let's open our schema again inside subject we have the teachers and inside this array we are going to add every single teacher using this ID and when it comes
to updating I will say teachers but this time I'll say set because if I choose a different teacher here it's going to delete the previous ones and set a new one here so I will Say data teachers map for each id id will be teacher ID let's see I'm going to update here choose this teacher and this one and update and they are here okay awesome let's create a new one I'm going to choose this one create and perfect I can also delete okay this is how we are using Server actions and updating our data
so let's do the same thing for the class let's see first as you can see each class has a name capacity and also we can patch all the teachers again and pass here the teacher ID and all the grades and pass here the cre ID and for the update again we are going to need this ID so let's create our schema I'll say class schema it's going to be an ID again name capacity is going to be a number let's change this message two more I'm going to delete this here is going to be great
ID and here is going to be supervisor ID here is going to be number here is going to be string because it's a user let's say optional but great will be required as you can see it's optional but this is required okay let's create our Actions here is going to be create class we are going to get the class schema we are going to create a new class let's remove here for now update class again I'm going to remove this and delete class we are going to get the form data and delete this class we
not going to use here but let's change for the feature you can use them okay so let's open our class List and change our form models instead we are going to be using form container let me close this menu open our form container and I'm going to add one more case here and it's going to be class if it's class we are going to need class grades we are going to get the ID and level and also we are going to need the teachers let's say class Teachers name and serame let's pass them here teachers
will be class teachers and the grades will be class grades okay let's open our model and create one more item here by the way let's comment them out for now I will say class class form of course we don't have yet let's Create I will open my menu inside forms let's copy this and paste again I'm going to change the name class form and change this component name okay right now I can use it here let's import we'll pass all these data and also I'm going to add here my delete action and it's going to
be delete class just like that okay I'm going to Import class form because remember we shouldn't import this we are using laser loading and that that's all I think let's come here everything is going to be the same I'm going to change here create class update class of course there is an error here that because we are not collecting all our data here is going to be class name let's update here and I'll create one more here is Going to be capacity there is a problem because we didn't import our type here is going to
be class schema and the Z schema just like that and I will say supervisor this time it's not going to be multiple each class can have only one supervisor let's say supervisor ID and here let's get the data from the related Data remember we pass here teachers and grades for each teacher again we are going to be using the name and surname and one more and this is going to be the gr gr ID gr uh for each grade ID will be number and the level will be a number let's pass here our grade and
it's Key and we are going to be using the grade level here let's update here and let's see I'm going to open my class list click here and as you can see all our items are here you can choose any grade Any teacher here let's say 20 I will say for B I will create and there's something wrong here because here is supervisor ID let TR again Create three I'm going to create something went wrong let's open our action oh because we didn't pass any data let's pass our data directly we are not going to
have any additional information I will save create and it's here okay what about delete let's see we get the ID and delete the class it's a number let's see I'm going to Click and perfect right now we can update our class the ID will be data ID and I will pass my data again but inside this form I'm going to also add select it so I will say select it if there is data and great ID equals data. great ID I will do the same thing for the teacher here in this case teacher ID will
be data do supervisor ID so right now let's create an item teacher 6 grade two I'm going to create and if I try to update you are going to see that teacher 6 and grade 2 is still here let's update and perfect so after creating a single form the others are easier you are going to do exactly the same thing you are going to create your Schema your actions you'll change your list component so let's do one more and you're are going to understand better let's take care of the teachers for example as you can
see we have the subjects so we can send this data as a related data so when we create a new teacher we can show the subject list so we can choose any of them okay first see I'm going to open up teacher form close this menu let's cut This and paste here we are going to need the ID for updating the teacher but it's going to be optional because when we create we don't need that we will have the US username password name surname let's change them and email is going to be optional but since
we are using a validation here it's not going to work to prevent this I'll say Or z. literal and empty string that basically means it can be an empty string if it's not it has to be a correct email here is going to be optional here is going to be the same you'll have the blood type birthday but remember if you are using number bullion or date you should use here C let's make them capital and image is is also optional let's open our Schema as you can see it's optional and also I'm going to
remove this instance of file because we are going to be using Cloud widget and when we upload our image it's going to directly return us the image URL which is a string and I will say optional it can be empty and finally let's add here our subjects it will be an array which includes strings and again it's going to be optional and basically inside this array We are going to store our subject IDs let's change this name teacher schema I'm going to pass this here and let's change this name just like that of course I'm
going to export them let's take care of our actions create teacher it's going to be teacher schema update teacher add change here after we are going to take care of This data because we should also add our subjects but it can stay like that for now and delete teacher form data and delete this teacher okay right now let's open our teachers list and after I'm going to update my form teachers I'm going to select those form models and they are going to be form container teacher create and teacher delete we don't have the update because
we already have the Single teacher page I'm going to save and open this container and one more case here and it's going to be teacher if it's a teacher we are going to fetch our subjects teacher subjects a wait Prisma subject find mini we are going to need this ID and the subject name name we don't need anything else let's say subjects teacher subjects okay so let's open our model Right now if you remember we commented this out let's open again we already imported this here and let's change our type we are going to add
this related data feature form and also I will say set open dispatch set State action and it's type buan let's change here it's going to be Teacher schema and teacher thought schema and let's see here it's not saved and again I forgot to add this here the order is different okay so right now we are going to do exactly the same thing we will create our use form State hook and if it's successful we are going to refresh the page let's copy this and paste here I'm going to import use form state if it's create
we are Going to call create teacher action if it's not update teacher action I'm going to call this use router hook use effect and TOs and let's say teacher has been created or updated that's right here a condition if type is create create a new teacher if not update the teacher remember inside related data we Have the subjects we are going to have the username email password here is going to be name here is going to be surname Fone address blood type birthday and I'm going to add here one more select and it's going to
be subjects that means we can choose multiple items let's change here and I'm going to get my subject Array for each subject yeah are going to return an option of course it will be subject and its type which includes the ID and the name and let's wrap this just like that and the value will be subject ID and here is going to be the name also we need a unique key again ID I'm going to save let's close Here the others and in actions I'm going to add this function here and let's see okay there
is something wrong with the list page because I'm importing twice let's remove this and all these subjects are here we can choose multiple one if I say create we'll see all these required Fields by the way it shouldn't be required image is optional but in our form as you can see we are using this image component but I'm going to remove this because we are going to be using Cloud nextjs widget let's open the documentation and install this library after that inside the EMV file we are going to add our Cloud name if you open
your dashboard you are going to See here your Cloud name you can change here so let's open the EMV file close this terminal and next public cloud cloud name will be lad and also we are going to add here our API key let's create one more and this is going to be API key okay so let's see how to use it I'm going to open up the upload Widget and we are going to import this widget and use it just like that and inside you can give any button or any HTML element so again I'm
going to be using exactly the same thing here so it can stay for now I'm going to paste it import and let's take this label and paste it here if you want to you can change here it can be a d because there is no input I can delete here and right now I don't need This let's see I'm going to click and our widget is here when I click on this widget nothing is happening because we didn't pass here our upload preset let's come back and on the dashboard I'm going to open up upload
presets as you can see those are our previous applications I will just say School and you can add here any folder name so when you upload any image they are going to be stored in this folder I will save and let's use it here and also as you can see we are not using this function when we click on this button we should open our widget so I'll say on click open this widget okay right now it's going to open let's see and perfect we can choose any image but after the successful uploading We should
return our image URL let let's see what's inside and it Returns the result and let's see what's inside let's open our console and try to upload and as you can see our image is here and inside the info and this is our image URL so we can use it to do that I'm going to store my image inside a store so let's come Here and say image set image use State hook and its type will be any and whenever our upload is successful we are going to set our image result doino and also after uploading
we can close our widget to do that I'm going to take result and also widget and I'm going to close it here let's see I will click upload this image and it's gone if you want to you can show your image here just create an Image tag and use your image URL but it can stay like that right now I'm going to open my actions and firstly I'm going to create a user on the Clark server and after that we are going to get our user ID and send it to our database to do that
we can use the same block I'll say const user await clerk client that comes from clerk nextjs server and I will say Users and create user function and inside we can pass our username which is data. username we can pass the password first name and last name but in our database it's name and surname by the way this n should be capital and after creating this user we can send it to Prisma so inside the data the user ID Will be user. ID I will write my other fields data do username name surname email phone
address image blood type sex birthday and finally subjects But remember we are storing the subject IDs inside this array so I will say subjects connect and for each item inside this array we are going to return the ID and the subject ID by the way here is going to be a string in this case we should trans transform this to an integer so I will say parse int and subject ID by the way there is something wrong Here of course these items can be undefined so I will say null okay let's open our schema it's
actually required and let's open our s schema and here is going to be not optional now right now there is something wrong here because it doesn't exist in our schema as you can see let's add I'll say birthday And it's going to be a date time I will do the same thing for the students just like that in this case I will update my seat you don't have to do that because when you open my GitHub repos story you are going to see the updated version but for now I'll say student will be 10 years
old and teachers will be 30 years old just like that of course there is a warning because we didn't apply the changes Remember how we are doing this MPX Prisma migrate Dev I'll will say yes at birthday and it's ready let's see right now okay I'm going to save let's see our users here we have only four users I will say user any password here doesn't matter John do I'll add the address blood type Birthday let's say 3 days ago I'm going to create and there's something wrong here let's check as you can see the
value should be capital and let's write here our error let's remember how we were doing this subject form and if there is a state error we are going to show it here just like that Okay we'll call create teacher but our image is here we are not using that so I will say add everything thing inside the data additionally if there's an image use its secure URL let's try let's say Chan and a password Here Jane do I will give address blood type birthday any subject here and let's upload an Image I will create and
there is a problem let's open our terminal there is something wrong with birthday it looks okay inside the validation we have our birthday here maybe it's a caching problem let's remove do next Jaz and start our application again I will refresh this page and let's try to create again and it's Successful our teacher is here it was a caching problem what about update we can see this single teacher page and I'm going to add here the update button I remember we did this but let's open our single teacher page I will close this terminal and
menu okay we didn't even fatch the single teacher to do that we are going to be using this param so I will say perm of course it's going to be an Asing Function let's write our type of course it's going to be params not param and that includes our ID which is a string we can use this ID because inside the app directory our Dynamic route is ID it has to be the same and after getting our user ID let's fetch this single teacher I'll say con teacher await Prisma do teer I'll say find unique
because we are going to fatch only one teacher and I will say Where the ID will be our param ID of course I can write here my type by the way let's get this ID and of course it can be also null and I will say if there is no teacher return not found that comes from next navigation so we are going to see here the N Found page and if we have the teacher we can use it here firstly I will say teacher. image and if it Doesn't exist use no Avatar PNG here is
going to be the name and surname here is our form model by the way if we are an admin we can update this teacher but of course here is going to be form container and instead of this data I can send teacher and also we are going to be using our user role not this temporary data let's move here and here and I'm going to import roll from Library and utils you don't have any description it can stay like that I'll say teacher do blot type here is going to be the birthday remember how we
are using our dates let me just copy and paste paste here is going to be the email and if it doesn't exist it's going to be just Dash because remember it's optional and here is Also phone or Dash and for the teacher we are not going to have any attendance it's specific for the students but I don't know what we can put here it can stay like that for now and here we have some counts this is going to be the subjects lessons and class numbers so let's patch them also so I will say Include
count and we are going to select subjects lessons and classes in this case I can change my type it's going to be teacher and also we are going to add here the count which includes subjects lessons and classes okay let's use them here here is going to Be teacher. count. subjects here is going to be lessons and classes okay there is something wrong with this roll I think it was not a good idea to use this inside utils we have a problem all the time but it's a server component we shouldn't have any problem let's
copy this we don't need this user ID I'm going to Comment this out oh we don't have any problem right now we don't need this user ID okay we have all the information here there is no lesson or class we created just one branch with this username and when I click here you can see that all our information is here but there is no birthday let's open our teacher form find the birthday as you can see the default Value is birthday but I should transform this otherwise it's not going to be visible here and as
you can see it's here because in original one there are also hours minutes and seconds but we need only the month the day and the Year this is why we are transforming and when we update the teacher we don't have to update the password so I will say optional and using this ID we can update the teacher let's see if our ID is is Here or not okay we didn't add remember how we are doing this if there is a data that means we are in the update mode so we can show our ID here
of course it's going to be hidden we are not going to see that just like that and after we can update our teacher so we are going to do exactly the same same thing here so I will say CL client users and Update user and we have to pass here which user we want to update and it's going to be data do ID by the way we can write here a condition if there is no data ID we are going to return the error I will add a comma and I will say teacher update we
are going to pass here our condition which is data. ID and we don't need this let's save and See I'll say test two I'm going to change the name last name let's add one more subject I'm going to update okay it still asks for password that because we addit here the minimum character so what I can do I can use exactly the same thing it can be empty and in my action I will add here a condition I will say if data. password is not empty the password will be data. Password let's see right now
I'm going to update something went wrong okay it still asks for the password because I didn't add this optional and also I didn't do exactly the same thing for the clerk and as you can see our user is updated we have two branches we actually updated the username let's update this first name and last name let's add one subject and Perfect but we have have three branches that because instead of setting new subjects and deleting the previous ones we used connect so I will say set right now if I add only one subject as you
can see it updates okay what about deleting our teacher as you can see it uses par int it's going to be directly string let's try I'm going to click and delete and it's gone okay this is how we are adding updating And deleting teachers let's do the same thing for the students and you are going to understand better firstly I'm going to fetch data for the single student it's going to be similar we are going to take the params patch our student let's copy here and open up the student page I'm going to paste it
here and the type will be student and Additionally we are going to need our class and inside the class we have the license let's import this and instead of count we are going to directly add the class I'm going to import Prisma here is going to be student and I will say include class if there is no student we are going to return not found we are not using count here that because they all are related to class if You patch only class we can reach to grade and the lessons let's add our information here
student. image or no outar here is going to be name s name blood type here is going to be the birthday again I'm going to copy paste my date here email or empty P or empty and let's update them I'm going to get The first character of the class name student. class do name Char at zero here is going to be student class oh we don't have lessons here let's change here is going to be the name so we have to get the license count to do that I'll will say include count lense will be
true so let's add this here in this case it's going to be Class and also count which includes lessons of course here is going to be select okay right now we can use our count here just like that by the way oh I removed this return by mistake and perfect what about this attendance we can also patch this inside this page but we are already using nasted query here if you want to Let's create a New component and also I can show you how to use suspense so after loading the student information we can show
here the loading indicator and after fetching it's going to show this percentage here so let's come here inside the components I'll say student attendance card we are going to fetch our data here and let's use this component here I'm going to be using suspense block paste my component Here and when it's loading we are going to be showing this text again you can show here something different I'm going to copy this and paste here and also I'm going to need the student ID the ID will be student. ID let's take this as a prop it's
going to be a string so I will say attendance Await Prisma do attendance find mini let's import this and inside I'll write my condition and the student ID will be our student ID and also we are not going to fch all the attendance the date should be greater than the last year to do that let's use new date get full Year and the last here and after that we are just going to need the percentage so let's say const total days it's going to be the attendance length and I'm going to find the present days
the days the student has been present so I will say attendance filter for each day we are going to return the days if they are present and I'm going to take the length and finally I can find my percentage present days divided by total days multiply by 100 let's use it here as you can see it's 100% And also let's update our schedule if you remember we have the big calendar container and we have to pass here either the teacher ID or class ID since we have the class ID let's say Type class ID and
the class ID will be student. class. ID I can do the same thing for the teacher page single teacher page and this time it's going to be the teacher ID by the way let's import and the ID will be teacher. ID okay our lessons are here so what about Students page again I'm going to change my form model there are going to be form container after we will add our actions and create our form it will be exactly the same thing so let's open our students Page by the way I want to remove this I
decided that I'm not going to use use it it gives error instead let's comment this out and paste it here Okay and here is going to be form container student delete and student create and we have to be an admin okay let's create our actions quickly I will just copy here and let's paste delete student update and create let's create our schema I will duplicate This it's going to be student schema I will pass it here and change my input type just like that again we are going to have the ID username password name surname
all these data but also when we add a new student we can get the grade ID class ID and the parent ID so I'm going to remove here here and it's going to be great ID it's going to be a number let's say minimum one and if it doesn't exist we Are going to return this message gr is required let's do the others here is going to be a string parent is required but we are not going to fch every single parent and show it on our form instead we are going to directly pass our
parent ID otherwise the calculation will be expensive if we have thousands of parents we shouldn't be able to see them on our form but we can fetch the grade and class because we are going to have just I don't know 10 10 or 20 classes and maximum six grades I'm going to save and let's use them here firstly we are going to create a clerk client but before I want to check my class capacity if there's a space we can create this student otherwise we have to pass a different class so let's say const class
item wait Prisma do class I'll say find unique and the ID should be the data dot Class ID that comes from our form let's actually move this inside to try and also it should include the students number because if the capacity is 10 and if there are eight students inside this class that means we have two more space so we should calculate it so I'll say include count and I'm going to select students let's write our condition here I'll say if there's a data item And it's capacity equals data item count and students that means
we don't have any space anymore so we can return our error just like that and if we have a space we can add our user and here is going to be new student and instead of subject we are going to have the great ID class ID and the parent ID and for the update it's going to be exactly the Same let's copy them and past P here of course we didn't add our schema student schema and finally we can delete our student and one more thing here we should also delete the student from the clerk
server so I will say A8 CLK client users delete user and I'm going to pass here my ID just like That let's do the same thing for the teacher I forgot that firstly we are going to delete from the clerk and after our database okay so let's open our form container I'm going to add one more case here if it's the student we are going to add the grades and classes Gres we'll get the ID and level of course grade not grades and also we are going to PCH the Classes and also we are going
to need the student number because we are going to show the empty space so let's say include count select and students let's pass them here classes will be student classes and grades will be student grades okay let's open our form model change here delete student we already have our form Here let's get this back also we are going to need the related data just like this and I'm going to move this here let's open our form actually let's take everything from the teacher form so it's going to be easier I will copy and paste here
I'm just going to change the component name student form let's see our model as you can see There is no error anymore and by way when we delete our items here is going to be the table name name and let's see what we are going to have I'm going to close this menu I'm going to pass my schema student schema and student sort schema again we are going to need the image if it's create we are going to call create student if not update student why it's not Coming I didn't use export somehow okay I'm
going to save and let's import let's change change here student has been created or updated I'm going to change here we'll have username email password name surname phone address lot type birthday we are going to have the hidden ID sex and instead of subjects we are going To show the grades we can select only one grade so I'm going to remove here I'll say gr ID and let's D structure our classes and grades and use them here for each grade that includes ID and level we are going to show to level and here is going
to be create ID and let's do the same thing for the classes let's actually say great because We are going to choose only one and here is going to be class ID we are going to map through classes and for each class that by the way includes ID name capacity and count and inside we have the students and and I can use them here and we are going to show class do Name of course I should change this name we cannot use class and also we can show here the capacity and empty space so let's
see class item count students and also let's show the total number class item and capacity and let's say capacity and I'm going to give here a space just like that we are going to have the upload widget and that's all I think let's see I'm going to click as you can see classes and their capacities by the way I can move this here it looks a little bit ugly I will cut this and let's paste it at the beginning okay it looks much better but we don't have here the parent ID I'll create need one
more field it's going to be parent ID as I said if you want to you can Fetch all the parents but it's not ideal it's going to be a string so I can delete here okay let's see our studio and I'm going to choose parents let's get the first one I'll say test and a password Here blot type birthday if you want to you can give here a limit Let's choose any class and great I'm going to create let's see and it's here what about update of course there is no attendance let's open up our
attendance card and I will say if it doesn't exist right here Dash as you can see the class is 2A which has five lessons that we can see them here and again when I click on this button by the way we don't have the Button let's create I'll open up the teacher page copy this open my student page and after the name I'm going to paste let's import it's going to be student update and student okay it's here because we have a div here that contains this H1 tag and our button okay when I click
as you can see the user is here I'll say test Two update okay we already have this username I think and perfect let's update again as you can see the username is here what about delete let's come back delete this user and it's gone this is what we want and that's all guys I think you can do the other forms I don't want to do exactly the same thing again and again but we can do one more thing here If you remember as a teacher we can add exams assignments and results let's look out and
login as a teacher let's open the exams and right now when we create an exam the lesson idea of that exam should be our teacher lesson because in our schema as you can see it has a lesson ID but we cannot add here some other teachers lesson ID it has to be Ours let's open up the exams page and change here form container exam update delete and create okay let's open up and add our case exam and we are going to have a condition here if we are the admin we can add any lesson we
want but if we are the teacher the lessons should be our lessons so let's add here our role first remember how we are doing This and let's say exam lessons Prisma lesson and rare condition let's remove this by the way and I'll say If the roll equals teacher the teacher ID of that lesson will be our user ID if it's not it means it's the admin so we don't have any condition and I will say Select yeah just going to need the ID and the name of course we are sure that our user ID exists
and let's say lessons is going to be exam lessons let's remove this open our form model import our form of course it doesn't exist let's create I'm going to copy my subject form and paste let's say exam form I'm going to change the component Name right now I can import and also let's update here firstly I will open my actions let's close this menu I will copy here actually it's too long let's copy from create update and delete subject just like that and I'm going to paste it here delete exam update exam and create Exam
we are going to update them later but for now let's say delete exam and let's use this form here if it's exam it's going to be exam form and right now we can update our form of course we are going to need our types first let's open up form validation again I'm going to copy here and paste you're going to have the ID here is going to be the exam title Let's by the way say exam schema and we are going to have a start time it's going to be a date if it doesn't exist
let's say start time is required and one more is going to be end time and one more and it's going to be our lesson ID it will be a number lesson is required okay let's use this in our form I can close here and others it's going to be exam schema and here then we create it's going to use create exam if it's update update exam exam has been created or updated create a new exam update exam and let's change our inputs we'll have the title And we will have the dates start date is going
to be start time field and the type will be I'm not going to say date because we should also get the hours and minutes so it's going to be date time and local here is going to be end time and finally you'll be able to choose lesson it's going to be a single select we are going to get the Lessons here is going to be lesson ID and I'm going to update them and we are going to be using lessons array and for each lesson we have the ID which is a number and the name
let's remove this and that's all right now we can update our actions here is going to be exam schema and here here can can stay as form Data we are going to delete the exam but we have to be sure that this exam belongs to us so again I'm going to get my user ID and roll and I will write here one more condition and I will say if the role equals teacher the lesson and its teacher ID will be our user ID if it's not it's going to be empty and we are sure that
it exists in This case we are not able to delete any other teachers exams this is how you can protect your request and again when we create a new exam firstly we are going to check if the lesson belongs to us or not if it doesn't we are going to return an error teacher lesson await Prisma do lesson I'll say find First where the teacher ID will be the user ID and also the ID will be data do lesson ID so right now we are sure that this lesson belong to us in this case we
can create a new exam but before let's write our condition if it doesn't exist we are going to return an error so I will say Prisma exam create the title will be data Title Here is going to be start time and time and lesson ID let's remove this and again when we update we will do exact the same thing of course we are going to do this if the RO equals teacher let's do the same thing here because if we are an admin we don't need that we are not going to run this block and
will say Update where the ID will be data. ID okay let's try I'm going to click here test as you can see we can choose any date and hour just like that but our lessons are not here because in our schema as you can see we don't have our user ID because I used my seat again and it removed my user id let's add quickly I'm going to change Here refresh my page by the way as you can see this is our existing exam let's say math test any a date here and and those are
our lessons let's choose this one and create and it's here and when I click here and delete it's gone this is how you can protect your requests using roles I just wanted to show you so you can do exactly the same thing for the Assignments and results and I'm not going to do the same thing again and again that's enough I think if you understood what we do here it will be easier to create the others it's going to be exactly the same instead of exam ID you are going to be using assignment ID and
for events and announcements we are just going to have title and class just fetch the class data and put it inside your form that's all and that's all I Think we finished our project so right now we can deploy our application to do that we need to make some changes in our application otherwise you are going to get an error when you built your application firstly I moved my roll and user ID to inside my component because when you define them outside the server component you are going to get this error let me build my
application mpm run build and as you can see all function Only supported in app rouer of course this file is inside the app rouer but you should Define them in the server component not the outside so I'm going to move this here and since we are using our R inside the column and row I move them inside the column component also just do the same thing for other list components uh for your form container again it should be inside your container and I realized I didn't add here the rou Dependency just add this and for
the other forms again I forgot to add this rouer and type just add them those are just minor mistakes nothing important and I realized that I didn't fatch the data in the parent page firstly we are going to get the parent ID and we are going to fetch all the students of that parent and using this list we are going to show different big calendar components for each child and remember it can be either A teacher ID or class ID since we are using using this for a student it's going to be a class ID
and we are going to pass here the student actually it should be student. class ID that's all let's build again and there is no problem anymore right now I can push my application to a GitHub repository but before I'm going to add here my Docker configuration because when we deploy our app we should also run our database server Remember we are running this postr server on the Local Host we are going to do the same thing on the virtual machine and also we are going to deploy our nextjs application as we did for this post
grass container to do that inside the root folder I'm going to create a file and it's going to be bucker file and I'm going to going to create one more and it's going to be Tucker Compos you can give here any version I'll say 3.8 and I'm going to write here my services in our application we are going to have two Services the first one will be our database and the second one will be our next JS application so I'm going to write po SC the image name pulse grass 15 as you can see we
are running post grass latest which is 15 and let's write The container name I'll will say post grass DB and we can write here our environment variables remember when we created our postr server we added our database name database username and and password I'm going to add them here also let me just copy and paste just like that of course you can change the names but it can stay like that and I'm going to give my port number remember it's running on those Numbers just like that if you want to you can add volumes I
will just copy and paste by the way you can find everything in the the GitHub repository you don't have to memorize anything I'm going to give here a space and after that I can create my second service this was postgress and this is going to be our next JS application let's say App I'm going to give the container name let's say nextjs app the port numbers remember it r on 3,000 I'm going to pass here the environment and let's pass our database URL it's going to be just like this string but it should be exactly
the same name here let's change them username password and the data base name you can write here whatever you want and also you can add your other Variables but it can stay like that and I will say depends on our post grass service because if we don't have the database we cannot run our application let's save here and inside the docker file we are going to write our steps let me actually copy and paste here and let me explain firstly when we run Docker it's going to use not JS 18 you can change the version
but it's the stable one and we are seeing here our application works on the App directory uses package Json and using this package Json is going to install our dependencies it's just like running your application on the local server remember we are using mpm install and after mpm on dev but this time we are going to build our application because we are deploying but before that we are going to run MPX Prisma generate so it's going to deploy our Prisma schema and our application is going to run on This Server this is how we are
Going to run our Ducker container so let's add it to our GitHub repository I'll say get in it I'm going to add everything but make sure that your EMV file is inside the G ignore file as you can see I'm going to add our think let's commit it's going to be on the main branch I'm going to add my GitHub repository Here git remote at origin and your repository and I'm going to push everything inside this reper get push origin main oops push okay right now we can connect to our VPS and clone our project
to do that I'm going to open up the hostinger panel if you remember we set up our hosting and right now we are going to reach it using this IP address but before we should add Here our SSH key so I will come here add SSH I'll say lad Dev and here we should generate our SSH key I'm going to run this command it's going to create my SSH key and using this command and we are going to copy that key and I will pass it here just like that as you can see it's here
I'm going to add it's going to take a while and after that we'll be able to connect to our server let's clear here and it's Ready as you can see we are going to connect to our VPI server using this command just like that I'll say yes and as you can see we are connected I will clear let's see what we have and right now I'm going to create my folder let's say app let's open and inside I'm going to clone my project git clone the GitHub repository and I will say dot as you can
see everything is here and also I'm going to add my EMV variables So I'll say Nano do em let's come here copy everything and paste and it's ready and right now we can run our containers I'll say tucker compost up and built it's going to take a while and it's ready and I'm going to copy our address and remember our application is running on this port number and as you can see our Application is here let's log in and our homepage is here we are an admin but we don't have any data let's try to
add I'm going to add a new subject I'll say test and as you can see it's here let's try to update perfect and delete okay it works so you can add your Items or if you want to you can use the seed file and let's also add a teacher Jane do any password Here name surname we can add an address blood type let's give a date and as you can see our subject is here I can select and let's create it's here okay it works and that's all I hope you liked it If you learned
something new today please like the video don't forget to follow ladv social media accounts I hope I'll see you in the next tutorial goodbye