Faceless videos are making people thousands of dollars per month, all without ever showing their face. And if you're not starting with YouTube automation in 2025, you're missing out on one of the biggest online opportunities right now. YouTube automation is one of the craziest, if not the best business models out there.
That's because in the last few months, AI has exploded and content creation has become easier than ever. And what makes this even better is that it takes little to no money to launch a successful channel. and you can literally start one right after watching this video.
I will literally explain everything from creating a channel, choosing a viral niche, creating the perfect video, doing proper SEO optimization, and I promise you what I just mentioned is only a small tease of the insane knowledge that you're about to learn. But before we get into all of that, let's start with the most important part, which is choosing the right niche. Now, you might be confused and don't know which niche to pick, but trust me, you're really lucky because I got the perfect niche for you, and it's one of the fastest growing niches on YouTube.
So, let me explain. If we take a look at this channel, we can see that there is a video with over 2 million views. Then the next one got 1.
4 million. Then another one got 1. 2 million.
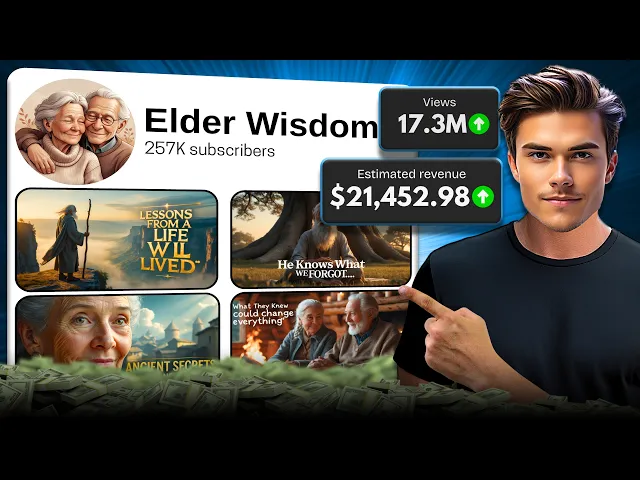
And basically, all of the videos this channel is posting have completely blown up. Also, this channel has gained over 200,000 subscribers and more than 16 million views in just 1 month, which is absolutely insane. But here's something even crazier.
In only one month of posting videos, this channel made around $20,000. Yes, you heard that right, $20,000 in the first month. But it doesn't stop here.
Another creator posted a video in the same niche just 2 weeks ago, and it already has nearly 600,000 views. Then another creator got over 400,000 views in just 3 weeks. And yet another one hit 700,000 views on a video posted only one month ago, which is completely mind-blowing.
Now listen, after studying these channels for countless hours, I was able to literally crack their secret that made their videos go viral. And that's why in this video, I will break down everything from start to finish, so that by the end of this video, you'll be able to start your own faceless channel in the same niche and make it blow up. All right, the first thing you need to do is create a perfectly branded channel.
And to start off, go ahead and open chat GPT. Since the first thing you need is a name for your channel. Go to the prompt box and ask it to create 10 unique channel name ideas based on the Elderly Wisdom channel.
Once you do that, just click generate. And just like that, you'll have 10 perfect channel names ready to use. All right, once that's done, now you need to create a description.
To do that, ask ChatGpt to create a humane channel description. Then pick the name that you chose and copy it. After that, just paste it in the prompt and you're all set.
Now, just click generate and in just a few seconds, it will give you the perfectly optimized description for your channel. Also, you can find all of the prompts and tools that I'll be using in this video in my Telegram channel linked below. Okay, now that you have the channel name and description ready, let me show you how to create a channel logo that will blow your mind.
To do that, first we need to create a logo prompt. So, in the same chat and chat GPT, ask it to create an image prompt of an elderly couple, but make sure to include that the prompt needs to be logo friendly. Once that's done, click generate.
And just like that, your logo prompt will be ready to use. Now, just copy the entire prompt that you've created. And once that's done, go ahead and open Leonardo AI.
Once you're in, open the image tool that you can find on the left side here. The first thing you need to do is set the preset as Leonardo Phoenix for the best results. Next, an important thing is that you need to set the image dimensions as 1 by one since that's the logo format.
Once that's done, simply paste the image prompt into the prompt box and then click generate. This will take around 10 seconds. And once it's done, as you can see, we've just generated the perfect logo samples that match our channel and it was totally free since Leonardo gives out 150 free daily credits.
Now, just choose the logo you want. Then download it and with that, you're ready to create your channel. I guess that all of you already know how to create a channel.
So, just open YouTube and create a channel using everything you've made so far. And it will look similar to what I have done right here. Now, watch closely.
Once your channel is created, open the settings. Then, go to the channel menu. Here, you'll find the channel keyword section, which is crucial for the channel's visibility.
So, let me show you how to create the perfect keywords. To do that, open a tool called Vid IQ, which you can use for free. On the left side, there is an AI coach menu.
So, go ahead and open it here. In the prompt box, ask the coach to create a list of perfectly optimized channel tags based on the channel name that you chose. And for the best results, just copy the prompt that I'm using.
Now, click generate. And just like that, the coach will generate a list of tags that are perfectly optimized for your channel. Once you have the tags, copy them.
Then, head back into the YouTube studio and paste the tags into the tag section. Once you've done that, simply save everything. And just like that, your channel is fully optimized and perfectly branded.
Now, let's start with the next step, which is creating a video script. The script is literally the most important part of the video. If you don't create a good script, no matter how good your video is, it will probably get little to no views.
But don't worry, because now I'm going to show you how you can create a banger script using only AI. First, open a channel in the same niche that has already gone viral. Then open the most popular videos on that channel and open a video with a good amount of views.
Once that's done, click on the share button below the video. And here, simply copy the video link. Now that you have the link, head over to a tool called Tactic, which you can use for free.
Once you are in, paste the link that you copied into the link box and then click on the button right next to it. And just like that, we've transcribed the entire video in just a few seconds. Once that's done, simply copy the entire script from here.
And with that, you're ready to create your own original script. And to create the script, we will use chat gpt. So go ahead and open it.
Once you are in, go ahead and paste the script that you have copied. Now delete the unwanted text above. Then scroll down and make sure to delete the second half of the script since chat GPT has character limitations.
Once that's done, ask it to remove the timestamps from the script. Then click generate. And just like that, it will give you a clean script that you will use as a template for your own one.
Now that you have a clean template ready, ask chat GPT to create a new completely original version of the one that you have included above while keeping the same exact structure. Down in the prompt, make sure to include the length of the script that you want, which I will set as 5 minutes. Once that's done, simply click generate and the generation process will start.
This will take around 20 seconds. And once it's done, just like that, you have created your own original script that is perfect. But if you want, you can just ask chat GPT to generate a new script for you.
And like that, you can generate as many scripts as you want for your next videos in the future. All right. Now that you have the script ready, let's head over to the next step, which is creating a voice over.
And to do that, we'll use a tool called Dubdub. So go ahead and open it. Once you are in, you'll find the AI voiceover tool, which you need to open.
Now, let's start with the voice itself. On the right side, there is a voice section. If you open it, you'll see a handful of voices.
You can search by voice style on the left. And if you want, you can also use the filters above which let you filter out everything. Then all of the voices will be displayed and there are a lot of good ones.
But I like this one the most since it matches our video style. So let's see how it sounds. Once upon a time in a small village, there lived a young girl.
She was known for her kindness. As you can see, this voice sounds mature and stable, which matches our channel branding. So feel free to use the same one.
After you pick a voice, just click select. And just like that, you are ready for the next step. Now you need to enter the script that you have created.
So head back into chat GPT and copy the entire script. Then open Dubdub and paste the script into the script section. Once that's done, you need to delete all of the unwanted parts of the script.
Basically, all of the paragraph name sections. After that, remove the blank spaces between each section so that you will have a clean script. Once that's done, just click on the generate button above and let's see how our voice over sounds like.
Welcome to our councy corner of the internet where today we're diving into the delightful world of napping. Yes, you heard that right. Napping isn't just for toddlers and cats.
The voice over sounds great and basically we are all set. So to download it, just click on the export button here. You will need to select to export it as an MP3 file, but you will have alternative options also.
Once that's done, just click export. And just like that, the voice over will be exported. But before we move on to the next step, let me show you some great voices that you can use in this niche.
The second voice that fits this niche is called Dne. And let's see how it sounds like. Welcome to our councy corner of the internet, where today we're diving into the delightful world of napping.
Another great voice that you can use is the Samuel voice. And let's see how it sounds like. Yes, you heard that right.
Napping isn't just for toddlers and cats. It's a secret weapon for adults, too. Research shows that a Now, you just need to pick the voice that you want, create the voice over, and you will be ready for the next step.
In this step, you need to prepare the visuals for your video. But don't worry because these videos require basic visuals. And I got the perfect way for you that will allow you to gather unlimited highquality visuals.
To do that, we will use a website called Vectzy. So, go ahead and open it. Once you are in, first on the left side, you will need to set the filter as video.
Then below that in the license section, set it as free license. And after that, down in the resolution section, set the resolution as 4K for the best quality. Once that's done, in the search bar above, type nature and then click search.
And as easy as that, all of the free videos that are in 4K will be shown for you. Now, for example, I like how this video looks like. So to download it, you just need to open it and then on the right side, just click on the download button.
And that's pretty much it. Now, just so we don't waste any time, go ahead and download around 20 videos so that you'll have enough to loop throughout the whole video. And this is pretty easy, so it'll only take a few minutes.
Once you download the stock videos, you're finally ready to move on to the next step, which is video editing. And to do that, we'll use a free editing software called Cap Cut. So, go ahead and open it.
Once you're in, the first thing you need to do is import everything you've created so far. the voice over, the stock videos, and anything else you'll need for the final video. Once everything is imported, start by selecting the voice over, then drag it down into the editing bar.
Now, as you can see, the voice over has these small gaps between the sections. And if you want a more fast-paced video, you can simply cut out those silent parts. Or if you prefer a more relaxed pace, feel free to leave them in.
But just to save time and make things flow better, I've already done that for the entire voice over. All right. Now, once that's done, go ahead and select all of the stock videos you imported.
Then, drag them down into the editing bar and watch closely. As you can see, the length of each video is different. Some are short, some are way too long.
So, here's what you need to do. You'll want to trim each video down to about 5 to 10 seconds. This way, your video stays engaging with smooth and frequent transitions that keep viewers hooked.
And it's super easy. Just drag the edges of each video to trim it. And repeat the same for all of the videos.
Now, let's make the flow of the video even smoother. To do that, go ahead and open the transition section above. And here you will need to find the mix transition.
Once you find it, select the transition and drag it down between the first two videos. Now, here's the cool part. To save time, just click on the add to all button on the right side.
And boom, the same transition will be added between all of your videos automatically. And now the video will look more cleaner. Now, let's enhance the video to make it look even better.
To do that, open the adjustment menu above. Then, just select the adjustment layer and drag it down above your videos and make sure to extend it all the way to the end of the video clips so it covers everything. Now, on the right side in the adjustment settings, find the contrast slider and set it to around plus 15.
After that, scroll down and look for vignette and set that to about + 5. And just like that, your video will instantly look cleaner and more cinematic. Now watch closely.
Make sure to select all the videos, including the adjustment layer on top. Then rightclick on any of them and click on create compound clip. Once that's done, simply copy the compound clip and paste it repeatedly until it matches the full length of your voice over.
If the last clip goes over the voice over, just cut the extra part so everything lines up perfectly. Now, to make the loop even smoother, go back to the transitions menu and once again drag the mix transition between each of the compound clips you just created. And just like that, your visuals will flow seamlessly through the entire video, and you're now ready for the next step.
Now, you need to add the captions to the video. To do that, go ahead and open the text menu at the top. Then, click on auto captions.
Once you're there, just hit the generate button. This process might take a minute or two. And once it's done, your entire video will now have captions from start to finish.
But we're not done yet. So now, let's make them look better. First, go ahead and open the animation menu on the right side.
Then open the caption animations section. Here you'll find multiple great options to choose from, but I personally like how this one looks, so I'll be using it. Feel free to use the same style if you like it, too.
Next, open the text menu. And here's where you can really make your captions stand out. First, choose a font that fits your video.
You can pick any font you like, but I'll go with this one since it looks the best for our style. After that, make sure to click on the bold option, and this will make the text easier to read and more noticeable. Then, scroll down and scale the text size to around 200% so that it's easier for viewers to read.
After that, scroll down a bit further and enable the stroke effect. To make everything look clean and professional, set the stroke strength to around 20%. And just like that, your captions are now looking absolutely perfect.
Now, let's add the final touches to your video. First, go ahead and import any no copyright background music that fits the vibe of your video. Once that's done, simply select the track and drag it below the voice over on the editing timeline.
Now, look over to the right side in the basic settings section and adjust the volume of the background music to around minus 10 so it blends nicely without overpowering the voice over. Next, copy the background music you just added and paste it right next to the original track to extend the length. If the copied track goes beyond the voice over, just cut it to make sure it matches the exact length of your voice over.
Now, select the first music track and use the fade slider on the right to add a 1 second fade in. Then, select the second track and add a 1 second fade out at the end. Once that's done, go ahead and select all of the compound clips, including the captions.
Then simply rightclick and click create compound clip just like you did before. This will combine everything into one clean timeline. Next, open the animation section.
First, add a fade in animation at the beginning to give your video a smooth start. Then, open the out animations tab and add a fade out to the end of the clip. And just like that, your entire video is finally ready.
To export it, click on the export button at the top. In the export settings, make sure the quality is set to 4K and the frame rate is set to 60fps for smooth and high quality motion. Once that's done, hit export.
And just like that, your video will be exported. So, let's see how it came out. Welcome to our county corner of the internet, where today we're diving into the delightful world of napping.
Yes, you heard that right. Napping isn't just for toddlers and cats. It's a secret weapon for adults, too.
Research shows that a quick snowance can boost your mood, sharpen your memory, and even lower your risk of heart disease. Who knew that catching some Z's could be so beneficial? Think of napping as a mini vacation for your brain, giving you the energy to tackle the rest of your day.
Plus, let's be honest, who doesn't love the idea of a guilt-free siesta? This is just a small preview of the full video, just so we don't waste any time. But as you can see for yourself, it looks even better than the original one.
But we're not done yet. Now, I'm going to show you how to perfectly optimize the video before uploading it. And trust me, this will blow your mind.
To start off, first upload the video into YouTube. And while it's processing, let's set everything up. So, go ahead and open Chat GPT.
In the same chat where you created the script, ask ChatGpt to create a clickbaity title based on the script above. Feel free to copy the prompt I'm using for the best results. And just like that, you have created the perfect title for your video.
Once that's done, ask chat GPT to create an SEO optimized description based on the name and script you created above. Then just click generate. And as you can see, it will give you the perfect description for your video, fully optimized and including relevant tags, which is very important.
Once that's done, go ahead and copy the title that you have just made. Then head back into YouTube Studio and here, paste the title into the title box. Next, head back into ChatGpt and copy the video description.
Once you have it, just head over into YouTube Studio and paste it into the description box. Now that everything is set, let me show you how to create the perfect thumbnail. To do that, first head back into Chat GPT and ask it to create a detailed image prompt that will give you a thumbnail based on all of the details above.
Once that's done, just click generate. And as easy as that, your thumbnail image prompt will be ready. Next, just copy the thumbnail image prompt that you have created and you are all set.
Now to create the thumbnail, go ahead and open Leonardo AI. Once you are in, open the text to image tool on the left side and watch closely. First, you need to set the preset as Leonardo Phoenix for the best results.
After that, make sure to set the image dimensions as 16 by9 since that's the thumbnail format. Once you've done that, go ahead and paste the prompt into the prompt box and click generate. You can even generate multiple batches so that you will have more options to choose from.
Once that's done, as you can see, we have just created perfect thumbnail examples for our video. And the quality is insane. Now you just need to choose the thumbnail that you like and then download it.
Now that you have the thumbnail, head back into the YouTube studio and upload the thumbnail into the thumbnail section. And just like that, you are ready for the next step. Next, scroll down and select that the video is not made for kids.
Then scroll down even further and in the altered content section, set the answer as no. After that, scroll down even further to find the video tag section, which is very important. So now I will show you how to create the perfectly optimized tags.
To do that, open a tool called Vid IQ, which you can use for free. Once you're in, open the AI Coach menu on the left side here. Ask the coach to generate a list of SEO optimized video tags based on your video title, which you will need to include in the prompt.
Once again, just copy the exact prompt that I'm using. And just like that, you will create the perfectly optimized video tags for your video. Once you have the tags ready, simply copy all of the tags from here.
Then head back into the YouTube studio and paste them into the video tag section. And just like that, you're all set. But first, if we head over to the video check section, as you can see, the video doesn't have any copyright material and is fully monetized.
Now, the last step you need to do is to set the video as public and then click publish. And congrats, you have just uploaded your first video that has the potential to blow up. Now, you have everything you need to start your own faceless channel.
But remember, in order for this to actually work, the real key here is consistency. Because what happens is some of you will post your very first video and it will flop. And when that happens, almost 90% of you will give up and think you're not meant for this.
But trust me, if you keep showing up, keep posting daily, and try to get a little bit better with every single upload, your lucky moment will come. And when it does, you will blow up. So don't stop.
Keep posting, and I'll see you in the next one.

![🎯 90-Day YouTube Automation Challenge: From 0 to Monetized [Let’s Do This Together]](https://img.youtube.com/vi/W0AGWRYGflk/maxresdefault.jpg)