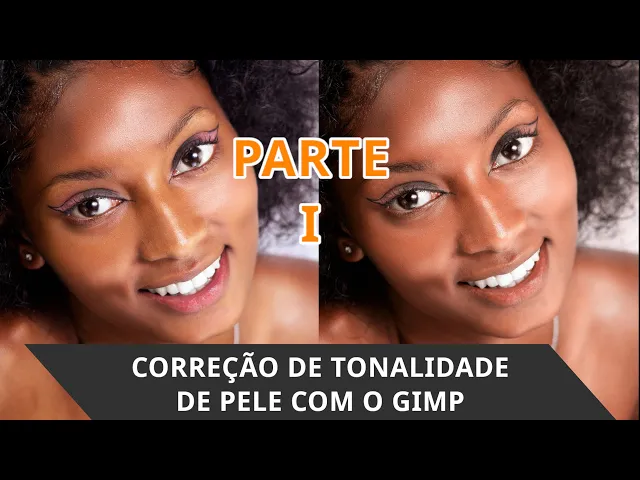
gimper Brasil channel back with another tutorial and in this tutorial we will learn how to correct skin tone if we look here at our model's skin we will notice that the color is not uniform we will notice here that there are several colors here although of close tones but it's not completely uniform so our job here is to balance our model's skin tone so I'm going to add a new layer here that will be transparent and now I'm going to use our eyedropper here I'm going to capture a skin color here I want it to
be uniform on our model's skin so I'm going to click here in this region I'm going to choose this region here and now I'm going to drag this color to the transparent layer that we just created the next step now it's simple I'm going to come here to layer blending mode and I'm going to use the Hue option here and now that we have a more uniform color for our model's skin, if you think it's too strong, you can work on the opacity here by decreasing the opacity a little, here we have a more natural
and now if I turn off this layer here we can see the before and after so this here is the before and now the after so we can see that our model's skin is more uniform in terms of tone color The only difference now what's left here are the sparkles on our model's skin but the color we can see is a uniform color So here we have the before I saw that now the skin was a more yellowish skin, right and after here the skin was much more uniform I I want you to leave it
in the comments if you already knew this technique, right? If you already know this technique, leave it in the comments, I already knew it or if you didn't know it, you can leave it there, I didn't know this technique, okay, let's help our channel grow We have other tutorials already planned to bring you here, I hope you liked it, it was a very quick and very efficient tutorial and until our next tutorial