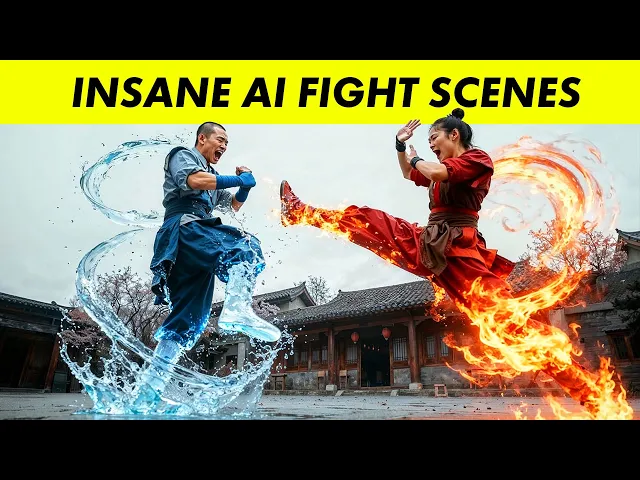
Here's how to create an epic fight scene completely using AI. Fight scenes are super hard to make because there's so much action. Even the best AI models have a hard time keeping up.
But recently, there's been some huge updates in the AI world, like the nano banana model, opening up a whole new world of possibilities for AI animation. And in this tutorial, we'll see how far we can push the boundaries by creating a fight scene with same visual effects, characters, and sound effects. So, I was scrolling on X and I came across this post that showed a AI animated fight scene and and I was blown away by the way it looked.
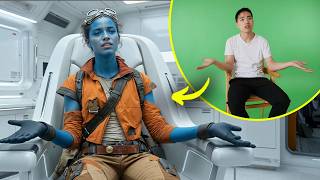
The fact that it's one seamless animation with a single shot really got me thinking what types of fight scenes can we make using AI. And so, I wanted to try it out for myself. For my fight scene, I'm going to go with some different looking characters.
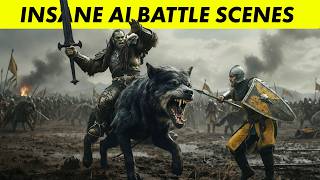
And I wanted to make more of a Mortal K combat kind of scene where it's a bit more dark and gritty, but with plenty of special effects and powerups, and also a lot of action. I knew the biggest challenge was going to be keeping the characters in the scene consistent while at the same time adding so many different motion effects, explosives, and powers to the characters, and it was going to take some work. But with some of the newest updates in AI, including the nano banana image generator, I figured that it'd be possible to create something pretty cool.
So, here's a storyboard I created for my fight scene, and we'll go through and break down everything step by step, but this is how I put down the ideas for how I wanted the final animation to turn out. I actually made some of the fighting poses using cartoon characters cuz it was a little easier to visualize. But the main idea is they get into a crazy confrontation.
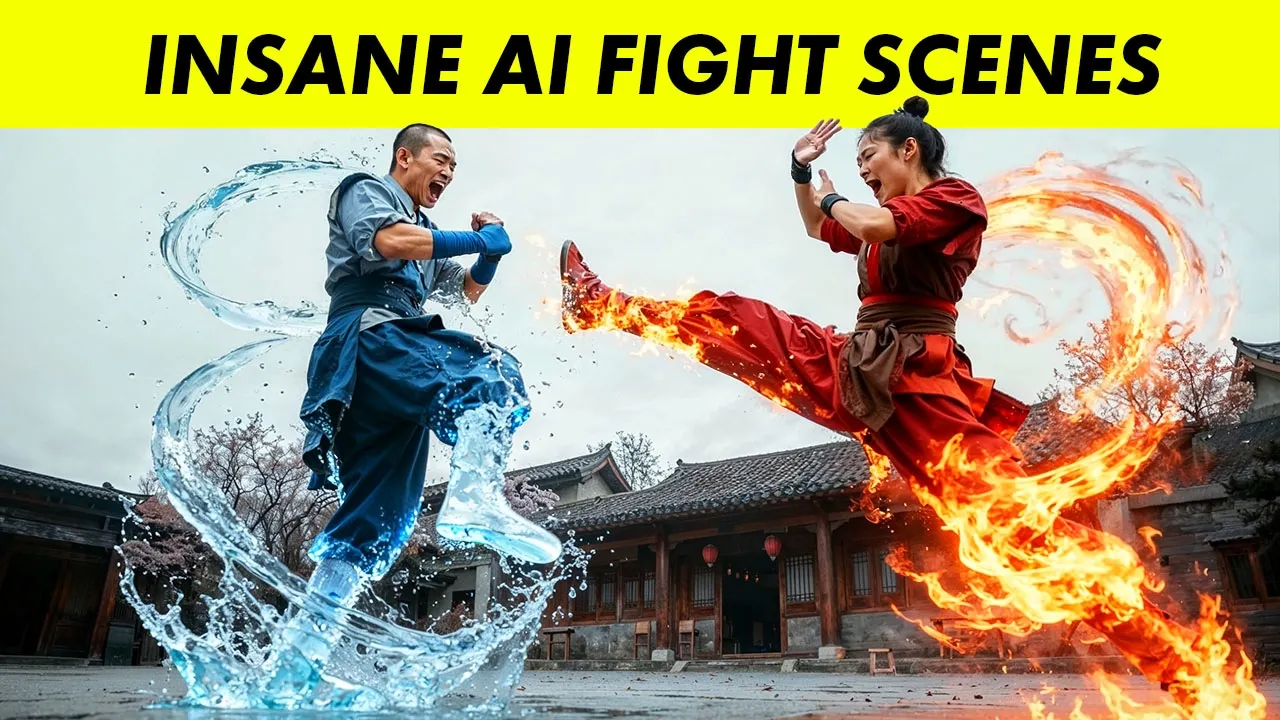
And I also wanted to use AI to create some really cool looking special effects like the woman with the fireballs and then this guy who has uh the ability to control water and ice. So all I've got is these two reference images of my characters which I created in Midjourney and I'll be generating all the different visuals for this scene using with just these two character references. So the first thing is just going to be a face off scene between these two characters.
So I actually need to make some close-up shots of both the man and the woman where we just see their face and their upper body. To create these, I am actually going to use a new nano banana image model. And I use this platform called Higfield AI, which uh has a bunch of different image models you can explore.
So if you look under the image tab, you have a lot of different options like they have their own Higsfield image model, but there's a one 2. 2 Cream and also the nano banana image model, which I'm going to start off with. So if we select this, you'll see that I have quite a history of images I've already generated.
But the way that Nano Banana works is that we can upload a reference image. For example, my full body character and tell the AI to generate a image of him in a different environment and scene. So, we can go and upload an image using this plus button.
And I've uploaded this full body shot of my character. For the image references, you will need to make sure that they're also widescreen image references if you want the images that Nano Banana generates for you to be widescreen. So, I actually took the vertical photo of my character and added a widescreen blank canvas behind him.
So, now I've got my character in there, and then I can add a prompt for the new image I want to create. So, I'll say, "Create a scene from a cinematic film of a close-up shot on the face of this character, an Asian temple in the background, muted colors. " It's very important that we actually tell it the intention behind the new image we want to create.
And so I'm specifically telling it that it should be a scene from a cinematic film. And if we run this prompt, we'll end up with a nice picture of our character. This is going to work perfectly for the visual style I'm going for.
Now, I need to make sure the visual style in all the photos I'm generating stay the same throughout. So, for the female character, I'm going to use a reference image of her full body, but also reference image of the male character we just generated. That way, it'll generate a photo of the female character in the same exact style as a male character.
So, these are my image references I attached. And uh here's the prompt. I won't read through the entire prompt.
So, the close-up shot of her looks pretty good after we created it. The issue though is that if you look at the temple behind her, it's the same tempo as the male character. And if they're going to be facing off and standing across from each other, it would actually make sense if their backgrounds were different.
So, a great thing Nana Banana can do is actually edit the images themselves. I told her it to change the shape of the Asian temple behind her to living quarters, adding a few trees in the background while keeping everything else exactly the same. So, now if we take a look at these two images of them facing off, it looks like it's going to be in the same exact environment.
However, the backgrounds will be different. And using these basic images, we can create all sorts of different action poses. So, if I take a reference photo of the woman's full body, and I combine that with a reference of just her head, we can tell it to make an image of her floating in the air, for example.
So, just to make it super clear, all I did is I went into Higsfield um with a nano banana image model. I cast a reference photo of her full body. I attached the photo of my character's face and I told her it to create a scene from a cinematic film of the female character floating in the air above the tempo in the background.
She has a kung fu pose muted colors full screen. And this will create that photo of my character levitating in the air. So, we've got the basics of the characters down.
We have a visual style for what they want to look like. Now, it's time to actually create the full-on fight scene. So, if we take a look at my storyboard, I actually have the poses rendered for what I want the action scene to look like.
So, I want them to run towards each other and then the guy should kick her in the head and they fight some more and eventually back away from each other. So, I actually created this stick figure image of them running towards each other inside of Mid Journey. And once I've got this stick figure image down, I can go back into Inana Banana and tell it how to change the poses.
So, for example, I can tell them to make the blue character kick the red character in the head. And you can keep iterating on this and create all sorts of different action poses between the two different characters. Once I created the pose images, we actually want to map our characters onto here.
So, we need to use a couple of different reference images to make this happen. First up is going to be the pose image. So, the two stick figures running towards each other.
Then, I need a character sheet with both of my characters on them. And also the photo of the female character floating in the air, which is going to be the visual style and the type of background I want the scene to be generated in. And then the prompt, I'll just describe the pose where I want the male character and the female character to be running towards each other.
While using the poses shown in the pose diagram. Now, when it comes to these poses, it might take a few tries to get it right. Sometimes it showed them just running alongside each other instead of running towards each other.
But eventually, I got a pretty good shot of them sprinting towards each other. And also, you can always go back and edit out the backgrounds if you want. So, if I don't like the way the tempo looks like in the background, I can simply tell a Nano Banana to edit the background.
And once I have this photo of the two characters running towards each other, I can take that photo and a new pose image of the blue figure kicking the red figure in the head and tell Nano Banana to edit the pose of the characters in the running image to match the poses in the stick figure illustration. And I found this to be a pretty cool way to create different action shots for my fight scene. One thing I actually want to do is adding some different camera angles into my fight scene.
What I'll show you how to do later in this tutorial is actually chain together the different images you created into a full AI video. And if we have different camera angles, for example, one pointing from above and one showing the fight scene from below, we can create some really, really cool camera effects where the camera is moving up and down while the characters engage in battle. Now, I found that Nano Banana wasn't always the best at this.
So, in this fighting shot, I actually told Nano Banana to create a low angle shot from below. So, it should actually lower the camera and point upwards. But, if we look at the result Nano Banana gives us, the two images kind of look the same.
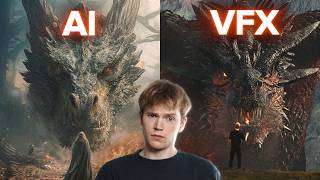
Instead, what I did is actually used a different image model. So, I swapped out another banana for the new Sedream 4. 0, all which also just released super recently and it's also a really powerful AI image editor.
And if we use Cadream and then generate the image, you'll see that it did a way better job of actually changing the camera angle, act moving the camera below and then pointing it upwards. So using this, I created all sorts of different camera angles for my fight scene. And this is going to come in really, really handy when we chain together all these images into a dynamic AI animation.
I found that what actually worked best for me was swapping between the Nana Banana and the Seream models and trying them out in different use cases. Here are some images where I wanted to show the characters powering up. And I'd say I like the Seamream photos a bit more.
Nano Banana's version of the fireballs just looks a little bit boring to me. Same thing with the male character. He's a water and ice user.
And for me personally, I just like the way the Cream model looked a lot more. Now, remember that for an animation, we actually want to tell a story instead of just have disjointed shots. So, I thought it'd be cool if I eventually showed this female character throwing the fireballs at the guy.
And what I wanted to do is actually have the male character turn his water orbs into a water shield and block the fireballs flying at him. I also created a shot of him with an ice dragon behind him. I guess this can be his finishing move, so to speak.
Now, I wanted to create an epic final confrontation scene where they're using their ultimate abilities against each other. So what I did was I actually took the shot of the male character with the ice dragon behind him and the female character with the fiery orbs and asked Seamream to create a wide angle shot from a cinematic film of the male character and the female character floating in the air far across each other. There's a giant ass dragon behind the male character and the female character has flames swirling around her.
And here is a shot for the final battle scene that the AI created. So, I finished generating all the images I need for my animation. I also went in and uh wrote down some notes on what I actually wanted to happen inside the different shots.
And so, now it's time to turn these images that we created into an actual AI video. So, this is the exciting part. For the actual AI animation, I wanted to create as much of a continuous shot as possible instead of a bunch of disjointed clips.
It would be way cooler if we can actually create seamless transitions between all the different powerups, the different fighting situations that the characters are in. And to do this, we can actually use Cling AI's start and end frame feature. So Cling's one of the better AI video generators.
And they have this feature where you can use two different images, one as a first frame and one as a last frame of a video. I can use these two image frames as a start and end frame and actually animate that full transformation. This is a super super powerful feature and makes for some really cool continuous shots.
So, let's see how to do this. I've logged into the queen. Let's go to the video generator and what I'll do is actually drop in the two frames for the male characters.
So, first uh with this male character and the water orbs, we'll upload that and below you can see the start and also an option to add an end frame. So, we can go to the end frame and I'll upload this picture of him uh floating with a water shield. So, we're going to start with a swirling water and ice around him and we're going to end up with him transforming that into a shield.
Then, in the prompt, we need to describe what should happen. So, I'll say the man condenses the water orbs into a water shield. Kung fu move.
So, you can also choose between a 10-second or 5-second clip. All the motion should be pretty fast in the fight scene. So, let's do a 5second video.
Uh, I actually tried this twice. Here's the first. I mean, that looks absolutely amazing to me.
Here's another version I generated. So, they look kind of similar to each other, but uh I think I actually like the first version a bit more. Now, you'll notice that cleaning AI automatically generates sound effects.
So, the sound of the water swirling around and transforming, I didn't add that in. That's just created by the AI video. This is kind of hit or miss, though.
Sometimes the sound effects sound amazing. Other times, it sound a little weird. One thing that I was really excited to try was the actual fighting motions.
So, remember how we created these different frames of the characters fighting each other, specifically from different camera angles? And if we use a start and end frames to chain them together, we get a really, really nice dynamic motion of the camera flying around the scene while they engage in a fight. And another bonus is that we do get some sound effects added on for us.
Some of the movements are a little bit blurry in this scene when they're throwing hands. The AI does look like it gets a general idea, but it's hard to preserve the consistency of their body structures, and there's a little bit of flickering where their bodies are warping and distorting a little bit as they're fighting. This is a trade-off in AI video and AI animation in general.
The more motions you add in and the faster that you add them in, the more likely it's going to warp and distort. So, we can do a quick comparison. Uh, here's one I generated in Google Veil 3.
We shall see about that. >> You will not. >> So, not the most exciting scene, but because there's less motion and the animations are a bit slower, it does appear way more consistent, the bodies don't deform as much.
However, if we take a comparison of what it looks like if we generated that same video inside cleaning, it's a way more dynamic action-packed scene. The camera flies around all over the place. However, because of how fast and quick the motion is, the bodies start tangling, uh, morphing a little bit, and it just doesn't have that consistency anymore.
So, I still ended up going with the videos created from cleaning because I really wanted to push the limits of what AI could do, especially with the fast-paced movements and make it actually look like a fight scene. But one of the issues is that there's a little bit of inconsistency in the videos. However, for a lot of these, I was super super impressed by the quality of the animations I was able to create.
Remember, all this technology is still super super new. It hasn't been around for a while at all. And and even though there's some imperfections, being able to create a scene like this completely from AI to me is amazing.
So now let's take a look at what the final fight scene looks like. I was pretty hyped about the way it turned out. [Music] Finished.
Finished. [Music] Heat. Heat.
Only the foolish challenge the temple. >> What's really impressive is that you can actually add stories into the AI animations. Now, it's not just a random series of really cool looking shots stay put together.
There actually is a continuous sequence between the characterser's motions and actions. Now, there are some imperfections. Again, that's really because I tried to push the boundaries and animate a ton of different motions and special effects.
If you wanted something that was more consistent, you'd have to settle for much less movement and motion. One issue you should know about is that it is hard to keep the resolution high and the detail sharp in the images. The more that you edit the photos in the AI video generators, the more it'll start blurring the characters faces and their specific details.
Seance is supposed to be generating these images at 2K or 4K resolution, but uh at least in my experience, that doesn't always actually work. You will lose some details in the faces of the characters. I made a complete guide on how to combine the latest features from AI image generators like Nano Banana with AI video models to create these incredible seamless motions.
If you want to learn how to combine the latest AI image models with the best AI video, go take a look at this guide right here.