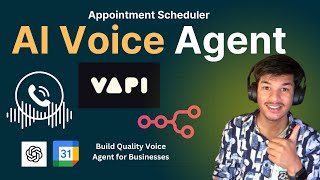
in this video I will guide you through the process of building an outbound AI phone code agent from scratch with no code tools you will follow along with me step by step and end up with a fully functional font cion I will be using vapi and make and I will also show you how to integrate it with go high level as many of you requested so if you want to start using or selling AI phone agents this video is for you this AI voice agent will be for an investment firm that I called wealthwise and
will do the following some someone completes a form on the website and 5 minutes later they will receive a phone call by the AI voice agent asking them more details such as the amount they want to invest or their investment strategy so I click on confirm and my phone is going to ring soon hi there this is Alex from wealthwise I'm reaching out today to get a better understanding of your investment goals and preferences is now a good time for us to chat about this yeah it's a good time right now I mean I'm recording
a video but yeah it's a good time great I appreciate you taking the time to speak with me while you're recording I'll try to keep our conversation concise and focused to get started can you tell me how much you're looking to invest um yes so I would like to invest $1 million all this information will then be gathered by the AI and updated inside gohigh level at the end of the call this allows you to do further optimization and automations like lead classification with further automation you will be able to move the lead to different
categories based on the response they provided to trigger even more actions and automations calls can also be triggered manually on go high level for existing contact by moving the leads to the two call category or adding a tag to the contact before jumping into the full walk through if you're new here my name is dona and I specialize in helping businesses streamline their processes with stay AI Solutions while I'm currently focusing on AI voice agents I can also build a range of automations Ros through make or more complex multi-agent Solutions if you're interested you can
book a free Discovery call just click the link in the description now let's get started and let's take a look at the architecture with a simple flowchart so the first thing is that we will have a form with the following information first name last name phone email and optin the optin allows the company to call the person for legal reasons once the form is submitted we will create a lead in the two call column on go high level and that will automatically trigger the make web hook that will then create the assistant and call the
user so it will automatically trigger the code right here once this happen then the AI assistant will ask for the information to the user so it will ask for information such as the investment amount the investment strategy investment risk tolerance and investment type once it gathered all of the information the AI agent will automatically end the call and you will have an end of Call make web hook that will be called this will automatically contain all of this information discussed during the core and will allow us to save this information on go high level and
then we will also set a tag to VAPI call ended to know that the call has been ended and that happened and also we will classify the lead depending on the answers in this case we will go with something easy where we will simply add the lead in two different opportunities or columns and that will depend only on his investment amount so in this case if the investment amount is less than 1 million it will move the lead to the medium ticket leads and if the investment is more than 1 million we will move the
lead into the high tickets lead just a new note after editing is that there is two other ways that we can also trigger a call from what I've created is that the first one is to add the VAPI call tag and the second one is to move a lead from any column to the two call column these two different action will automatically call the web hook and Trigger the call as well now that we know exactly what to build let's go inside go high level and add everything that we need so the first thing that
we need is to create that form in order to do that we need to go directly to sites right here and then click on the form right up there and now we can add a new form so here we'll just click on ADD form and click on start from scratch and and it will automatically create a basic form with the different information that you need so in this case we have the first name last name phone and emails we basically have everything that we need and we can simply maybe click on the button here changing
into confirm or something like that and we can directly click on Save at the top right and this will just create our form now that my form is created I will go and create the pipeline with the four different columns that I described before in order to do that I can simply go here on the left and click on opportunities once this is done I will click here on pipelines on create pipeline this will allow you to create a pipeline name at the different stages right here and then click on Save I've already done that
and this is my pipeline right here as you can see so I have new leads to call low ticket leads and high ticket leads and what I can do is I can create an automation to do that we have to click here on automation on the left and then here I will click on create workflow and starts from scratch so what we're going to do now for our first automation is that every time someone submits the form we will create an opportunity to add to our column to call and for that we have to think
about what is the trigger so the trigger is like what is the action that is going to start this whole Automation and that action is submitting the form so here I will type form submitted and I can directly click here on ADD filter and what I will select is that that my form has to be the form three so now I can click on Save trigger and it automatically creates here and then I can add something that will happen once that trigger is uh triggered so in this case I will click here and I will
say that I want to create or update an opportunity and what will happen is that I have to select uh the pipeline so in this case uh I take my pipeline called Pipeline and the pipeline stage will be two call the opportunity name I will select the user full name and opportunity Source would be form three but I can pretty much add anything and then I will have to select as well this um allow opportunity to move to any previous stage in pipelines and then I will click here on Save action now I can click
here to publish it and I can also rename it in this case I will call this when form submitted create opportunity now I can save that and now we can go to our form and test if everything is working so let's go back to our workflow and let's check that this is published so it's enabled and if I go back to my sites right here and then I click here on forms and I go to my third form and now I can directly click here on preview and I can test the form form so in
this case I will add my name my last name my phone number and my email now as you can see if I submit the form it will say please accept the terms and condition so this is really mandatory in order to go further now that I select this I can click on confirm and let's go and see if my lead has been recorded so let's go back let's go to the opportunities right here and then let's see that I have one new lead that is registered in two call so my form is actually working now
we're going to create our second automation which will automatically trigger the call on make in order to trigger the actual call to the user so to do that I have to go back to Automation and create a second workflow so in this case I will also start from scratch and and the way I will call this is that whenever there is a new lead in to call it automatically trigger make and call and phone call actually let's call it phone call so and now again we need to add a new trigger so this trigger will
be pretty easy that it will be opportunity status changed so we had a filter and we say that in pipeline pipeline when the opportunity moved from St status oh actually no this because the status is linked with like open and so on what we need to say is pipeline stage so here we will say pipeline stage is to call and now that I want to save the trigger it says that there is opportunity status change trigger required opportunity status filter so I need to go here and say opportunity status um move to status and here
we can just say uh open so now what happens when this trigger is started is that we're going to automatically do a call to web hook and here we can put whatever is the web hook of make so we're going to come back to this later to be able to test it but this is the setup right now so in this case I would just put google.com for now but we'll have to come back and change that and now what I wanted to show you as well is you can add another trigger so for example
you could say when there is a tag on the contact which is changed which is added and is equals to VAPI for example we can also trigger actions when this happens so in this case whenever we add that tag to contact it will also call the web hook and call this user now I can click here on publish and then on Save and now we're going to go on make and create our first hook and then we will be able to test if when adding this tag or changing the opportunity status it will automatically trigger
the phone call and call the user the next step is the make setup but before that if you like this video so far please leave a thumb up and subscribe to the channel I will be publishing more and more videos about how to build AI voice agents and AI Solutions in general if you have any questions feel free to leave a comment and I also recently launched my school Community where you can access all my resources and templates connect with other AI Builders and join live Q&A and building sessions it's completely free for anyone who
joins now this is the first blueprint that you will need to import from the school community so I will put directly the file right there and you will simply have to go here on more and do import blueprint and then automatically choose the file and you will get all of these automatically created so I will simply goes through how and what to change in that workflow to make it work for yourself and the first thing is you will have to set up a couple of variables these variables are important for for you to set up
with your own VAPI account VAPI phone number etc etc so the first thing is you need the assistant ID you need the VAPI API key you need the phone number ID and is testing to be false but is testing is basically a viable that allows you to not trigger the call but still trigger the make web hook to test that everything is working without having to call the user and spend money and the way it works is that right here at the end you will have the East testing and that will check if East testing
is true or false and if it's false then it automatically trigger the call otherwise it doesn't do anything but you can still see through the whole way what happened and what are the values of everything so let's go back to the first thing and set the valuable the first one is the phone number ID and the way you have this phone number ID is that inside VI right here once you create an account you will be able to import phone number and what happen is like you will create a phone number on tro you will
buy this phone number on tro or that's what I've been doing here in this example and then you can directly click here on input and then here you will add the phone number and here the account S ID and O token where you get these two variables is simply by going to the trillo console and in the dashboard you can see here the account S ID and and um o token so here you will just click on copy right here and right here you will just paste it here and here add the phone number click
on import for trilo and then you will get this view right here so this is the phone number that I've set up and in this case I've set it up as an inbound but we will use it as an outbound but what we need is to have this trilo number ID right here so as you can see here I will click on copy and and then I will go on my make and I will paste it right here then the first variable is the assistant ID so and and you will get that one when you
click here on assistant and at the top right here you will simply click on copy assistant ID and you will get that ID and then the VAPI API key this is something that you get by going here clicking on API keys and then you can directly copy your API key right here and paste it right there so now you have everything set up and of course you will need to set up is to true for now so that it doesn't trigger any call and just test the whole workflow once the workflow is working and your
assistant is created then you can turn it on to for so here we are creating a transient assistant uh if you have any questions feel free to ask it in the school Community I will be gladly answering any questions you have about this but in this video I don't want to go through this because otherwise the video will be way too long but here I will also set up a couple of variables like for example first name uh to be able to inject this data directly into inside the assistant uh and this can be also
extracted from go high level as well once you you are calling the assistant so you can have a lot of information that you have inside your own system inside go high level take all of this information and create the assistant with all of that information for your customer this can be really useful if for example let's say the customer has already some information and you want the AI agent to be able to know that information you don't necessarily want to use a knowledge base or any complicated logic but you can directly put everything into the
prompt the only limit is that the more you put the more it might make the assistant confused and the more it will also cost you so it's not good for a lot of data but for a couple of lines or a couple of text it's actually pretty good to do it this way and that's mostly it like then you will directly go all the way here and it will create the assistant and do an HTTP request to call the assistant with your variables so now let's test I'll make web hook and see that everything is
working and the first thing I need to do is to click here click on copy address to clipboard okay and then click on run once so now I will also click on wait for new data and now I will see if that is getting triggered so I go back to my go high level so I click here on web hook and then here I will paste the URL of the of the make so now I can save it I can save there and now what happens is I can simply go to my contact and add
the tag and see if the workflow is triggered so in this case this workflow is started and I can go to the contact right here and here I can just directly add the tag so I will select the user click on ADD tag and then here I can directly select VAPI call and I can just say action name this doesn't really matter so it can be like add tag um and then I can click on ADD tag and it automatically check progress and then now we can see that it's actually processing um so if we
go back here we see that my call has been happening right here and we can see that here it automatically created the assistant so now we can see that this assistant is actually getting triggered it's actually getting C so I could simply turn the variable there is testing to false and it will automatically trigger the call now let's go inside VAPI and create our assistant so when you are in VAPI you can easily create an assistant by clicking here on create assistant and then here you can say for example inbound Q&A or customer support and
and so on in this case I would advise you to start with a blank template and just follow through the different things that I have we'll find all of the details of that specific assistant inside the school Community uh under the course tab on the resource Hub you can see there is um different Tab and here you set up the main configuration of the assistant which is the first message what is the assistant going to say once someone answers and then the system prompt so the first um thing that you need to add is brief
introduction of what is the assistant doing so in this case uh this assistant is called Alex it's a digital assistant for wealthwise which is a financial advisory firm and you make outbound call to clients to gather more information about their investment preferences and strategies then you have the tasks and this is like the step by step of everything that is going to be going on with the client so like the script of the core it starts by Greening the color and then establishing some reports so asking if it's a good time to call right now
and then it start asking different information that it needs so the first one is the investment amount asking how much the user wants to invest then is the investment strategy seeing if the user wants shortterm midterm or longterm then it's the risk tolerance of the user if he's more risky and aggressive or conservative the investment type what type of investment they want to do if they want they are more interested into real estate into um stock market or cryptocurrency for example and then a summary of all of the different information so here it will summarize
everything that it has been asked before once this is confirmed by the user it will go to the next step and explain what will happen next that the user is going to be contacted by someone um and discuss what's the best option for them and finally conclude the Cod so that's it with the it will be on the school Community you will be able to just get it from there and paste it directly here if you want to try it out and do some tweaks and and try an experiment um then the second thing that
you need to set up in the model tab is the provider so in this case I use anthropic CL point5 clo 3.5 I find it pretty good but it's a bit talking too much sometimes so sometime you might want to switch to open AI depending on what's the need but in this case I think it's it's pretty good then you have the temperature if you want it to be a bit more more random then you have to increase that temperature in this case uh I just left it to 0.7 but we can even reduce it
reduce it more if you want a really streamline and strict process if you want it to be a bit more flexible saying different sentences not always the same thing and follow less the examples that you add right here then you might want to increase the temperature um and then you have some other couple of things like the max token uh per answers and also the emotion in this case this is just disabled and to 250 then you have transcriber which transcriber is how it is going to transform the voice of the client into text and
here you can set up uh the basic one is like deep gram with language English and the model is Nova 2 and then you have the other one which is the voice which is transforming the text that the llm return into voice and in this case I'm using 11 Labs Michael C vanon because I think this is a pretty good one like I really like it um and here you can select uh a model to use so in this case you can just select uh 11 turbo for example that's that's pretty good um doesn't really
matter much but yeah this is like one I have been using and I didn't have any problems and then you can add background sound if you want or some other parameters I won't get into deep detail into this right now because uh it's not really the purpose of this video but I can make another video uh if you want to talk more about but how to set these up and what do they mean and how I actually decide which parameter I use for what uh if you want this type of video let me know in
the comments and I will make it the next one is functions in this case we don't need any functions or any tools and then you have the predefined function like enable nend of C function and so on this should actually be turned on because it allows the um AI agent to end the phone call uh and here you can say an end call phrase as well and then you have the advance tab where you will want to send all of the different parameter for the end of call function on make so on make you will
have a web hook that is going to be called at the end of the call to receive all of the information from the call and this here will be the URL of that web hook that we will see that later how to find it and how to make it and here you will have also end of core report to add because you want that uh API to be called so for now just add here end of Cor report here you will have transcript hang and function call and then here you can also have a message
for the voicemail in case the person get uh the voicemail U because the person isn't available that's pretty much it for the advance Tab and then the analysis tab is really important as well we will see that later with make but then you can click here on publish and the assistant is created if you want to talk directly with the assistant you can click here on talk with assistant and it will automatically call it inside the web browser but if you just complete that take the ID that you have here paste that ID directly here
in the set variable it will automatically work so now let's find out how to extract information from the call to directly have this information available on go high level and first step is you will need to add what you need inside the structured data so here you will say in the prompt you will say directly extract the following information from the call if any and then here you will add the different information that you want to extract from the code in this case investment type which is a different investment type the user is interested in
so stock market crypto real estate and I say that you will add a coma add to the value if there are multiple ones so for example crypto comma real estate or the stock market then the investment amount that the user wants to invest then the investment strategy that can be shortterm midterm or longterm and then finally the invest risk tolerance and then I can click there on published at the top you will also need to go to advance and add the URL of the make workflow so to create the make workflow you simply have to
import it from the blueprint it will be in the school Community as well and this is just three steps that are pretty straightforward so the first step is a web hook which is the one that you will have to copy the address here and directly paste it inside VAPI so this is what I've ped pasted right here so here you can directly paste this it will automatically call the make at the end of the call now the first thing we need here is to create go high level so hopefully there is an integration already happening
inside make to integrate directly with go high level so you will click here and then you will have to connect with oo and authorize the call and make to have access to it and then here you will identify and search for that contact so this is like a search contact uh on go high level with the phone number of the person so this is just the first step that you will have so here you just set one message customer number you click on okay and then here you will directly get a contact ID from there
that you can use directly here so this is like the contact ID I'm getting from this step and then if I scroll down I can set up some tags as well so here in this case I will set up the VAPI call which should already be set up anyway and then the VAPI call ended and now I need to go on go high level and create some custom field to export and update the contact with this custom field so in order to do that I go back here I I scroll down I go to settings
and then I will go here to custom Fields here I have all of the custom fields for that specific user and what I can do is I can add a folder so in this case I added a folder here called investment details which is about all the different information that I get from the code so when I click here as you can see I've already created them but the creation process is pretty straightforward you simply have to click here on add folder then you add the folder that you want to add and say for example
investment details in this case then click on ADD field add just a simple line single line field click on next and then add the name right here then type for example investment amount click on Save and then it will automatically show it right here so now here I have my four different fields that I need to update so if I go back to the make I will see that my fields are here and I can directly get it from the structured data so here I can say message analysis structured data and then investment amount investment
strategy investment risk tolerance and investment type now I can click on okay and it will automatically update all of these fields at the end of the call so before we go further I just tried to actually fill the home and it didn't trigger any call on make so then I went back into the Automation and I figured that something was wrong so let's go back now and fix that right now so if I click here on Automation and then I see that I have my automation here which is new le in to call trigger make
and phone core and what I figured out is that we didn't have the right trigger so in this case there are two triggers that you need to have and the first one is the opportunity created right here so what we want to do is like every every time there is an opportunity that gets created inside Pipeline and to call then we're going to trigger the call so that's the first one and this is happening when you submit the form it automatically creates this opportunity that then trigger the call so this is the first one and
then the second one that we need to have here is opportunity change and this one is about when the it is in a pipeline and when it is moved to two goals so this happen when you drag and drop the opportunity so when you switch a different column to another column then this is going to be triggered so here you can click directly on Save and now we have these um three triggers right here which the first one is as I said opportunity changed second one opportunity created when I submit the form and finally the
contact tag gets changed to VAPI call so now let's do a full demo to see from the form submitted all the way to the information gathered in go high level to see the full demo you can go to the school community now let's get back into what happens after the call um so if I go back to the contacts right here and I click on my name then um let's see if it actually captured all of the different information um so as you can see right here we have all of the different information that I've
been saying on the phone so I want a long-term aggressive stock market and one million so now what we can do based on all of this is that we can classify automatically these different um opportunities to different categories so for example if I go here to Opportunities uh as you know there's low ticket leads and high ticket leads and what we can do is we can check depending on the amount if the person is a low ticket leads or high ticket leads if you are interested in adding some lead classification and other automation techniques I
invite you to check out the full tutorial available in my school Community it's completely free to join and in this longer video you will discover how to seamlessly categorized leads based on criteria like investment amount immediately after the call there are also additional enhancements you can explore for instance you could reassign leads to different categories if the AI assistant is redirected to voicemail and set up a follow-up call for the next day you can further fine-tune your automation logic inside go high level to ensure calls are made only during business hours automatically rescheduling for the
next available time integrating AI Voice Assistant inside go high level and significantly streamline your business processes and save you valuable time if you have any questions or if there is any specific use case or topic you would like me to cover in the future video please let me know in the comments thanks for watching and see you in the next one