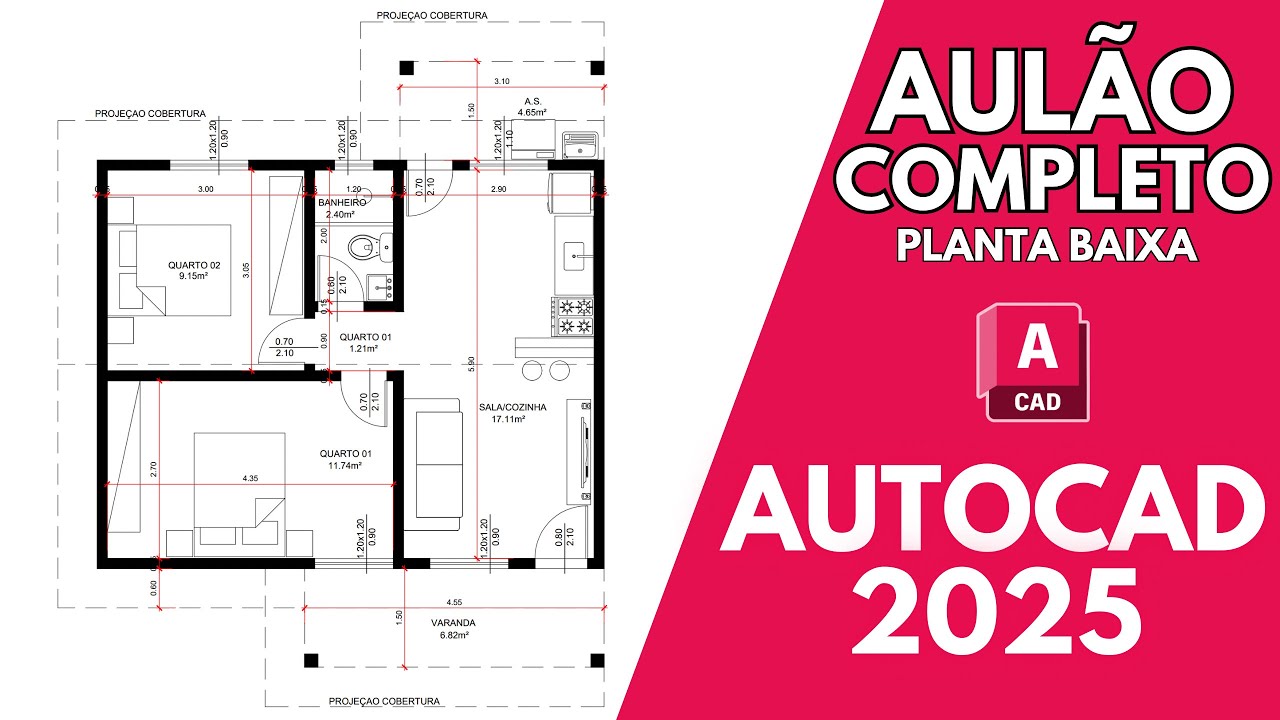
So guys, in this course we will learn AutoCAD 2024 from scratch, we will learn the main commands, the configuration commands and in practice we will make a plan like this. class we will learn about the AutoCAD environment and how to navigate it but first for those of you who are not registered, register, leave your like Activate the bell and come with me [Music] Hey guys, for those who don't know me, I'm there at Cristofer I am a civil engineer, occupational safety engineer, specialist in industrial automation engineering and designer, I will be teaching this course in 2024. If you do not have Autocad installed and want to install a free student version, just follow the link below in the description without further ado when you open AutoCAD and you will come across this screen here we have here on this side a side menu with some news options and connection right in this case it is connected by an account that I am a subscriber right here is the way we will have the most recent files open or it will show here the last files you opened so you can access it, right, we have other options, the list option and the image option and an interesting thing is this little clip here, you can activate it If you want a file to always be here first and here on the side there is also another menu where the main part would be here where you have to open the file or create a new file.
So if we click here on Open new file it will open a new file and notice here that it has the tabs my new file is here is clean from scratch and I can work with several files open at the same time, this here is the file I'm using for the course, right? Let me come here in mode, then I'll explain what this is, so this is the base file, I'll go make this available for download then access it then in the description there will be the link there and an option that I will play to give us from the 2021 play it is releasing it from here, for example I want to work with this one outside the played note where it left if I work with two screens I can move one to another screen Or I can even maximize it here now with the full screen or I can also bring it back here and in Autocad 2021 with the screen released its Minimize if it is exit here, it minimized when touching everything, in this option 2022 onwards this doesn't happen so you can work with the windows completely Independent but I thought it was really cool when touching 2024 there isn't much new No, actually it's just some files there for those who work more with topography which is an option outside the basics, right and an option for blocks also when you insert a block and there is an option that makes it easier for you to place it, the rest is identical to 2023 and for those who are here When playing an older version from 2017 onwards, you won't feel much difference except this part of the drop-down window, right, and some commands that I 'll show you later, a few of them that were only for some version 2020 onwards, right, but then I'll talk about course So I'm going to put the window back here and we're going to continue browsing here so our AutoCAD, just like any program that comes from Windows, we have this bar at the top here where as usual we have the new file here o Open save and save as, right here they are some options for AutoCAD subscribers that you can use on your mobile, you know, print back, which is the famous control Z and forward, which is also unlike back, and here is an option where you can customize this screen by adding some things, I usually add only the properties, which is something that uses a little Following here below we have the tabs if your LT touch which is a 2D autocad only it will have the same tabs as mine if it is the full 3D Autocad we will also have some more tabs here is the main tab which we will use this one here home and these Tabs here above we can also be configuring them here o Click with the right button and come here to show panels So here are all that are active of these the only one I don't use is the Birds clip you can even remove it to gain space if you want to add or get lost. Any of them can come this way if you want to move around, make some adjustments to the way you want, right?
be changing it here or leaving it loose to work with it loose I will also put it back here it is all modular here below So we have that first tab start we have the new file and the file that was already open if we click here on the plus we open a new one file too, so we can work with several at the same time and we can also move the order here, also during the course we will learn about the parts of the Tab separately, which in this case is the drawing part, the auxiliary commands part of this drawing, right, configuration commands and among others Remembering that below here there are also some more commands below here we have our command line if I click here type some option command for example op appeared there the option top command will appear here too I prefer to deactivate it here for example I have an online command I I click from here and it appeared there, look, I want this line to have 500, for example, look there, it just gets a little in the way, I'm going to delete it, so I usually deactivate it with f12, I just pressed f12 when I entered it online, it's down there that it will appear, for example, 50 500 is smaller so for example I typed it in the first point I will give five enter Hello from UESC to release then everything appeared at the bottom I prefer it to be here so as not to disturb here so with f12 I activate it I deactivate this function and if by chance you accidentally close this here, I closed it, note that he gave me a message before I closed it, right, control 9 is what makes it enter and exit Close and appear again so if I accidentally closed it, just press CTR 9 and it will appear again we're getting to the bottom menu here we have some Model Tabs it's this screen here that our main drawing window everything we're not going to draw on it then we have layout in this case it would be the views So what can I be inserting my boards separately it will pull there from the Model and here I make some settings like scales, right , we're going to learn a specific class about this and we can add as many layouts as we want, coming back here is the Model, let's talk about this bottom bar here, good, first item here, Model, I'll be showing the Power size mode I'm actually going to the layout if I go here in the paper it goes into the mode it's not an option we're going to use because we're going to do a more advanced one that makes our lives much easier so let me come back here in the mode this second option it activates and deactivates this background grid, it also has F7 as a shortcut, what is it used for? Using Line, I'll teach it later, when I click on it, it will always stick to a point on the grid. It sticks just right.
I don't particularly use this gradation, it always leaves it deactivated, but if one day you see it necessary, you can use it in my case, it always stays on off to delete selected delete later I will explain exactly about the selections how it works as we have several types, right moving on We have here the orthomodi is one of the most used here so I can use F8 to use it as a shortcut so it is deactivated with the online command I I have the line loose to do it the way I want once I activated F8 I pressed F8 it locked straight so it always locks orthogonally the next one here is Polar you can be changing the way it will help you to make some diagonal lines, for example, if I put 30 60 120, right, when I use the online command, it will help me use these angles, that little green dot appears, right, so if I click, I know that there is an angle of 30 degrees here, 120 degrees, you see and so on, it is useful for us to use in isometric drawings, like this one for example that I have ready here, where the whole drawing is at 30 degrees to make the pipes, it is 2D but it looks like 3D, right, because it shows the sides of the pipe and shows the height too, so xyz in disguise, right, moving on, the next one here is the isometric Drft, this one is when I click on it here, it stops me as if it were orthogonal, but on the diagonals, look, it's free to work, but you will press F8 it will leave me only the options configured in it let me press esc to release the line So What are the settings? When I open it here, there are a few more, so I have this one that doesn't have a straight axis, just the two diagonals. You can only make drawings similar to the ones I showed there, which is isometric, I can activate it, deactivate it, right?
so I use it for some situations, yes, the other main one that I'm going to show you is Snap, this one, its shortcut is F3. This is very important, opening it. Here we have its options, I usually leave this setting here, let me see if there is any others that I usually Open also, not normally these are the same ones, they serve as the magnet so I'm going to get the online one here and Imagine that I want to start my Line from this little dot here, I can't get the exact precision so I press F3 right away when I turn it on , the green square will appear.
It turns on, it's a magnet. So it helps me a lot with this, it has several, let's assume that F8 is deactivated and I want to play a line here, but I want it to come perpendicular, exactly, I have the Zap there is perpendicular, the little symbol there, so I know that here there is a 90 degree angle, because here I also have the perpendicular activated. So we also activate this one every time as needed, using F3, the Sniper options So they are all of these here I'm going to talk quickly about the main ones in a point statement, the two determined lines have a magnet stuck to them.
Midpoint is the middle . option and there is also the middle o the middle so here is the right middle, right we have the Center if there is a circle we will get a magnet right in the center of it I want to make a line there right in the center we have it here so geometry I don't use that here the Note I use because it connects in the middle of the line in any location, right quadrant, I don't use intercession, it also uses some situations extension, also perpendicular, I showed you, right, the others, tangent, sometimes I use it, I want to get a tangent of the Circle, right, but it's more rare the others There the ones I showed are the main ones we can be Removing or adding more coming here Note that mine has more of this one here which is Lineu in this case what is this line here for when I have some thicker lines let me set this here to be thicker I'm going to tap it doesn't show us it's all thin but if I activate it here it will show me this is not the real thickness of the line it's the thickness that will appear on the plot, right? Then we'll talk about this and a specific class and also the image settings, if it is not activated here , activate it here in the graph and performance, what is it for?
it does, I'm going to deactivate it so you can see, ok, notice that here, everything is serrated on the line, you can see it doesn't have a nice smoothing, so once you activate it, it even makes a circle for you to see, ok, everything is crooked, a bit silly, right? Once we activate it, it will bring us a smoothing of the Lines Mainly the diagonals, oh, it's more smoothed, so this will depend a little on people's video card, if you have a very bad video card, this command may be deactivated, continuing on navigation, we also have the mouse wheel if we turn it forward, we have the zoom zoom in, turn it backwards, distance it , so we use this a lot here to be able to navigate, if we click on the little ball, the little hand appears, I die the whole screen to one side and the other, with the little ball clicked, so we use it a lot and the zoom works like this, let me throw a drawing here just so you understand, it will always zoom in. Where is the mouse, so if you go here look, get closer there o drawings are far away get closer in the middle o the two of you together get closer to it o Go to it so this one is an important thing so you don't get lost in the navigation Oh but if you get lost in space I'll just throw it away I got lost, where is the drawing, oh my God, you have an option, you can press Z enter and Enter and centralize both, go without having sex with everything on the screen when it OK , this one will do it again .
it's the Zoom command, I pressed oz enter and it appeared at the bottom Zoom and the options o and extend so Z enter and now to finish we're going to configure Autocad so that it's easy for us to use.