Okay, let's get into this. So, every time you get a sales call booked, this agent is going to start working. First, it's going to go and research the company of the prospect.
Then, it's going to go research that person. And then, it's going to try to find based on their application the best fit product for them along with two potential upsells. And to do this, it's going to look through your product list to find the best fit solution for them.
And it's going to add it to this sheet right here. And then when your agent is crafting an email and text message, it's going to look through your testimonials and case studies to find the most relevant testimonial and case study to include in the email. And here's what this looks like.
Hey Jason, saw your booking. Excited to dive in on our call. Automating proposal creation from CRM data and notes is right in our wheelhouse.
We actually just helped Sarah Kim, who owns Vibe Studios, a creative agency, scale from sending two to three proposals a week to 14 custom proposals in 7 days just by automating their proposal workflow. Looking forward to showing you what's possible. Now, for the purposes of this demo, I'm using Google Sheets, but you could really use this with any CRM or call booking software.
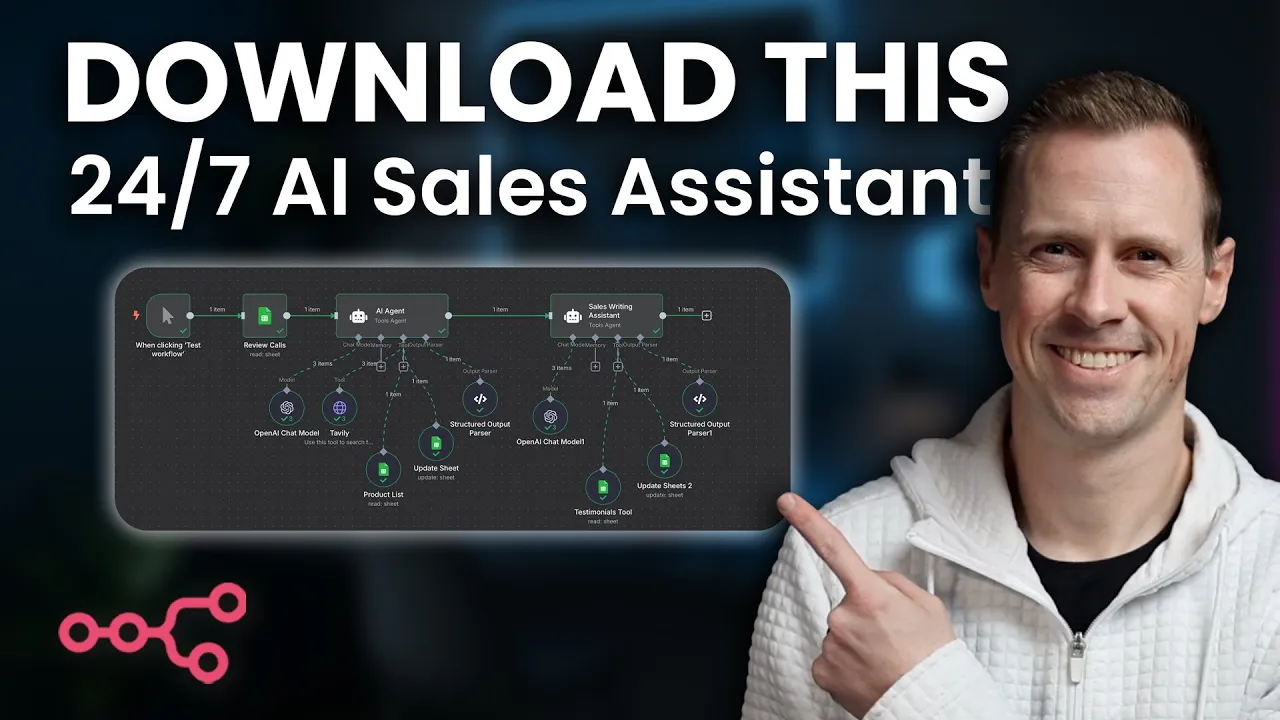
So guys, in this video, we're going to build this agent top to bottom together. But if you want to skip the build process, all you have to do is click below, go to my free school community. You can download this and other templates for free.
But if you want to stick around for the build, just hang out. We're going to dive in right now. Okay.
Now, to start out, I would typically build based on the actual thing I'm trying to install. But because it's going to be completely different for everybody watching this video based on your tech stack, I'm just going to walk you through my thought process to see if I can give you the framework behind this. So to start out, I would probably trigger off of the call booking itself.
So whether you're using Calendarly, schedule once or something, go high level or anything like that. Um HubSpot you can actually trigger via web hook or you can trigger via a an update um based on your CRM. So if a new record is added, new call is added, you can go through and you can trigger from that.
Now, for this build in particular, I'm going to start by using a manual trigger just to make sure that I can get through this build and I can show you it without having to book dozens and dozens of calls. So, first off, we're going to set our manual trigger and then we're going to come over to a Google Sheet node. Now, again, you can use another type of database.
I'm using this as the simplest possible form just to show you how the system can work. So, right here, I'm looking for get rows in a sheet. I've already created a spreadsheet with mock data for sales calls.
You can see here it's got the typical sales call information. Um, and then I added in all of the columns that I'm going to be filling in with my agents. So, company overview.
And for me, as an AI automation agency, the tech stack matters. For you, it may not, right? So, you can adjust this based on your needs.
Company updates. Then I've got primary solution, solution two, and solution three. Here's a list of mock products my agent is going to look through, and then it's going to reference it when trying to decide which product is going to be the best solution for that particular prospect.
It's also worth noting that I like having upsells ready because typically in my business when I find one area that needs an automation, typically there are two to three other areas surrounding that that would benefit from additional automations as well. So I have this set to automatically pull up to three solutions for me. And that's why I have primary, secondary, and tertiary solutions right here.
And then down here, I've got my email subject, email text, and SMS. And the purpose of this email is to make the first outreach after a call booking seem more personalized and well thought out. Most people right now are just using an automated message that's something like, "Hey, John, just saw you booked a call.
See you on meeting date and time. " But what we want to do is we actually want to remind them that they booked this call for a reason. This is a valuable call.
And there's another human on the other side of this. And that's why we're using testimonials in our outreach. The purpose is so that we can show them, hey, we have experience in your industry or we know what you're experiencing.
Uh someone else who had a very similar problem is now experiencing this outcome. So we can give them a clear path to success by working with us. Right?
So overall, the goal of this entire sequence is one to inform the sales rep and then two to increase show up rates. That's it. Because once those two things happen, you're actually increasing the efficiency not only of the time used on the sales call because the sales rep is more educated upfront.
It's also improving the show up rates, which means for every dollar spent or every unit of time spent to get prospects to book calls, you are getting more output. This is my sheet. I've got meeting data, products, and then success stories.
Let's dive back into our workflow. The first thing we want to do is we want to find our sheet. We've got mock data right here.
And then from our sheet, um, for this one, we want to pull meeting data. I'm running this workflow as if every time a meeting is booked, it's added to a Google sheet with all of the meeting details. Now, typically this would run automatically whenever a new booking comes in.
But because we're doing this from a manual trigger, I'm going to add in an additional feature to filter out. So, I'm going to go back to my meeting data and I'm going to add in the word fill right here for company overview. Again, this is just for demonstration purposes.
When you do this build, you will not need this. Coming back over here, I'm going to add a filter. And so if this column company overview has value fill, then we'll continue.
Okay. And if I test this, I'm going to go ahead and run this. We came back with one item.
It's on row number four. Let's double check to make sure that's right. Row number four.
Fill. Great. So, this now works.
Okay. The next step is going to be to add our first AI agent. Now, this agent is going to be our research agent.
So, I'm going to come into AI AI agent. I'm going to make sure that the source for it is defined below. We're going to add a user message and a system message.
So, we'll come back to this in just a moment. For right now, I want to make sure I add my chat model. Um, I'm just going to use GPT41 for right now.
This is a bit heavier on the prompt and requires multiple pings to multiple tools. So, I want to use a little bit more robust uh GPT. Okay.
So, now that we've got this, we're going to come over and add our Tavi tool. Now, this is going to actually be an HTTP request node. I'm just going to name it Tavi here.
And I'm going to use this tool to search the internet. The endpoint for this particular tool is this right here. This is going to be a post method.
And then I'm going to send body using JSON. Copy and paste this. And you'll have to just go in and add in your API from Tavi right here.
And then the next thing we're going to do is we're going to add one placeholder. And we're going to call this search term. For the description, it's just going to be what the user has requested to search the internet for.
Really simple. And I'm going to set the output type to string. And now we're good on this node.
Next, let's add a Google Sheets tool. Credentials are already set up. We're getting rows.
We're looking from the same sheet. And we're looking through our product list. The next tool we're going to add is an update sheets tool.
This one is just going to be update row. Once again, same sheet. Uh, and we're going to be updating the meeting data.
It's pulled all of the columns for me. And so, I need to select a column to match on. You can match on anything.
I'm going to match on the email. And I'm going to use the email right here to match. The only things that I really want to update are the company overview, text stack, company updates, and primary solutions, secondary solution, and tertiary solutions.
So, I'm going to get rid of all the rest, just leaving these. And then I'm going to click this little button right here that just allows the AI to decide for me what values should go there. And we're going to name this update sheet.
So to start, remember for our input, we want to pull data from the initial call that we already have so that it can use that information to then begin the research. So we're going to set the user prompt to expression and then we're going to start typing. I'm going to open this up to type, please research these sales call attendees.
We're just going to add in the values that we already have. cannot type today. And then we're going to drag and drop all of our values over product type or business type and then project type.
This is our input. Extremely simple because all we're doing is providing new information. Now comes the hard part.
We have to give the system message so that we can train the agent. Overview. You're an AI agent responsible for gathering company data and updating a Google sheet with a structured output context.
After generating output, you must call the update sheet tool with six specific fields. Do not skip this step or simply return JSON. The tool must be called explicitly to trigger the Google Sheets update instructions.
Accept and parse the input fields. Use the Tavly tool to gather and summarize company overview, text stack, and company updates. Use the product list tool to identify primary solution, solution two, and solution three.
Format all results as valid JSON with exactly six fields. Immediately call the update sheet tool using the structure shown below. Tools.
Use tab to research company background text stack and updates. Product list used to find relevant products based on business type and project. Update sheet required to write the six outputs into Google Sheets.
We've got input and output examples here and example tool calls. Coming down to our SOP here, we've got parse and validate input fields. Use Tavly to collect information.
Use product list to determine solutions. Combine results into a valid JSON object and using exact field names. Uh call the update sheet tool using that object.
Final notes. Return only valid JSON. No extra text or descriptions.
Always include all six fields even if data is limited. And use of the update tool is mandatory to complete the task. So all we're going to do now is we're going to copy this in right here.
And we don't have any variables we're pulling in. So we don't need it to be an expression. We can leave it as fixed.
And before I test that, I just need to add in my output parser. And so to do that, I'm just going to use a structured output parser. So right here, I'm just going to input a JSON structure.
So if I come back over here, we can see the structure that we want to use. I added in some limitations only because these prompts can pull back an enormous amount of research and I wanted to limit what came back and the token usage on the account. Okay, so I'm just going to copy this.
I'm going to add it to an output parser. Okay, now I just want to run the test up to this point. Let's double check to make sure for this particular testing state we have Phil in the company overview.
We do. So I'm going to come back over here and I'm going to test the workflow. You can see right now it read our sheet.
It found one item which is right and it started hitting all of our tools. Let's take a look at the execution. So if I come through here in our logs you can see right here that it hit our product list and then you can see our uh first tably hit.
This one was for the company overview search term background overview. Then the next one was our tech stack. So it looked for any information around what softwares they might be using.
And then the third hit was for news or updates. And you can see again all the news and updates. And then coming back to our model, you can see all that information dropped in there.
And then heading over to update the sheet, this is where it was able to add in all of the inputs um to the sheet itself. And then coming back over here, it structured the output and sent it out. And again, just to double check, we can look at our output parser and we can see all of the information that we wanted sent out correctly.
Let's pin this information so that we can keep testing. The next step is we're going to add in our sales writing assistant. Coming back over to AI, AI agent.
Let's rename this sales writing assistant. Rename. And we're going to change this to define below.
I've actually already got our user prompt for this. So, I'm going to copy and paste this in, and it should populate. And it looks like some of the fields aren't pulling because it's supposed to be coming from the review calls node.
Let's go back over and see. Ah, I did not name this. Let's rename this.
Calls rename. There we go. And we should be able to just test it on this.
Let's give it a go. I'm going to come back over here. I'm going to add in another and let's test this workflow.
Save it real quick and test the workflow. Once again, it's running through all the information. It's hitting our tools.
Looks like it's updating our sheet. It's sending our data over and our tool is starting and you can see now it's recognizing all the fields. Great.
So, we fixed that. Next up, we do also want to require a specific output format. We're going to do the exact same thing we did before.
And by the way, for this prompt, um, all I did is I added everything from the first, so contextually all the information about the, um, individual and then everything from the research and the product selection. So, we're just giving as much context as we can to the sales writing assistant. Coming in here now, we need to add our system prompt.
Once again, I've already got this because it took quite a while to build and a lot of iterations to get it right. So, you are a salesw writing assistant uh AI agent responsible for generating a short, personal, and persuasive email, subject line, and SMS right after a prospect books a call. The format must feel handcrafted and human while integrating strong personalization and a sharp testimonial to build conviction fast.
Context. The prospect should feel like the message was written specifically for them, not templated or generic. The core structure focuses on one key problem they face, followed by immediate proof that we solved that problem for someone else just like them.
Messaging should be short, clean, confident, and natural, written like a thoughtful sales rep, not a marketer. SMS should be simple, friendly, and casual. Final output must be logged in a Google sheet.
Okay. instructions. Analyze the input fields to identify prospects name, company, basically all their information, right?
Text stack, painoint. Uh, use a testimonial tool to find a success story with a company similar in size, industry, or problem. Pull company name, business type, specific result, outcome, solution used.
Drft a subject line like excited to connect, first name. Write the email using the following exact structure and voice. And so basically just we have a solution here that's fairly templated.
It's saying, "Hey, first name. Saw your booking. excited to dive in on meeting date.
Um, automating project or problem is uh right in our wheelhouse. We actually just helped testimonial first name who owns testimonial business name or type achieve a similar outcome and uh another outcome if if possible just by solution. Looking forward to showing you what's possible Nolan.
So the next instruction is to draft the SMS message using this format. Hey name Nolan from a stack here. Just saw your appointment come through.
Pumped to hear more about project details. See you on meeting update. Now, I want to note if you just added in project details in a regular template and it wasn't going through an AI writing assistant, what would essentially happen is it would autodrop in whatever it is they wrote verbatim.
And that's not what you want. You want this to be like, oh yeah, oh, that's the problem you have. Um, you don't want to repeat the exact words back to them because then it looks and feels automated.
You want this to feel personalized, human. You want it to feel like, oh, okay, this person has looked and they understand and they do feel confident. that they have a solution, right?
Tools, testimonial tool, uh, email agent, and update sheets too. So, here's what we need to do. We now need So, we're going to need to add these tools in.
I'm going to do that in just a moment. We have examples here are output subject, output email, uh, output text message, and you can really change these to anything that you want for yourself. Um, it took me a number of iterations to kind of get the style and feel that I liked.
Um, output text message. Uh, and you can see here this follows kind of the example that it pulled. And then we have our detailed SOPs right here.
You can pause if you want to screenshot it or just go through and add it yourself. Uh, but this is the prompt. Let's go ahead and copy this and head back over to NAN and drop this system message.
And again, there are no variables in here, so we can leave this as fixed. Okay. Um, and I'm going to get rid of this.
I didn't mean to copy that. Cool. So, now that we have that, we need our tools.
We already know that our tools need to be named testimonial tool, email agent, and update sheets 2. So, I'm going to come in here, and again, you can name these tools anything you want. Just make sure you update the prompt accordingly.
So, I'm going to add in my tools, and the first one's going to be a sheets tool. And we're going to change this to testimonials tool. And we're going to pull data from our sheet again.
And you would essentially just do this from wherever you're housing uh testimonial or case study data. So I'm going to pull it from our success stories. Next, I'm going to add another sheets tool.
We're going to do an update sheets. We're going to do instead of get rows, we're changing this to update row. And for this same thing, mock data.
And then we're going to come back to our meeting data because that's where we have these columns right here that I want filled in. Right? So, we're going to come back through and we're going to make sure we select a column to match on.
I'm going to continue to use email. And then I'm going to delete all the columns I don't want to update. Otherwise, it's going to update them with uh empty values.
So, I'm going to come all the way down here. I'm just looking for the bottom three. And finally, we're going to need our structured output parser.
Okay. I'm going to go ahead and define below. I'm gonna swap out and I'm gonna put my values in.
And now we should be good to run this again. So I want to make sure that this is named accordingly. Rename.
That should do it. Now that I have that, I'm going to go ahead and test workflow. And it's going to start running.
Okay, so it looks like it ran successfully. Let's double check. It looks like it got all the first information, but our email, email, text, and SMS didn't come through.
Let's take a look and see why. So, coming into our update sheets node, that would be the reason why. We don't actually have any values put in here.
So, I'm going to use the let model define this parameter, and I'm going to update that right here. And I'm going to save it. I'm going to come back over here, and let's just delete this information.
And let's run this again and test. And there we go. Now, let's double check.
We've got our new row right here. It looks like all this information populated correctly. And there we have our email subject, email text, and SMS.
Now, this is the end of this particular workflow. But you notice we still had to have a structured output parser. The only reason is from here you can do an enormous number of things.
Uh you could add ClickUp tasks, create a task, right? And we could pump in all of this information into that task. We could send an email to a sales rep.
We could do any number of things. We could update lead statuses. We could do anything like this um that we really wanted.
So this this particular workflow is extremely modular. There's a lot of things we can add on before it, a lot of things we can add on after it, and a lot more depth we could add into each of these agents themselves. But for a fairly simple agent, this one is quick to set up and it's going to improve show rates out the gate and help you leverage all those testimonials you've already been collecting in your business.
Um, so with that being said, guys, I hope you found that valuable. If you enjoyed that, do me a favor, give me a like and subscribe. If you want this template along with a lot of others, you can head on over to my free school community.
The link is down below. Don't forget to comment down below with any builds you'd like to see down the road. And with that being said, I look forward to seeing you in the next video.