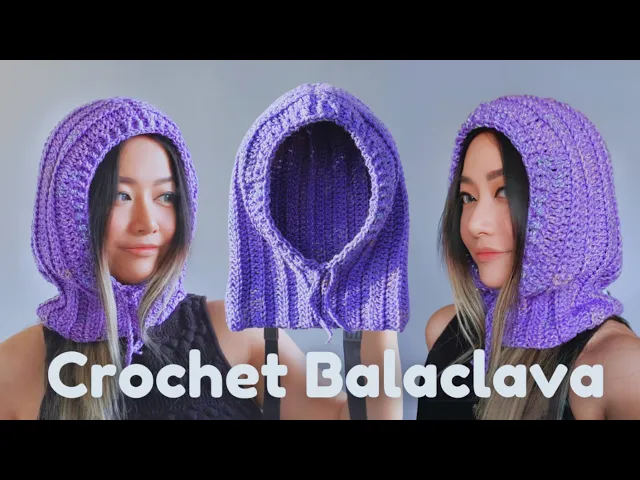
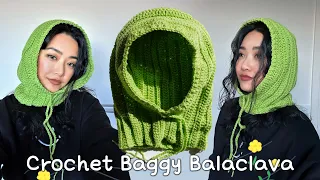
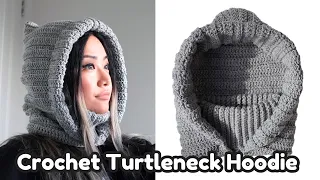
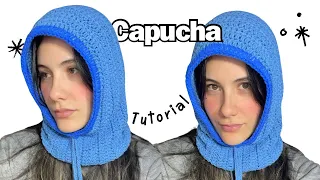
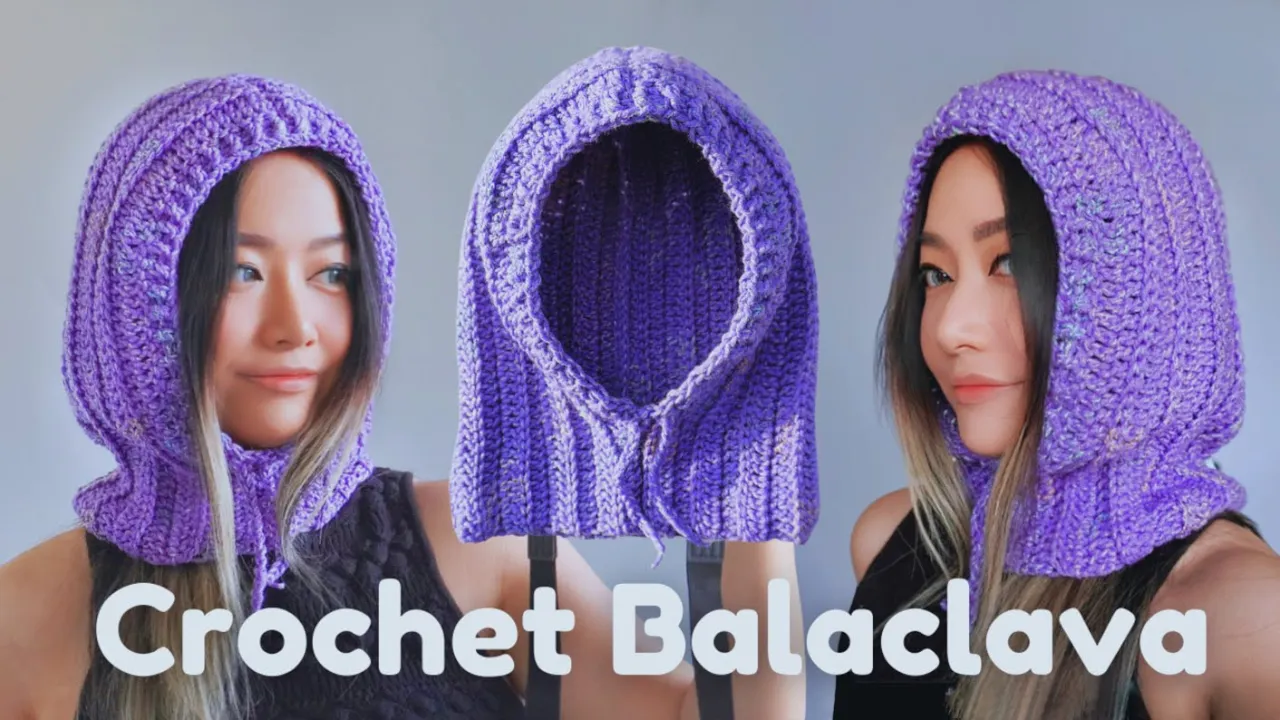
hey guys today I'm going to show you how to crochet this B CLA this pattern is made to measure which means you can adjust the height here and the depth here to make it easier I'm going to be giving you guys the measurements instead of how many stitches or how many rows of done because if I give you guys the measurements you can use another weight yarn and the hook that yarn calls for you don't have to use the same yarn I'm using which is this one um I actually got this yarn from like a
scrap yarn section from my local yarn store so it didn't come with label I don't know what weight it is but I'm going to say it's about temply and from my personal experience for this yarn I decided to use a 5 mm crochet hook and that's why I'm going to be giving you guys the measurements so that you can use a different weight yarn and when you use that yarn be sure to read the label and use the hook that your yarn calls for so before I started the project I actually made a Swatch and
it looks like this this is actually the back side of the Bala clava here so I did this just to figure out this pattern here as you can see the back side of the balaclava is curved instead of being a right angle this balaclava is made of two panels what you're seeing right now is one panel so for the panel I actually started from the back here this is the beginning chain which means we're going to begin from the back here this is the beginning chain and then we're going to work back and forth in
rows like that increasing here until it reaches this height from the top of your head to the bottom and then we work back and forth normally without increasing as you can see here this is flat so the first thing I did here was figure out the distance between this and that so zero here as you can see is at the top of my head and I want my B Clover to be around here and that's about 14 in which is around 36 CM so once I figured out the distance here the beginning chain is actually
2 in shorter than that uh the 2 in difference is just because of how I did this pattern here so if I want this distance to be 14 in my beginning chain should be 12 in which is 14us 2 so to begin the chain I'm going to make a slip knot grab this yarn and pull it like that and then we have a slip knot insert your hook and I'm going to make a chain of 12 in by the way 12 in is about 30 cm so to make a chain you just y over and
pull it through the loop on your hook that's chain one chain two chain three so I'm just going to keep chaining until I reach 12 in I don't know how many chains I need yet if you have a different WID your yarn meaning a different thickness the chain numbers you need to make might not be the same as mine which is okay you just need to make sure your chain is 12 in so with this yarn This is 40 chains and it reaches 12 in and then after that I'm going to chain one in the
second chain from the hook I'm going to make a double crochet first if you know me I make my first double crochet different ly so instead of a chain three I'm going to make two stacked single crochets which means I need to make a single crochet first in that chain but instead of inserting in the back Loop I'm going to insert in the back bump because if I insert in the back Loop um we're going to have a big hole here this Edge would just look better if we insert in the back bump and the
back bump if you turn your chain like that it's that thing the second chain chain from the hook turn your chain find the back bump and insert your hook make a single crochet so you over pull it up yarn over pull through two and then that's the first s cochet I'm going to make a second single crochet in the left vertical Loop so insert your hook in that Loop y over pull Yar through two loops on your hook Yar over pull through two so that was two single crochets and they make up the very first
double crochet I'm going to put a stitch marker in it so like that just in the top two loops and then I'm going to start this row with an increase on this end not on the other in the very first Stitch we already made a double crochet I'm going to make two more normal double crochets in the same Stitch to make a normal double crochet Yar over and then we're going to insert in the same Stitch here this is the very first Stitch so insert your hook yarn over pull yarn up yarn over pull through
two yarn over pull through two again that's one normal double crochet I'm going to do it one more time in the same Stitch so yarn over insert your hook in the very same Stitch yarn over pull yarn up yarn over pull through two yarn over pull through two and that's it that's three double crochets in one stitch we just finished the increase and then from the back Loop of the next Stitch we're going to make one double crochet in each Stitch so yarn over me search your hook in the next back bump yarn over pull
yarn up yarn over pull through two yarn over pull through two continue doing that yarn over insert your hook in the next back bump and make a double crochet so I'm just going to keep doing this working one double crochet in the back BMP of each Stitch until I reach the end of the chain okay so I'm near the end of the row as you can see that's my last chain that's its back bump I need to make one more um double crochet in it so just insert in the back bomb make the last double
crochet and that's it on this side we won't be increasing so when you reach the side with a yarn tail you just turn your work we're going to directly start the next row in that direction and when we reach this end we're going to increase again so again we're going to start with that special double crochet which is two single crochets also from this row we're going to insert in the back Loop only so that's the first Stitch as you can see and that's the back loop we're going to insert in the back Loop like
that and YN over pull it up make the first single crochet and then insert in the left vertical Loop make another single crochet again mark this very first Stitch going to put my stitch marker in the top two Loops here and like I said at this end no increase so we're going to move on to the next stitch in the next Stitch back Loop make a normal double crochet so yarn over insert your hook pull yarn up yarn over pull through two yarn over pull through two at this end with the tail we're always going
to do this um no increase just one double crochet in each Stitch so we move on to the next Stitch back Loop double crochet one double crochet in it I'm going to continue working like this so I'm near the end of the row The Marked Stitch should be the last Stitch we work into so one more double crochet in that stitch in the very last Stitch that is marked I'm going to work three double crochets um so here I'm going to make a bit change if I if I work all three double crochets in the
back loop it's going to pull the yarn like that and leave a hole there so for this very last Stitch instead of working in the back Loop only I'm going to insert in both loops and this is just to avoid that hole so insert in both loops work the first double crochet and then I'm going to do two more here because I need to increase on this end so go ahead and work two more double crochet in the same Stitch and then one last one okay so that's the first two rows from the next row
I'm going to change the pattern a little bit instead of working three double crochets I'm going to work two so turn your work I'm going to work that special double crochet in the very first Stitch so that's the very first Stitch insert in the back Loop and make a single crochet first and then in the left vertical Loop make a second single crochet that's the first double crochet you can take out this stitch marker and place it in the new first Stitch and I'm going to work a normal double crochet in the same Stitch I
think I'm going to insert in both Loops cuz when you work multiple stitches instead of one I pull this yarn a bit more and then it'll create an unwanted space so for the first Stitch I'm going to work in both Loops as well because I know I'm going to work multiple stitches more than one in this Stitch and that's why I'm inserting in both Loops so make that single crochet and then in the left vertical Loop another single crochet now I'm going to mark that Stitch and then in the same Stitch both Loops again going
to make a normal double crochet and that's it that's the increase two stitches in one stitch and then from the next Stitch I'm going to insert in the back Loop only Yar over insert in the back Loop and start working that normal double crochet okay contining doing that to the end of the row and like I said before we're at this end with a yarn tail so I'm just going to work one double crochet in each Stitch all the way to this um last Stitch that is marked um I'm going to insert in this back
Loop because I'm not working multiple stitches in this Loop so I can work it in the back Loop but if you want you can still work in both Loops so like that and then I'm going to begin row four I'm going to start with the special double crochet so one single pet so that's the special double crochet and then I'm going to move on to the next Stitch insert in the back Loop and work a normal double crochet and then I'm going to continue working in the back Loop only make one double crochet in each
Stitch until I reach the other end so I reached this end now I have this last um Stitch that is marked and on this end I'm going to increase as you can see I need to increase on this end this end don't need to increase so I know I'm going to increase I'm going to work two stitches in the last Stitch and that's one I'm going to insert in both Loops instead of the back Loop only to avoid creating a hole so in this last Mark Stitch I'm going to insert in both loops and make
a double crochet and then in the same Stitch I'm going to make one more so two double crochet Shades in that Stitch and that's it now I have four rows here on this end I increase by working multiple um double crochets in the very first Stitch and this end just one double crochet in each Stitch and the increase pattern for the first two rows I worked three double crochets Row three and four I worked two double crochets now I'm going to work two more more rows following this pattern meaning on this end I'm going to
work two double crochets in the very first Stitch and that end one double crochet in each Stitch which means row five I'm going to turn and because in this very first Stitch I'm going to work two stitches so I'm going to insert in both loops work a special double crochet and then one more normal double crochet in the same Stitch and then one double crochet in the back Loop of each Stitch back Loop only so one double crochet in the back Loop of each Stitch to the end of the row um I forgot to mark
this Stitch but it's this one if you pull it you can see that's one stitch that's one that's one so the first Stitch is here in these top two Loops so work one double crochet in the back Loop of each Stitch all the way here one double crochet back Loop one double crochet back Loop in this very last Stitch that is marked and then you turn your work do this row again so you work a special double crochet in the back Loop of the very first Stitch Mark that Stitch and then move on to the
next Stitch one double crochet in the back Loop of each Stitch you work your way back in that direction so I'm at the end of Row 1 2 3 4 5 six in the very last Stitch I'm going to work in both Loops again two double crochets and the increase is going to stop from the next row which means including this end I'm going to work one double crochet in each Stitch no increase anymore from row seven so turn your work this is the beginning of row seven I'm going to start from the very first
Stitch insert in the back Loop only and make that special double crochet and then from the next Stitch insert in the back Loop work a normal double crochet and continue working like that end of the row one double crochet in the last Stitch which is marked back Loop only and then you turn again repeat the same row here so just one row repeat so yeah from the next row that's what I'm going to do um from the very first Stitch to the very last one which is marked I'm going to work one double crochet in
the back Loop of each Stitch and I'm going to work back and forth like that just continue working like that until this is thick enough um to fit my head so after the first six increase rows I did 10 more plain brows so the whole thing measures about 9 in which is about 23 cm and this is the depth of the B clava after you finish the last Stitch you're going to chain one cut this yarn and pull it through then you're going to repeat the same thing make a second panel so the first panel
you cut like that the second panel you're just going to finish your last Stitch and then pull your yarn like that because we're going to use this yarn to sew up the seam okay so now I'm going to sew them up I'm going to start from here and go along this Edge like that and if I sew them up from this side that means the other side is is going to be the right side so I'm just going to sew them row to row you'll notice the ribs don't line up that's normal so that row
to that that to that that to that so I'm going to work two slip stitches for every double crochet row so two slip stitches and two here I'm going to start from the very first very last Stitch actually insert in that Stitch um so I can pull this Loop through like that and then I'm going to chain one to attach them together so two slip stitches here I'm just going to insert in the very edge of the Stitch and then I'm going to insert in The Edge on this side as well I'm going to Y
over and pulley through all the loops on my hook including that one as well so that's a slip stitch one more slip stitch here and on this side as well Yar over pull through all to make a slip stitch so that's two slip stitches for one row um I'm going to work two more here for the next row like this and the other side slip stitch the fourth one and on this side slip stitch so I'm going to continue working like that two slip stitches for each double crochet row the same for this curved part
yet two slip stitches two two two two like that I'll see you here like that and then I'm going to start um joining these stitches now I can see I've got three stitches here and three stitches there in one stitch so I'm going to work in that one stitch on this side I'm going to insert in there and that side there as well that's actually the bottom of the three increase stitches that we did so I'm going to slip stitch and then from the very next Stitch as you can see I have the top two
Loops here top two Loops there on this side I'm going to insert in both Loops so I'm going to find the next Stitch that insert in the top two Loops like that and on this Edge I'm always going to insert in the back Loop only so find that matching Stitch here I'm going to insert in the back Loop only like that and slip stitch and I'm just going to continue doing that next Stitch top two Loops next stitch on this side back Loop only slip stitch I'm going to keep doing this until I reach the
end of the row that is my last Stitch and I'm going to find the back Loop in there and slip stitch chain one I'm going to fasten off here like that I'm going to tie these together later I can whip this in um the stitches on the wrong side so this is going to be the wrong side let me turn it over that's the right side of the seam so now we need to close this at the front and leave a hole for the face now I'm going to put this on and here I can
see how many stitches at the bottom I need to sew up so I think this is good I'm going to see how many stitches I have here so I'm going to sew up the 12 stitches at the bottom here and when you sew it up don't forget to turn it to the wrong side because we're going to do the joining from the wrong side so this is the wrong side I joined my stitches from this side now I'm going to make a slip knot first and insert my hook in the first Stitch of both edges
so just the top two Loops here and then the first stitch on this Edge and then grab the slip knot pull it through chain one so that was the first stitches joined together now from the second Stitch whenever I insert on this Edge I'm going to insert in the front Loop only and then and then the second Stitch here I'm going to insert in both loops and then I'm going to make a slip knot so next Stitch front Loop only both loops and then slip stitch this is one 2 3 4 five after number 12
I'm going to chain one and then I'm going to do one round um maybe two rounds I'll have to see but I'm going to do one round first a around this front opening but this is the wrong side so I'm going to turn it over uh cuz I want to do that round from the right side um so that Stitch is joined with the other side that's going to be my first Stitch the first Stitch I'm going to work into in that Stitch I'm going to make the very first special double crochet but I'm going
to insert in both loops here and make that special double crochet so for this round I'm just going to insert in both Loops I'm not going to work in the back Loop only and from the next Stitch I'm going to work normal double crochet but in both Loops so I'm going to work one double crochet in each Stitch like that and at the seam here I actually have two stitches they're just being sold together so I'm going to work one double crochet in each of them so here I have two stitches left that one is
um joined with the other side so I've got two stitches is one and two then I'm going to join in the round with the very first Stitch that is marked actually I'm going to work one more here just to fill in this Gap like that so one last double crochet and then I'm going to join in the round with the first Stitch inserting in the top two Loops of the first Stitch like that and slip stitch chain one um I'm going to take out this hook and I'm going to put it on and see if
I want to do one more round so I actually thought that was good so I'm just going to stop there I'm going to cut this yarn and pull this yarn through like that I'm also going to make a chain that will go through the stitches at the front of the opening so you make a slip knot again um insert your hook in this slip knot and start chaining and I'm going to make my chain about 30 in which is about 76 CM so it looks something like this and then I'm going to chain one pull
tight cut this yarn and pull it through that's it that's my chain for this one um you can use a yarn needle or a hook but basically um this thing is going to go through the stitches so from the bottom here go in and come out so in front of the next Stitch behind the next so just in and out like that and I can also do this with a hook or with just my hands and the final result looks like this I'm going to cut off these Yarns and also don't forget to weave in
these yarn Tails as well on the wrong side so for this one I'm just going to let it go through the stitches um like this like the seam on the wrong side just like that and then I'm just going to cut it so I'm going to do the same thing for this tail this one and these and when you finish all that this B clava is done