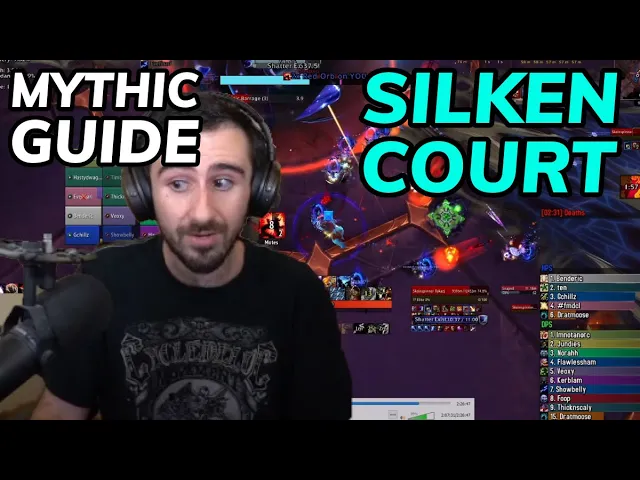
hello everybody my name is ratos and welcome to my Mythic silicon Court guide this fight's aoy there's a lot happening here I'll put some links to raid plans and weak ORS and stuff in the description below and I'll show them off as they happen but this fight is quite a lot I'm going to try my best to explain everything so starting off at the very beginning of the fight you need to split up into two groups of 10 uh and these people will get inside the circle of one of the two bosses if you don't
do this you will just get killed and you will get a permanent buff for the rest of the fight either the Mark of paranoia or the mark of rage and you need to split your group up into two of 10 we split it up two tanks we're blue obviously two healers into each team we put all of our evokers into the red team uh we put our dks in The Blue Team the blue team is generally the one that's kind of allowed to be under the scarabs and meleeing them any red melee aren't allowed to
do that so uh we put like our Enhancement Shaman our Rogue and our Havoc DH and Red Team uh and then there are couple of specific teams we did for this as well so this is the echo strategy that we used on this fight there are a couple different strats you can use for this boss I'm not going to claim this one is necessarily better than the liquid one but it's what we did and it it worked okay for us so um I'll kind of talk thing by thing as this fight happens with all of
the special assignments and stuff so yeah we we've split up we've gotten our our 10 and 10 um first thing that happens is we get a frontal from the Scarab boss now the frontals from the Scarab boss are blue frontals they always Target a random person on the blue team frontals from the this the tall boss will always Target somebody from the red team so we call those red frontals and blue frontals so we get first thing we get is a blue frontal it targets the blue that we're all stacked up over here so we
stampeding roar and we move to the side uh of this boss and we get to keep hitting this boss um these two can't be stacked until that finishes and then we can start moving the boss uh the boss does a tank hit there we have that tank hit hit our DK so that our DK then can not be tanking that boss and I can tank the boss instead and our DK can do grips after this now the next mechanic that comes out here is web bomb web bomb targets six people on the red team preferring
ranged so you should set up to have exactly six red ranged now the way that we do this is you're going to need to make three web teams right web connections and we have that set up with some special teams so we have three teams one of them is two red evokers one of them is a blue Mage and a red Warlock and the other one is a blue Mage and a red uh disc priest for us although holy priest would work too any healing priest right would work for that um red ranged healer right
so those are our three teams that have the job of actually getting a web bomb and spawning it so what we do is when this web bomb comes out we have the three three red ranged are just standing over here they're baiting a web bomb here those web bombs are just going to sit there for the rest of the fight we're going to ignore them the three or The Two Reds that are paired up with blue people are spawning their web bombs near the middle of the room uh and then one of the two evokers
that's on a red team with another red evoker is on the wall and one is not on the wall and spawning their web bombs you can see we've got three web bombs spawned in specific positions uh these people go to those same positions every time and then the other three people that are spawning useless web bombs just stack them up against the wall so that comes out now those web bombs spawn now and those people will then need to get with their teammate inside their web bomb and then touch the middle of their web bomb
to trigger the connection between the two of them now throughout this entire fight whenever you get hit by venomous rain which is just coming out now or that web bomb hit you will spawn a moat that needs to get soaked by a member of the other team so that's part of the reason we do this this way is the two evokers will be spawning some extra they're red players so they'll be spawning extra red modes that need to get so by blue people the other two web teams that are done near the middle of the
room have one red and one blue person so they can each just rotate around and soak each other's orbs and we don't have any problems there because if you ever run within a few feet right within if this blue circle if there's ever a red player within this blue circle we both die um so that is why this strategy is done this way um so you can see this web bomb or the the venomous rain comes out we spawn a bunch of blue Moes over here A bunch of red Moes behind the boss and now
we rotate around the boss clockwise in this case around the boss um we also have our evokers have they they got one of the web bombs back here and they linked up with each other so they've spawned some extra Reds back here and you can soak one or two Moes of the other color if you don't soak them it will explode and give everybody a stack of a debuff if you do soak them it will only give you a stack of the debuff if you ever get to three stacks of the debuff by either soaking
three or soaking two and then one goes exploded somewhere or three explodes somewhere you die um so that's very bad you try not to die as much as you can so here for instance I soak these two and uh the red team is now rotated around and soaking all the blue orbs we dropped if you ever stack the venomous rain such that there are two people getting hit by it you'll both drop two Moes instead which is very lethal people will die if there's ever two Moes stacked on top of each other it's very likely
to kill somebody you need to open your microphone and say double there's a double on red and you can identify it by looking at the swords that are floating above the Moes if you see there's two swords then you can identify that it's a double moat uh because that's easier than actually seeing there's two orbs the orbs kind of Stack into each other um so that's the rule for that now with scarabs coming out here these scarabs need to get gripped under the boss so having at least two dks is nice so you have enough
grips to just get these under the boss they have a damage reduction for a little while and they fixate on the closest person once they finish borrowing out of the ground um they can kill people very easily non tanks that they're fixated by these should try not to get hit by them too much uh because they do a lot of damage and they Stack Up and increasing damage taken from all sources on you and also they can crit you and kill you for fun so uh don't let them otter you don't do that and we
try and grip them under the bosses um as fast as we can so that's part of the reason I'm tanking both bosses here so the other the DK can be focusing on that uh in this phase as well the tall one does put a poison on your tanks dispel that like if it gets above like five Stacks you should definitely try and dispel that as much as possible okay here you can see what the the red blue pairs are doing in the middle of the room you see that they're both I guess it's under the
raid frame so you can't see but you'll have to take my word for it they're both under they're both inside this bigger web AOE and one of them has walked in and triggered this and now you see there's a red Mo and a blue moat there and they both just do a little circle and soak each other's Moes and now they both have a web line and they stretch it across the middle of the room um so here you'll see there's a red evoker pretty close to the blue melee as well you got to be
careful of this this caused a lot of wipes for us was people running into this person that person and the melee have to be very careful of each other uh the boss we use urs's Vortex here to try and get the scarabs all just nice under the middle of the boss we got a fun charge here and you have three lines so the boss gets stunned um and then you it's taking double damage here so mad Queen's mandate really good for that double damage amp window any kind of effects like that really good to send
into the boss uh during this burn spread for venomous rain and now we're going to go and soak each other's orbs the tall boss has two different positions that it can jump to here either up in front or over to the left from our current position you have it we have we had we called it the normal spot because that's what's in the Echo kill video and then the cringe spot because we didn't have that in their kill video to figure out what we were supposed to do so we had to figure out from like
watching Prague to do that either way it's the same so on this one on this kill I think it moved to the cringe spot but either way you basically do the same thing um so here comes a frontal and then what happens after this frontal is you take the boss and you stack it on top of the other one so this is the cringe spot and you just move the boss such that they're stacked up if it's in the normal spot you do the same thing just blue are kind of on the outside of the
room and red are on the inside middle of the room uh running towards that new location and you take the boss over here stack him up nice and nice and tight and then here comes a fun set of mechanics um if you have fun with Annoying mechanics uh so we have a bunch of ads spawning that need to get gripped under the bosses we also get a blue frontal here so the Scarab is going to pick a blue person at random and aim a frontal at them so your blue people that are on those ranged
teams that are out in the middle of the room because your two blue people that are on those those red those teams with r red people need to be in the middle of the room later what they do is they go off to the side and actually they both ice block in this section they ice block before the venomous rain hits them and they stay in that block until after that frontal is either baited on them or not um and that way they can avoid baiting this frontal through the red or through the middle of
the room uh this frontal either targets a blue melee in which case it's fine or it targets one of those two blue Mages and they are in an ice block safe and sound uh you know if they get targeted it's okay and they also ice blocked so we aren't spawning random blue Moes over in Narnia where they would not be soakable uh so that is an important thing to do here that frontal finishes and uh then this the web bombs happen immediately after this so the three red range that are spawning useless web bombs need
to quickly get over to the wall as soon as the venomous rain happens and the other three red people that are part of the teams uh instead spawn their bombs two in the middle of the room and one over here on the side and then again this one's the evoker one so a rescue is used for those two red evokers to just quickly get that bomb and these multicolor teams get their lines there uh we get extra red Moes as a result back there we rotate through the boss again uh the rule here basically is
the red are rotating around the boss and the blue run kind of through the boss uh to get to their other side and soak where all those Moes used to be then we get our next charge here again urs's Vortex really good for this one and charge comes through and then we just get to keep hitting the boss for a while through this damage amp uh this is a good spot for 2 minutes as well to be potentially used or for potions rather to be used depending on what your CD timings look like uh on
this charge it can be good you'll still get them for lust at the end of the fight now we move the boss to the middle of the room and we have these two world markers indicating where our team should stand for for this intermission and the rule for this intermission is you want to start to the left of your marker now there are two the people that are on these teams right the people that are web teams with each other are also intermission teams and they're kind of standing back doing their own thing cycling around
rotating with each other the The crucial insight for this intermission is that it is exactly the same slices every single poll there is no variance on these slices so if you stand in if you have these World markers it is the exact same set of slices every time so with that we know that if we start to the left of our markers uh the first pie slice is always going to come right on top of us and then we can start moving and the the marker will be the right edge of the first pie slice
with these markers and we all move right except for those two people on each side you can see that there's a red and a blue that are kind of their own team here and they're rotating and soaking their own orbs over there and we all just run over and again you soak one or two of these red Moes once this last one finishes of this first cast we do a scoot left so everybody needs to try and get one slice over into this area that just got hit try and get as far left as you
can so that you spawn these Moes in this new slice cuz it's the one that's about to get hit and then for the rest of this we're just always moving right we do a red light stop like we do a stop here there's actually guilds that keep moving in this spot which I think is kind of psychotic but you can just stop here after you do two slices on this move you can wait for this one to go and then you can move in here's a double there's a double red so so this was calmed
over voice there's a double on red right very easy to miss this very easy to accidentally not see that soak one earlier go to soak another oops I soaked two I'm dead uh so be very careful with that but if you call it then somebody can be like oh I'll soak the double and they just don't soak a first one we spread again and we keep moving right and uh you see we have this weak here this is a liquid we I'm not sure if it's public um I'm sure they'll public their we soon um
but you the goal basically is to break this shield around be sometime just before this next in Tropic barrage 5 would come out so try and break the shield with maybe 5 seconds left on this cast again there's another double Red Double right there uh so that one needs to be carefully soaked you can see I'm staying away from it cuz I already have one stack but I can soak this one cuz it's a single and I get another stack and it's all good all the Moes have been soaked the two bosses come up and
uh yeah the reason you want to delay that ideally you can you can push a little bit earlier than that but it's just nice to have time to soak all those Moes and it's good for CD timing as well uh to do that so we get into phase two now phase two begins with a blue frontal we actually have some blue players playing kind of to the sides of this boss so it's lucky whenever they get targeted but it doesn't really matter because everybody can just move if it targeted the bulk of the blue people
that would be fine as well you dodge this frontal during this phase the the SK skinny boss will do void bolts now so this is not a poison dispel anymore it's a magic dispel but your magic dispels are being used for the main mechanic on this fight so what you want to do is you want to figure out some healers who don't need to dispel for a while and have them dispel your tanks as they're getting above five Stacks that can be really valuable stone form is also really nice if you're playing a dwarf uh
for this part of the fight too so they can you can just stone form if things are getting sketchy um but yeah okay so frontal comes out next mechanic is web Vortex now this mechanic is very easy to not understand but once you do understand it it's actually very forgiving so what the boss is going to do is it's going to pick one group either red or blue and then grip them in and spawn Moes under where they came from and then two seconds later it's going to grip the other group into the middle and
spawn Moes where they came from so our rule for this is that we have split up our entire raid into either running left or right every time this is targeted this comes out um so here's our left and right groups for this right we have a red group left and a red right and a blue left and a blue right if you are the first team gripped in you will then go either left or right according to what this to your assignment and probably break the webs that are spawn not probably but you'll break some
webs most of the time from doing this sometimes you'll run in the same direction as whoever you get webbed to if nobody's dead it will web you to the closest person usually but maybe they're already getting Webb to somebody else so then it'll web you to the next closest person it'll usually web you to close people as you're getting gripped in we didn't bother trying to manipulate that we just said okay half the raid will run right right half the raid will run left right um so whichever group gets in first say it's the blue
team that gets gripped in first here I would just start running right because I always run right and some people would would run left and if I if me and whoever I was web to are running different directions that's great our webs will snap if we're going in the same direction then we're going to have to to break our webs as soon as we get to the other side now if we get gripped in second we can instead run through where the Moes were from the other team as we run out and actually grab those
modes along the way um if we get gripped in first we kind of have to loop back in and grab those modes later but again you need to make sure that you get out of the path of where the other group is about to get gripped in right uh so let's let's see that in action here so first grip is going to be coming out and it's the red team is getting gripped in first so they're going to run left right around us right they're going to kind of we we're in a nice loose stack
here you don't want to double you don't want to Stack tightly because then you'll spawn double Moes right you're spawning Moes where you're getting grip from so a nice loose spread here and then you're getting yanked in bunch of Moes are spawning we are staying here and all of red is in the middle of the boss and they are splitting left and right around us right see this they're going around us cuz they don't want to run into us as we're all getting gripped in here so this is about to be lethal this entire cone
here is about to be lethal if there are any red people still there so they're getting out of the way we are gripped in and because we are the second grip we can just run out through these Moes so I can pick up two Moes on my way out our webs get snapped uh pretty much instantly everybody can snap their Moes and there's a couple of Moes still outstanding which we just run back in after that AOE and finish soaking them now here comes the dispels that's right it's more mechanics time uh so five people
get Afflicted with the dispel uh you can use the northern sky we or pack to handle assigning your dispels and putting the markers on people or putting numbers on people's name plates I think it has that functionality as well um and what you want to do is you need to dispel these under the boss um there's a duration on this debuff so if you dispel one onto the boss and you don't dispel the next one soon enough it will expire and you will wipe because you need all five of these to get dispelled on the
boss the way that it works is uh at least with the the liquid pack I think the northern sky has the same logic too but if not uh what we did is we had our blue people we preferred blue melee then blue rang then red melee then red ranged would go under the boss in that order um so you could kind of know when it was your time the middle of the skinny boss's hit box is banned you're not allowed to be there unless you're the person who's about to get dispelled and so we would
just we would say uh person's name let's go back a little bit so here comes the debuffs are coming out right now as we're running out so we can see instantly okay we've got our we've got our five debuffs physical is our first dispel so we' say Okay physical get under the boss physical in two one dispel and then physical we get dispelled and then I'm not an Orc in two one dispel and he's on the boss gets dispelled teras an in two one dispel he gets dispelled B der in two one dispel and then
now the boss still has 5 seconds on the cast time so we hold our last dispel for a few extra seconds and dispel it right at the end there the reason you want to do the first four kind of quick uh and then the last one is the one that you hold is that each of these stat a actually gives the boss a 20% damage taken increase so most of your raid right now should be hitting the skinny boss because it has an 80% increase damage taken phase and the longer you delay that fifth dispel
the more value you're getting out of that and then you get an 100% increase damage taken during the stun so that is good to do I'm hitting the other boss here because I'm the tank I'm making sure I have threat and stuff and my positioning and things and excuses but I should probably be hitting the the skinny one right now as well for the extra damage value too uh so then our last spell is Timber he just gets under the boss he just Waits there if you dispel onto somebody else it's not the end of
the world you just need to adapt uh and you need to keep going and then you'll just need to do your last dispels more quickly but if it happens often that's a problem that you do need to solve uh because it will wipe you a lot of the time that it does happen uh we also have scarabs coming here so that's why I'm tanking the boss here the way that it works is at the start of P2 you want your DK tanking the first piercing strike and that will set them up to be free to
do the grips that they want to do uh during this phase again cuz I can be tanking the boss for like 30 seconds uninterrupted here while the the grips come out last spell comes out bang interrupt the boss Hit The Boss another mad Queen's mandate goes into that boss while it is stunned from me uh now we get to stack hard stack on our markers so everybody stacks on the opposite color marker as their group and I'm marked with a square Eve is marked with an x uh Eve the creator of the raid plan by
the way if you do want to y a lot of the strats we do have a lot of this in a raid plan we made some changes to these but Eve made this uh this great Great Raid plan that was the initial plan for a lot of how we did this fight so if you're curious about exactly what our ideas were here that is where those come from um but yeah he's the captain of the red team I'm the captain of the blue team we pixel stack on each other here on ourselves on the opposite
color marker near the middle of the room and uh now there's going to be two frontals we got a red frontal the red people Dodge that to their left we got a blue frontal the blue people Dodge that to their left now the skinny boss will teleport to a random spot on the edge of the room what happens here is we need to make a Call of which side the red team is going to go to and which side the blue team is going to go to so with the boss teleporting here you could go
either side right red could go to the left or they could go to the right and blue could get kind of over further to the right or over further to the left either one we have enough time to do you do need to use movement CDs here to make it happen and you need to react quickly so the call gets made here red right which is fine you can make either side work red right gets called though and that means blue is going left so singar blue just needs to get heading leftish and forward of
the boss and getting a nice spread because now we get a web Vortex almost immediately here um so one advice here as well as you can see where the boss is going to teleport we're going back a little bit we got the two frontals we Dodge our frontals to the left then the boss cast a Teleport as soon as it's teleporting it faces where it's going to teleport so you can start pre-thinking about uh what we had as Eve would call red right or red left based on where it went to uh so he would
be already thinking about it he be calling red right and immediately red is running to the right and blue is running to the left as a result of that call and now here comes the web Vortex again either team can be gripped first here um whichever team gets gripped first is going to the left and the right according to again Isle was run right if I'm going to the left and the right and whichever team is getting gripped second we'll just be able to run kind of straight and go grab all of our our modes
so we're running to the right and the and the left blue team is and red team just goes and picks up all these beautiful Moes that are easy they're all spread from each other and they can go and pick them all up nice and safely they're doing that we pick up some of these Reds on our way out and then the ones that we didn't get we come and get on our way back in Easy another set of dispels comes out and adds now um so the dispels have to happen under the boss here what
we want to do on this set is ideally we want to to spell three under the boss before it teleports to the middle of the room so we do one pretty quick two goes under boss gets spelled pretty quick three goes under boss gets spelled pretty quick and then the boss teleports to the middle of the room where we're going to do four and five um so we that's the plan with this set here we got a blue frontal bait this blue frontal away from the middle of the room so you want to make a
call here of blue just bait towards the wall so you don't bait this frontal towards the middle of the room abs are getting fixated on people and we're again gripping ursel's vortexing in the middle of the room you know killing them near the middle of the room bringing the two bosses together is and we get our stun on the the skinny boss and again we should be hitting that skinny boss during this damage amp uh because it's taking extra damage right now then we get to the second intermission hooray we've done it is that it
was that easy this whole time it was that easy uh so now before the second intermission you can be in a bunch of different positions in the room we always reset before this intermission to our color markers slightly again to the left of our color markers um there's a couple of different configurations that this intermission can run in but you kind of learn them as you do this fight a couple of times um a certain idiot does die on this particular pole again to Showcase how it looks like if you die but uh it is
I think it's good to just always during this like 10 seconds of breathing room we just always have blue team rotate towards blue marker and Red Team rotate towards red marker during this phase there's no need to do the thing with the teams of people soaking each other's orbs I don't think anymore those people are just part of the group now as well uh and we're just have we just have two groups of 10 boss runs into the middle of the room and the goal is to beat the third set of orb drops in this
phase it's actually a pretty forgiving Shield you don't need to stop damage in this phase like you do in the first intermission just as soon as you can get out of this intermission is good um so we rotate around the boss and again our goal is to soak this is a dangerous spot here if you're trying to go get one of these orbs you're going to get hit by the spike you can Bop people out of the spikes if they get hit by it but usually they're just going to die so the rule here is
if you need to not hit the boss for a while just run out and don't hit the boss you can see the entire blue team basically Runs Out doesn't hit the boss for a bit all these orbs are kind of getting attacked for a little while somebody got spiked they died that's that's what it looks like if you get spiked that's not good not the only idiot to die in this intermission though again so now we now we stack up after we soaked all those first orbs we spawn our second set of orbs and again
we rotate right uh this can be a good spot for movement CDs too and again we're kind of zoned off of everything here we pick up the orbs as best we can we've got another spiked gamer back there there's what happens if you run over three if you run over three you die that's why I did that so that's that's what that looks like to show you you just instantly die but luckily you can get resed on PTR you couldn't on PTR you were aad if that happen so that's one of the reasons this fight
was easier than it than it was on PTR okay so we're down a player doesn't matter you can be down players can die you can lose DPS and you can still kill this boss it's not the end of the world um so do get ready to kill this B like don't wipe this as soon as somebody's dead it's not like Nexus princess kza free Nerf or whatever where you needed just every single person alive to have a chance of killing the boss so P3 starts we're down a red gamer that's okay uh if you have
a lot of players dead and you're trying to make prg you should generally res the person on the team that is under represented so that because otherwise you're going to get just uh more Moes of that color right uh the soak to Mo ratio gets bad um but also you need to Res you know tanks healers people with important jobs so if it's all things Z equal that's how you should choose JZ during Prague so the boss uh comes up where it went down the skinny boss so you can already know where that's going to
be we ping it as well to get everybody aware of it and there's also you can see the boss there as it is spawning uh this boss what we do here is red moves to the side of the boss and blue we kind of drag the two bosses together we cleave them for a little bit uh and then red is going to bait a frontal here and then they're going to move towards the wall so a red frontal is going to come out soon again the DK takes the first piercing strike of this phase it
doesn't there's no more ads in this phase so it doesn't really matter who takes the first one anymore uh the Red Bait the frontal and then they move towards the the wall blue we deal with this swarm which is some raid damage uh we're still a little bit but we're getting ready now to all cheat towards the middle of the room because we're about to get a web Vortex and it's really good if blue can spawn our orbs towards the middle of the room so it's okay to back up and not hit the boss rbit
here uh and just back up not cleave not hit the boss spawn some nice orbs in the near the middle of the room we all get gripped towards the boss whichever team gets gripped first has to go uh well okay so this one's got special rules I'm sorry the there were different rules for the other ones but so blue gets gripped first here we are going left and right if we get gripped second we're still going leftish and rightish but we can we can start clearing those modes red if they get gripped first they're just
running to their right uh which I guess is my left they'd be running over here if they get gripped second they can just run Center towards this but they don't do left right on this set because they need to keep their webs so they can't go to the different sides of each other they all need to go in the same direction here um so that is an important rule here red keep their webs uh so that they can actually stun the boss because now in this phase the boss does a charge again so blue we
get gripped in we go left right red gets gripped in and they all run mid and they're all keeping their webs and soaking these Moes mid uh meanwhile we run out and we finish soaking our Moes as best we can meanwhile the boss is now doing a charge but all of our red people have their webs in the middle of the room and so uh with one red Player dead we only get four webs so if one of them breaks it's okay if two of them break it's a WIP um but yeah they charge the
boss boss gets stunned we hit the boss for a little while now red needs to immediately bait a red frontal such that it doesn't hit the blue team and move us off this boss here um so red all back up towards the middle of the room bait a beautiful red frontal such that blue team can keep hitting uh and then we're going to now chase this boss we're going to chase the skinny boss as soon as the entangled is over we're all heading over towards the the tall boss here and there's another web Vortex coming
out now this one is just regular rules we don't need the webs from this one so we're breaking all the webs so the first team that gets gripped in is going left right right they're either they're going according to their assignment left or right and the second team that gets gripped in is going leftish rightish and also can run forward and soak the Moes um along the way so there's the first grip there or actually they all you just run sorry this this one's different this one's different than that this one the first team that
gets gript in just runs to the middle of the room and the second team that gets scripped in runs and goes and grabs the Moes and also does ideally left right so I should have gone right there um but yeah the first team that got script in actually has to run towards the middle of the room on that one CU there's just not enough room if they tried to do left right there's not enough space for them and they need to be uh red needs to be they need to I don't know there's some logic
you have to you have to do it that way sorry um okay now we snap our webs here any webs that are still outstanding we try and break now we get our next set of dispels so uh this is just dispels on the on the tall boss this one's pretty easy we want to do a dispel under the boss where where it is so physical gets dispelled you can delay that first spell for a couple of seconds so that the second one will it's only lasts for 10 seconds on the boss so you if you
do it insta what we do is we only do one under the boss before it teleports and then we do the remaining four in the middle of the room if you do the first one insta you need to do the second one quick before those 10 seconds are up but if you delay it a little bit you get a little bit more time and you can see yeah there were still 5 seconds is spare so if you do it fast enough it's fine whoever is number two needs to be ready in the middle of the
room instantly gets dispelled number three gets under the middle gets dispelled number four this is big raid damage now every time you dispel it does raid damage and the other boss is casting swarm so this is a good spot for healer CDs um this where I'm inating as well and to spel five comes in we stun the boss and we're all hitting the boss that is stunned because it's taking extra damage uh so always be Target swapping to the boss that is taking extra damage is the rule uh okay now what's going to happen here
is blue is going to occupy the middle of the room and red is going to chase this boss red is going to chase the tall boss to where wherever it goes um so the tall boss is going to look somewhere teleport and red is going to follow blue is going to get into the middle of the room because we want to leave our Moes in the middle of the room because red is going to be soaking soon and also going to have web soon and they're going to need to all be in the middle of
the room so that's where we need the mes to be so blue form a nice loose spread in the mid Red Bait another frontal towards the the side and then they go up against the wall and then we got our next web Vortex so this one is the same as the first of this phase it's uh blue will always go left right or you know left rightish towards the Moes if we're second and red will either go right to if they get first and then loop around towards mid or they'll just go straight to Mid
and they keep their webs here so they're getting grip first so they're all going to go right with each other look at that beautiful all together all those webs being preserved and we blue are going to go left right forward right leftish rightish and forward soaking our our Moes along the way if we can now the red people are all in the middle of the room with webs to each other and they've all soaked they've soaked these modes while this has been happening five debuffs have gone out so we need to now dispel under the
boss and also be clothes lining this boss at the same time so uh the this is why blue dispels are first right this is one of the reasons why blue dispels are first is we want to do two blue dispels under boss here during this time we did those that was sketchy as hell that was extremely dangerous what what happened there um so let's let's watch that again here I'll hit you and Alex G dis spells one and two look how fast they do this one two wow okay well actually it it changed the assignments
Midway through so sometimes there's a travel time on those dispels coming out so yeah 1 two three oh he died with it okay orc died with it and it bounced on to it bounced an extra stack onto Tera s m so he has two stacks now this also increases your damage taken and is an extra large dot so he's in tremendous danger so this is very sketchy actually uh but yeah I'll hit you gets dispelled under boss Alex G is going to be up next and getting dispelled under boss uh as soon as he can
or the boss teleports to the side here and we need to do that it teleports the side and then it teleports mid it's weird um but yeah you can see there's only two seconds left to this debuff so the first spell being fast there this is the spot where if you can delay that first spell for a little bit and then get the second one so the first one can be over on the side the second one in mid really fast uh is really good there you need the very middle of the boss's hit box
to be free so red needs to not be in the middle where that boss is teleporting to and whoever is dispell number two basically needs to be right there ready to get dispelled he goes he gets dispelled just in time to refresh this stack if you lose that stack it's over um so in the meantime the Scarab boss is stunned right now and is taking extra damage so everybody should be hitting the Scarab boss I'm targeting the the other one as an example of what not to be doing okay so we've now got two stacks
on the boss teras has two stacks as well so he'll just go under and get both of them dispelled onto the boss uh and the boss is up to four Stacks now and then the oxy will get dispelled right before the end here this is where you lust as well uh because you go from a damage amp on one boss straight into a damage amp on the other boss and you just hit it with as much damage as you got you can see now I'm targeting that was a taunt I had to to Target swap
for a taunt there so I wasn't just always targeting the exact wrong one but it wasn't good I should have hit the the Scarab when it was stunned more now we get towards the berserk so if you've done this fight with the kind of delayed intermissions as much as we have here you get this berserk right now that's part of the reason we delay the we do the intermissions on the Cadence we do as well is so that we get this berserk right after all this raid damage and stuff has happened uh and the bosses
aren't going to do anything for a while except for melee super hard uh so here I basically I still have 12 seconds of incar for a little while uh we have a bunch of CDs on snap I also call uh like PS and TD to go one on each of us basically uh so that we get these externals rolling on us as we now have the bosses going berserk starting to hit very hard for a little while but tank defensives are pretty strong so you can just hold for a little while we have a bubble
taunt as well so you can survive for quite a while into this berserk the thing that's going to kill you is the next swarm uh once that comes out that does a bunch of raid damage it's going to kill everybody so uh you do the fight as long as you can here then you get deep into this berserk your tanks start running out of defensives you get to this swarm and you can see that takes for a lot but the bosses die before we do that's it that's Mythic silk and Court hope you've enjoyed this
video let me know if you have any questions I will put links to all the resources that we had all the The Raid plan the groups and stuff stuff um in the comments down below as much as I can yeah it's a hard fight it's it's deceptive it's a very hard fight the thing to remember about this fight is a lot of the stuff it'll do the same things every time so you should always position the same way every time learn that you like the venomous Reigns in P1 always be in like the exact same
spots for those uh instead of kind of trying to figure it out on the Fly each time and going to different spots pick a spot stick with it if you're going to something say something so that everybody can talk about it and understand what they need to change uh and why you're changing it and Stu same with the intermissions just always kind of try and play in the same relative spots to everybody else and uh yeah kill the scarabs kill those scarabs get them under the boss and kill them stun them uh you'll see stuff
like kidney shots going on to them that's really good that keeps them from hitting people your damage almost never matters on this fight like we we had a lot of people dead on this fight we still killed it uh we could have done maybe another 1% or something before everybody would have died in the enrage there and this was like a scuffed pull with a lot of deaths so optimize the mechanics the damage will be there if you're at this point if you've killed Nexus princess kyza even post Nerf you have the damage for this
encounter I promise you do not optimize damage optimize mechanics and you will kill the boss much quicker hope you enjoyed this video hope it helps thanks for watching see you in the next one bye