OpenClow has taken the AI world by storm and become one of the fastest growing opensource project right now. So in this video I'm going to show you a complete blueprint to get up and running with your own cloudboard and in fact not just one I'll show you how I created three AI employees that work 24 + 7 for me. Neo is an AI engineer.
Then there's pulse that is a deep researcher that gets me the latest and greatest uh in the AI and machine learning space. And finally there's pixel which is uh my very own graphic designer that given a query or given a concept it understands what I need and it creates a really great diagram for me. We'll see them in action very soon.
So if you stay with me in this video here's what you are going to learn today. We'll start with a complete architectural overview of how cloudbot works under the hood. Then we'll set up our own cloudboard and actually multiple cloud boards and control all of them right from my telegram.
As you can see, all of these uh bots are available in my telegram also and I can control them from here. And we'll also see how you can add custom skills to your bots or the AI agents that you're building from a repository which has 45,000 plus skills. And I'll also show you how you can set up Chrome jobs so that your AI employees are working 24 + 7 even when you are sleeping.
So without any further ado, let me first show you what's exactly possible with what I built. So I have built three AI employees using open claw and I want to give you a quick demo of how each one of them work. So let me open my telegram app here.
So first one is Neo and Neo is basically a software developer come AI engineer who can write uh training scripts for you can set up data pipelines can build fullstack applications and uh let me just quickly test it out and uh show you how exactly it can you know run the code execute it and send back results to you. So right now I'm in my telegram app and I'm interacting with Neo. So let's uh fire up a query.
So basically what I'm asking Neo is to create a minimum animation that uh visualizes gradient descent show a ball rolling down the lo curve to find the minimum. So basically uh we wanted to create a three blue one brown like animation using the manim library. So let's fire up this query and ideally to achieve this uh Neo should be able to you know first install my name then write a script based on the description that we have given and then run the script render a video and send it back to us on telegram.
So let's see how it goes. Okay. So it took its time but uh we have the video that we wanted.
So yeah, this is it and you can see the ball is rolling and uh it is you know uh finding the minima. So yeah, this is truly mind-blowing and in fact like you can configure it to have access to your GitHub repository, your codebase. It can look at the issues and uh based on that fix them and make PRs all of that is possible.
So I just wanted to show you like how easy it is to you know control it from from your telegram and then it is something that can work even when you are sleeping. So now let's move to pulse. Pulse is my deep researcher.
Her job is to keep me updated with the daily digest of the latest and greatest that is happening in the AI space. So I just ask it give me my daily digest of what's happening in the AML space today. So it will fetch the best news from uh Reddit like I configured it to you know scan through a few channels.
It will also go to trending uh papers and repositories. It will also go to GitHub trending and it it is also going to scan some of the you know uh top news sources. And every day I have also set up a chrome job that every day at 8:00 a.
m. you should be sending me this daily digest. So I get to know what's happening in the space uh in just 10 minutes.
All right. So we have the result and uh I have configured it to make sure that it also lists the date of the event that is happening and along with that it also gives you you know the citation or the link to the actual source from where this uh news has been fed. And this is really impressive.
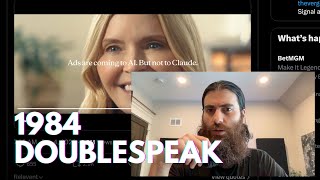
We all know about the anthropic and open AI world drama. This is a recent news and you can see like pulse is able to you know fetch uh the entire story around it. So Anthropic versus OpenAI Super Bowl ad war.
So yeah I mean uh pretty cool. I do not have to you know scan through hundreds of pages to uh stay up to date with all the news. And along with that uh it's not just uh the news that is happening.
I have also configured it to you know go to hugging face check the latest uh papers and trending repositories and stuff like that. So it gives me a copy of that as well. Maybe I need to improve it a bit like the way things are rendered.
But uh if if I render it in the actual application then the markdown shows uh properly but I mean that is a small thing. I can easily fix that and I have also configured it to scan through uh Reddit. It is going through r/loama fetching some of the top post from there.
So yeah that's how pulse work. And finally my third employee is pixel. Pixel is a graphic designer and here's what's cool about this.
I configured pixel to understand how we create designs at daily dose of data science. So it generates excalro style handdrawn diagrams that match our brand and I just asked it to you know create uh a nice diagram showing the end to end envelope cycle. So we are just waiting for it to respond and uh let's see how it goes.
All right. So we can see the diagram here. So one thing what happened right before the demo was like I consumed all my credits for nanobana.
Currently I have to uh configure it to OpenAI's image in but I mean that's uh a fairly easy thing like I I'll just need to you know change uh an API key and I can hook it back to nanobana and in that case the diagram are going to be even better. So we all know like nano banana is really cool. But anyways like you got the point like how it works and how effective it is.
Plus these three things that I built I've been working with them to build them for over last 3 to 4 days and I still need to refine them a lot of course but uh even the first interaction that I'm having with them is like really impressive and they're already solving uh some really good problems for me and saving me a lot of time as well. So if you find this exciting and want to build something similar just stay with me. I'll tell you everything step by step on how you can do the same.
Before you build anything, let's understand how OpenClow works under the hood. Everything starts on the left. These are your inputs.
The way you talk to your agent, you have Telegram, Discord, Slack, WhatsApp. You can connect it to any app that you want. You also have Chrome job which are basically schedule trigger.
Think of them as alarm clocks for your agent. So, let's say every morning at 7:30 a. m.
check my calendar, send me a summary. And uh I have similarly configured pulse which is one of my agents that is working for me. Uh it sends me the daily digest of what's happening in the AI world every day at uh 8:30 a.
m. All of these inputs flow into the gateway core which is uh what we have here and uh it's uh a demon process that is running 24 + 7 on your server and it is basically the heart of our system. So inside this we have a message router which figures out where the incoming message need to go.
Then we have the session manager and this is the key. So a session is a persistent conversation with its own history, its own context and its own memory. So each session is completely independent and when you run multiple agents you are really just you know running multiple sessions.
So this session manager takes care of it. And finally we have uh the chromeuler managing all the time tasks as we just discussed and then we have a web soocket API giving you programmatic control over everything that is happening. The gateway then passes the message to PI agent which is the reasoning engine of our system and this is where the actual thinking happens.
It takes the message the conversation history and decides what exactly it needs to do. So to think it calls the LLM provider and uh you can choose any LLM provider that you want. Open is agnostic to model but that said I have configured it with miniax and in fact miniax is the model that is also officially endorsed uh by the founder of the openlow application and the reason being I've seen that uh it's a really capable agentic model and you get to do everything at oneten the cost of models like load opus and all now here's what separates an agent from a chatboard it has access to your entire file system it has access to your shell so that it can run commands it can execute code and do whatever you want it wants.
Along with that, your agent can have access to a browser. It can use the browser on your behalf and call any API that you want and all of that needs somewhere to live. So that's where the workspace comes in and uh it is a directory on the disk uh which is basically uh containing all the files like agent.
md that kind of gives the agent instruction or what it needs to do. It has the heartbeat, the tools uh that it needs to call. It also has uh the identity plus sold is another interesting file that we are going to see like what exactly that means.
So basically these are sophisticated prompts telling your agent what it is how it's supposed to behave what tools it can call and along with that uh uh I need to mention here like there's a directory of uh skills skills that that you want to add to it. So I already showed you in the beginning that uh we are going to use this uh repository of skills uh which have 42,000 skills. We can pick from there based on our use case and uh add it to our agent.
So all of that is going to reside inside agent's own workspace. So this is its playground. It can do whatever it want inside this in order to solve a task that you have assigned it to do.
So that's the full flow. You send a message through telegram. The gateway receives this message and routes it to the right session or the right agent uh that is going to handle it.
Then the PI agent thinks about like what exact action it needs to take the tool it needs to call or what exactly it needs to you know read from the workspace. So basically on the basis of that it is going to hit an LLM API and send the response back to the user. So this is how the entire process works.
So now that you have uh a fair understanding of uh what a cloud bot can do as I already showed you some demos and also we have a really nice overview of the architecture as well like what exactly are the component and how they come together to make your bots so amazing. So I think it's the right time to sit down and actually move into the hands-on part of this demo wherein we are going to you know set up our first cloud bot uh step by step. So let's do that.
So I'll just come to their official website and uh there's a single command that you can use to you know set it up whether you are on Mac, Linux or Windows. It's fairly easy to do that. So let's copy this.
I'll now open my terminal. I first need to you know uninstall everything that I have already done. So let's uninstall everything that we already have.
All right. So now we have uninstalled uh openlow and it's time to you know start everything from scratch. So this is the first you just need to go to your terminal run this command.
The first message that you get is I understand this is powerful and inherently risky. So let's say yes. Let's go to the onboarding mode and uh choose minimax as the model provider.
And you can see it says that M2. 1 is one of the recommended models to uh go with the cloud bot or open cloud. So I'll select minimax o.
I'll authorize this. Authorization is successful. Let's come back to the Yeah.
So we have been authorized. And uh let's keep it as minimax m2. 1.
And now it's time to configure our telegram board. So you can also connect it to WhatsApp or any other uh board that we have seen. But since we were going uh with telegram in this demo.
So again let's uh set up telegram only. It gives you like all the instruction. You go to BF father, create a new board uh grab a token from there.
So let's uh do that. Let's call it uh Tony Stark. And now we need to choose uh a username for this board.
So and it should end with the underscore board. That is what boardfather is saying. So let's do that.
So you have to choose a random name because like if you do something uh absolutely common then it is going to have a clash with the the name that someone already has. So let's do that. It says that it's a invalid name.
Just go with this uh suggestion that it is giving right and uh add a few extra characters to it. All right. So we have our new board created and uh this is the board token that uh we needed.
So if you click on this, it's already copied to clipboard. And uh this is our new B uh Tony Stark that we just created. And uh let's get back to the terminal.
You just uh paste your B token here. So let's uh configure some skills like uh if you want to add uh some skills. So in here like you can select whatever you want.
Along with that, I'll also show you like how you can add custom skills that you need from the repository that we just saw. But uh for now like uh these are the skills that are available here. If you see like you already want to configure it with one of them, you can do that.
But for now, I'll just skip it because I probably do not need uh any of it uh for what I'm trying to do. So we'll basically try to you know recreate uh pulse which is our AI news aggregator. And in order to do that, we'll be using uh firecrol's uh CLI skill and add it to our agent.
And this will give it uh you know access to high quality web data. It can search through web. it can scrape all the website uh also has capabilities to understand let's let's say the images and everything that is there on the uh website that we are scraping that is that is why the responses that we are getting from pulse were really great so now I do not need the Google places API right so here you can uh configure nanobana pro if you have the API like in that case like uh it will be using nanobana pro to generate all the designs for you in case if you want that but let's not do that and uh I don't need notion also So yes, let's add open AI for image and in case if we need to do that.
Okay, now my API key is visible. Probably I'll have to you know not probably I'll have to revoke it after this demo. And uh yeah, so there's one more interesting thing that I forgot to tell you.
Uh you can also either install whisper uh on the machine where you have uh your cloudboard running or you can use uh open whisper. So what happens is so once you do that uh you can directly send voice messages to your telegram board. I have already tried it maybe we can you know uh do this uh with this board that we are creating.
So no I do not need 11 lab and uh it says that the gateway service uh already installed. So let's restart it. All right.
So I think uh our agent is up and running. So let's say uh let's try to you know directly uh message it from telegram. So this is the board that we created.
So let's start. Uh all right. So it says that uh you need to configure the access for this user.
So let's do that. And uh I'm just going to you know copy this command from here. Go to a new terminal tab.
And I also need to paste this code that is generated. All right. So now we are an approved user.
We can directly interact with this. So, so let's say hello. All right.
So, we can see like uh it is able to respond and uh we have uh connected it to the board that we just created. So, the next thing that uh I want to do here is or plus I what I wanted to show you here is so this is uh the project that we have. So once you install openlow it creates a dot openlow directory uh in your home directory and inside which you can see like uh the entire project structure or how things are you know uh configured and uh what all files are there in this uh particular project.
So now you see like this is the workspace that we are talking about. If you remember the workspace that we had here it's coming from uh this workspace. So this workspace is here along with that uh you know our agents are configured here.
So you can see the main agent and these are its oath profile. So if I open it up it will just show you like uh you know uh which channels it it's connected to and the model. js file might contain like you know all the details about uh what model it has connected to and the API keys and stuff like that.
So probably I'll just avoid opening that but you just uh get uh the idea like what all these files are right. So currently since we have only created one agent so it shows that agent main. So I'll also show you like let's say I mean this is just one employee or one agent that you have and if you want to create more how exactly they're going to get structured but you are going to you know see all of them inside in here uh in the agents directory.
So coming to the next part uh then come sessions. So as uh I explained in the beginning uh every agent or every interaction that you have is uh actually an independent session right. So all the session or all the chat history and uh everything are independently managed.
So the sessions use a JSON NL file to record all your inter interactions uh that you had with the board. So sessions are basically uh an independent interaction that is happening with a particular agent. And uh this is very important because uh the agent that you create can also have uh uh multiple sub aents that it need to spawn to achieve a particular task.
Right? So uh there's a nice way how all of the memory and everything is managed and it also makes sure that you know let's say if uh and a sub agent is running it is not polluting your main session because this is something that is going to persist over time and it helps the agent understand like uh uh or let's say learn from experience. So it is kind of acting as a memory for your agent.
Then next and the most important thing as we also show uh in the architecture is uh the workspace. We'll come to tool access and adding skills as well. So workspace is where we have all this interesting file.
So we have uh an agents. mmd file. So this is basically you know telling the agent what it is what kind of permission it has uh what is its role and how it can you know kind of achieve uh all the task that it is supposed to do right so this is kind of a user manual uh for the agent uh to achieve its objective and along with that there are lot of other files as well.
So to think about it, you can also just think of it as you know uh a kind of a system prompt that the agent has but along with that this system prompt is nicely stored and organized into multiple files. So first let's uh talk about soul right? So if we think about this example of let's say if it is Tony Stark I mean it is going to have a different soul or a personality and if it is Pepper ports or someone else right it is going to have a different personality.
Same goes with let's say if you have an engineer or a designer both are going to have kind of a different soul but yes of course they have to be helpful assistant as well. Similarly along with soul you have the identity. Identity is something you know uh soul is something which is internal like how you behave and all.
Now identity is like who you are what other people should call you. So this is going to be the name of uh your agent and stuff like that and uh whether it's an AI, robot, familiar, ghost, stuff like that, right? What's your vibe, how exactly, you know, you communicate uh what's your tone and stuff like that and all of these can be configured inside here.
Then tools uh give you you know uh details about like what what tools do you have access to? Let's say if you have a skill like how exactly you can use this skill and all. So that is going to be here.
So now uh let's uh try to add uh a new skill. As I mentioned, we have access to a lot of skills and we are going to add firecroll as uh one of the skills to this agent. So again I'll just go to uh skills.
mmd. I'll click on uh search for firecrol and in here we have firecrol cli. So I just uh copy it from here since this is a skill that I want to add specifically for this particular agent.
Right? So first I'm going to move into workspace otherwise like if I just add it inside do openlow this skill is going to be uh you know uh at the entire project level and multiple agent can then use it. But I want uh this particular agent that we have built to have access to this skill exclusively.
So I'll go to workspace and inside here I'm going to run this command. So yes, you can select like uh this CLI skill works with any agent that you're working with whether it's cloud code uh client and uh currently we are interested in uh open code. So let's do that.
So I want to install it in the current directory instead of globally just go with uh what's the recommended way and we'll proceed with installation. So now you can see we have uh a skill ready and it's already added in here. So this is the fire crawl skill.
It uh is uh same as the skills that we have with cloud code and all right. So it has a skills. mmd file that basically tells like what this skill can achieve and all.
And along with that like in here it has some rules uh some rules it needs to follow. And along with that if you want to add some custom scripts you can easily add it here so that uh you know based on the skill. md the agent would understand like what this skill is supposed to do and if there are any utility or helper scripts that it need to run to achieve the task that can be added here.
So we have the fire control skill ready. So now I I I've just come to telegram and uh I'm instructing it like uh who you are what you're supposed to do and all. ID like it should have asked me that question but anyways uh I mean it's fairly easy to you know configure and directly tell it okay who you are what you're supposed to do and uh I can also mention that uh you have a really good skill called CLI so use that so now it is trying to further clarify like uh what all uh you need exactly so let's uh take all of them I need a morning summary.
I'll also tell it uh you know 10 bullet points every day and uh and we'll also tell it like what all Reddit channels I'm interested in. I mean you can always add more and all. I just wanted to quickly show you how easy it is to configure it.
Now based on this I'll show you how exactly it uh you know updates its agent MD uh its identity and uh the tools that it has access to and all. So we'll see that. All right.
So it uh got us some latest news. I mean we still need to give the instruction that I also need citation all but that can be you know easily done. It's it's fairly easy to do that and uh yeah so it has got us some news and finally it is asking want me to set this up as a daily chrome job at specific time.
Yes. send this to me every day at 8 a. m.
in the morning. So now once I tell it that I want this to be happening every day at uh 8:00 a. m.
it is going to send me this daily digest without fail right on my telegram and I just need to go wake up and you know get to know about everything that's happening in the world. All right. So you can see like uh the chronob is set and every day uh it is uh going to trigger the chronob is also something that we discussed in here.
So this is also one of the way you can you know uh activate uh your agent uh to work on a particular task that you have and uh you can do it programmatically as well right I'll show you like uh if you want to programmatically set up a chrome job so it's fairly easy like uh you can just run this command open chrome add like if you want to you know uh be more specific about or you want to have more control over it so just give the name of the chrome job the time so in this case like it's 7:00 a. m. and the time zone the session should be isolated.
If you remember I told you like there's a main session and then uh this chrome job is going to run inside a uh a separate uh session so that it does not pollute your main chat history or the main interaction that you have with the agent right so it is going to run inside a separate session and uh yeah so this is the message that you can tell it like uh in your case maybe we want it to you know give us the daily digest of what's happening in the AI world select the model channel where you want to send it uh in our case it's going will be telegram but you can also do it with WhatsApp. Now that you understood like how to create a single agent, it's time to know how to go from 1 to 10 and up to n agents. So that is also fairly easy.
I mean you just need to you know uh go to a new tab and uh open makes it uh super easy for you. Just type in uh you give the name of this agent. So let's call it uh you know Neo.
So we want it to be our programmer. So now it's asking like uh should I create a separate workspace for it? Of course like uh this aging need to have a separate workspace.
Now uh the second thing is whether we want to uh it to have the same profile as main. No, we do not want it to have the same profile. So let's configure uh the agent for this.
So again we are going to go with minimax with ooth. We are going to select global since we are international users. Next thing that it needs to do is to you know configure channels.
So let's uh configure the channels. Now uh again we want it to be telegram board. So it says that telegram is already configured but now since this is a separate agent it has its separate memory and session.
So we want to configure it with a different channel. So let's say we'll modify the settings. So default is already there.
We'll add uh a new channel call it as uh Neo Telegram channel. So we want to use a different token now. So you'll have to select no and add uh the token for NEO.
Since I've already deleted uh my previous configuration, so I can again hook my uh Neo that we just demoed uh in here as well. So let me grab the token and uh we already finished. We do not need any addition channel.
So let's call it finish. And yes, pairing recommended. And it says that route selected channel to this agent now.
So I said yes. So let's go to Neo now. And uh Neo should be able to hook it up to this new thing that we created.
So let's say hi. It's typing as you can see here. So now Neo says that uh I just came online fresh no start.
So who I am, who are you? So basically this is where it is asking who uh what it is supposed to do and it also tries to know about you and accordingly like you know it is going to update all its file. So I mean we can give it again all the instruction and everything that uh it it is supposed to do and all.
So let me just show you my older configuration for the agent that I had. So let's uh go to cursor. I'm in cloud.
cp. So let's check uh what we have for pixel. Right.
So as I mentioned that pixel fully understands my needs who am I and what it is supposed to do. So it there's a user file also right we discussed about the score soul skill and along with that we can add a bunch of other files as well and then there's a skill uh in here as well right so this skill is basically uh the skill to create uh images you can using openAI's image gen and uh there's a file called user user MD and inside this it understand like who is the user so the user is a pachar and uh what projects do I usually work on what are my requirements uh and stuff like that. So it fully understands uh what things I need to focus on and what exactly I you know need out of it.
So the agent has understanding about uh you know who is trying to control it the human of the agent which is me in this case and [snorts] uh then the agent file uh uh has all the rest of the details like uh this is kind of a function or user manual for the agent like how it is supposed to function and uh complete its tasks. So that's all about it and uh lastly I also wanted to you know touch upon uh something really interesting. So there's uh along with chronob we also have heartbeat.
So heartbeat is basically a periodic check-in. Every 30 minutes by default your agent uh wakes up glances at your inbox uh calendar or uh pending task and whatever you want it to do right so you can configure the heartbeat like what should be its frequency whether it should be 30 minutes whether it should be 15 minutes you can easily configure that. Right?
So in that case what happens is uh your agents are not running all the time. Let's say if you just configure your agent to check your email every time a new email comes and in uh now maybe it happens that every hour you you are getting 100 emails. So it is not wise to you know wake it up every time and make an LLM call and it is going to be you know very costly.
So this is where heartbeat comes in. So if you want uh your agent to do some periodic scans let's say at uh every 15 minutes 30 minutes or 1 hour you can do that and then we have chron jobs and chron jobs are something which are more specific I want a particular task to happen that exactly at uh 8 a. m.
So you configure your uh uh or let's say add a chron job that it is going to you know fire up a query and uh send it to your PI agent through the gateway every day at 8:00 a. m. with the whatever task that the agent is supposed to do.
Right? So that's a subtle difference you need to understand here. But both of these things uh help you to you know uh autonomously control your agent and also making sure that if you want periodic scans you can decide the frequency so that uh you know your LLM is uh not being called at every event that is happening and you also end up saving a lot of tokens as well.
So with that we have come to the end of this tutorial and uh I'm also going to create a bunch of uh other good tutorials in this series. So one uh that I like in particular is uh how cloudbot is or let's say open claw is managing its memory. Currently it's relying on BM25 for keyword search and uh vector search.
But I mean what if we can add uh something like a knowledge graph memory because uh as you interact with it uh the sessions are going to get longer and longer correct. So in that case like it would be much better to have uh a humanlike memory that is available to it and it can actually you know capture all the nodes. and important entities and the relationship between them right.
So giving it a true humanlike feel uh in the longer run. So we'll work on that and maybe you know giving a unified memory access to all the agents so that they can also share task and delegate task to each other. So that is going to be very interesting something that I'm going to cover uh very soon.
But for this video I think uh that is all I wanted to share with you today and I hope you found it helpful. If you did, make sure that you uh like this post and uh also let me know in the comments uh anything else that you would want me to cover and any particular case use case that you are trying to solve with the plotbot. And if you're watching this on YouTube, make sure that you subscribe to my channel to support my work and uh I'll keep pushing uh more good content your way.