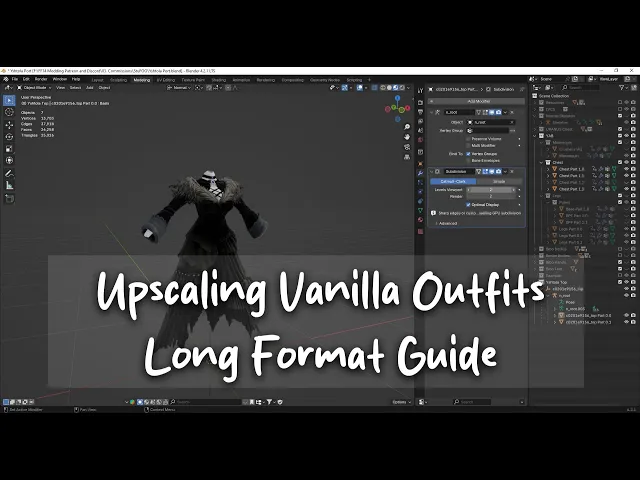
hey everybody so this is going to be a slow guide with the intention of showing you how you would go about upscaling a vanilla piece but really any modded piece or any piece of gear to be upscaled to any body type the information I'm going to give you will translate pretty universally to any body um although there will be some subtle differences between devkits the premise is the same for this I'm using text tools which you're going to need and blender 4. 2 um you can still do a lot of this in pretty much any version of blender but just be aware some of the options and settings and even some location of things have changed over time I would recommend using 4. 2 as it's a very stable build I haven't tried 4.
3 but hopefully it works as well now what we're going to be doing this on is the cion sorceress's robe we're going to upscale this to yab large so first things first if you've used text tools before or haven't used text tools before by default it's going to put you in what's called safe mode this prevents you from editing the files in any way you can still access them and you can export them and all that but you can't change a damn thing so I wouldn't change it to unsafe instead click transaction status and click prepare transaction this is going to put you into a staging mode where now you can edit files to your heart's content and when you're done everything will be reverted back to normal you don't have to worry about affecting your game files you can even do this while logged into Final Fantasy so feel free to do so and test your stuff and all that this doesn't affect the game at all close that when you have it in preparing mode you'll see it still is in preparing mode and first things first make sure you have the right model selected there's this drop menu here some models have many different options in this case there's midlander female which is the base model for all female races makot female which has its own unique model for its own reasons usually because of tail flaps and such and Lafell obviously because lell are the size of a potato sa we want the midlander female one because that is what the yab body is scaled to and pretty much every body is scaled to so select that click save as this menu here fbx I've already exported it so we'll just export it again to make sure it's the right one you can save that fbx file anywhere you want doesn't matter as long as you know where it is now head over to blender and open up your dev kit in my case I have a bit of a custom dev kit but it has the Y chest it has the app legs which I've made safe for work for this video and it has all the standard options from the abde kit which would be if you go into the object data properties you see all the different shape keys and all the ways you can Tinker with them you can turn buff on and off you can turn Rue on and off and a whole host of other things I'll go into that in more detail in a little bit first things first click here so you have so you have nothing selected but you're in this window and click this button up here that'll create new collection double click it and retitle it we're going to call the Isola top and with it highlighted blue go to file import fbx and go find that model in my case it is right here when you bring it in you'll see the model the skeleton it came with as well as a whole bunch of weird stuff for starters for the skeleton the simplest way to hide that is just go up into the overlays this may be on the bottom because sometimes this entire menu is flipped towards the bottom so just keep that in mind I prefer mine on the top expand this menu and just turn off bones that won't delete them that'll just hide them from view so you can't select them or anything but if we were to expand this group here you see this end route the bones are still here they're even technically still visible just not really we're going to hide the chest for a moment and hide the legs so we just look at what we're dealing with your model is going to come with these things called groups there's going to be multiples of them typically and sometimes there's even stuff embedded you can go ahead and shift select all these groups and you can right click and delete hierarchy they are not important text tools will recreate these once you repport your model so you don't have to worry about that expand the root this is the skeleton and this is everything that's part and attached to the skeleton these parts all have numbers 1. 0 1. 1 1.
2 and zero and Etc the first digit in each of these parts lets you know that this has a unique texture or at the very least is separate from everything else with some sort of intention behind it in uh vanilla outfits it pretty much just means if you go to material properties it has a different material so you see this one is material b001 a whereas this one has this item number this is equipment 9156 that's the item topor a which is the clothing textures you need to make sure by the time we're done here that your body parts and whatever outfit you're making have different part numbers they have to be unique so that you can assign the right materials to them if they were the same what I either this is going to have to look like bio this outfit or the chest is going to have to look like clothes so you need to make sure they're different and unique in our case we don't actually need these three pieces so you can select them right click delete hierarchy that leaves us with just the close now you'll see the clothes have these weird transparent cutouts all over to fix that select the top again a material properties scroll down to viewport display there'll be a render method in 4. 2 change it from Blended to died that'll just make it so that these edges look a little smoother on top of each other now lastly let's just talk about quickly if you've never used blender before middle Mouse click will let you reposition the camera as such you can move around and take a look holding shift and middle Mouse click lets you move move the camera and pan it around obviously you can zoom in and out and lastly if there's any part of the model you want to zoom in on let's say the sleeve you can select it and then press the decimal or period on your numpad it zooms in and focuses on that object if I choose this outbow if I choose the top it zooms out and this also works in edit mode if we go to edit mode and I just select a single line at press the period Zooms in right up on it you can use that to reposition your camera and just get a good look at what you're trying to deal with so just keep that in mind now for upscaling there's a few steps that we have to take in mind number one we have to take a look at our model and separate what are called double-sided edges there's a a number of ways to do that but the best way typically is to just do it painstaking little by little and remove the back sides out how do you tell which is a back side and which is a front side you come up to this group here the overlays and you turn on face orientation everything that is blue that is one side everything that is red is the other and to give you a better example of what this means if I have a Plane by looking at it like such you can see I can see both sides of the plane no issue if I turn on the face orientation you'll see the top of the plane is Blue which means it's facing the camera and the bottom side is red which means it's not facing the camera the reason this is important is because if I go into the materials of it and I turn on backface calling based on the camera position the back will disappear it's completely gone that is because this is a one-sided texture to make it double-sided you either have to turn off culling which can be done in the material properties in text tools or duplicate the mesh go into edit mode mesh normals flip doing that with the camera back face on now we can see the bottom side and if I hide it you can see see it disappears this is how these models work they have the exact same duplicate copy of whatever part of the model but just reversed so that it projects on both sides you can see it here all over these feathers if I wish to select the feather and hide it with h it stays there and the reason it stays there is because I'm looking at the backs side and you can see that by turning on camera it disappears there are two sides to the feather the same thing how there's two sides to the skirt there's a back side and a front side this is how all models work and the only way to really make sure you don't up your model is to carefully go through and remove the sides I recommend turning on base orientation you would hover your mouse over a plane press three to make sure you're in face edit mode and press L to select do that for the faces press h to hide them so all you see is red do face H face H again you're pressing L and you're pressing H you going into a thing you're pressing L you're pressing H now some they they will have a blue side on one side so you just have to keep that in mind but the goal here is to go through and remove 1 half of the model intelligently so that what you're left with are the faces that are facing the same way you see here my goal is just to make everything that's facing one way make sure it faces that way and if you ever like I did here hide something in the entire thing disappears just press contrl Z to undo that means that you've already got the the half that you need so let's get some of the halves from up top and you're it's fine if some of the model disappears because it means that it extends further than just that one face we just have to again do this little by little carefully and I'll tell you why this is important we're going to be merging these things together and when we merge them together we want to make absolutely sure that what we merge together doesn't merge with the wrong side that's just going to cause us endless grief down the line but once you're once we're satisfied and we think we've got them all you can break a p selection now we have two sides we have the original and we have the other half now that we've separated them I'm comfortable selecting our main part going back into edit mode we can press alt H to unhide everything and now we can press M by distance everything that just merged together is facing the same way and we can see that if we hide this part and we turn back on face orientation this still looks clean and concise doesn't matter that I accidentally took the wrong side here versus this side the point of this is that when we merged it we didn't merge it with the other half we made it so that it's all one thing now this is going to be mostly a thing for vanilla model so just keep that in mind but we're now going to go into this part we're going to grab it do the same thing go to edit mode select everything merge by distance everything is still facing the same way but now we know we have two parts we're going to do the same thing for this group so again face orientation select out the parts that are double Ed it looks like it's just the cuff so that makes this easy in this case we just press a merge by distance unselect everything alt H done hide and merge by distance perfect now we select the part here this may not have any double-sided faces it doesn't look like it does so I think we're good so we don't have to do anything here we can just press a make sure nothing's hidden merge by distance now that's going to make us have the model set up the way we want and now that we've done that and we know that we've merged things together that's going to assist us with waiting down the line you might say your model looks still still a little funky there's some black edges here but again if we just go in to the material settings of the model and turn on the back face coling by camera that'll all get fixed the reason being is that what's happening with the normal is it's projecting light in two ways the back and the front with the culling on we're only ever looking at the light based on the side we're looking at so we know that we're covered on that so now that we have all that figured out the next step is to go into one part at a time we'll start with part zero go to edit mode and while in line mode holding alt and clicking the edges you can hold shift and ALT to select multiple select them like this press right click Mark Sharp you're going to want to do this because what's going to happen once we get to the next stage of merging things together we're going to have to make sure some of these edges stay consistent so any floating Edge like that like that mark them as sharp which sharp edges do is they tell the normal to consider this to be the end of where to calculate your light as a result it comes up crisp it doesn't have any weird lighting or shading effects it's used by the developers all the time when they're making a model we don't get to see that data because we're just working with the aftermath having to verse engineer what they're doing so we'll just go ahead and do it ourselves doesn't take too long that was a seam Mark Sharp and we'll do it up here Mark Sharp and here Mark sh grab that edge now how perfect you are we'll largely just or how perfect you need to be I should say will largely depend on what you're working on but this is all just the prep work for what's going to be coming next now with all that done we'll do the same thing on the wrist the only part that needs to be marked sharp is this and with this and for this bit we got to Mark Sharp this inner Edge you can press control and click around to get to it or you can just press shift to select them one at a time you see the moment I do it it cleans up this Edge and makes it look much better we'll do that on both sides and this is the most common issue you'll run into when working on a model is that has this weird dark edges all over the place now the next step now that we've made sure the base model is merged together correctly so that the pieces individually are working we have to put this all together into one model so we can merge it together and have it ready for waiting the waiting the merging we're going to be doing here though is very selective we're going to want to merge it just at the joints where the elbow meets the upper potty where the wrist Ms uh meets the uh the uh elbow and the reason for that is when we do waiting we want it to be consistent across we don't want it to have any chance of uh of gaps or of what what will be called seams so first select each part press right click and join it needs to be all one model and now going into edit mode we're going to want to turn on thank you gForce turn on x-ray switch it to viewport shading or solid mode and make sure you're in vertices mode here you can just press one to get into that we're going to want to zoom in on where we want to merge in this case it's this ring right here this is where the elbow meets and if you're not sure what you can do is you can press three hover over any part of the and press L and you can see very clearly where those seam lines are honestly it probably works if you press one as well yeah it does so just press L over it and you can see where that is now what we're going to want to do is holding shift make with nothing selected just drag a box and select the edge press M and then choose by distance you see removed eight vertices we just merged that right there do the same thing on the other arm it's right here so select select with shift held down m i distance now if I do that exact same thing pressing L it'll select the entire upper arm okay now we can do the same thing down here we want to select these all around the ring just make sure you're only selecting the stuff that actually matters I know this is a little weird to look at sometimes just toggle the x-ray mode as much as you need to see what you're doing but while it's this low poly thankfully it's not too bad press M by the distance and we'll go to the other side we'll do it here too like so M by distance now in some cases you'll see this it looks a little funky the lighting there's this dark Edge to fix that the same Edge that we just selected the reason it's Happening by the way it's because there's two sides converging on the same point to fix that you just have to select these faces and you can just hold control and select them down like so all the way around you can go to mesh normals reset vectors normals reset vectors and that should fix up quite a bit of that anywhere you see it so we'll do it on this cuff here and this is most commonly going to happen at places just nearby where you merged but it cleans it up pretty nice check the other side the other side doesn't look like it needs the same treatment so we're looking pretty pretty good here so now our model is merged very intently everything is where we want it to be now we can focus on actually doing the upscale let's go back into turning on our body so our chest you can see they stick out quite quite a bit with these bodies in this case part 1. 1 for me could be 0.
1 or whichever for yourself if you go to the object data you're going to have a number of options in the shape Keys shape keys are the state of a model in a bunch of different ways for example you can turn the nipples on and off you can make them saggier you can increase the pushup and decrease it you can mess with your model however you want in my case I want the squeeze to be at one I want the push-up to be at 05 I don't want them to Sag at all and I want the nibbles to be off because we're not going to see them there's no reason for to have to worry about them there's other options obviously you can set them to be medium size you can set them to be small and you can also choose things such as buff and root now going to go back to viewport shading or the material shading rather to upscale we're going to select our model go back into edit mode you're going to make sure this is turned on proportional editing and also make sure connected only is off what connected only does and what proportional editing does if I was to select a face with proportional editing off and move it around it moves just this space everything connected to it will follow it because it's all connected to those points but it just moves that face if I have proportional editing on with connected only the off and I move it it moves not just the face but everything nearby within this ring you see this ring I'm increasing you increase the size of it using your scroll wheel but the reason it's important is it makes it so you can pull parts of the model out and it'll affect all the nearby things and it'll be consistent and the reason we merg things earlier in such way that we did is to make it so that the things that it's moving are also connected and will work with the waiting which we'll get to it in a little bit I would also recommend having this mode the orientation changed from Global to normal and we talked about what normals are earlier but they also if you imagine them having a uh an imaginary line protruding and shooting outwards this normal I've selected would shoot like this so when I move it I can press g z on my keyboard you see this line appears now when I move it it's going to move this only on that axis relative to the face so if I want to move things for example this line over here I can press G and z and I know it's moving away from the body because that's the way the face is it makes it a lot easier for you to move things without having to worry about whether or not you're moving it the right direction and you don't need to twist your camera all over in order to get the right look erase my lines here now before we actually start there's one more step select everything and this is for vanilla I'll mention this is just for vanilla outfits you don't typically have to do this for modded outfits right click subdivide the model needs to be at least High poly enough to to fit and not be weird with the yab body and if it doesn't work with the yab body the right way it's going to cause a whole host of issues if it's too low poly you're going to get all sorts of clipping so we just make it one subdivision higher just so that there's enough polygons for this to actually work now let's get into actually making our model we have the mode set to normal we have proportional editing turned on I recommend being in face mode select a couple faces you can just press shift to select a couple press g z and you can just start pulling them out select the chest in a couple spots just press shift you don't even have to see what you're clicking it's gz and pull it out you can click up here to go to the side view turn on x-ray mode and you can now start selecting faces like such and just move G to move them around press G to move them around and just start shaping it to fit over top the body you'll notice I'm doing two things anytime I move one side I'm trying to make sure I move the other side about as equally and what that lets me do is it keep it proportional at least as much as possible obviously people don't typically have uneven sides but you're just going have to be careful so just keep that in mind now let's press G and z and pull this side out I want to move this side out G and Z we want to raise this side up raise this side up and try and get things to look nicely on top of this body let's get the side here pulled out go to the other side do the same thing gz pull it out go to the back select these two sides pull it out go up here pull that out a little bit and probably here as well just pull it out it's looking okay and then for the arm gz and you have to be careful with arms because if your circle's too big it moves the opposite side of the arm so just shrink that down and just pull the arm out ever so slightly where it needs to in truth we're probably going to hide the underarm because we don't need it but it's good that this is at least proportionate to the body and just look around you see there's a bit of clipping under here roll that out just look in the other side probably the same not really looks pretty good and that gets us our model scaled to the Yap top but again remember with yab stuff there's also a butt always turn the legs on when you're working on dresses and make sure the butt's good and with dresses what I'd recommend I could just go in and do what I did just grab these two sides and pull it out but what that does is it ruins the shape of the back it makes it so it's no longer a straight line so what I recommend doing is changing your tool from select box to Circle go to a side profile by clicking the X and just paint down like so so you get like the entire line make sure you're in x-ray mode and just get that and now when I press G and Z the same effect will happen I can increase it but it makes it so the back straight Arc of the dress is consistent and I'll do it for the sides as well just so that there's enough room for the hips so we just do gz like so and like so and voila we have booty room we have an outfit with all of its scaling we've got the top now properly scaled you got to make a little adjustment to the arm here so I'll just do that real quick like so the next step is waiting now with skirts we need to be very careful about waiting if I turn the skeletons back on you'll see here this has all the bones that's because of some settings I have sometimes your skeletons won't have certain Bones the big thing here is this is the leg bone and you'll see that when I move it nothing moves with the body at all the skirt stays completely still that's because the skirt has zero leg weighting it doesn't need it because it instead is using skirt weighting skirt weighting Works different skirt weighting is very deliberate it's programmed to move and flow in a very specific way as you run so it doesn't need leg weights with mods if you ever see your leg clipping through a skirt while you run it means typically there's the waiting on the skirts either poor or the shape of the skirt doesn't fit the way the game is intending for it to fit therefore you can see these skirt bones this is the top of the front here's the next ones The Arc of the skirt here is very narrow if you have a skirt that goes like this or even um maybe more narrow like a slip you're going to have issues with skirt BNS because the the game doesn't know how to cter for that so it's just something to keep in mind the big reason I'm bring this up is because when we transfer weights to this body we don't want the leg bones to transfer we just want the bones that actually matter which would be the breast Bones the arm bones the chest bones and in some cases the skirt bones if then if necessary but how do we do that what you're going to need is what's called a mannequin your mannequin is going to be a m complete mashup of all the parts of the body that you use in this case my mannequin is all the chest bits the leg bits the hands and the feet and it has all of their settings I set their settings to match what I intend for my chest and legs Etc whatever I'm using and this is my base for actually transferring weights and to transfer weights you do the following select your mannequin shift select your outfit go to Weight mode and you're going to go to weights transfer weights Now by default your settings are going to say nearest vertex you're going to say active layer an active layer like such they'll look exactly like this if you don't see this menu menu it's probably just collapsed just open it the settings that we want are as follows we want to change nearest fex to nearest face interpolated active layer to BU name and if you want to filter out only the bones that actually matter for your upscale turn off create data it's only going to transfer the bones that already exist in the model now obviously if you want to add both bones and be specific you can click the plus and change the name of this to the name of a bone so let's say I did want the leg bone I can type it in and when I do my transfer it'll transfer the leg bone that's useful if you ever want to do physics mods you can just copy the names of the bone and there you go you can also delete bones if you accidentally transfer things just by clicking the minus so you're never really hoop here now when I do this and I do my weight transfer if I was to go to the breast bones which are called mun you'll see it looks good but it's a little rough around the edges what you can do is you can go to Weight smooth change it to all groups and two iterations it'll just tidy up those weights a little bit doesn't do a huge amount but has a bit of impact what this lets us do now let's go back to object mode we can hide our mannequin we can hide our legs they're not important and for our chest we just have to go to its modifiers and for the Armature reassign with the eye dropper to our skeleton you can either click the skeleton here type the name directly or just choose it from here whatever's easier for you and now we can do what I call the is basically just the the rig test click on your skeleton go to object mode hose you can turn X-ray on and off whatever it's easier for you but we need it on for a second we're going to start with the chest so click the two breast bones that's these two right here in the middle press s and then just drag it up doesn't have to be too big but the purpose of this is just to take a look at the model and see is the model behaving strangely when I increase the chest size is it stretching is it warping is it doing anything I don't intend you can see here it actually separated from the two parts and the reason for that is because they're not merged so how do you fix that we go back into object mode we're going to select our model here we're going to click these two icons which will lock the model into this mode when I go into edit mode with these two off you see it reverts back to normal so leaving those two on and I'm in edit mode can see the model where it broke what we're going to do is we're going to select these two bones so I'm going to select this one and this one and I'm going to go to m by distance this one and this one you know all the way up you can also just if you'd like hold alt and select the edge it'll select all those vertices you can do the same thing here merge by distance and it'll seal that right up go over to this side do the same thing select that that is Edge that edge distance and it seals it up real nice and if you start seeing like this weird glossy effect that you don't really expect the reason is because it's missing a sharp edge so you can just press two select these edges if you already had them selected it's even easier and just go to Mark Sharp and it'll tidy that that up too and again you can just go select some of these faces mesh normals reset vectors what I'm trying to get across is that upscaling a vanilla item takes a bit more care than a modded item they're made very deliberately everything about them is designed for efficiency they don't necessarily work too well with the modded bodies so take care with it go slow and do it bit by bit but if you follow these steps to merge the vertices together to make sharp edges where you need them to reset your vertexes or ver uh your reset your vectors on spots where they're dirty when everything's said and done you end up with a model that looks pretty dang good now to make her a little less busty just select your skeleton go back into pose mode you just press a to select all the bones pose clear transform all it'll reset her right up after you've tested your posing out you can again you can click any bones just rotate them around now we can focus on how to get this model back into Texs so the one thing we don't need is we don't need this bone or this mesh because it's hidden by the arm you're never going to see it so we'll hide that we have our neck chest and wrists that's all we need press a to select everything that's visible go to file export fbx I made a test earlier so title it wherever you want and just press export with the following settings limited to selected objects geometry I like having triangulate faces on it catches any mistakes everything needs to be triangulated and turn off animation press export and when we go back into text tools all you need to do is press load at the bottom go find your model my case it's over here the only setting here that you need on is shifted shift imported UVS the rest of it are irrelevant they don't matter the only time the Clone uv1 to uv2 matters is for hair press open editor and in here you'll see the following basically everything in in this leftmost column this entire section here is unimportant there's some Advanced editing you can do in here but it really doesn't matter for for General use this second column with starting with mesh this is going to correspond to the part numbers mesh Z down here part 0. 0 being the clothing and we would assign its material by using this drop menu and selecting it in this case midlander female or any material you have or made for yourself the part number in this case we only have the one part right now is where you would assign things such as whether it's a wrist a neck an elbow and this is important if you have a model that you want to hide certain parts when gloves are worn or maybe when you're wearing um a head item that would hide the neck you want to assign the right properties so that part of the model disappears in this case this is the whole thing we don't care we'll change the mesh group now to group one this is the body so it's not vanilla skin it is bibo skin and we know chest 1. 0 is the neck we saw that earlier so we're going to assign it the neck property so it hides when you're wearing the right type of stuff we know that 1.
1 is not a wrist it's the chest which doesn't need a property at all so just remove we can skip 1. 2 cuz there's nothing there and go to 1.