Welcome to our first how to use video, with which we would like to support you as best as possible, in order to use the new Bogballe spreader precisely and to be able to take advantage of all the opportunities it offers. Before we go into more detail about the spreader, let's take a look what is also included in the delivery. This is this bag with all the operating instructions.
I'll just show you briefly now with a fertiliser test set, which I will show in a moment. There is also a special anti-corrosion oil in here. We know that this won't last forever, but it is an indication that a spreader naturally requires a certain amount of care.
And the more thoroughly you care for the spreader, the longer it will last you get something out of it too. We recommend checking the spreader before using it for the first time. The spreader is already the spreader Spray completely with this oil This is the most optimal corrosion protection you can do right from the start.
We have in that in this bag a fertiliser test set included. This fertiliser test set consists of one pressure Fertiliser strength meter that is crucial for possible casting widths and settings. For special fertilisers there is a physical point the compressive strength of the fertiliser.
You can measure this with this F indicator. You simply place ten grains on a disk or on a table and then crushes each grain of fertiliser until it bursts. And you can see from this ring the pressure at which the grain burst.
You can do this together with the specific gravity, what you have to determine and the result of this D indicator enter into our app. Here it is, after all. We have three screens in this box here.
That means we can have four factions here Use four fractions to determine the size and distribution of the fertiliser. These dates You can enter it into our spreading tables app or on our homepage, together with the specific gravity and compressive strength of the fertiliser And we can then create a suitable spread chart suggest for this particular fertiliser. Detailed instructions for these two test variants is here in the bag.
We can only recommend that you actually use it, before you don't know how to adjust the spreader. In general, this spreader is very low-maintenance, but there are a few points that of course have to be taken into account. We recommend always cleaning the spreader with water after using it.
If he stands for longer or stands for a few days, Of course, we always recommend redeeming the spreader. This doesn't necessarily have to be our special corrosion protection oil. We simply recommend a brine free anti-corrosion oil with which you can do the whole thing.
We have some points in maintenance too must be considered. Of course we have the cardan shaft if you work with a cardan shaft and not hydraulically driven. Apply some lubrication points to the spreader on the drive shaft.
The completely normal procedure must of course be protected as well the joints the joints are lubricated. And we have help in the two funnels from the inside one agitator each. This agitator also has a lubricant and we are missing according to the operating instructions this regular greasing, actually carry out.
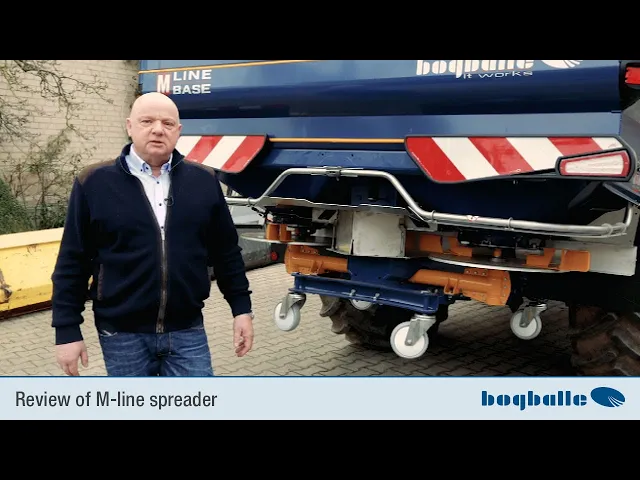
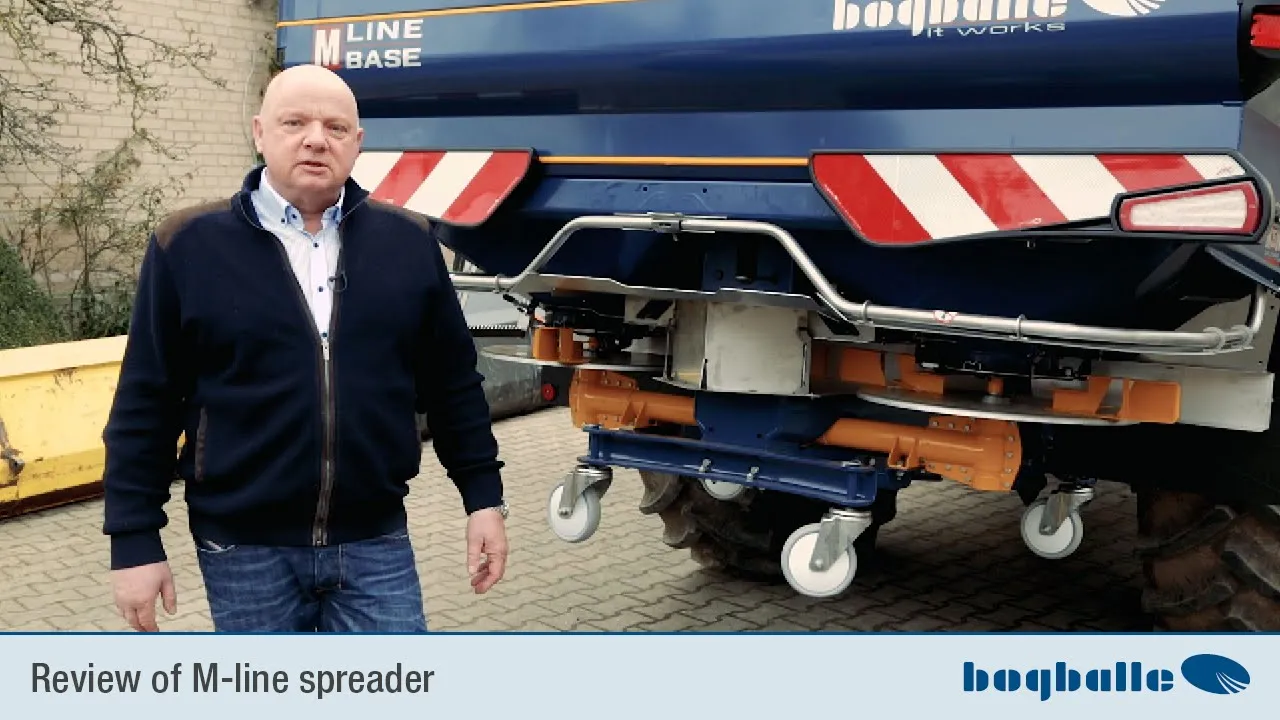
Otherwise there is not much to the spreader and not much can break. Will you enjoy the spreader for a long time? Here we have our model M35W in the picture.
W stands for load cell M35, M is the series 35 for possible loading depending on the container up to 35 quintals, i. e. 3.
5 tons. This is where the name comes from. This spreader is characterized by our spreading principle from what we have with all spreaders.
All two disc spreaders work on the same principle, We work in the field with the bogballe with a fourfold overlap. This means that the plates rotate in opposite directions in the field. This disc spins like that This disc spins like that.
And what we achieve is that with every litter disc over the entire area from the left in a semicircle to completely throw to the right. This means that both spreading discs produce normal spreading two identical scatter images each. This means that we have a double overlap in one crossing a system in the passenger, resulting in a real quadruple overlap.
The more overlap you have, the less you can do wrong, the easier the adjustment is and of course the better the distribution in the field. For border spreading we say okay if we have a great system in the field, because we want to work there with maximum overlap, but this overlap at the border is not necessarily desired is, why don't we do it at the border the same as other spreaders? That is, we have in the backs of the scatter wings, you can see The border spreading wings are integrated and for border spreading Let's just turn both plates around differently.
So this throw fertiliser then outwards, to the left or to the right in this case. This plate throws the fertiliser to the left when spreading the border Very important The spreading wings are different on the right and left, no matter what working width you do. That causes, that on the one hand you create a very steep spreading pattern to the border, but if possible no further, on the other side but still throw it far enough into the field to get the overlap there to get to the next passenger.
And overall have a balanced spread pattern. If we look at the spreader and the settings of the spreading wings I'll come right away. This is actually always the default setting We have two shooters here with the protection rail.
You can open it up so that you can better access the spreader for cleaning. That means you can just do this Release the lock and the scatter guards swing open completely. Now you can really get to the spreader for cleaning.
Of course this is also an advantage for me. I can show it a little better so you can see what's going on with the spreader is or how something is set. If we first look at the right window here When we look and fall, we notice the wings that are on the control screw.
If you look here, you have a hole here. Image Very important All you really need to remember is that a scatter vanes Always in position one, one spreader wing is in position two. This is also stated exactly in every spreading table.
There are only a few exceptions at 36 meters. Otherwise, this is the basic setting because you can do 99% of everything to do with. What it looks like is shown here on this sticker up here.
Here it is explained exactly how the grid is, what number it has, what position it has. A spreader wing in position 1 and one wing in position 2. The holes are made in such a way that you can't really do it wrong.
A look at it actually explains itself like this, that it's child's play and the stray wings only need to be changed very rarely. We also have this slider on here, the additional one this is the SC Dynamic i. e.
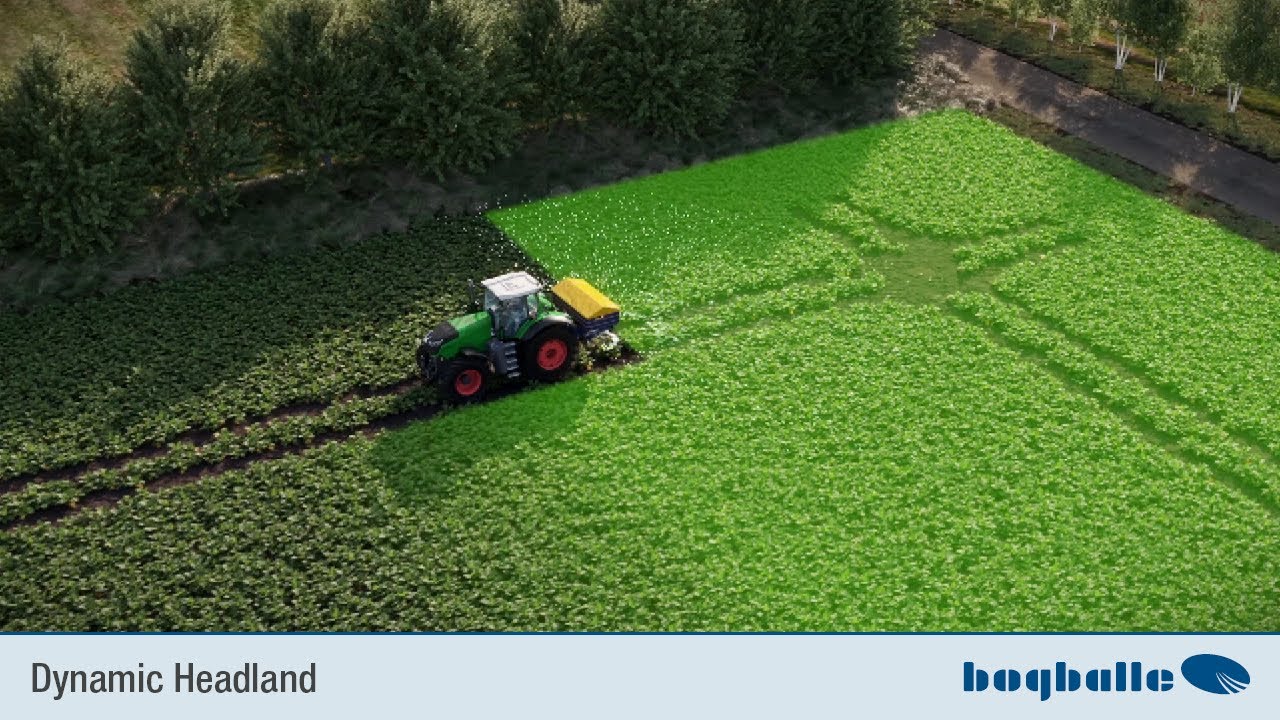
Section Control Dynamic slider, for larger working widths. When this system is used, This not only changes the amount of spread in wedges, but also adapts the spreader parts to the wedges With working widths smaller than 24 meters Maybe it's a little better, but it's not such a big deal difference, so that here the Section Control STANDARD with a simple, Intelligent adjustment of quantities to remaining working widths. So it's completely sufficient even in the wedge or on the last lane.
We also recommend for larger working widths to install the Section Control Dynamic System. These sliders are then controlled by two additional motors. Via electronics, via GPS.
Possibly we recommend that use because they not only have a quantity adjustment for wedges, but also always an adjustment of the scatter images to the wedges from the inside to the outside as well as from the outside to the inside so that they So you can optimally spread wedges there. If you want to look even further here you have it a lever on both sides. This little lever is just one Locking for this stainless steel plate that is under the outlet is.
This is now set for STANDARD, so STD stands for STANDARD. The positions are again explained in detail on this decal. We have a STANDARD opening.
We have a max. for very high amounts of fertiliser. Opening This means that if you twist the disc, you can set that.
To a max. position. It's right here next to it.
Now, depending on the fertiliser, up to 650 kilograms per minute can So one big pack can be spread about every minute. And of course this allows you to spread large quantities when you are away from work at very high speeds, which is sometimes crucial is important for normal attitude, for normal fertiliser also for working widths up to One and 24 meters is usually enough for you completely the default setting. Very important Please note if you are behind change the dosing slide to a max.
position or even to a min. position, you need that communicate in the electronic system. Because you decide change the outlet geometry and hence the on-board computer or the electronics can only implement that, if you know about it.
It's actually self-explanatory, that the spreader knows what he does, when you change the setting. I'll put it back for you to STANDARD, because that's how we want to start the whole thing. Yes, from the spreader, away from the litter that is now explained.
So in the field the plates are spinning like this. You can't say that often enough. At the border the plates turn the other way around.
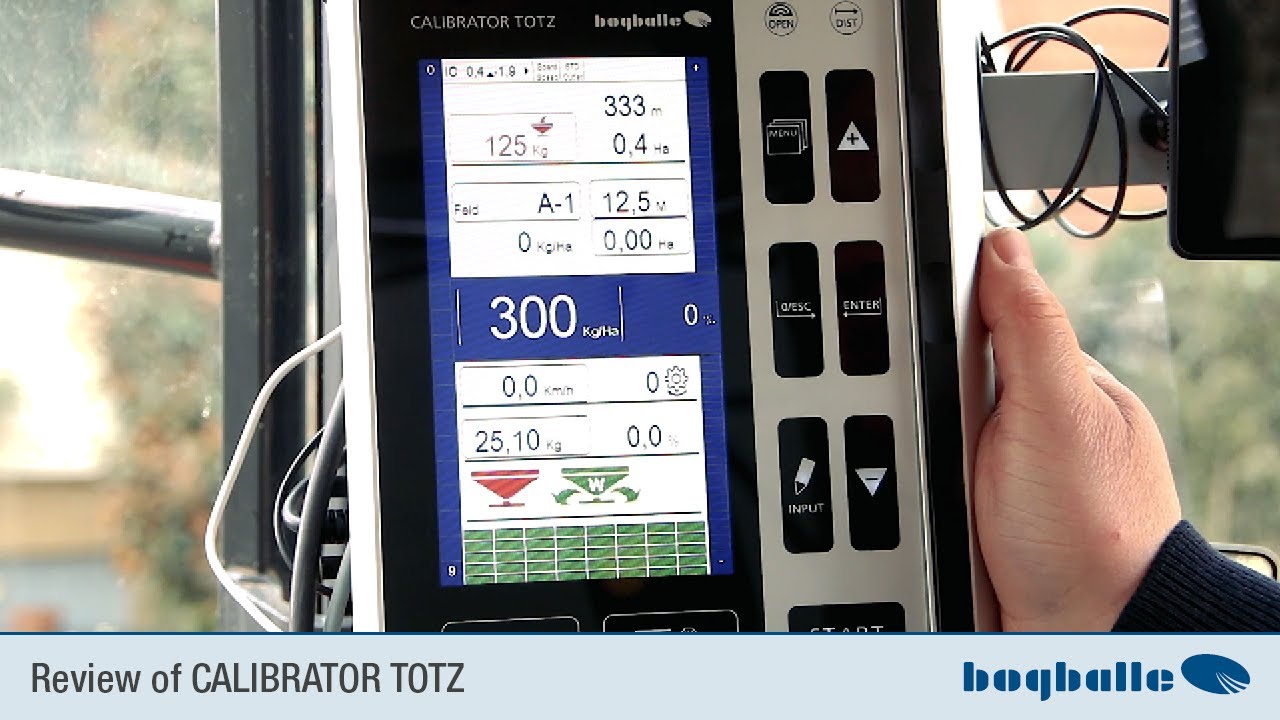
The circuit is done via the on-board computer. We'll take a look at that right away in more detail, if you use the on-board computer look at. What we still have here are these rear lamps, the rear Lamps can be folded down.
I'll just do it, you see here, this here and here as well as here and there are holes in the frame here. From the side there is also the front there is a hole in the frame. This simply serves as a cleaning opening.
That means you can here with the Spray in the high-pressure cleaner and therefore also about the deflector here the frame backs which always the critical point are for cleaning automatically or very well very easy to clean with it the same is the case here too on the frame. This lever just shows it how the border spreading is set. The lever inside like it is now.
Then the spreader is set to normal spreading this lever is fully extended, Then he's into border spreading if you are unsure. Here it is explained in detail at once on this little decal. Therefore we have from behind Actually almost everything about the spreader is explained.
Maybe there's something else here as an accessory are the parking wheels. When spreading, we actually recommend These wheels are easy to remove. Because otherwise you'll quickly hit a rock or a threshold, when you drive out of the barn, Keeps hanging.
And the wheels can handle that not generally. The wheels are not intended to around the spreader, when it is fully loaded, turn it off but just the spreader to place in the void, to put down. In the barn, on the solid ground, so that he can move there, where you can maneuver back and forth.
In winter, when you need other space, Yes we have the basic concepts of the spreader and We just looked at the basic elements. I leave the protection open. Of course the shooters have to normally be closed.
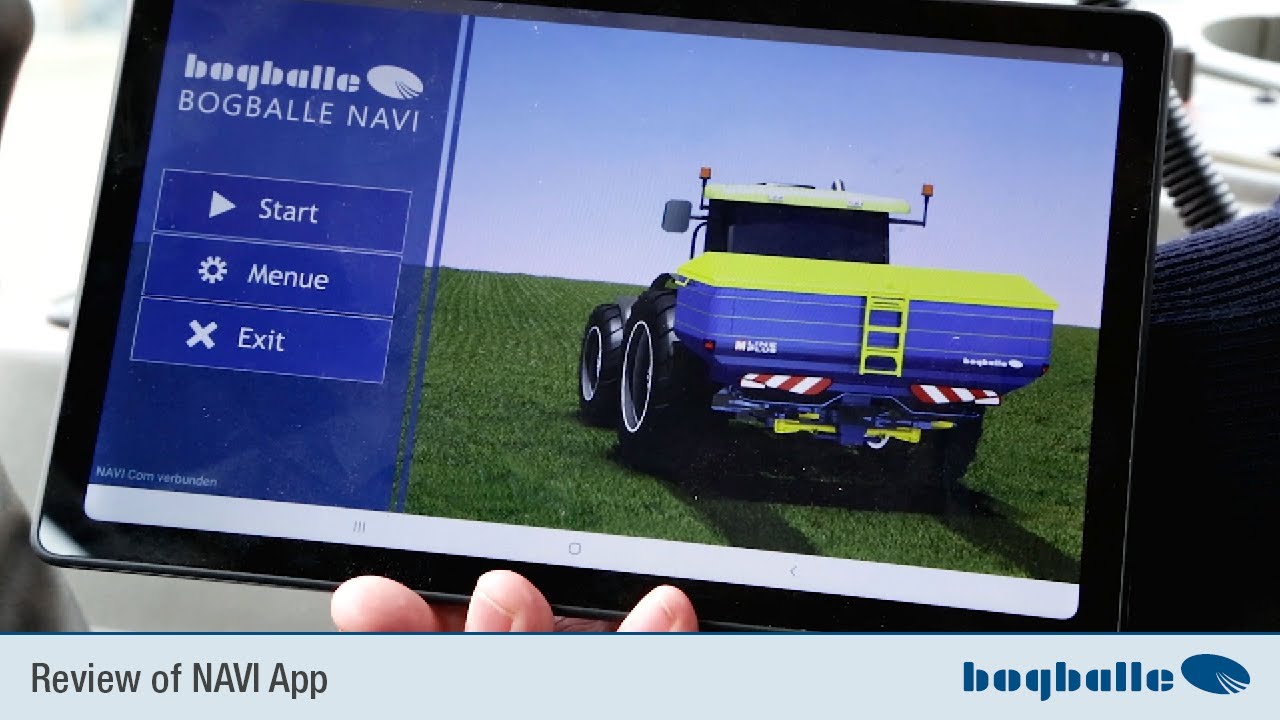
Finally, let us show when we look at it. If you now prepare for practical use If you want, take the spread chart table usually in the app I'm not showing the app now because that would be too small You wouldn't see anything on it, but me Just take a spreadsheet to hand. We have in the scatter table if you have a printed version, here is a list of fertilisers, those at different working widths can be scattered.
We have here in the example This is a spreading table for 12 meters. If we just meet each other a common fertiliser, this is, for example, pick out the A-S-S, then you look here okay, I have here the manufacturer Eurochem as an example. I have an A-S-S 26 plus 13, The E-1 are here immediately Spread wings on it, so the spread wings.
This is also stamped here again, with an R on the wings for the right disc and an L for the left disc is on it. You really can't make a mistake. One in position one one in position two, that's always the same.
If we look here now, his scatter table number is included. That's like 12-408, there Let's now look at 12-408. Found them straight away.
This is 12-408. First up here is PTO. So that's the PTO, like all of them Fertiliser, except in the 36 meter area, it can be different 540 PTO in the field.
There is a number next to it that says: Limit scattering should be adhered to. That means they don't represent just the direction of rotation, but they also adjust the speed, so that you can protect the European environment Comply with the standard for fertiliser spreaders. Can, that is, less than three per thousand fly over the border.
The speed, which here stands for the border spreaders. Taking them here is always border spreading The symbol is the Limit spreading speed where we are in the testing hall the European environment Standards for fertiliser spreaders so less than three per thousand of the limit. Make an edge scatter, so you want the full amount spread to the limit.
Then take tours 30 to 50 tours high. It's best to actually see it. From the tractor it looks like because with the border spreading direction, where the plates diverge the fertiliser overtakes them sits on the tractor for a bit.
And you can actually do it very nicely Visually estimate where the fertiliser will reach flies on the outer edge and simply via speed, reduction or increase the entire border spread pattern adapt optimally. So you have a totally flexible system. You can on one edge where one.
is a concrete path or a water, where you stay further away. The limit spread via the speed adjust to the other three Sides where there is a field next to it, where you have more of an edge spread want, that the full amount reaches the border, you can easily increase the speed and optimal to achieve spreading of the field. Then you have here the number is here again the scatter vanes 12 to 18 meters are actually always the E-1 spreader wings.
It is noted again here on the lock image on the window a spreader wing is in position 1, a spreader wing in position 2. You need the whole thing electronically regulated spreading actually don't pay attention These are the settings of the metering lever for different working widths and quantities The on-board computer does this all by yourself and via weight technology of course much more precise, as we did this via a setting can manage at all. What's important is back here.
This column is such a small angle of inclination or an arrow with a number of degrees above it. The degrees are under there. That means, the only thing you have to adjust, is the inclination of the spreader over the top link.
You can set that about electronics, if you use the hydraulic top link have, you are actually sitting on a tractor and fill the spreader and can then use the hydraulic adjust the inclination that suits you on the On-board computer is always shown. Included this is simply a basic setting, which is approximately at one optimally 2/3 full container should be exact. If the spreader becomes empty, a little comes out high, spreads a little wider.
That's never actually the problem. Especially with larger working widths that's definitely not a problem. So basic setting, height of the Spreader 75 centimeters Lower link coupling point above the ground or about the inventory during later fertilisation.
Otherwise easy Adjust the top link and get started. More is actually almost unnoticed. You have here at the bottom in every spreading table the results from the shake box, so this test set so that you can compare whether they are the same Have fertiliser or not.
You have here the specific gravity inside and you have the compressive strength here also included. Just so you can compare If you are unsure, whether it is really this fertiliser, you can with the test set understand this at any time and an optimal one Find the setting for your fertiliser. Otherwise it is in the spreading tables not much in it.
Like I said, it's great easy to adjust the spreader. We'll have one more round quickly, do it again very briefly Spread wings one in 1, one in 2 Spreader height 75 centimeters of the lower link coupling point Let's take a look from the side on, above the ground or consisted. And otherwise maintain the speeds and adjust the upper links correctly.
Nothing more needs to be taken into account. People often ask how do I do that? with late fertilisation?
It is of course very clear if I have stock of plants, which is so high, then the distance is of the spreading discs to the stock. Of course not anymore with 75 centimeters. That's why this chapter is exactly in the operating instructions also described again.
If you are between the diffusers between 15 and 35 centimeters about the inventory, Simply tilt the spreader three times degrees more than with normal spreading is required. Is your lens 35 to 55 centimeters above the stock? The spreader will increase by two degrees inclined, it is 55 centimeters and higher above the stand, then take the completely normal setting, as is also the case for normal sprinkling with low vegetation on smooth soil necessary is.
One thing we still have a remaining amount of emptying. When you're done sprinkling, it is contrary to expectations Fertiliser left over, then it corresponds good professional practice, the fertiliser to expire properly. There are holes in the plate for this purpose.
The holes are covered through a flap. This flap is very simple to dismantle. You just go under here.
You then have a small lever on it that you kill and now you can run this just below the outlet hole and the slider Simply open it using the on-board computer. Fertiliser is just now running out on the right side, then take this on the left small flap out of the lens and you can do that right away on the left make them so that they are in sack or once stand underneath. Or you drive backwards just to the pile, to the fertiliser, hope indoors and can Simply let the fertiliser run out.
That's actually all there is to it you can see here at the back of the spreader. Due to this we are now with the explanation from behind the spreader and I would suggest that we walk around the spreader together and from the side look at the whole spreader again, where we then have the settings can explain a little better. Yes, we see the spreader with that here Adjust turret in front of the page and I want to briefly explain what to pay attention to when hiring must.
We said before, They have the spreader blades are adjusted correctly, are always in the same position and you need the height and the top link set. The height is explained very simply. We have the upper lower link here Crosspoint, as it normally is in the Default setting is set.
And this top link coupling point must be 75 centimeters above the ground. And if you put the ruler here, then you see that now is about 80 centimeters high. My recommendation is simply four five centimeters higher.
For larger working widths over 24 meters You can also do it ten centimeters be higher, because the tractor says one anyway, when the spreader is full. And you have in stock yes also lanes, which give in a bit or have moved out a bit, so that they are there with large working widths between 80 and 85 centimeters on one level Set concrete surface. For smaller working widths 75 to 80 centimeters around 75 centimeters on the stand definitely to be realized.
Otherwise we still have the tendency Setting for tilt adjustment we have a yardstick here. There's a spirit level down here Element with a spirit level and you just put the Angle of inclination in the spreading table in the column, that we just looked at now in this example zero degrees, that means the spreader is horizontal. If the spreader is on a flat surface standing with the tractor, set exactly zero degrees here and the upper link is set correctly.
If the spirit level is plumb down here, up here is just a reference spirit level, which always has the horizontal, the horizontal inclination displayed by the spreader. Otherwise you have the dosing scale here, which you can see here. There's a stopper down here.
It just has to be at position 9, for electronically regulated spreader. If you don't have electronics, the quantity is adjusted here. This scales Stopper only serves as a stop during initial commissioning.
During a first calibration, so the electronic system fully opens twice and can be closed again and thus everyone Counter readings are basically calibrated, so that he gets the right amount afterwards attitude can be implemented on the field. Depending on driving speed, Spreading amounts and of course huge Behavior of the fertiliser. Otherwise here is from the side not much to see on the spreader.
Still important sits in the middle between the straight ones the actual technology. It's clear that you're paying attention must ensure that there are no foreign bodies here are in between. I've had it before, has a screwdriver placed on the frame, because he grew something here on the tractor.
And then it occurred to him Of course that's not the case. That would always be a hindrance of accuracy. Otherwise there is nothing here.
That’s what makes the spreader so easy. You don't need big here set something. Height, angle of inclination, done.
Yes we now see on one page again. We talked about cleaning earlier spoken. For optimal cleaning you can here Simply pull out this support too.
That means you loosen at the back the little screw by hand without tools and can then Simply pull out this protection. And come then use the high-pressure cleaner wonderfully also approach the entire unit from the front Of course you can do this on both sides make. Remember that you have the support slide it back into the holder here and locked again, so that it doesn't change somehow can move outwards while driving.
Otherwise we have here in this shot you can see the ladder, It's best to fold them down and you notice, that's right a lock in it, that you can pull them out, it also locks in the extended state. You can then simply go down the ladder succeed. And now here you can see this like this the lock from the Just push the tarpaulin in here and you can use the tarpaulin as normal open completely so you now fertiliser can let it run in or You can also look in via the ladder.
Very important, I'll leave the tarp open for now. In practice you would after filling close again. And when you push the ladder back in, The easiest way is to fold it up and simply push it in.
It's important to give it a little tug to lock it the ladder also states that it cannot rise again on its own. Fold the ladder up and it no longer interferes with the tram or with transport at all.