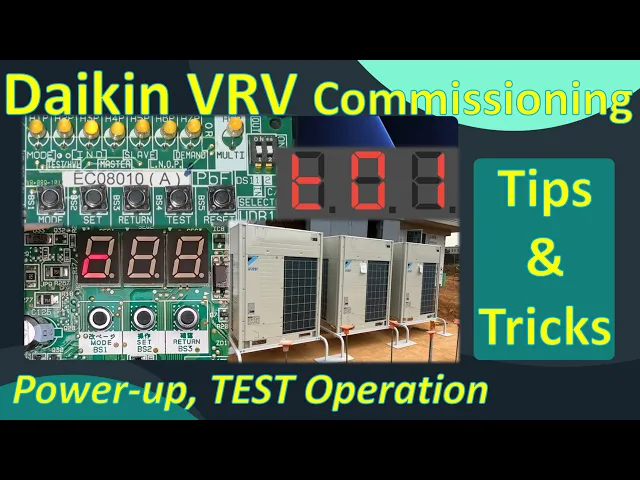
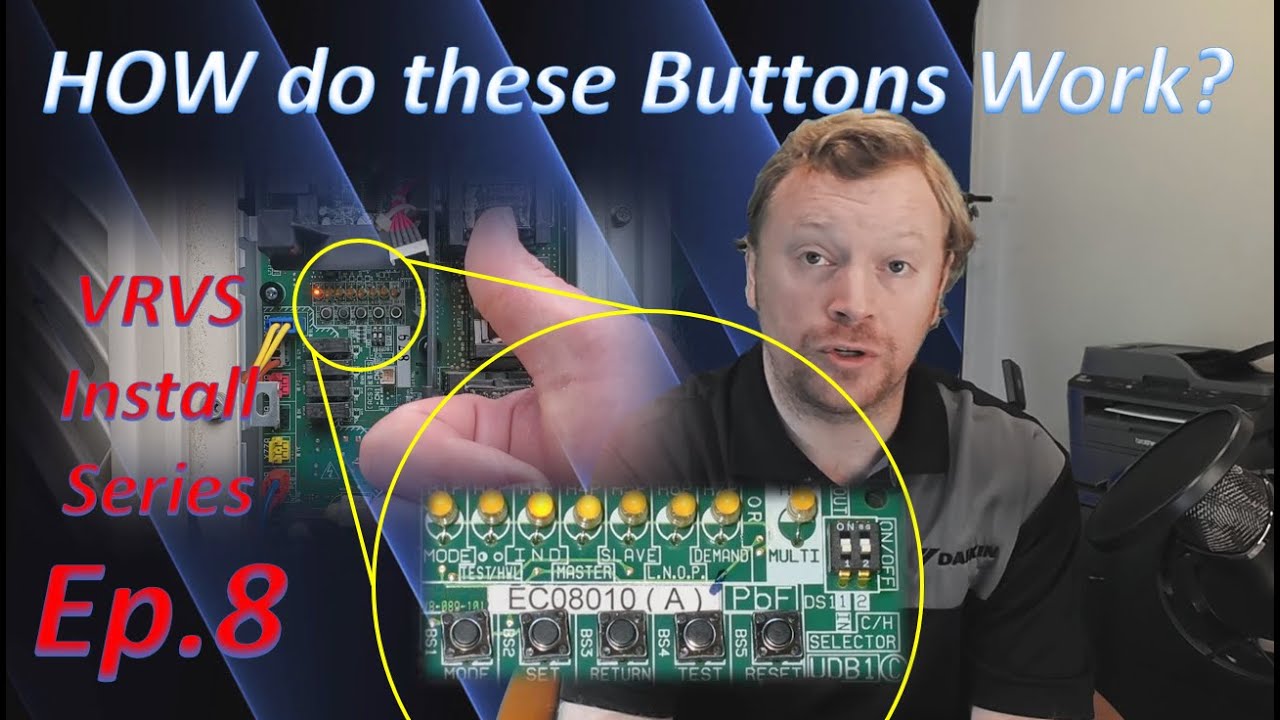
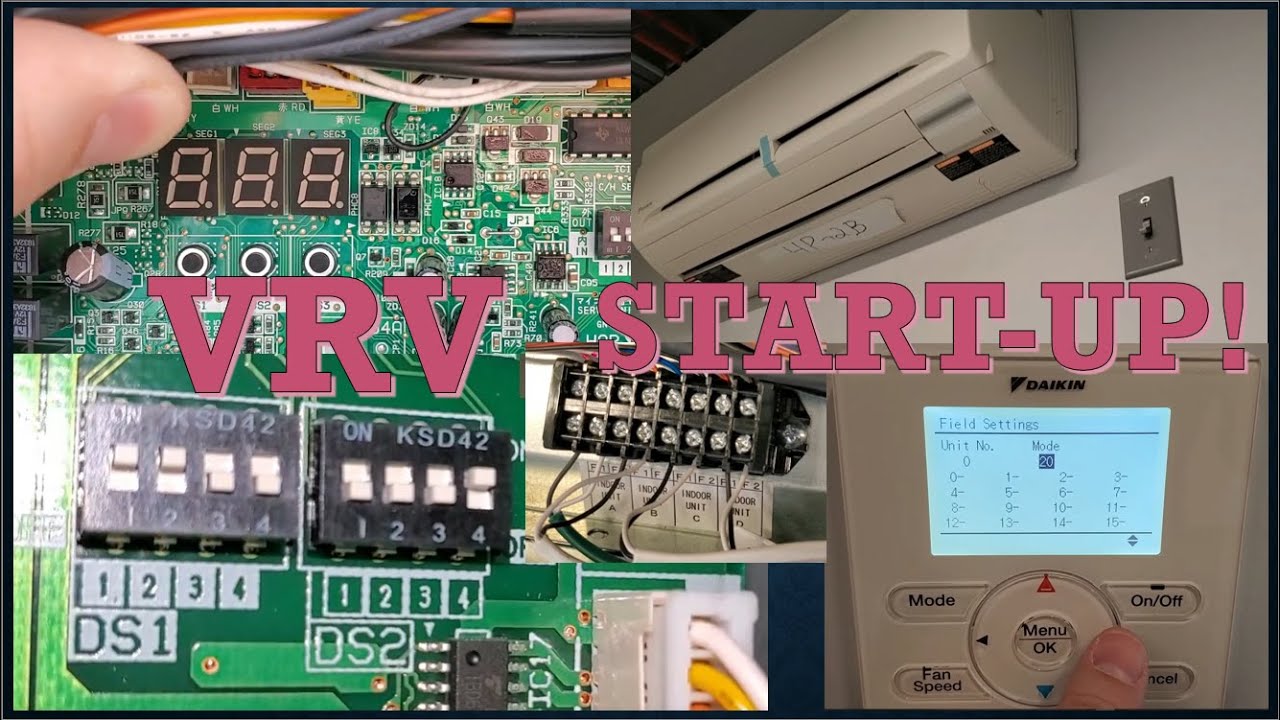
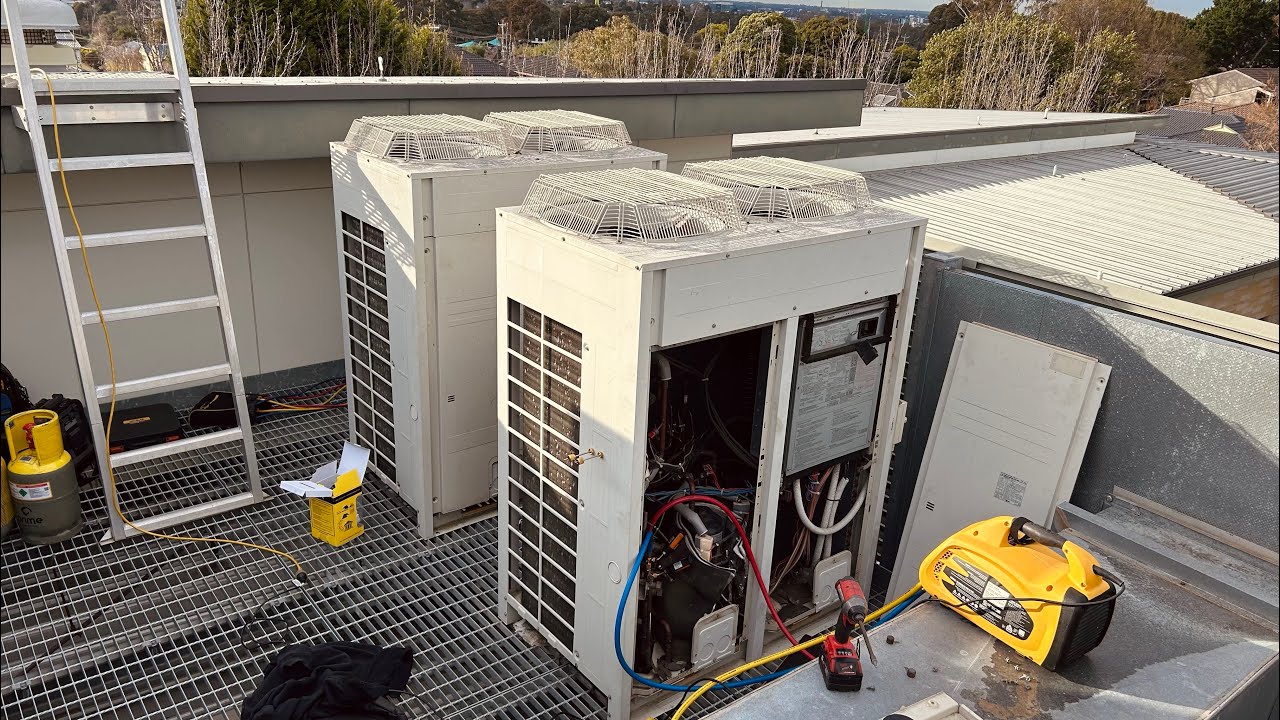
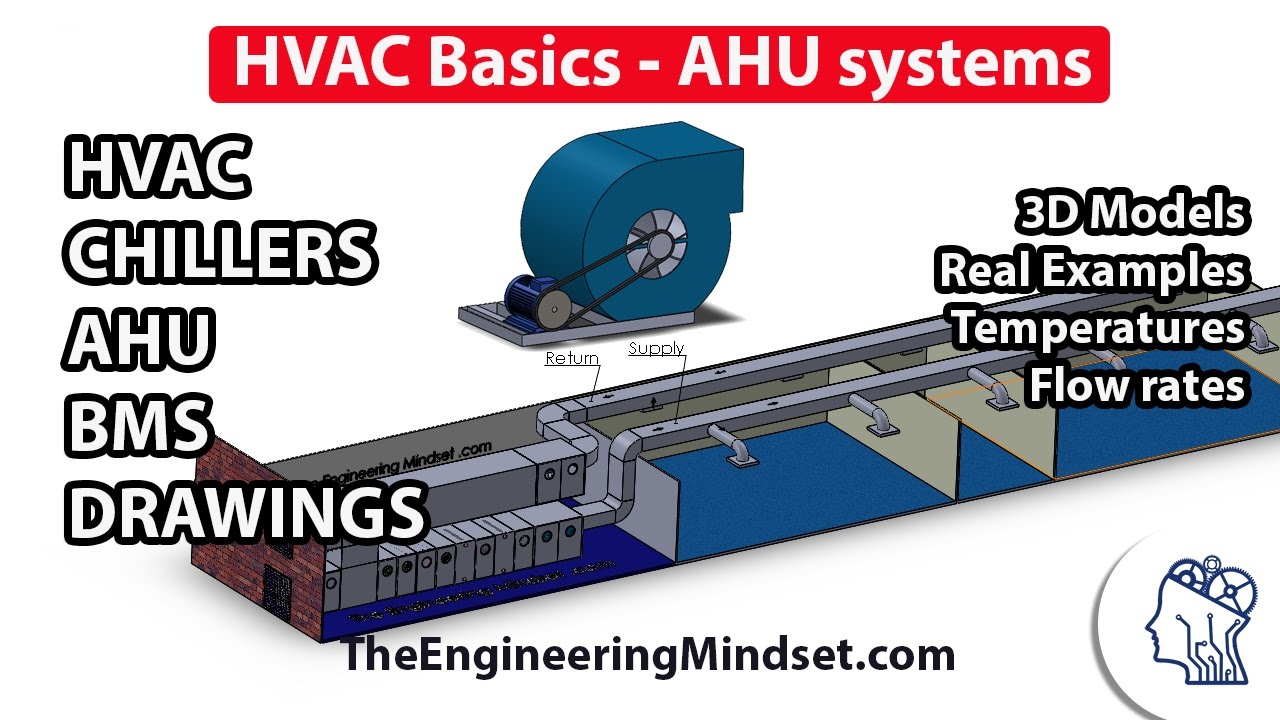
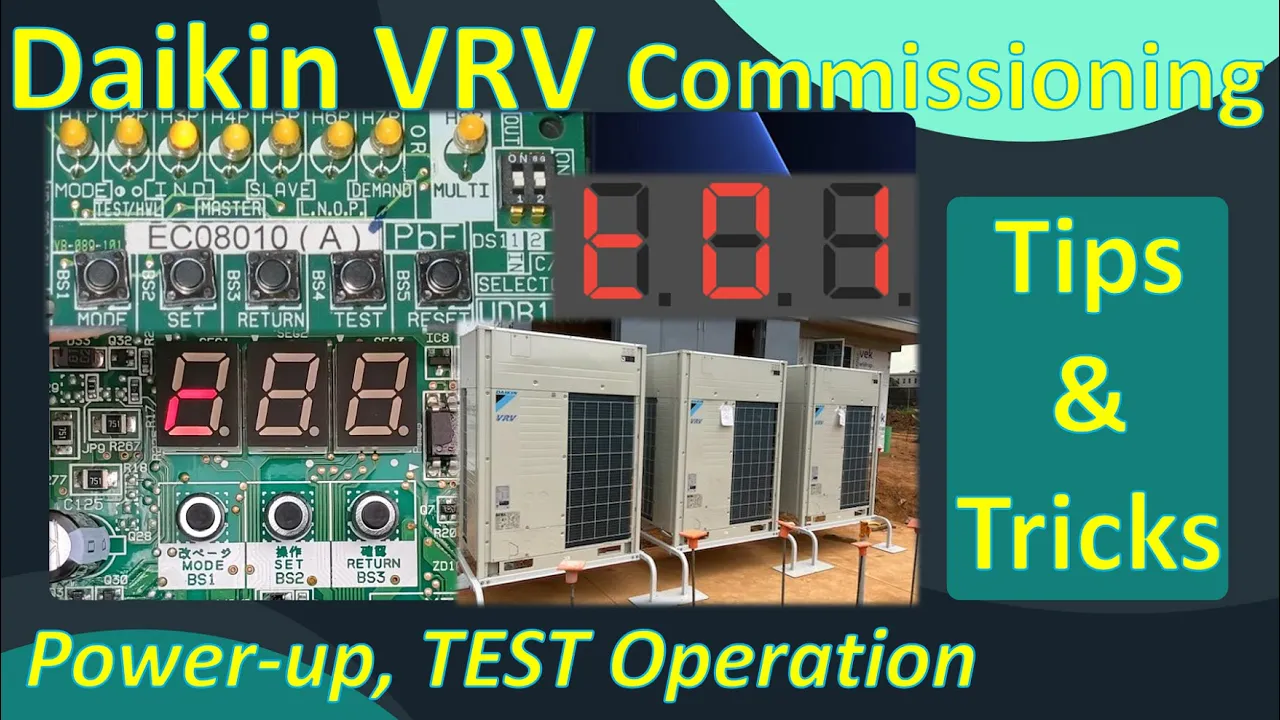
hi everyone i'm dana and welcome back to inverter always in today's video we're going to be talking a lot about the startup procedures for daikon vrv systems and there's a lot of information to talk about in today's video so much information in fact that i'm going to end up breaking this do a two-part video leading up to today's video over the last few weeks we've been talking about vrv installation tips and tricks you know things to look out for during the installation process things to plan ahead and consider to make the installation go as smooth as possible last week we talked about pre-startup things pressure test evacuation refrigerant charging procedures and calculations to make sure you have the right amount of refrigerant added to the system all very important things that are leading us to today's video so in today's video we're going to be focused on the startup process specifically powering up the equipment on a daikon vrv system getting through the communication check we want to make sure all the equipment is communicating properly and then finally a test operation before you can walk up to the thermostats and operate the equipment however you want you have to run the system through a self-diagnostic basically it's just a test that says can i physically function based on how i'm currently installed so we're going to be focusing on that today i'm actually going to go through and show you how to do it on both the older printed circuit boards the ones that have all the leds and you got to push all the buttons and then i'm also going to show you how to do it on today's boards that we use that have a digital display and only a couple of buttons so you you're going to get to see both in today's video so the goal is no matter what system you're working on if it's a vrv system you can use this video for reference i hope you guys enjoy hope you guys can learn something again a lot of information to get through today so we're going to go ahead and jump in if you guys enjoyed today's video please click the like button below really helps out my channel and if you guys enjoy this content and haven't already please consider subscribing all right you guys let's jump in [Music] now before you guys start the actual commissioning process you want to walk the job site make sure that everything has no power everything should be powered off because the power up sequence is very critical you cannot power up the outdoor unit for example before you power up the indoor unit for example and we're going to get through these procedures in just a moment one thing i did want to let you guys know about though is the outdoor unit needs to be powered for a minimum of six hours before you can actually operate the outdoor unit and so typically what i'll recommend to guys you know when we're doing classes or when we're getting ready to do a startup before i get out on the job site to assist with that startup i'll tell guys hey the night before power up the outdoor unit so that way you can warm up the oil and the compressor and then when we get there that next morning or the day of startup go ahead and kill power to that outdoor unit and then we're going to go ahead and start with powering up the indoor units which is step one so in step one you wanna power up all of your indoor equipment you're gonna then walk the job site and look at all the thermostats because you want to make sure that all the inner units actually have power the way that you can do this very easily is by looking at the thermostat if the thermostat has a display there is power being supplied to that thermostat from the indoor unit now that doesn't confirm that the system is wired properly but it does confirm at least we have power but when i say go check all of the thermostats for a display i mean go physically verify that every single thermostat has a display you can't go through 19 of 20 and then assume that because 19 of 20 had power that that 20th unit didn't have power what ends up happening oftentimes is we're doing our startup we power up the indoor units we go through and power everything else up and along the ways we get an error code during the startup during that outdoor unit initialization process and it's because it saw a different number of ports on the branch box being used compared to indoor units that are actually powered and communicating with said branch box so when i tell the contractor okay you need to walk through and you see which unit doesn't have power it's always that unit that had the locked door or i couldn't get access to that room and it's like well then we shouldn't have powered up the rest of the system until you can confirm every unit has power that is step number one every indoor unit needs to have power now step number two is only going to apply if you have a heat recovery system so a 3 pipe vrf system where you have branch boxes branch selector boxes and i'm going to add one more thing to it this only applies if you have a branch selector box from a generation 4 vrv4 product and later so the newer style pcb if you have the older vrv3 vrv2 heat recovery systems this particular step is not going to apply to those branch boxes this only applies to the generation 4 and later branch boxes as of the time of this recording in 2022 you need to make sure before you power up the branch boxes because those are next after you power up all the indoors you power up the branch boxes but before you power up the branch boxes you need to make sure that you properly set all the dip switches on each of the branch boxes for the system that you are going through and powering up and the reason is because you need to make sure you disable the ports not being used uh twin the sets of ports that are twinned and you need to make sure you verify that the proper switches are turned on that disable ghost ports on your six and ten port boxes now if you are not familiar with any of these things that i'm talking about i actually did a full-blown video just on the dike and branch boxes the dip switch settings how to configure the settings when why etc etc so go ahead and click the link in the corner of this video and i'll show you in that video how to do everything that we're talking about in this particular step all right so step three is going to be powering up the outdoor units at this point we have all the ender units powered we verified a display on all the thermostats great went ahead we set all the dip switches on our branch boxes and we've powered up the branch boxes awesome now we need to power up the outer units now if this is the first time you've ever powered up the outdoor unit say for whatever reason you never powered it up the night before or the day before to get that six hour minimum on time this is the first time you're powering up that outer unit that's fine power it up and then you're gonna sit and wait because the outdoor unit needs to initialize and this is in this initialization process can take up to about 15 minutes shouldn't usually take longer than this there is a potential that it takes up to 30 minutes which we'll talk about here in just a second but basically you're going to sit there and you're going to wait for the outdoor unit to go to a blank screen on vrv4 generation systems and later these are the systems with the newer pcbs if you have an older unit say you have a vr v3 or a vrv2 or even a single phase vrvs or vrv life or maybe you have one of those hybrid uh rmxs48s they're like a vrv s outdoor unit but they have a different port box it's a manifold with valves it's like mini splits on the indoor side and vrv on the outer side anyways it's a hybrid it's super old we never sell them anymore but i digress you might still have one in the field or even a sky air system all those other units have the older style boards where you have all the leds when you power up any of those units h2p is going to blink h3p is going to be on in solid and you need to sit there and you need to wait for h3p to be the only light on that is going to tell you as the technician that it has successfully completed the initialization process it's a lot to be looking out for on the older boards whereas the newer boards you just sit there and you wait for a blank screen now if this is not the first time that you've powered up the system remember you should have powered it up the day before or the night before so you get that minimum six hour on time to warm up the oil in the compressor if you did that good job for starters you listened now you need to power up the outer unit the condenser because you have powered everything else already powered this time when you power up the outer unit you need to press and hold the reset button on the older style board the board that has all the leds on it you're going to press and hold that reset button for 20 seconds as soon as you apply power to the outer unit so you turn the disconnect on clunk walk over to the unit you verify h2p is blinking h3p is solid you hold the reset button for 20 seconds the reason you hold it for 20 seconds is because depending on what literature you actually read some of the literature says to long press some of the literature will actually give you an amount of time to press but it always seems inaccurate so what i have found over the years is if you press and hold reset for 20 seconds and then let go it will work basically every single time it works every time for me at least now on the newer boards if you're before generation and newer the one that has the digital display that just pops to you you only have three buttons you don't have a reset button when you apply power to the outer unit and you see little three little circles flashing that's the initialization process has started you press and hold the return button for 20 seconds and then let go in either case whichever board you have after you've pressed and held the buttons their respective buttons for 20 seconds and then let go the screen doesn't change so the vrv4 generation and later boards the newer boards they continue to blink the three small circles eventually going solid eventually going to a blank screen and the older boards still have two blinking three is solid eventually two goes solid with three solid and eventually just three is the only light that's on and solid once you get to that blank screen on the new boards or the h3p light all by itself on on the old boards that is good that means that the system successfully initialized and we'll go on to the next step here in just a moment there are few things to look out for or things to consider when you're powering up the outdoor unit first and foremost you want to make sure that all your thermostats are turned off if any of the thermostats are on they will be in alarm they will be in a communication alarm because they are not talking to the outdoor unit because the outdoor unit hasn't been powered yet well what happens many many times especially on a brand new startup is because the outdoor unit doesn't see any of the indoor units it has to go through and find them and address them there will be an error in the system and it will fail to initialize this doesn't always happen but it can happen so because it can happen you don't want it to happen you want to reduce your risk for problems so make sure all your thermostats are off now at any point in time during this initialization process if on a newer board you have the three small circles go solid and then they stay solid for more than 30 minutes there is an error code within the system and it failed to initialize so anytime you get any of these error codes along the way the outdoor unit fails to initialize the best thing to do is to go around and turn on all the thermostats find the error codes resolve the error codes and then shut down the outer units anytime you shut down the outdoor units leave them off for about five minutes so the capacitors can discharge and then power them back up and repeat this power up process and hopefully next time you get through the initialization and now you're at the main screen the main screen on the new boards is the blank screen blank screen is a good screen that's the main screen and then on the old boards that h3p light we call the happy light that's your main screen so once you get to the main screen you're good we can move on to the next step once the system has initialized and you're at the main screen of the outdoor unit the very next thing you need to do which for whatever reason always gets skipped people just immediately jump to the test which is like three more steps away from where we're at but the next thing you need to do is verify communication you need to make sure that the outdoor unit internally addressed the same number of indoor units that you physically installed if it didn't and it only addressed let's say four of the five indoor units that you installed and as soon as you start the test operation you're going to have problems anyways again we're trying to reduce the risk for problems so by going through all of these steps in order step by step by step we are checking off the list things we need to do before we get to the test so that way by the time we get to the test our success rate is going to be much higher and so this next step is going to be verifying the correct number of indoor units are addressed and if you have a heat recovery system the correct number of ports got addressed and i'm going to do these one at a time we're going to start with the older pcb style the one that's got all the lights on it because it is a different uh button sequence than on the newer boards so on your older board you're gonna be starting with h3p that's your main screen and you need to go into what we call monitor mode one setting 5. so you press the mode button one time h1p flashes and then you press the set button five times you know you've pressed it five times by counting the binary value now i know this is going to blow all of your minds but counting the binary value actually isn't that hard you start with the seven p light all the way on the right that's a value of one and then every light to the left doubles in value so six is worth two five is worth four four is worth eight three is worth sixteen two is worth thirty two now if this is very very confusing and i've lost you it's okay i actually did a video specifically walking you through how to learn how to read all of these buttons so i'll put a link in the corner you can check that video out get a much better grasp on how to read these lights and then come back to here and hopefully then you're caught up anyways when you press the set button five times you should have a binary value of five shown on all of these leds which is h five p and h seven p four plus 1 equals 5. h1p will continue to flash that is indicating that you are in the monitor mode menu and that's fine you can go ahead and ignore h1p for right now but i'll continue to bring it up just to try to keep you guys on the right track the next button you press is the return button you press that button one time and when you do it shows you the current number of indoor units addressed count up that led binary value for example if i have seven ender units installed i should have h5p h6p and h7p all flashing at me indicating that i have four plus two plus one which equals seven indoor units that means yes it sees all seven that i physically installed if i installed seven but only lights h5p and h6p were on that would tell me that that's six that means that we are missing an indoor unit i'll talk about how to find that missing unit here in just a brief moment we're gonna push pause on the old board now we're gonna go to the newer style boards that have the digital readout because in these boards you need to go to monitor mode 1 setting number 10.
so just like before you press the mode button one time but this time the screen displays 1. 00 then you're going to press the set button 10 times it's very easy to see how many times you've pressed the set button because it shows you on screen every time you press it 1. 01 1.
02 1. 031. 04 and when you get to 10 the screen will say 1.
10. then you simply press the return button one time and it will display the number of indoor units that it has addressed and hopefully again if you installed seven you see a seven shown on screen now regardless if the number shown matches the number you installed or not you need to escape out of that menu before proceeding to the next step so to escape anytime you're in any of these settings simply press the mode button one time your newer boards will go back to a blank screen and your older boards will go back to h3p solid by themselves now if the number of indoor units displayed does match the number you physically installed awesome we're going to repeat this process but this time we're going to check for branch ports and this is again only applicable on heat recovery systems but we need to make sure that the outdoor unit sees the correct number of branch selector box ports being used uh to the number of ports that we're actually using in the field sometimes you have multiple indoor units on a single port and so we just want to make sure if we're using seven ports the outdoor unit sees seven ports being used so from the main screen always start from the main screen again we're gonna start from the old board h3p is solid you're gonna press the mode button one time this time you're gonna go to monitor mode one setting six so with h1p flashing telling you you are in monitor mode one you're gonna press set six times this time h5p and h6p should be on because that is four plus two which is six press return one time and now read the led binary value if i used seven ports again five six and seven should be on showing me it sees seven ports then simply press the mode button to escape on the newer boards the ones that have that digital readout press mode one time the screen flashes 1. 00 now you're going to press set 11 times 1.
11 and then press return once and it will simply give you the number of ports that it sees so again if you're using 7 hopefully it flashes a 7 on screen again regardless of how many ports it shows you good or bad matching or not matching you need to escape then out of that setting back to the main screen by pressing the mode button one time on either of the boards that you have that takes you back to the main screen blank screen on the new board h3p solid by itself on the old board and now we can proceed to the next step so if the number of indoor units and ports if you have a heat recovery system matches the number physically installed we're going to skip the step i'm about to show you which is something called forced fan in the event that the number of vendor units or ports does not match the number you physically installed and this is somewhat common especially for those of you who don't actually go around and check that you had powered all the indoor units when i asked you to go check that you had power to all the indoor units skipped one oops that was the one we couldn't get access to dana sorry about that well i told you we're gonna now have to do more work so we have to enable a setting from the outdoor unit called forced fan and what forced fan does is it tells all the indoor units that it can see to operate their fans and the idea here is when you enable this mode you just have to walk around the building look at all the indoor units and see which one is not operating its fan and that one is the culprit oh man shoot now we don't know what's wrong with it maybe it's wiring related maybe it's power related i actually did a whole video on forced fan i'll put a link in the corner of the screen for that video you can check it out get a little bit more information today i'm just going to show you how to get into it so we can find that problem child and then move on to the next step so when you need to uh turn on or enable forced fan again you're going to start from the main screen on the older boards h3p is solid this time we need to change a setting so we're going to press and hold the mode button until h1p is solid and then we're going to go to it's called service mode 2 setting number 5. so h1p is solid that tells us we're in service mode 2 hit set five times you know you've pressed it five times because h5p and h7p are on that's four plus one which equals five then press return when you press return it's going to show you the current option the current option is off or disabled which is h7p so h7p will be sitting there flashing ignore h1p it's still solid that's just telling you what menu you're in you're in the service mode menu that's fine h7p is flashing we need to enable force fan so we press set one time to move it from option one to option two h6p has a value binary value of two so now h6p will be blinking you save this setting by pressing return one time it goes from a flashing six to a solid on six that tells you you've saved that setting and now you need to activate that setting so you press return one more time and it goes back to h1p solid by itself now leave the board there because now you need to walk through the building look at all the other units and see which end or unit is not blowing the fan or not blowing air not running the fan motor and that is the culprit once you've identified which unit is the problem child go back to the outer unit on the older board styles you can simply just kill power then go fix the problem then go back to the outdoor unit reboot it hold reset for 20 seconds because now you are going to be adding an indoor unit or multiple indoor units onto the communication network so you need to tell the outdoor unit to re-address during the initialization process on newer boards so if you're before generation and later again start from the blank screen and the button sequence is actually the same press and hold the mode button until 2. 00 is flashing 2.
00 is service mode 2 and you're gonna press set five times so you should have 2. 05 then press return one time it's going to flash a zero on the screen zero on these newer boards means off you're gonna hit set one time so it flashes a one that means on i want to turn on forced fan operation then hit return once it goes from a flashing one to a solid one i've saved that setting and then hit return one more time that activates the setting it goes back to 2. 00 now leave it here walk the job look for the problem child indoor unit or indoor units great we found them go back to the outdoor unit turn it off fix the problem come back to the outer unit turn it on press and hold return for 20 seconds to tell this outdoor unit or this type of board to re-address the indoor units because we are now adding to the number of vendor units on the communication circuit it's very important anytime you're adding or removing indoor units from the communication network you have to power cycle the outdoor unit and when you power back on hold that return or the reset button depending on what board you have for 20 seconds to tell it to re-address all of the equipment so we've gone through and initialized we've fixed any of the problems from the last step that we have now we're on a blank screen we've verified communication we see all the indoor units we see all the ports if it's a heat recovery system awesome great now what well a lot of folks will just straight jump to the test mode but we're actually skipping one more very important step and we have to actually go backwards to uh last week's video where we talked about doing the pressure test triple evacuation and refrigerant charging calculations we have to make sure that we've added all of the necessary field added refrigerant charge before we can run the test you can't run the test if you haven't added in all of the necessary refrigerants so sometimes the vacuum will not pull in all the refrigerant charge that you need to add and that's okay there is a process that we have to add the remaining charge and i'm going to walk you through how to do that now on the older pcbs the one with all the lights again we're going to start with h3p solid this time we're going to go to service mode 2 setting 20.
so just like before you're going to press and hold the mode button until h1p is solid and then you're going to press set 20 times so this time you're looking for binary value 16 and binary value 4. binary value 4 is h5p and then you're going to also be looking for h3p which is a value of 16. so you should have one three and five on that is indicating that you've pressed set the proper number of times which is 20.
then press return it go you go into that setting seven flashes to tell you that setting is currently off press set one time go to go from seven flashing to six flashing that turns it on then hit return once and it will go to a solid six no longer flashing solid six means you've saved that setting but you still need to activate that setting so press return one more time and now all the f all the lights will start lighting up and flashing and on the older boards this is how you know that you've enabled the additional refrigerant charge mode now at this point you need to make sure that the bottle of r410a is on the scale the scale is zeroed out the hoses are purged and you've connected your hoses to the refrigerant charging port on vrvs vrv life sky air the hybrid super multirm xs systems vrv2 vrv3 all those systems came with a charge port and usually that charge port is right next to your main service port so that's where you want to hook up the hose as the system turns on and starts operating to pull in that liquid refrigerant remember with r410a you always need to add it as a liquid and you're weighing it in based on that calculated amount that you should be adding to the system based on your installation capacity and field piping lengths i digress you need to make sure that it's hooked up to the charge port because that charge port is going to pull it through a capillary tube it's going to flash it off it's going to be adding the refrigerant safely this charge port also exists on the vrv4 systems however when we went to vrvx and now vrv merion and later whatever we get down the road we uh no longer have that charge port to use so there's a little bit of a different process for adding the refrigerant and we'll walk you through that now on the newer board styles you're gonna again start from the main screen which is a blank screen you're going to press and hold the mode button until the screen flashes 2. 00 again you want to go into service mode 2 and now we're going to go to setting 20. so you press set 20 times the screen will simply display 2.
20 it's much easier to follow how many times you've pressed the set button on the newer boards once you get to 2. 20 you're going to hit the return button it's going to flash a zero which is indicating that that setting is off it's not enabled it's disabled press set one time to enable it and that goes from a zero to a flashing one then you're going to press return one time to save it it goes from a flashing one to a solid one and then press return one more time and now you're going to get a t01 that activates the setting so as soon as you see t01 that system is going to then come on in a few minutes the compressor will start and it will operate and it will start to pull in that refrigerant now vrv4 systems as mentioned we have that charge port but on vrvx and later we no longer have the charge port so where in the heck do we put our hose you actually could put the hose connected to the suction service port but you need to be extremely careful here because as you're weighing in the refrigerant directly into the suction line you don't want to flood the compressor you don't want to wash out the bearings you don't want to wash that oil out from the compressor so you need to make sure that you are metering the amount of refrigerant you're adding as the system's running and pulling it in we typically just call this bleeding the refrigerant into the system there is a specific rate you need to stay under and that rate is stay under two pounds per minute so as you're adding the refrigerant you're watching the scale you need to make sure that you are not adding more than two pounds per minute if that makes sense it's actually slightly more than that it's 2.