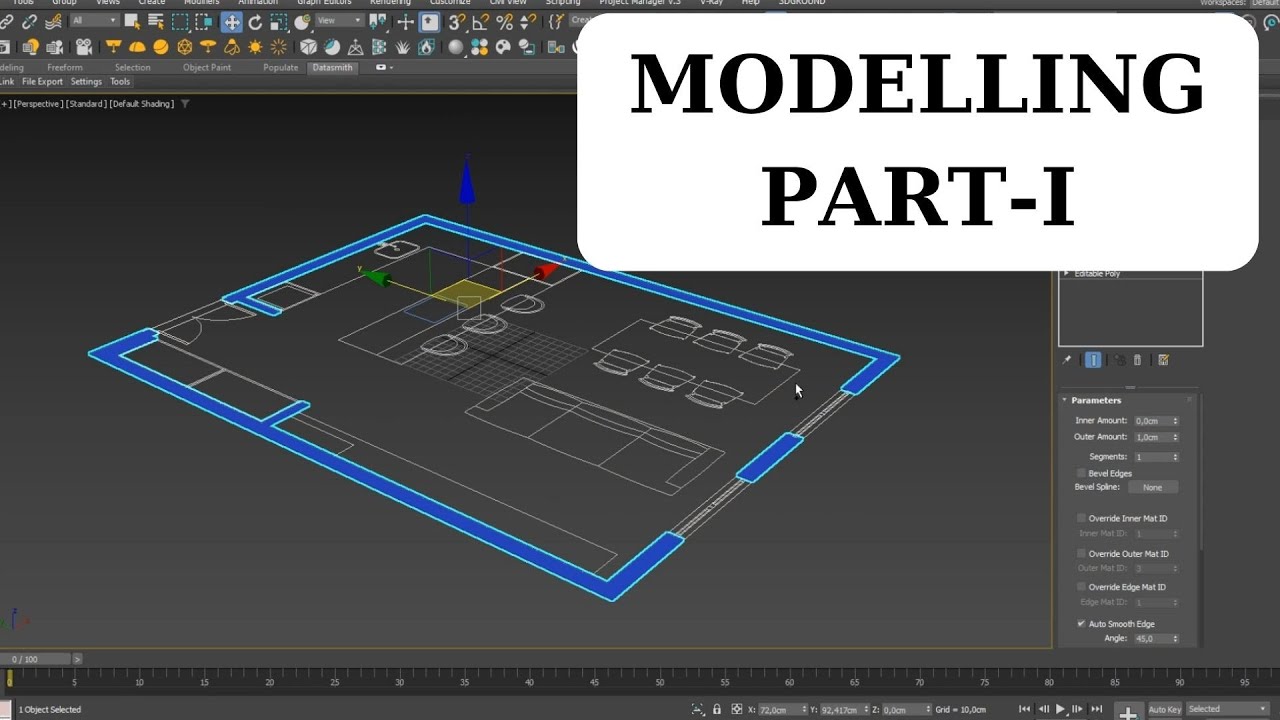
hello everybody welcome to hm studio in this tutorial i'm gonna show you how to model the scene you might have watched my other video about interior modeling but this one will be more informative i'm gonna give you more details and i hope you guys like it so without any further ado let's jump into it so for this tutorial i've selected this scene which i think is small enough and it's fairly detailed so it's not going to take a long time to model it and i think it's going to be a good practice on my previous tutorial we've tried to model the scene based on an autocad file but this time we're gonna model it based on an image we have the floor plan here and as you can see it's not that big and we're gonna model the whole scene based on this one now the first thing we need to do is to right click on the image select file information and we can see the dimensions of this image right here and we're going to have to create a plane inside 3ds max with the same dimensions so we could drop that image on this plane and we could start the modeling from there so let me create this plane with the same dimensions okay let me move it right to the center and since we don't need any of these segments we can simply get rid of them by right clicking over here here and there and there you have it now we can go back to our images and simply drag and drop this image onto our plane and there it is okay now we can start the modeling now go ahead and click on this button right here which maximizes the active viewport or you can simply press alt w on your keyboard which does the same thing the next thing we need to do is to adjust the scale of this image now we have this dimension line here which represents two meters and what we're gonna do is to create a box with two meters of width like so okay now we're gonna scale up this image so these two meters on the image is equal to two meters that we have on this box for that let's go to the hierarchy tab over here and click on effect pivot only and with this we can simply move the pivot point of any object to where we want it to be so i'm going to go ahead and move it to right over here and then click again on this button to deactivate it now let's go ahead and select the scale tool or simply press r on your keyboard and scale up to the image like so okay we're done with this we can go ahead and delete the box since we don't need it anymore now we can start the modeling so let's go ahead to the create tab go to the shapes and select the line and we're going to create a line all around this plan just keep in mind that we have to create a vertex on every corner like this and if you hold shift it's going to create a straight line so one more here and we're going to continue like that and at the end we can just close the spline yes now we're gonna have to create another line inside the plan on every room so let's go to the modify panel while the line is selected and click on create line right over here now let's go ahead and create another line inside the plan and we're gonna follow the same logic now let's say we want to create a vertex right next to this one and we want them both to have the same value on the y-axis what you're going to have to do is to activate the snap tool simply by pressing s on your keyboard and while holding shift on your keyboard you can simply click on this one and it will create another vertex right next to it and we're gonna do the same with the other ones as well as you can see i'm creating these perfect straight lines just by holding shift on my keyboard okay now that we're done with this one we can go ahead and take care of the other room so once again while this sp line is selected let's go to the modify panel select create line and go ahead and create another line for this string you all right now that we have the sp lines ready we're gonna have to put an extra modifier on top of everything so let's go to the modify panel and from the modifier list you can find extrude right here okay and let's make it 300 centimeters height and there you have the walls so remember that i told you we need to create two vertices on both sides of every opening that we have they come in handy right now so by creating them we can get these segments after we extrude the sp line then we don't have to do it all over again in editable poly and it makes everything way easier for us now what we're going to have to do is to create an editable poly on top of this geometry so we could create the openings now let's go to the modifier list again and select edit poly from here now let's go back to the images to see how the windows are actually look like okay for example this one i would say this is like 60 70 centimeters and we have one more here like 250 centimeters let's go back to the max and go to the front view by simply pressing f on your keyboard now let's select the edges by clicking on this button over here or pressing 2 on your keyboard now we can select all the vertical edges like so and create two segments by clicking on the connect button over here and make it two like that and okay now let's go ahead and select vertices from here or pressing one on your keyboard and select all of these vertices and what we're going to do is to move them down to this level which is 60 centimeters so let's go back to max and put 60 right over here we're going to do the same thing with these vertices and we're going to move them up to 250 centimeters and there you have it okay the next thing we need to do is to actually open the openings and for that let's go to the perspective view then select both polygons in the front and back of each opening and actually let's go back to the images and see how they look like uh for example this one uh yeah these two these are actually doors and they go all the way from the floor level to 250 centimeters so let's go back to max this one i'm going to select both front and back polygons right and simply click on bridge and it will open this polygons for us and we're going to do the same thing with all the other openings as well for these two i'm going to select both front and back also this one this door over here and then let's click on bridge there you have it let's go ahead and take care of the doors also oh as you can see i forgot to create a verdict here so we don't have this segment over there and we're gonna have to create it manually so let's go ahead and select the edges and select these four edges now create one segment over here and we're gonna move it and put it right here next to this one let's activate this snap tool from here or actually we can just press s on your keyboard there is one trick that you need to know about the snap tool if you right click on the snap tool you can have this window and if you go to the option tab we have this option over here enable access constraints if it's disabled you cannot move any object in a straight line it will just move in every direction x y and z but if you have it enabled if you click on every one of these axis you can move it only on that axis so for this purpose we have to keep it activated so we could just align these two segments to each other yeah like that okay now that we have this segment we can go ahead and create our openings okay now let's go ahead and click on the bridge oops all right seems i forgot yeah i forgot to select these and yeah there it is okay now that we have the walls ready we can go ahead and create some of the interior objects for example i think we can start modeling this counter over here yes let's see what images do we have well apparently we don't have enough pictures but it's a pretty simple object and i think we can use some of our creativity right so let's go back to max and start off by going to the top view and let's create a box here let's go to the create menu geometries select the box and simply create a box right there and since we're modeling based on an image and all the numbers are not accurate let's just go ahead and change them like 280 and 90 would be a good start okay let's go to the perspective and now we can add some details right if i go to the images and this one okay as you can see the white part is actually like three panels and what we can do is to add an editable poly on top of this box yeah let's select the edges these ones okay and let's isolate this box with clicking on this or pressing alt q on your keyboard okay i guess this is important for you to know that you can actually select one of these edges and select ring and it will select all the segments on that ring as you can see right and we can create two segments one for this right here and one for the other side all right now we're gonna select these segments and move them all the way to the right next to this one and for that you can actually select one of them and to select the whole loop you can simply click on the loop right here and it will select the whole loop right and let's activate the snap tool which is actually is and move it all the way to the right on top of the other one and we're going to move it to the left by right clicking on the move tool and move it on the y-axis by 1. 5 centimeters okay now we're gonna have to do the same thing for the other side let's select the whole loop or clicking on this one will work as well move it all the way to the left and 1. 57 okay we're going to make another one for this top part and for that i'm going to select this segment and select ring and create one segment over here okay let's move it all the way up to here and move it down by 1.
5 centimeters okay now we're gonna have to select these two polygons the front one and the one in the back and simply click on the bridge as we did for the openings okay we don't need these polygons we can just simply get rid of them by hitting delete on your keyboard and there you have it now let's go back to the image to see what else do we have we created this white part and now we have to create this black box inside it so let's go back to the 3ds max and create a box from the create menu okay select the box activate the snap tool and we're going to create one like so as you see we have to push it inside a little bit like i don't know five centimeters and for that i'm going to create an editable poly like that let's select this polygon right click on the move tool or press f12 on your keyboard and you can push it back by five centimeters okay for the back side also because we have some stools we have to push this one inside so there's some room for the legs right okay it actually might be a little bit too much but we can always go back and fix it later now we're gonna have to create these doors right and for that i'm going to the front side let's go ahead and create a box go ahead and activate autogrid so we could actually create a box on top of this one like this all right let's give it 1. 5 centimeters of depth and now we can create the doors as you can see we have this gap over here which is like 15 centimeters and two three centimeters from the top and actually we need to have a gap on the right and the left side right and for that what i'm gonna do is to like reduce the width by one centimeter so we could have like half a centimeter from each side okay as you saw in the pictures we had like three centimeters gap from top and 15 centimeters from the bottom and to do that we're gonna go ahead and create an editable poly on top of this box okay let's select all these vertices from the top and move them down by three centimeters and for these vertices on the bottom we can move them up by 15 centimeters now we can go ahead and create the doors and as you saw we had four doors and we need three segments like that okay to do that we're going to select these segments from here and actually let's go ahead and isolate this box alone so we could work easier right and let's go ahead and click on this button over here twice and there you have it okay let's create three segments by clicking on connect and add three segments like so okay now we have to make a little bit of gap between these doors and simply just detaching them from each other there's an easy way to do that while these segments are selected let's go ahead and select extrude and we will get two options here the first one will extrude every segment that is selected and the second one will expand the base like this and for this purpose the first one is not that important to us because we're going to delete them eventually but anyways the second one i think 0. 25 will be a good number and that means half a centimeters gap okay now you can just go ahead and hit delete on your keyboard and that leads us to this we actually have the gap now we have these openings over here which we don't need right these borders so let's select all of these borders and select cap from here it will close all the borders like that so we have four separate boxes right now oh i actually created everything backwards let's go ahead and select everything and click on this button over here mirror and mirror it on the x-axis let's just hit okay and move everything to where they're supposed to be okay seems like we're done with this one and we can go ahead and create probably this unit over here on the left let's see what other images do we have this one probably might work all right as you can see we have it on the plan right here let's see if we have other images also from other angles okay one thing that you can see is this part of the ceiling is lower than the other parts let's say it's like 250 centimeters so when we create this box this unit we're gonna extrude it by 250 centimeters and as you can see it's kind of like a box it's pretty simple so let's go back to 3ds max and select the top view from here or by pressing t on your keyboard now we're going to create a box right here we don't need autogrid anymore so let's create a box over here let's try to be as precise as possible but you can always change the dimensions later okay let's make it 250 centimeters high there you have it okay let me just change the color and we can go ahead and create some details and as we did before to make the process easier we can just isolate the box and the plane together okay let's go back to the images and see what kind of details we have okay seems like we have three panels next to each other here let's go to the other image yes exactly so let's go back to 3ds max and in the top view you can see that they are right here so to be more precise let's apply an editable poly on top of this box and select these vertices from here and let's move them right over there okay now we can go to perspective by pressing p on your keyboard and we're gonna create three boxes here next to each other all right let's enable auto grid so we could create the box on this surface and enable the snap tool by pressing s on your keyboard okay let's make it 1.
5 centimeters and yeah as you sign the image we have three boxes next to each other and there's a little gap between each two so let's go to the top view and copy this box two times let's leave a little gap in between and okay all right i think we need to have one more on the other side i can show you here in this image yeah right here okay there's another one on this other side so we can go ahead and copy that box one more time okay let's copy this one you can just hold shift on your keyboard and move it on the y-axis copy okay now with the snap tool we can move it right next to the other box that we have okay as for the next thing we're gonna create this base cabinet over here which is like 85 centimeters the easiest way is to select this top polygon from here and just move it down let's go with 85 centimeters here okay now if we take another look to the images you can see that this space over here let me show you yeah here it needs to sit back for one centimeter and a half so we could have some room for the doors so let's go ahead and select this polygon and move it back for 1. 5 centimeters now we need to move this back face also to the middle since we have this closet back here all right let's see what else do we have all right we have this cabinet top over here this could be also 1. 5 centimeters so let's go back select this polygon and move it down for 1.
5 centimeters okay let's go back to the image as you can see we have this tall unit over here which goes all the way up to the ceiling and we have one two three four doors here all right so what we're gonna do is to select all of these segments and create three segments over here okay now this one as you saw goes all the way up to the ceiling but first of all let's extrude it for 60 centimeters maybe 80. okay that's more like it let's compare it to the image yeah i think that looks fine then we have to create this part also so let's go back let's hit okay and we have to extrude it again okay again let's enable the snap tool and move it all the way up to here okay now you're gonna have to select this polygon over here and extrude it hit okay and with the snap tool we're gonna move it all the way to here okay fine good now we're gonna have to create another box here to close it up once again with the snap tool i'm going to create a box here and that's it looks good the next step is to create some doors and also we need to create this countertop over here so let's check the images as you can see this is a simple box so we can as always with the snap tool enabled create a box over here on the top like so let's make it 1. 5 centimeters and it should probably touch this edge over here let's check it out yeah exactly so what i'm going to do is to add an editable poly on top of it as always now let's select this polygon over here and move it all the way to here good so for the next step let's create a hole for this oven as you can see we have like 10 centimeters here and then 60 centimeters for the oven itself so let's go ahead and select one of these edges and click on ring now we're going to create a segment here we need only one i'm going to move it all the way up to here right click on the move tool and bring it back down by 10 centimeters now we need another one 60 centimeters below that one so let's go back select this one click on ring another segment move it all the way up to here and move it back down by 60 centimeters perfect now we can select this polygon over here and extrude it inside i'm going to move it all the way back to here and now we can keep this polygon we can delete it uh i would prefer to delete it so simply just hit delete on your keyboard and it's gone as for the next step we're going to create the doors so we have one two and three let me see if i can find another picture from the other side okay this one all right as you can see we have this gap down here about like 10 centimeters and we have this gap up there which is basically the handle and we can make it like two centimeters or something so we can just keep this part empty and let's go ahead and select these polygons let me check the picture again okay we have this door right here and three more up there we also need to create this gap before i forget so let's go ahead and select this edge over here select ring create a segment and i'm gonna make it like three centimeters i should probably create another segment here also let's go ahead and do that okay now we can select these polygons again okay i forgot we need to create two more segments here also all right now we have to detach these polygons and create a copy and for that we have this option over here detach as clone right what it does is that it's going to create a copy out of the polygons that we've selected so it's not going to detach them completely from the geometry it's going to create a copy so if i select these polygons and move them you can see that we still have those polygons back here right so this is basically just a copy now let's go ahead and isolate it and as you know we don't need these polygons up here since we're going to have the handles here so let's select these polygons and simply delete them now we're gonna have to get rid of these edges over here since we don't need those anymore as well for deleting segments we have two ways we can delete them with backspace and or control backspace control backspace will delete the edge and also the vertices that are connected to it right so we're gonna have to use that but if you simply just hit backspace it will keep the vertices after that we're going to select all the edges and we're going to use the extrude tool here let's extrude it we have two numbers the first one is the amount of the extrude which is not important to us here and the second one is the size of the base which is the important one so if i put 0.
25 it will expand the base 0. 25 centimeters from each side which gives us like half a centimeters of gap right after that you can just simply hit delete and it will create the gap between these doors as you can see we have some extra vertices here we don't need them let's get rid of these also by hitting backspace on your keyboard and when that's done we can add a shell modifier on top of this geometry this modifier is pretty straightforward you can see that it creates a shell basically and there you have it these are the doors right i think something is off here yeah exactly here i made a mistake shouldn't have created that edge so let me just move this back down and done okay seems like we're finished with this part and we can go ahead and create this closet back here okay what we can do is to just simply make a copy out of this box right so hold shift and move it on the x-axis let's make a copy and with the snap tool move it to here okay we have four doors so basically we need three segments let's add an editable poly select all of these segments here and create three segments as we did for the other side we can simply extrude these segments as i said before this one is not important for this purpose you can put any number but here i'm going to use 0. 25 centimeter hit delete and what we have to do is to close these gaps right so let's select all of these borders and cap we need a little gap over here like half a centimeters also so i'm going to select all of these vertices and move them by half a centimeter also for the other side all right now that we're completely done with this unit we can go ahead and create this bookshelf we cannot see the whole thing but i'm gonna try to create something similar so one two three four five six seven so we're gonna need six segments here so go ahead and create a box right over there 250 centimeters let's add an editable poly and select these segments and create six segments by the way we have two different approaches to create something like this i'm gonna show you the easiest way first which i don't really recommend but just for the purpose of this video that i want you to learn some stuff maybe you can use this method when you're modeling other stuff right so let's go ahead and start with that all right we've already created these vertical segments now we need four horizontal segments but since they don't have the same dimensions and one of them is bigger specifically this one we're gonna have to create this one separately so let's go back to max and create one segment now go ahead and move it down all the way to here okay now we can create three more up there perfect the next step is to create these holes right so let's go ahead and select all of these polygons okay now we're going to insert these polygons and we get two options here group and by polygon right if i select group it will insert all the polygons together it will count everything is one right but if i select by polygon it will inset each polygon separately and this is what we need right now let's use 1.
5 centimeters or maybe one centimeter okay that looks fine now we just need to simply extrude everything towards inside okay so that was the first method the second method that i'm using all the time and most probably everybody is this one so let's go ahead and create a box over here let's make it 1. 5 centimeters and we don't need this guy anymore let's select it and hit delete all right now we're going to create one segment over here we'll need it later i'll show you in a second now let's make a copy for the other side all right now we're gonna have to create a plane on top of this from the middle of this box to the middle of the other one this plane will work as a helper right let's create six segments over here and we can simply copy this box from the middle this is where that segment comes in handy five times all right now we can get rid of this one and create the shelves so let's go ahead and create a box over here okay let me check it out so we have one box all the way down here okay let's make it 1. 5 centimeters now we can align it with the window like that and now we can make some copies okay now let's select all of them with holding control we need to make one more copy for up here and now we have to create another plane as we did before as a helper okay let's get rid of these segments and we need to add four segments over here okay once again let's select all of them and make some copies three times all right we don't need this let's get rid of it and now we have all the top shelves now we need to create some doors down here so let's go ahead and start with a box let's check out the photo one more time okay we have a gap down here and that's it all right let's go ahead and create a box actually i think it's only one box down here yes exactly so before creating that box let's go ahead and select all of these first add an editable poly go ahead and select all of these vertices and move them up to right there okay now we need to delete these boxes select this one add an edit table poly again select these vertices and move it to the left all the way to here okay now we can go ahead and create that box all right let's add another editable poly first we need to get rid of that edge okay select the top polygon move it up to here now we need to push this face towards inside by 1.
5 centimeters okay now we need to select all of these edges and create five segments hit ok now select all of these polygons let's detach them as a clone all right let's go ahead and select it oh not this one all right okay we had a gap down there so i'm going to select all of these vertices and move them up by two centimeters now select the edges select all of them extrude all right hit ok and delete now we need to add a shell modifier and that's all 1. 5 centimeters this one is ready after this we can go ahead and create the ceiling let's take a look at the photos that we have all right not this one probably this one okay we have two parts one is there and the other one is here maybe let's find another picture um yeah this one as you can see they have two levels of height this one is one of them and we have a gap over here for the curtains and there's another one over there with a gap in between and if you look at this we can see that this breaks into two parts but they both have the same level of height alright let's go to 3ds max and start creating them as always we're going to start with the box let's create one from here to here okay let's add an editable poly select this polygon and move it all the way up to there we're gonna have a gap over here for the curtains but let's start with this one i'm to move it all the way to the left all right now let's select this one and create that gap i think 20 centimeters would be good enough now we can go ahead and create the other part of the ceiling so let's go to the create menu select the box and create a box like so okay let's go back to the picture again as you can see we have a gap over here and a gap over there for the curtains so let's go back to 3ds max and add an editable poly now i can make this polygon 275 centimeters high let's select this polygon over here and with the snap tool enable let's move it all the way to there we're going to have to create a gap over here for 10 centimeters and we're gonna have another gap over here for the curtains so let's make this one 20 centimeters as well all right now that i'm looking at this picture i can see that i missed one detail over here this curtain goes behind the bookshelf so we have to make it smaller and we also have this gap here that we have to make so let's go back to 3ds max let's zoom in and select all of this bookshelf like this and from the modifier list let's go ahead and create one fft modifier on top of everything okay this modifier gives you these control points so if you go ahead and select control points from here or press one on your keyboard you can select any of these vertices and you can manipulate the shape of all the selected geometries right so in this case i'm going to have to select all of these vertices and move them on the x-axis all the way to here we also have a gap on the top so let's go ahead and select all of these vertices and move them down by one centimeter all right perfect okay the next thing we have to do is to create that gap that we've seen before in this picture over here to do that we're gonna have to go to the top view select all of these edges over here and create one segment okay let's move it all the way to here and we need to align all of these geometries also let's set up all of these vertices move them all the way to here and also this bookshelf needs to be adjusted all right let's select the ceiling again and create another segment i think this gap is gonna be like three centimeters so let's go ahead and move it three centimeters to the right now we're gonna have to go over there select this polygon and extrude it like five or maybe 10 centimeters yeah i guess 10 is better let's check the picture again yeah okay 10 centimeters is fine okay i think the next step is to create a hole here for our sync but before i do that i should merge some of the objects that i've selected for this scene i've already gathered everything saved them into a separate file so i'm gonna merge that file into this scene and later on we're gonna create the wooden floor as well uh i don't need this camera so let's get rid of that and this one also is useless let's hit okay okay it seems that i have some objects with the same name i'm going to rename everything and there we have it all right let's go ahead and start with the sync so let's just select it and move it to where it belongs i'm going to do it from the top view to be more precise you have to rotate it 90 degrees all right it should be somewhere around here i actually need to enlarge this box down here since it's a little bit small so let's select these vertices and move them to the right like so we don't need this polygon at the top so i'm going to go ahead and delete it and the next thing we need to do is to create some segments in order to create that hole for the sink right so let's go ahead and isolate this stuff so it's easier to work with i'm gonna have to go to the front view and move it down a little bit okay in order to create that hole we need some segments i've already shown you how you can do it with the connect and this time we're gonna do it with the quick slice under the edit geometry rollout so let's select that and just create a segment like this very easy we need another one here one more bit there and the last one here sorry let's do it again okay all right now that we have these segments we can go ahead and select these two polygons so let's hit four on your keyboard or select polygons from here and select both of these polygons and then just click on bridge and we're done with this oh seems like this faucet is flying so let's just move it down it's a group so i'm going to ungroup everything from here let's select the faucet and move it down on the y-axis like that all right from now on we're just gonna move some objects around put them to where they belong but we honestly need to take care of the wooden floor as well so first of all let me just move this little guy over here to see if it fits yeah okay it looks fine so in order to create the floor we need the floor generator it's a plugin that you can easily download and install on your macs i'll put the link into the description and you can just find it there and the instruction will be on their website as well as you can see we have some different parts on the floor with different directions for each of them we need to create one plane but before doing that i'm going to isolate some of these objects so we could do it easier let's go with this unit walls and probably the layout so let's go to the create menu select plane we don't need autocrate we can just disable it and let's activate the snap tool i'm going with 2. 5 and let's create our plane okay the first one will be like this let's add an editable poly let's move this one all the way over there all right let's go with the next one same process let's move this edge all the way to the left actually since the wooden floor will go under the doors we have to just expand this one like so all right let's go to the next one all right we need to adjust this one a little bit perfect one more here and the last one will be there okay we need one more over here as well all right let's go again all right cool now let's go ahead and select for example this one let's go back to the picture to see how it looks like you can see the arrangement of the planks and we're gonna create something similar now from the modify tab we're gonna add the floor generator let's adjust some of these numbers looks fine for the extrude which is like this part i think 0.
2 would be great and bevel 0.