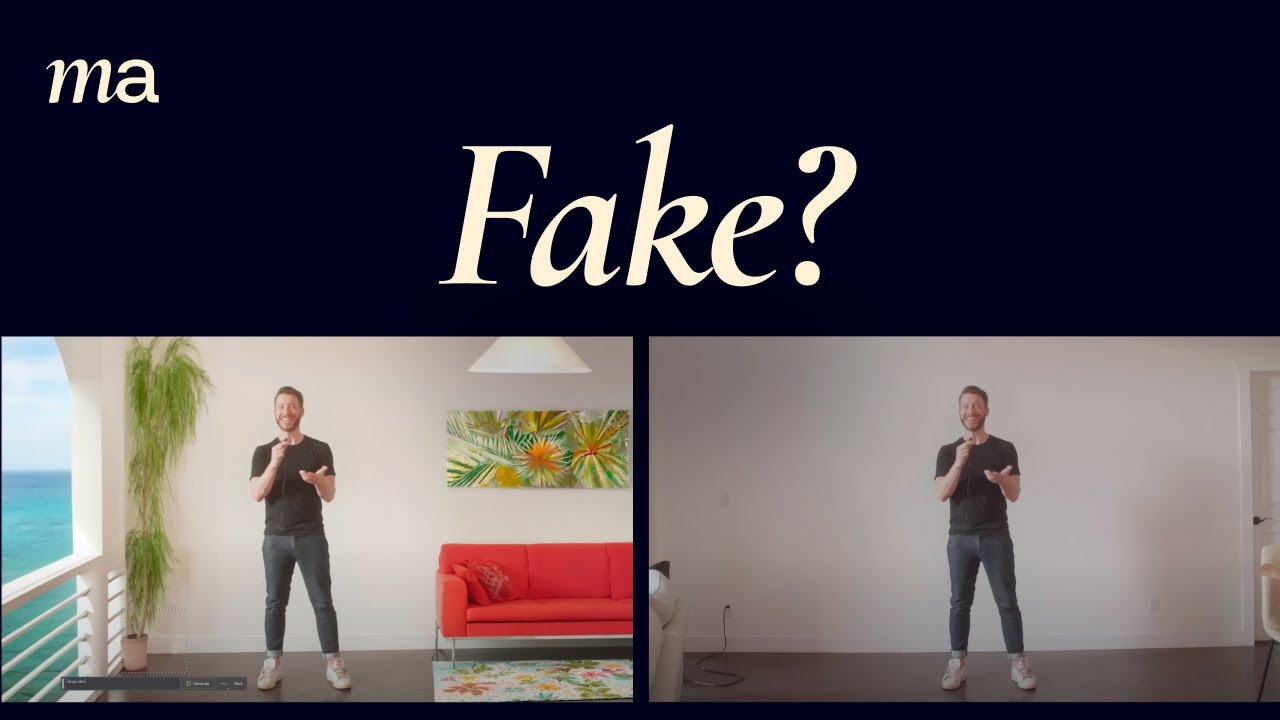
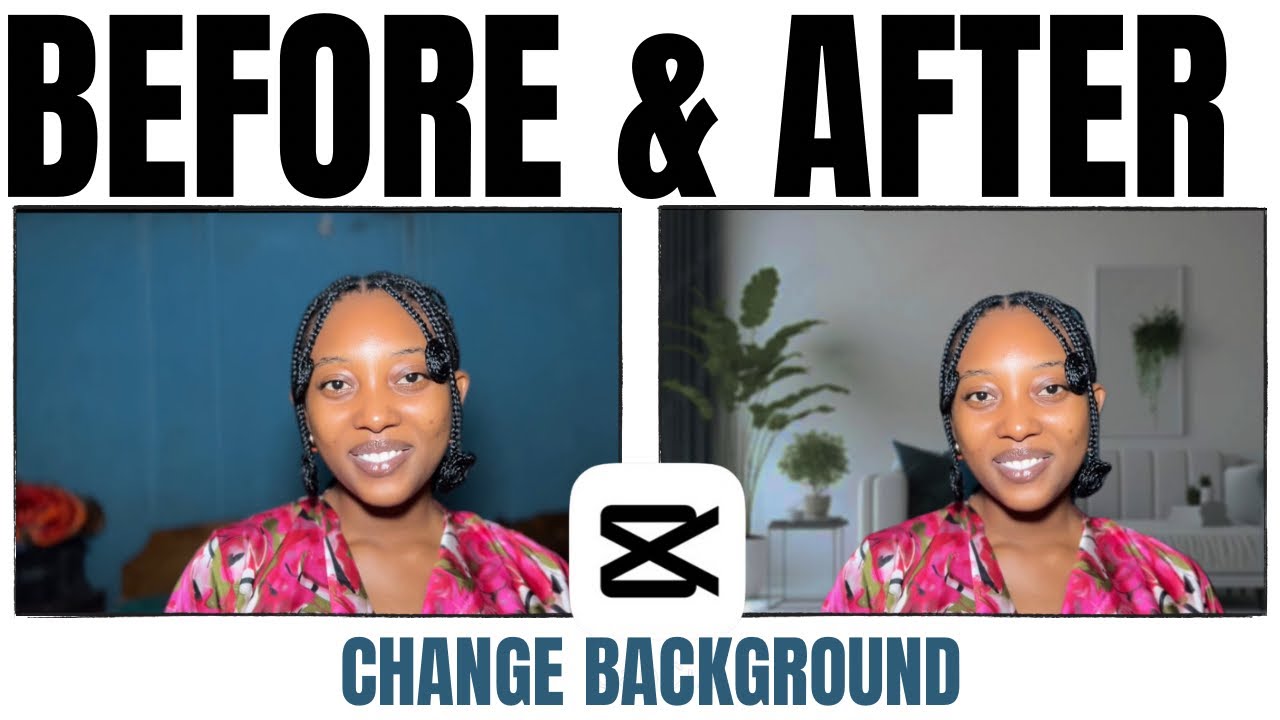
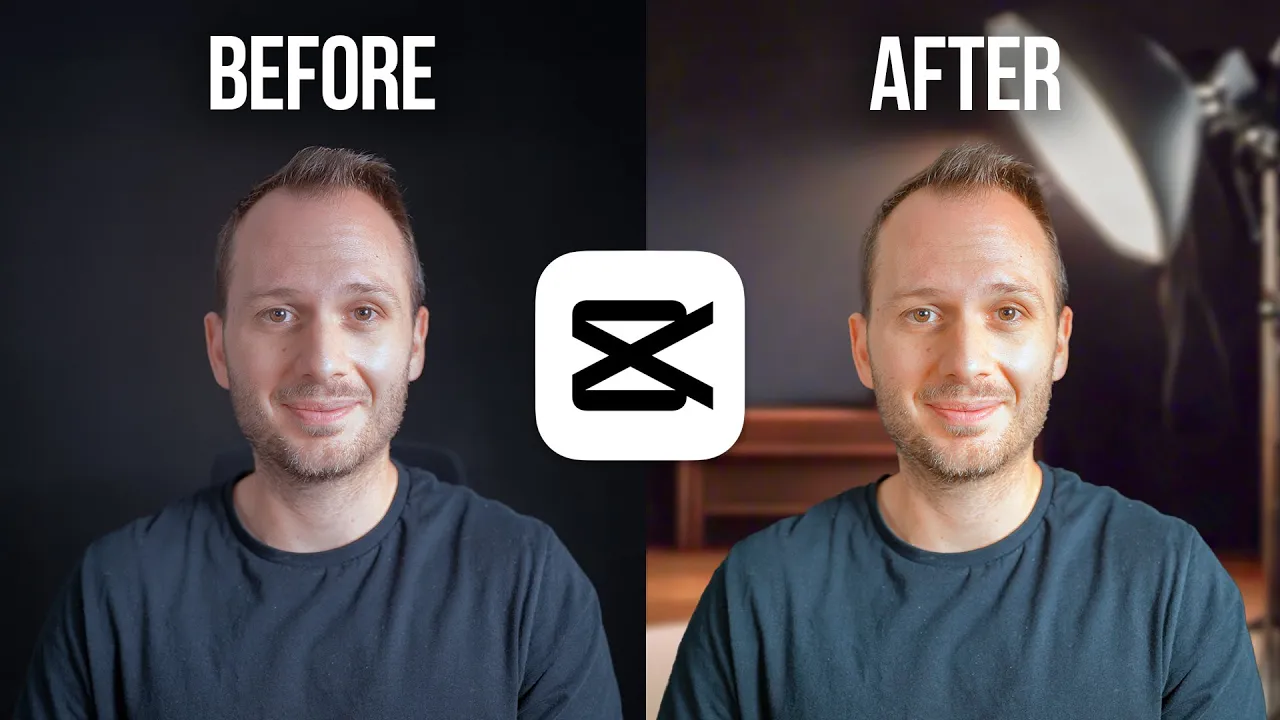
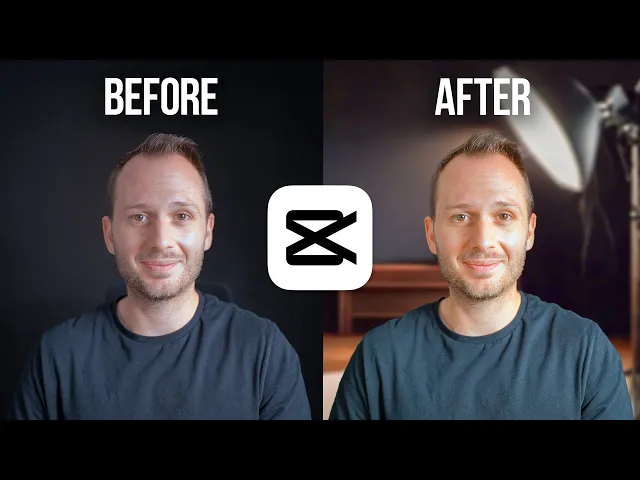
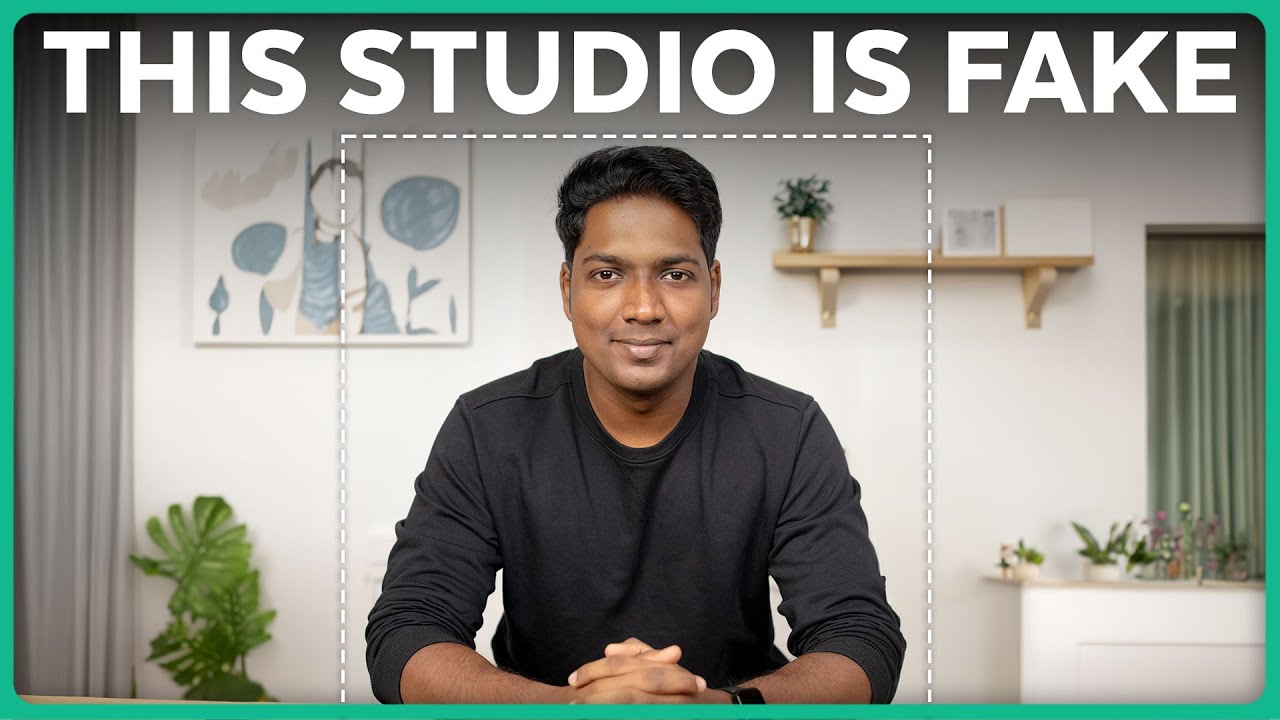
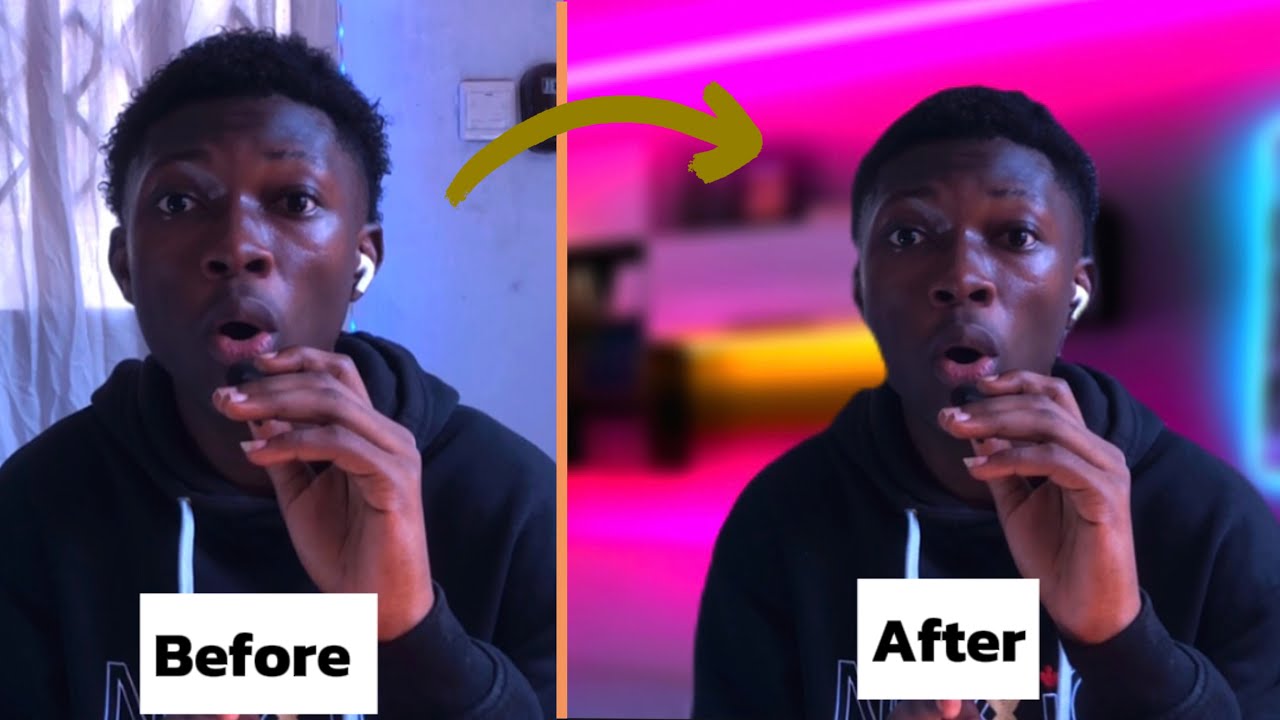
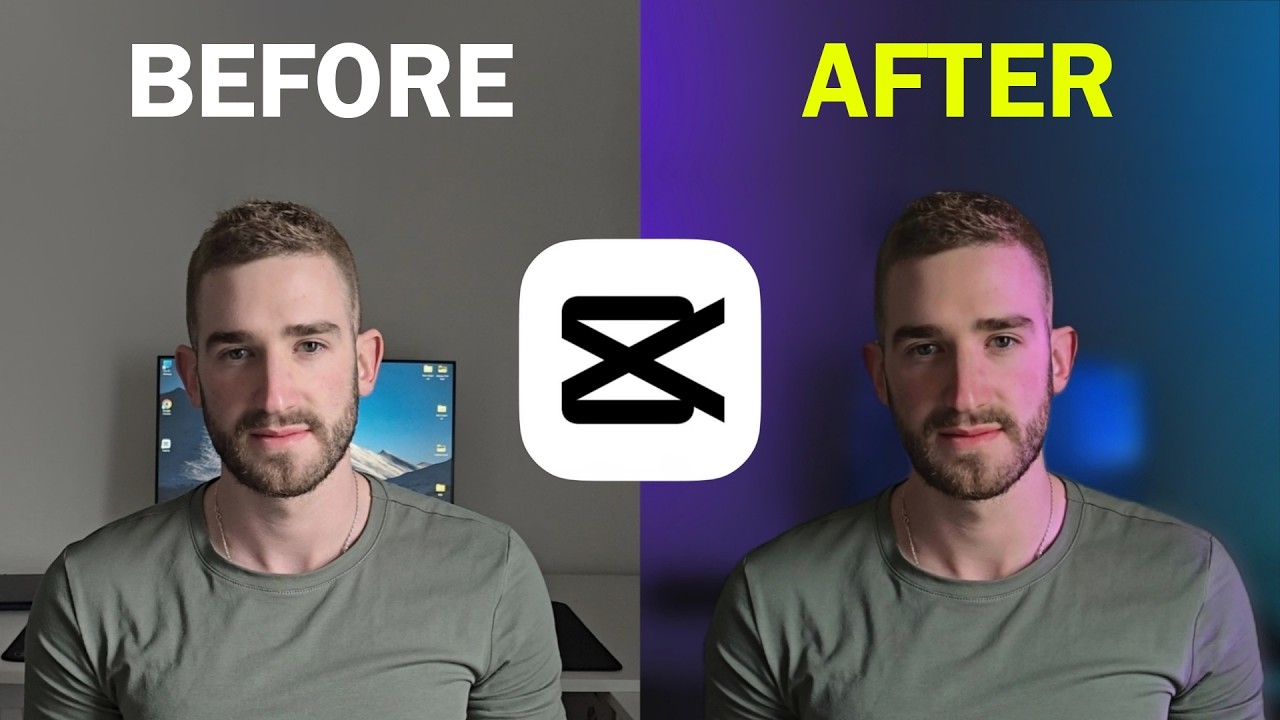
This background is fake, as is this one, and this one. So, if you want to replace your video background but you don't have an actual green screen, like I don't, then in this video, I'll show you how to do it completely free in CapCut and make it realistic. Something to keep in mind while filming to get the best result with replacing your background is to make sure there's a little bit of separation of you and your body from the background.
So, while I'm wearing a black shirt and there's a black background behind me, I have lit up my body. I've got a light behind me as well, and this creates a nice defined outline to make it easy to remove the background in CapCut. Alright, I've got my clips here in the CapCut desktop editor.
The first step we're going to take is selecting the clip or clips that you want to remove the background of. I'm going to start with this one. Now, heading up to "Video," then under "Cutout," at the bottom you'll find "Auto Cutout.
" If I check that on, CapCut is now going to work to remove the background, and it's gone! That was super fast. And if you're editing a really long video with lots of extra footage — I know sometimes I end up filming 10 times as much as I need to — I would recommend doing this after you've already cut your footage down to avoid the effect having to be applied to a much longer clip than it needs to, and therefore taking much longer.
Anyway, here's the super cool part that's going to blow your mind. Instead of heading onto Google and downloading someone else's image that very well could be copyrighted, thanks to CapCut's AI, you don't need to do that. So, we're going to head up to "AI Generated" on the left-hand side, which will generate an image of anything you ask it to.
It's very similar to the DE or MID Journey software. So, I'm going to tell it what kind of background I want. You don't need to go into too much detail, but giving it a little bit of description will help it generate something more specific to what you're after.
So, I've gone with "photography studio with soft boxes, moody lighting. " Under "Adjust," you'll want to make sure the aspect ratio is set to 16:9 or whichever the aspect ratio of your video is. And here, under "Steps," by default, it will be set to 30.
However, I'd recommend going up to 50, since this essentially means it will take a little bit longer to produce a much better and clearer result. So now, go ahead and click "Generate," and in just seconds, it's generated these images that look quite lifelike. If you like one, then you want to click "HD" here, and what this does is it will convert the image to a high-resolution image, which will be much better for our background.
From here, you can either download it or add it directly into your project. So, I'm going to click the blue plus icon. Now what we need to do is put this clip here of me talking over this image that we've just generated.
To do that, I'll turn off the main track magnet. Then I'll drag the image across, and I'll just shorten it so it's the same length as the video. So now, there it is behind me.
While I could settle for this, I think we can make it even more realistic. So firstly, I'm just going to play with the scale of it a bit and move it around. Now, to make it look natural, most backgrounds are going to be darker than the foreground, especially if you have lit yourself up like I have.
So, I'm going to head over here to "Adjustment," and in "Color Correction," I'll bring the brightness down. That is already looking better. Next, I'm going to head up to "Effects" on the left-hand side, and what I want to do is simulate a shallow depth of field, aka a blurry background.
Therefore, the filter I need is "Blur. " So, type in "Blur," and right here, this very first result, "Blur. " And now I'm going to add it into our project.
This has created a new effects layer with this blur filter on it. However, it has also blurred me out, and I don't want that. So, all I'm going to do is drag myself up, which puts the layer of me above the blur and above the background, and already this is starting to look realistic.
If you select "Blur," you can make it more blurry or less blurry. And right there, in 60 seconds, I was able to create this semi-realistic fake background. Let's make another one and try to make it even better.
So, we'll repeat the process by going up to "Media," and if you click on "Showcase" here, you can find an entire library of images that were generated with very specific instructions. So, if you want to go into extreme detail like these instructions, you're going to get a way better result than my very simple photography studio. I'll take a look through "City" for inspiration.
I'm really digging some of these. I'm going to try this one, and it's instantly inserted. Then I'll click "Generate," and look at that, it's produced some fantastic realistic backgrounds for me.
This one looks good, so I'm going to click "HD" and add it into the project. So now, you would repeat the same process as before. So, with our next clip, I'll select it, head over to "Video," "Cutout," "Auto Cutout," then drag this layer up, resize the image layer so it fits in that gap, and drag it down, move it across, drag the blur across so it blurs both of these images, and now I'll do that color correction that will make the background feel a little bit more realistic and consistent with the lighting of my main shot.
Alright, let's do one more. What about this one, deep space, galaxies, and stars everywhere? What could go wrong?
Okay, yeah, this one's pretty good. Okay, I'm having way too much fun here. I think you get the gist.
It's a three-step process. Step one is the auto cutout. Step two is generating the AI image.
And then step three is layering the two while adding a blur in between and color correcting the background so it looks and feels more natural with the main camera. Again, these images are completely AI-generated, therefore they're copyright-free. So, feel free to use these in your YouTube videos or any other type of video project where you need a very specific style of background.
To add the icing on the cake, if you select all the clips of you on the top layer, heading over to "Adjustment" and doing some color correction on this layer will also help the colors match the backgrounds. So, I'm just going to make some small tweaks to the colors and contrast. And if you have a Pro CapCut account, you can also take advantage of the "Relight" feature, which allows you to add a fake light into your scene to make it look like the light source is coming more from the direction that you would think the light source would come from in the background.
So in this case, it would be the softbox. This feature is seriously cool. However, Relight is pretty advanced, and you really don't need it to pull off this effect.
Well, okay, I've done a bit more tweaking on these backgrounds, and I'll show you what I've done to make them even more realistic yet again. With the first one, I felt like the generated background wasn't the most realistic, mostly because the light stands and the shape of the light look like an AI-generated image. So what I did was I went back and tried a few different keyword combinations.
The one I ended up with was "photography studio, moody lighting, realistic minimalist," and I found one I liked here. Then when I added it in, it just fits so perfectly for this opening shot, which I then adjusted the color temperature of to make it warmer to match the shot of me, and I played with Relight a bit to get the light roughly where it would be in this specific photography studio. With the second shot, I didn't change much aside from the color temperature, where I made the layer of me much bluer since daylight is naturally blue.
And I also tweaked the background a bit to be blue daylight since the original was a bit on the warm side, as you can see there. And while it was hard to make this one look ultra-realistic, I think I did a good enough job to fool you in that opening montage. Then with this silly sci-fi one, I changed the color temperature to really blue, turned the saturation right up, and increased the contrast to make it feel a bit more sci-fi.
So whatever your specific lighting setup is or generated background, spending a few minutes to make these tweaks can make your video that extra bit realistic. If you enjoyed the video, subscribe for more CapCut tips and tricks. And if you're new to video editing and you want to level up your editing skills quickly, then the best way to do that is by speeding up your editing workflow.
So in this video here, I'll share all of the best shortcuts that I've used over the last 20 years as a professional video editor that I've adapted to CapCut in order to edit 10 times faster and save wasting so much time. You will not regret watching this video. I'll see you there.

![I Replaced ALL my ADOBE APPS with these [free or cheaper] Alternatives!](https://img.youtube.com/vi/5EfqHg49kMk/maxresdefault.jpg)