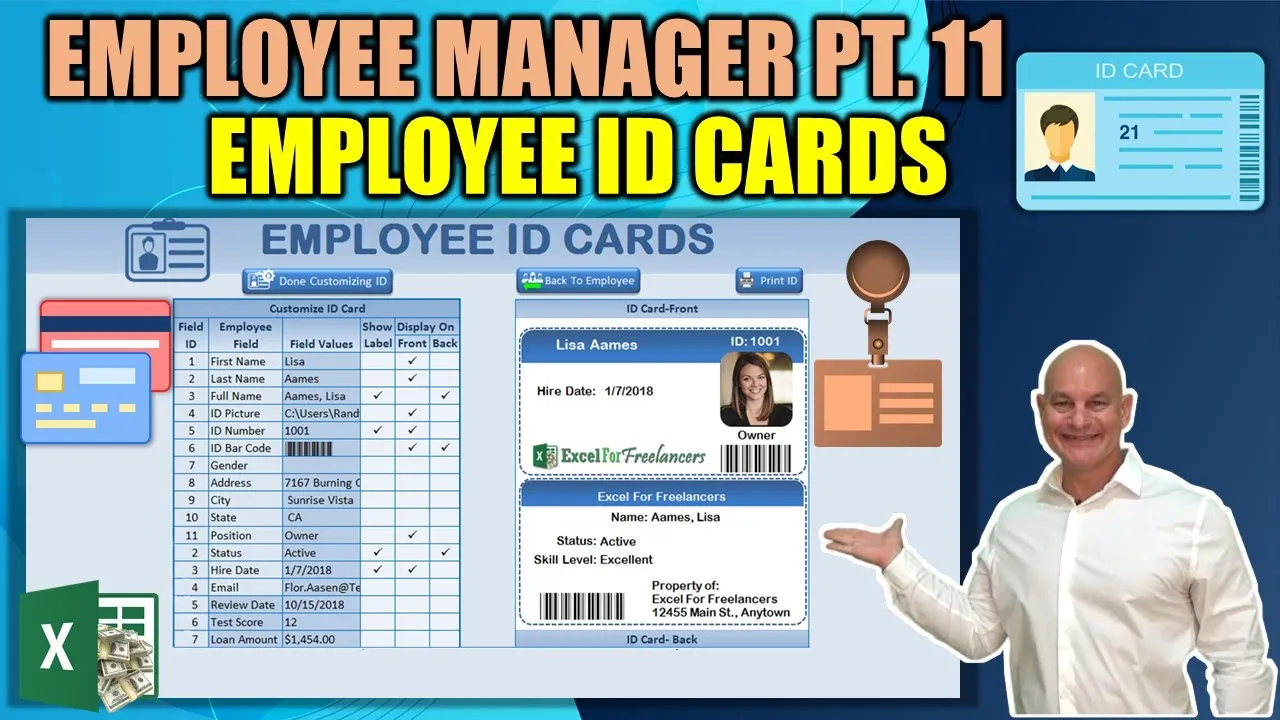
Hello and welcome this is rainy with Excel for freelancers and joining us for part 11 of the employee managers where we have a host of new features including employee ID cards where we have the ability to customize each and every ID card and that means adding pictures on both the front and the back of the ID card selecting barcodes as well we have a host of features ability to customize them we can also click back to employees we've added a ton of new features to the scheduling including time clock features so we know who's been
clocked in who's been clocked out and as well as if there is any missing time clock and that's for both the month view and the week view as well we've have added a ton of other features and I can't wait so let's get started all righty I'm really glad to have you here after a week off thank you for the patience I was doing some traveling so we just skipped week but we're you've got a fantastic training for you today we're gonna cover so many different types of features and events and new i futures based
On your request so we've got a ton of that I want to get right on it in fact I've made a list let's just go over the list real quick so we can see we've got a duplicate employee notification so if we have a duplicate employees we're gonna go over that scheduling we've got a right click to go over event let's just go ahead and show you that real quick if we want to create an event we can just right click or if we want to go to an event we just right click click go
to an event it's gonna go right to that event there so that's a really great feature I'm going to show you how we did that we've got a filter by position and filter by event type in the scheduling so all we'd need to do is select a specific position and it'll filter by that we also have filter by specific event types if they're contained we can do that so that's another great feature let's see what else I've added and I've been hard at work for you guys giving you the best employee manager in Excel so
we've got a lot scheduling we've got show clock in or out missing we'd go over brief at the intro so in both the month view and the week view we have the ability to show clocked in If their clock did if they're missing a clock out or if they're clocked out we're going to show that in colors and that's well in the month view except in month you were just showing them as colors and not text so we've got that ability as well we're going to show you how we went through that I've got a
we've got affixed a ref issue on the employee archive if that was an issue I'll show you how we did that employee ID cards is an amazing feature let's go ahead and through that basically we can get to it just by clicking ID cards and then we have the ability to display print and ID cards by clicking the print button it will print to the default printer whatever your default printer is set as that's my combines Snagit so we've got that up there and you also most importantly admins are gonna have the ability to customize
this and by choosing from a host you have the ability to choose or hide a label you have the ability to show just by clicking show a barcode on that you've got the ability to show any types of fields just by you know whether it's on the front of the ID card or the back of the ID card just by selecting I can't wait to show that To you so that's gonna be a great feature we've got also some custom fields here which we're going to get into the custom fields here we've got that available
to you I'm gonna show you how that works and we obviously have the ability to go back to the employee information so that's great we've got we fix an issue within events on the frequency and we've got sort employees on click I did Anna sort here a sort button we're just gonna sort our list alphabetically so we've got a lot to get to let's go through it the first feature I wanted to show you was the ability to we had a lot of questions about if there's a duplicate employee how are we going to handle
that and so I wanted to make sure there was a warning if we let's say we have a facility called Lisa aim so if we go into another employee we try to change the name to the same actually it's EE and then the first name of leave so we're gonna get a warning right away it's gonna say duplicate of found please make the necessary connection Corrections so that is really an important part and I wanted to show you how it was going to change this name back to and okay so as soon as we change
it back to an Original name it's going to automatically update so that's going to go it's going to go away so we use conditional formatting on that so I wanted to show you how we did that and if we click on this cell here we see duplicate employee name found but it's hidden so we're gonna use conditional formatting to show that when it applies now there are two conditions two possibilities one is when we're on a new employee if we're on a new employee and we have aims and then we put in first name here
Lisa it's going to also show up whether it's a new employee or whether we change an existing employee so that's really really important that we have the ability to show for both existing and new employees so let's go ahead and take a look how we did that if we look in the conditional click here and click on the conditional formatting into the home conditional formatting and manage rules we're gonna see that we have here our conditional formatting b8 equal true b8 equal true that is the rule that we're using and when we format that all
we're gonna do is we're gonna change it from blue to red on a fade a fill effect fade from blue to red then we're gonna change the font To red so that's the condition and that happens when b8 is true let's take a look at b8 and see exactly what is contained in that cell to help us determine whether we have a duplicate or not remember there's two conditions we have whether it's an existing employer new employee so we have to make those considerations now because here's the reason if we're gonna look up in our
Employee List we're gonna look for a name right we're gonna look here in the employee name here and I want to know if it exists or not if it's a new employee for sure we have to understand that and if it's an existing ploy we also have to understand that too so let's go ahead and take a look that's what we're comparing it with so let's go back into the employee manager and take a look at b8 and take a look at this right here we don't need it that big we can zoom up okay
so if all right we're going to start out with and there's gonna be two conditions kuku conditions the first thing is B six has to be false in this first conditions B 6 is false what is B 6 well B 6 is a new employee so that means on an existing employee so for this particular condition existing employed count if Employee name that's the name I just showed you an employee list count if equals and why we do f6 comma I 6 what is that remember that is the last name comma space the first name
because that's the same format as we're using right so what I want to do is I want to look up this employee name and I want to look for something that is equal to F 6 comma e 6 so I'm looking up for this exact name and it has to be greater than one because if it's an existing employee then it must then it's already there right we're already there so it has to be greater than one in other words it has to be more than two times it has to be more than one time
estin it has to be usually it's going to be two if there's a duplicate so for existing employees we're looking for something greater than 1 greater than one because it has to exist already and another time so that's important we want to know that if it's greater than one if it's greater than one then mark this is true so those are the two conditions otherwise otherwise let's try something else we've so now we have accounted for the conditions if it's an existing employee if b6 is false but what about if b6 is true if it's
A new employee then I only need to know if that name exists just once just once in this employee name if it exists just once then I need to mark it as true that means true meaning it is a duplicate so b6 is true that means it's a new employee count if Road we're gonna count if inside this employee name inside this range equals again f6 last name comma space first name is greater than zero so the difference between new and existing is 0 greater than zero or greater than one existing if it's existing it
must be greater than one if it's new and must be greater than zero that means it already exists and if that's the case market is true so if these two cases if this if this and this is greater than one then true if this is true a new employee and this and the count is greater than zero that also market true and if either of those conditions are not true then market false so that's how we know we just the important thing is to know that if it's a new employee it has not been saved
in the list yet so we need to count if it's just one then we know but if it's an existing employee we needed more than one so that's how we do that's how we mark this is true so as soon as We type in let's go ahead and type in again aim so as soon as we type in this name and then we go to Lisa it's gonna change b8 to true BA to true why is that because one b6 is false that's correct count we know we've got this in the list we know we
have this plus a comma plus a space is already in the list right it's already in this list it's already here now it's twice so we cannot have that we can not have this toy so we must change it so so all we need to do is just change this to change the name and as soon as we make that slight change it goes away so that's a really good way of how we can differentiate and how we can see very quickly if there are duplicate employees whether it's for a new employee or an existing
employee so that's how we handle that all right grant we've covered duplicate employees let's go ahead and cross that offer let's change that so we know we've we've made that green let's go ahead and change the color on that we've now let's go scheduling right-click go to event this is a great little feature back into the events and back into the scheduling so first both on the month view both on the month view and the week view we have added a Future a right-click event and let's go ahead and click on an event right if
we click on something other than event we're going to get something that's other than event this is the time clock or this is blank oh we would just get in message please select a valid event oh so we need to make sure that we actually select an event like this one right click go to event and that's going to bring up right here this is a very easy macro the first thing we do is we want to create a right-click option right click option and we can do that here under we've created a yellow little
triangle here as an icon and then go to events go ahead and see how we did that and keep in mind before we go remember we've covered in Prior trainings 60 spaces over we've got the event ID so this event ID is important if this for some reason is blank we're gonna return out this is not an accurate event so the event ID which is 60 columns over to the right is very very important we need that so we know which even to pull up on the event sheet so that's critical so we're gonna need
that anytime there's no event for example this we're just gonna get that message please select a valid ID a valid event alright so we've got that covered now let's go ahead into VBA and we're gonna start out with the right-click and we've added right-click and before when we created the new event but we've added on to that so we're gonna go into the VBA into the developers tab if you don't have it all f11 will get you there quickly and then we're going to go into this workbook and that is where we're gonna start out
there and basically what we're going to do here is on its like before right-click event before right-click event that's what we want some to do something and the first thing wanna do is we want to delete and leave it we can add one more here if we want to because we've added another one but I think it should be sufficient it helps remove duplicate entries when we delete we always want to delete it in fact I've got two of them so I may I may want to add one more to this just in case it
gets duplicated so what we're gonna do is if the Act she is she ate meaning if this is the scheduled sheet then right click and call events so we went over that before cuz we have added some right-click events already into our schedule remember in a previous Training we did at the add leave event where we can add an event based on a right-click event today we're going to focus on the go-to event and basically the reason that we have the reason we have that option is when we click another sheet and we right-click we
don't want in fact here's it is you see why this is appearing it should not appear because I need to have that delete I need to have that delete right there before so let's show you how important that it alright so let's go back into the workbook and I'll show you why that is important why we must delete it we deleted the other one but the other one so we've got to create one more I'm gonna delete this I'm going to duplicate this right-click and I'm gonna paste it right there and but I do want
to update the name with the right-click and name the actual name of our right-click in fact if we click the right-click menu we are going to see that we I have added one more called go to event go to event so all we need to do is copy that go back into the workbook and we want to make sure we delete that button when we go into another sheet if the sheets not we want to delete it so now when I right-click Here it's not there anymore because that's why it's always important to delete it
I only want this appearing on the scheduling sheet right here I only want go to event on the scheduling sheets and we click any other sheet it's automatically deleted okay so it's not there we only want that on that so that's how we can do that we always want to make sure that we delete it at times so this says on so we're gonna delete it regardless regardless if we're on sheet or not why because when we when we are on she date this macro right here right click call events that's gonna create our right-click
menu so we're gonna so we want to delete it first because when we're on sheet a is gonna create it if we're not on she date it will not create any right click that now let's go ahead and take a look at this macro this is a macro that we visited before but I've added onto that some features so let's take a look under the right-click menu here in the module we were just there this is called the right-click event and now previously we did add these which was going to we did that add leave
event and now we're gonna go to go then we also want to delete them here just in Case they're existing we want to always delete them if we don't delete them it's gonna create duplicates and we don't want duplicate items in our right-click menu so always deleting before we create always leading and if for some reason they don't exist we've got on our resume next just in case this is not existing it's gonna skip because we have this on air it allows us to go to the next line just in case it's not there or
not found now those we've created this previously this is our pop up to sense the leave button and here that here set go to event button we've created this go to events that go to event button this is a command bar button command bar button previously we had a command bar pop up what's the difference between the two of them right click a command bar pop-up allows us to give a pop-up just like that but when we go to a command bar button is simply just a button there is no pop-up so that's how we
that's how we do it when we want to just a button we create a command bar button we want to pop-up we click a command bar pop up so we've differentiated those in our dimension statement right here command bar pop-up and command bar Button and this time we got it a command of our button so we've deleted it said we're gonna set the go to event button as a command by ourselves control add before to why before too because this is the top position and I want this in the second position right below and it's
gonna be a Cammisa control button not a pop-up but a button so here we've set it up and now what we're gonna say is with we've created the leave button here this was previously right so we've done that previously this is how to create the leave how we're going to create those multiple leave where we loop through those we did that previously but in this case all I've added is on its this additional code right here and this says with the go to events and we're gonna set a caption the captions gonna be called go
to event I'm gonna set a face ID of 1812 face idea is just a an ID so if we were to do a search on Google and we could see that you can you can find out many different ways to do that let's go ahead and just show you what we could do is there's some different ways to do that you could do let's take a look let me lower the screen just so you can see different ways to find that face ID Because you may want something different in your face ID so let's go
ahead and dump excel vba face ID and if you look at the pictures there's some really good images here and it kind of gives you you want something with a number like this it's kind of small but and the numbers that go along with it now you'll see here you see each one of those has a number that goes along with it and there's a lot of them you can search them you can save them but basically the idea is that each one of these numbers is assigned to a specific icon so when you select
one you know then you could use that number correspond so that's that's how we get those and there's a there's a few different ways there's a few different programs that can get you a face any but it's pretty much simple to look it up on Google you may want to save these pictures in your file if you're gonna be using them often so I've done that as well all right let's move back in so now we know how we got that face ID all right so here we are now back into it go to event
button we got a set set the caption of go to event that's the caption and the face ID is 1812 that is the number associated with that yellow triangle Option that I'm the yellow air option that I've used and of course on action what do I want to do when the button is clicked well I want to run this macro I want to run a Mac are called schedule go to event so that's the background let's go ahead and dive into that specific macro and look at them and we can find that matter in our
scheduling logical module everything is organized so we've got everything named scheduling macros and we're gonna go to again called macro call right here on the top schedule go to event and the first thing I want to do is I wanted to mention the current row the active row as long and the act of calm I need to know the row and the column those are important and then we're gonna dimension the event ID as long as well the event ideas whole number so those are helpful so we've got those three as long and we're gonna
determine the active row a CT row as our active so row and remember active cell we use when we're off the sheet when we're on the sheet when we're doing coding on a sheet we use target row target row four on the sheet off the sheet we use active cell row so that's the difference that's why you see sometimes you see active cell And sometimes you see target target means code on the sheet code off the sheet in a module weaves active cell active cell row and active cell column so we define those we're gonna
need those now we have to check remember that remember that event ID I need to check to make sure that that's not empty and remember that's our current row the current row plus our current column plus sixty columns to the right sixty columns to the right remember that here's our event we move sixty columns to the right and we're gonna see an event right there that's the number sixty exactly so what I'm gonna need to pull that number if it's blank and then we're gonna say this is not a correct event so we need to
make sure that there's a number in that existing row sixty columns to the right that's where we store our event ID all right so we need to check for that it's the first thing we want to do so it's if cells and we the reason we use dot cells is because we've already defined sheet eight up here if sheet eight cells active row the current row that row won't change plus the column plus sixty if that value equals empty then we know we not we cannot go to him to a specific event if There's no
event ID so in that case we need to put message box please select a valid event to open to to I guess we could say to go to event okay so and then exit sub we can't move any further if we don't have an accurate event ID so if example if we click on a white space here and we click go to event we're gonna get that message box please select a value event to go to event that doesn't really make sense either all right let's go ahead and just put it back the way it
was to open all right next up event ID now that now that we're sure that this contains a value we can set the value to event ID that's ideas equal to the cells the active row plus the active column plus 60 so that is our event ID next up we want to activate sheet 5 that's our events events sheet 5 so we need to activate that we want to make sure that's of active and then all we need to do is just two things I need to put the event ID into range b4 before and
then I'm gonna load run the macro load event so if we go into our events sheet right here we slide on over and let's to b4 and that's we're gonna put we're gonna put the event ID there and all we're gonna do is load it up so if we were to Put in 20 and run the events it would it would load that event or any event that we put would automatically load it so it's a really really handy handy feature let's go ahead and take a look at how that works so when we go
back into the scheduling we select on any event let's see for Tonya angel this event Tonya's vacation we right-click it go to the event and pulls up Tonya's vacation just like that and with same thing for the week view we have that same feel because again even in the week view 60/60 columns over right we've moved it over again 60 exactly we have our event IDs here so the same macro works just fine for weekly as well so we right-click go to the event again Gabi's car trouble right here so it's a very very easy
way to go to the event right from the schedule you see it's not a lot of coding alright great I'm glad I got you let's go ahead and move on we've got so much to cover we've got so we've covered that so let's go ahead and color that to know that we have colored it with green scheduling filter by position let's move on that next we've got those two filtering by position and by event types don't want to show you How we did that all right so let's go ahead and head into scheduling and take
a look at that and again what I'm looking to do is I want to filter if I only want to show a certain position I just want to filter and show only those positions that are managers I only want to show a perhaps a position that is an owner or I only want to show specific positions I may not want to show all the schedule and of course this would halt true for both the week view and the month view so the week view the same idea managers and just so this way I can limit
the schedule specific we have a lot of employees we may want to filter it down by just specific employees based on their positions and once again the positions are based the list the list of position types are based here in the admin once the admin we do have our employee settings in here we have our list of positions so you can add to that list here anytime you want in the employee manager sheet once again we can select any type of position here simply by changing or adding here we can set the position of any
employee and this gives us the ability to filter it out so let's go ahead and take a look at this let's start on These positions and show you just how we did that the first thing of what I want to do is I've got a list of employees here but I want and really what I want to know what their position is and I want them listed out on this table so I've got them what I did is I basically just used what's called a helper column and if you slide over here to the right
into column 172 FP I've used one index match to basically determine what their position is in place it here the first thing I did is create a named range called employee position and if we look in here under the formulas the name manager and click on employee position here let me tab over it's gonna show you that it's an offset formula within our employee list and that is going to contain all of our employees and keep a note let me show you this one more we're going to start at the header row 3 why do
we start they header row we start in the header row because if end or when all employees are deleted maybe you're just starting out we won't create a ref error as long as we include the header row so we've included the header up but we've offset it one row down that means it's gonna start one row Down from this so that helps us we're gonna do the same thing when we count except we're counting a why are we counting column a because a contains our employee ID and employee ID is required for every employee so
we always want to count the list or the column that contains a mandatory field such as employee ID in column a so we're gonna count all of the values including the header row except we're gonna subtract one because we don't want to include that header row so we're gonna include the header row in the count and then subtract one this helps us keep from any ref errors when we delete all the content and of course that's going to be just one column there so we're gonna use that offset to determine just as we always do
our employee positions here so we've got the employee position we've named that range so now we can go back into our index we're gonna index the employee position but we need to find the row what is the row we're gonna use match to find the row one of my favorite a lot of you like vlookup you'll see I don't use that very much if at all I'm preference to index mess but whatever works for you so to get the road we're gonna match and we're gonna use D 8 D 8 as our employee name we
can also use employee ID too as well play these looking at B 8 so if we were to match mmm use B 8 and we could match using employee ID which in fact let's go ahead and change that I like that a little bit better employee ID we can a match employee ID although it shouldn't matter both will work we're gonna get the same message we're gonna get that all we need to do is double click to paste it all the way down that way if just in case the names are not always the same
or the names change although they should always update because they are always linked that way we'll always have it accurate accurate number accurate position so we're using employee ID here we can use both of those or either one of those and just remember our employee ID is located in be here right here it's be here okay so we've we've used that but it also uses the employee name to match it and the names are linked so it's pretty much the same thing you can use either one it's not going to make a difference in this
particular case because they're always linked to the employee list in the b/c column okay so now we know how we've obtained the positions now we're Going to use this as a filter and we're gonna use this and remember this is call them 172 but we're gonna create a table and that table actually is gonna start on column seed here we're gonna call them calm sea so in fact this if if our columns if this is 1 then our column here is actually 170 because we're starting we're not starting at a we're starting at C so
it's gonna be 170 so 170 is our first 171 and 172 so those are the columns this we're gonna use for the event types and I'll show you that just a moment we're starting at just positions so let's take a look what do I want to happen well I want something to happen when I make a change here to DD 3 I also want something to happen when I make a change to T 3 so we have DD 3 and T 3 with either of those change I want to run or filter cuz it's both
for a month view and week for you so when we click owner I want that automatically to filter out when I make a change to t 3 or I want that automatically to happen when I change to DD 3 to is well so we want those things so both of those so that's a change events when we go into our developers we're gonna look at the work she changed so let's go ahead and take A look at that into the scheduling sheet we're on it right now and we're focused on work she changed work she
changed and right now remember those two we're working on the types of positions so that's scheduling we're gonna start out if intersex target that means if we're gonna make a change to again those two cells that I just spoke of DD 3 or T 3 so if I there's a change to either one of those cells then do something what are we gonna do we're gonna do all of this alright so the second thing I want to do is first I want to check is the target value I want to make sure it does not
equal all types or positions that's important we if it does not equal all types positions then do this but if it does equal all types then do this else right here so if it does not equal that means we're gonna run our filter the first thing I wanna do is we're gonna set the auto if it's not if the our auto filter mode is not on we need to turn it on and we need to show all data that's the first thing we want to do is show all data so then we can run our
filter we don't want to run it twice without clearing the filter so the first thing is we're gonna set our auto filter we're gonna start At C 6 C 6 and we're gonna run it all the way to F P 314 that includes both week view and so we're starting it out if month view we're gonna start out all the way over here on c6 because we're gonna include the names and everything and we're gonna go all the way over to F P we're gonna all the way over to here F P we want include
I've got to include this column right so F P is the last column I want to make sure to include that all right so next up we've included that we're gonna run the auto filter and now we're gonna say is with this range with this same range on the auto filter field 170 that is our last field that's the last column what is the criteria and that's the target value we're gonna set a criteria to the target value because the target value is either whatever we just changed in DD 3 or T 3 so that's
gonna cover both of those instances our target value is gonna be whatever we changed it to whatever that filter is whatever we did right here for example if we select managers manager is our target value so that is what we're going to be using and that means I want to only filter managers I only want managers to be displayed here So we're gonna we're gonna hide everything else is basically hidden we're not using an advanced filter this is just a standard Auto filter we're gonna filter those by just managers so we've done that and now
how we just filter that so it's a very simple code so back into that we're gonna filter it by the target value and that's it that's all we need to do is to run that filter however if it equals this is does not equal but if it equals else else means equals equals let's go ahead and I'm gonna copy that just so we know make a note of that equals all data positions just so you know else if the actually auto mode is off then show all data as long as it's if the auto mode
is on it's gonna if we try to just run this code automatically without checking to make sure the auto filter mode is on it's gonna create a bug so we want to make sure that it's on in filter mode and then we want to show all data so they'll show all data so that's how we do that we've also added a clear filter button so that is all we have to do next up we're gonna move to scheduling filter type events we're gonna go through this this is how we do the event types so let's
go back into There and this is right here this is the event type so if we click leave we're gonna get only leave the events that if we click let's see what else we have here training then we'll go only get specific items with training and of course we couldn't theoretically have leave and training but this is any type and what I have done here is I've also created a helper column one helper calling for the week view and one helper called for the monkey because the month view contains a lot more information so we
need to have each and I'll show you how we did that in that helper column right here now here's the helper column and basically what we're going to do is we want to know if it's month view we're gonna be focused on a c3 a c3 if its month you and we're gonna be focused on D f3 if we're in week view so we have two different helper columns we have a week view and we have a month view now the formula it's gonna tell us true or false if it's contained it's gonna be true
if it's false so if we're gonna use this if da8 through dg8 count if what are we counting that is this entire range here this whole week view right we're looking for something what are we Looking for we're looking for whatever is in here whatever's in here if it's contained and this week whatever's in here then market is true right and we said and why do we use this star well because look if we click on training let's let's get out of that and click on training so that we can see what so because training
contains training but it contains much more than training it contains our vet has the name so I don't want to look for only cells that include training only I want to include cells that have the words training in it and probably have a lot more including the event name so we buy adding that asterisks at the end that's the wild-card so by adding this wildcard to the end that means anything that's in DF DF and the wild-card so it means anything after that anything after that would be also be true as well so so that
is how we do that so it's let's go ahead and take a look at that so again DF DF 3 in this case training so let's go ahead and click on training so now we have training and now this is true why is this true because we've looked through da 11 through DG 11 DF 3 is training DF 3 is training and the asterisk and the wild-card That means anything after that is okay as well if it's greater than zero for counting it anything greater than zero would be true otherwise it's false so we've marked
every instance if there's more than one instance it's gonna be true if there's zero instance it's gonna be false so that helper column allows us to determine if the word training is here within there so if we were again if we were to click on let's say I believe leave we have a few of them right so these are all leaves so all of these contain true because they all have leave associated at some point in the week for that employee that is how we do that now that's how we get to true or false
we've done the exact same thing for a month you accept month for you the entire range will go from F all the way to AJ so that is the entire range we're looking at and of course we're gonna compare that with whatever is in a c3 so again month view again we're looking through da 8 all the way through DG 8 we're looking for whatever's in AC 3 and again using the wild card the asterisk that means anything after it is just fine and that's got to be greater than zero if it's found it's gonna
be Marked true otherwise it's false then all we need to do is run a filter find out wherever it's true and hide everything else so basically hide all the falses unless of course it is all event types then it doesn't matter so let's go into the code and see just how we did that again if we're intersecting a c3 or DF 3 is the 8th of the month view or the week view is nothing then do something we're gonna dim the add column as long why do we need the add column because I need to
differentiate right here I didn't differentiate between week view or month view but at some point I need to know because I've differentiated it here here's our week view and here's our month for you right so our week views in 173 and 174 so we're gonna do is we're gonna add one if it's month view so back into the code here and here we have if the target address AC 3 then add one right if the target address is AC 3 then add one because I need to know so then we'll use that add column 171
plus 1 remember 171 plus so it's gonna be 172 the reason it's 170 so we're starting on column C so we have to deduct - right - duck - we're not starting on a ok so if the target value does not Equal all event types then do the following if it does else if it does equal all that's then again true if the active sheet mode is an auto filter then Auto filter and show all the data we want to show all the data so but if it's not then we need to filter what are
we filtering we're going to filter it again active sheet out of filter mode then show all data first we're going to show all the data before we do the filter we're gonna again set our range from c6 all the way to Fr this time it's F R remember here was F P why are we going to Fr because F R we need to extend it all the way to here all right because we're gonna use it we're gonna need to use this or this so we need to extend it before it was F P now
we're gonna send it to F R we're gonna use these columns based on their true or false results so now I'm moving back in Auto filter 171 we're starting out plus the add column the add column if it's weak view will be 0 if it's month view will be 1 so the field is either gonna be 171 or 172 don't let this confuse you this we are starting out on C so this should be minus 2 in actuality let's go ahead and equal that equal minus 2 so in actuality work because We're starting it out
so this is actually equals -2 minus 2 the reason is because we're starting a column C minus 2 so that's a little bit so when we started right there we go now 171 172 etcetera so that's how we use these columns right so this is comp 71 172 that is how we differentiate so it's gonna be 171 either plus 0 or plus that's how and the criteria is true remember we only want to show rows where the criteria equals true and I went over that formula with you so that's it that's all we have to
do now I did add additional clear filter in there just in case we need to use it we can clear the filter that's gonna clear the auto events if they're always it's just this is a quick way to if you're filtering it and you can also just clear the filter it's just another way to do it let's go over that clear filter it's very relatively simple work should and go ahead and go into the scheduling macros here we're gonna look at the clear filter which is right here and what we're doing that we're going to
return DD 3 and T 3 we're gonna return to all types we're gonna return df3 and ACA to all event types scuse me all types or positions and all event types that We need to return the values we are going to if the Auto filter mode if it's on we're going to show all the data and turn the auto filter mode as false now the reason I like to start in a high I started in row four because I don't like to show those drop-down lists that are common so when we unhide these you're gonna
see when we run those filters you're gonna see it appear but I don't like to see these right I'm not a big fan of this so I used those that's why I started it row six that's why I started because I want them hidden these are these columns or you know these rows are both are formless so we always hide those so that is why I can use the auto filter and hide it it's kind of a cleaner look so I like that a little bit more and so clearing the filter also does the same
thing it returns it off so the auto filter mode is actually on it's just hidden inside those and I know we can turn those drop-down lists off through a setting as well but it works kind of well here as well so we've turned the auto filter mode false off so that kind of clears it out so that is how we filter both the position types and event types in the schedule that can Be really really handy when we're focused on a lot of employees and we want to just drill down to specific weather event types
or employee types that's really helpful I'm glad I got to show that to you let's knock that off our list both of those items will give those a color of blue so that we know we've covered those we've got so much to cover if I don't make a list I'm gonna lose track scheduling show clock in or clock out missing oh that's a you're gonna love this formula or not let's take a look scheduling let's go ahead and take a look now we will unhide these and this row so that I can go over so
basically as you know prior events we've created formulas and then these formulas help us what's going on hi that helped us determine what we need to show whether it's event and before we just had events in here events information training or leave but now I want to show scheduling information as well so before we just pull information from this events list here I would pull the information from this events list and then I would display it but now I want to pull information from the timeclock list as well I want to pull information so we've
added some named Range and know let's go ahead and look at these named ranges under the name manager I've added a few of them they may have been here before but I don't think so so under the time clock list here let's expand that we have clock in we have clock out and we have time clock employee ID that's important and we also have the time clock list ID those AB lists and again I've used the same parameters the offset formula including the header so we've that's pretty consistent throughout and so we have those four
different named ranges clock in clock out employee ID and timecard list ID those are gonna be very important moving forward because we need to know it and if you remember correctly our time clock ID here is based on the year the month the day and the employee ID that's how we can figure it out so we've used all those to differentiate so we can get a unique time clock ID but it's based on some parameters such as the clock in and the employee ID so that's really really helpful when we're trying to figure it out
and in fact we're gonna need that so when we go into the scheduling and I need to know what the time clock Liz I know this dates the 19th so If we're trying to find a specific time clock and we know in column B here here's the ID is the employee ID so I know so I know the dates and I know the ID so what I need to do is I need to combine them and say hey is there any clock in with this ID in this date so basically in fact if you see
on 1124 there is right so if we go back into the time clock list and we see 2018 November 11 24 and the 101 7 is the employee ID 101 6 so we've got all of these actually all of these on the 24th which is today's date so that is going to help us moving forward because we need to oh that so let's go back in to the scheduling so again we have these for example we have 1 0 0 and I employee 1 0 0 9 on 11 24 so I've got to say here's
the date here's the employee number find a time clock if there is let me know is it and I really need to know three things we really need to know four things let me just write them down here I need to know one has the employee employee clock clocked in and not out okay have they clock in and not out have they clocked to have they clocked in has the employee clocked in and out or three has the employee clocked in and not out and is the Time that they clocked in greater and let's see
the time they clocked and or actually I should say and now the current time and the current time and the current time - let's do - - the clock in time is greater than the threshold threshold and what does that mean let me show you with that now let's go ahead and go their threshold basically what I want to know is I want to know what when they're missing the clock if it's been 10 or 12 or 15 hours and they haven't clocked out we need to know that that's very very important but first of
all whether it's 8 10 or 12 hours that's something that administrator consent and in the admin screen under the employee settings excuse me under the time clock settings actually we have set this threshold automatically clock in for next shift when nine hours so we're gonna use nine hours have passed since the last we're gonna use this day threshold that's important so that means if this amount of time has asked if it's now 5:00 p.m. and they clocked in at 8:00 a.m. it's been nine hours so write it at 5:15 the time has passed for them
to they're already missing their clock on I want to know it I want to know when Somebody's missed their client this can be this can be set dynamic dynamic so let's take a look at this missing the clock out time and we saw that my list is gone but missing the clock out time this instance let's take a look at this Bailey Chase on November 24th let's look at his time clock let's look at Bailey has clocked in at 851 a.m. the current time recording this is 941 p.m. alright so it's been 13 hours 13
hours what if I change this threshold into the time clock settings to 14 hours 14 we go back into the scheduling screen and we take a look boom it just changed the clock it did you see that it just changed because it's now over the threshold in other words let's go through it I know it's a little bit confusing but it's really really important if we look at the time clock list they clocked in at 851 a.m. it is now 9:42 p.m. so it's exactly relatively almost 13 hours after they clocked in so if they're
under that threshold 13 hours if they're under it and in this case the threshold is set to 14 then good but if they if they are if they are below the threshold then I need to have a warning so let's say we set that to 12 all of a sudden it's gonna Turn red again missing clock out to them so that's what I want to know I want to know when somebody missed their clock out time and the given number of hours in other words if the current time is basically over the threshold then we
need to know that they missed the clock out so that's how we did and we did that through a formula and it's a little bit complex for them but we're gonna break it down for you so not to worry and that formulas housed here all of our formulas around here let's drop that down a lot more that's okay it's kind of a big formula sorry about that we covered the event types here this here all the way from here is our event types right basically this part says if there is an event type on that
day with that event ID if there's an event ID match the type look for the employee and finding event and put the event here so for example this is an event it will display so that formula which we went over before is the way we find events so we've covered that but next now I need starting right here starting at this if right here now I need to know three things three things all we're focusing on one have they clocked in and have they clocked Out if they've clocked in and they clocked out I want
to show us something like I want to just something like this clocked out if they've clocked in and they're still under the threshold like for example this guy has clocked in and let's take a look at that under Lisa Eames I should say girl Lisa okay so Lisa a.m. she's clocked in at 406 p.m. right it's only about five and a half hours after that so we're still under the thresholds because they just clocked in five hours ago so we're just gonna show them as clocked in so in that instance it's fine clocking so the
three things that we need to know the three things three different types of events one let's go back to the formula have they clocked in and out if they've clocked in and out sho clocked out if they've clocked in and they're under the threshold show clock in if they've clocked in and not clocked out and they're over the threshold scroll missing so those are the three scenarios we're gonna focus in on and it's broken down into just three sections and we're gonna use it starting right here right at this if and in this case we're
gonna index time clock lists we're going to find the time clock ID Here that's all that does so if the time clock ID is found it's going to be does not equal zero okay so one that's one instance the time clock ideas found okay so now we know we've got a time clock ID for that employee for that date okay so that's gonna help us we're gonna index next we need to check one more thing we're gonna index the time clock is clock out and all this this part does right here all this part here
it's a checks is there a clock out for that employee on that in clock out is there employed for clock out for that employee on that date if there is then mark them's clocked out that's all that does I know it's a little bit tricky it just finds it says is there those two scenarios one two things this is why we have and two things is there a time clock ID does not add not equal zero and is there a clock out if there is none other words does not does not equal empty right then
mark it as clock down okay so that's our first one we cover that right here again two instances is the climb time clock ID found and is there a time clock out if there is no seam mark them clock out cuz they've clocked out so we're good we've covered scenario number One now let's focus on scenario number two and that's gonna be right here let's let me highlight that one focus that just that focus right here okay so in this instance what I've highlighted is now I need to know one is there it's also to
the end and it's gonna be three scenarios and is there a time clock ID found okay that's one is there a time clock in found and is the time clock under the threshold so we've covered that here so let's go ahead and so we're gonna use an because there's multiple scenarios and index we're gonna find that time clock we need to know time clock in does that exist I'm caught in match all right we're looking for a match finding that time clock in the time clock list okay so that's is here right here time clock
clock in did we find a time clock clocking in if that doesn't like well okay so we have a time clock in now we know is there a time clock list time clock out we're looking for a time clock and does not if equals zero that means equals we need that means there is a missing time clock missing because we have equals blank so that means yes there's a clock in and no there is no clock out no clock out again time clock list clock out Indexing this if it's found and it's empty okay so
now we know it's empty so those are the two conditions that we have so far we know there's a clock in and we know there's a missing clock out the next thing I need to check for is if the current time now - the clock in time - the clock in time which is right here right here time clock less clock in were matching I'm just getting the row here I'm getting the row here in times 24 we always have to multiply times 24 X were focused on hours so if I for example if I
do one o'clock - twelve o'clock p.m. we're gonna get a decimal but as soon as I multiply that times 24 we're gonna get one hour so it's always important to multiply it times 24 to get that number of hours so we have to multiply it times 24 this is gonna get us the number of hours right here right here is gonna get the number of hours since they clocked in number of hours if this number is greater greater than the day threshold that's the hours we set in the admin then missing the time clock missing
the clock out so you understand that one I'll go over to get one they have a time clock ID okay - they've been clocked in three the clock in the Current time - the clock in time is greater than the number the day through so it's greater nine ten hours 12 hours in that case missing the clock out okay that's it so now we've covered those two scenarios we've covered clocked out the scenario in which they're clocked out we've covered missing clock out and the only other scenario is we've got a whether they're clocked in
and that's pretty simple we just need to know if there's a clock in this case this is the last scenario right here the last scenario right here if there's a time clock ID that's found time clock list clock in has to be found and with the time clock ID and it's got to have a missing the time out must not exist right so the time clock cop must not exist we already know it's under the threshold because if it was above the threshold it would be set here so we already know so next all we
need to know is if there is and time clock in and no time clock out and work under the threshold and those in those cases market is clocked in otherwise just leave it blank and this is otherwise if there's an error otherwise otherwise leave it blank here if if it's true if it's false leave a blank right Here on the other side of the comma right there otherwise and this is the if air you see if air leave a blank we also want to know so if there's an air just leave a blank and that
is what's gonna give us those three scenarios clocked in missing clock out and clocked out I know it's a little bit I didn't go over it in detail because we have so much to cover but I want you to download this please and go over this formula alright remember just I'll go over the first brother the first part just focuses on events so if there's an event it's gonna return that event first the second scenario covers whether they've clocked out so that means they there's a clock in and a clock out so they're good we're
clocked out this third scenario covers whether they're above the threshold if they are missing the clock out and the third scenario covers whether they have clocked in but not clocked out and they're still under the threshold in that case we're gonna mark it's clocked in alright so that covers that for now I know I know when I'm over a little bit quick on that but but I don't want to keep you too caught up in just those small details when we have So much to cover so that's the three scenarios it covers and it comes
and this is the same for both month view and the week view the same type of formula that covers through rotted alright so we've covered both of those and we have the same but in the only difference is in the month view I didn't display the text right we're not splitting the text or just displaying the values here I've got clocked out here I've got clock the clock in time and the clock out time but look these are both time so how is one read house 1 green these are times trust me these are times
when you see a decimal this is the date and this is the time and it's fine that they're in decimal formats and it's helpful if that we don't need the format's we could eventually add some more information or right-click what I probably do on this is I want to be able to adjust the times right click and I want to change the event times based on here like a pop-up form I think I'm going to do that becoming ones so be able to change the times or adjust the times simply by right clicking and having
a little pop-up form so here in this case we have limited space so all we just entered The times and then I used conditional formatting conditional formatting to show whether it's red or green let's go in this conditional formatting so I show you just how it's done under the conditional formatting manage rules now we did cover some rules before which were here and those are fir event types these are for leave these are for training and you can add your own I've added 3 more event types let's go over say if the cell value equals
clocked out colored blue that's pretty simple these two are a little bit more complex because they involve times if the current time in the threshold and threshold let's go into these and let's look at green edit rule and let's look at this formula here first we're gonna start off with f8 why do we always use f8 because that is the first cell in our range f8 when we cancel out of those we notice f8 these we have to always remember when you conditional formatting the applies to here absolutely references fine is always must equal the
same f8 here that is how we are able to use one rule that covers the entire table and fade so they both must begin in the same cell so in this one f8 does not equal Zero we want to make sure it's not zero we want to make sure it's a number okay it's a number that's important because our events contain letters so we don't want to get them confused and here I've included the formula if now the current time minus f8 that means the value not just an f8 but every cell accordingly the CEL
if it's times 24 if it's less than the day threshold less then color green that means they have not they're still within the threshold of clocking out so we're good no problem there however if I want it red when they're over the threshold when they go over the threshold so again f/8 and is number so those are the same those don't change but this one's a little bit different all I did was change this to greater greater greater than the day threshold that means the current time the current time of excuse me the current time
minus the time that they've clocked in is greater than the day threshold notice the number of hours cuz we multiply it times 24 is greater in that case they're missing the clock out and I excused missing the clock out and I want to color that red so it brings attention to the managers that's very important all right so Look at that so if we were to change this to a big number you see on number 24 remember we've covered that if we're gonna change this to a larger number you'll see that disappear like 220 hours
and we go back into the schedule and we'll see that red disappear but if we change that to just a few hours here if we change that to two you're gonna see I think two or three of them changed back to them because there we go four of them because four people are under that threshold so just by changing the threshold you can change the colors let's put it back to a reasonable number of hours let's say ten okay so that's very important this threshold here is very important we use it for the time clock
and we use it for the scheduling and that's really gonna help managers get a control over their employees and who is clocking in who is clocked out so that's very very important also keep in mind I've been asked this time clock is a great feature but employees are required to be at the location I will introduce additional methods so that employees can clock in or out remotely and then bring that data back into I'm thinking about Google Forms I've got a few other options I'd like To use some third-party apps but we're gonna work on
that a little bit so I do understand that there are employees that are not on site that do need to clock in or out and that data needs to come in as well so I do understand that and we'll work through that to get that soft hour so we've spent a good amount of time on the scheduling and now let's go ahead and back into our employee manager so we can mark off the scheduling click in or out and we're going to skip right over let's go scheduling the refere on employee archive all this was
was let's go ahead and take a look at that there was a ref err employee and the ref err was due to me not including so you want to make sure that you're named ranges always include the header so that you don't have any data at all you won't have a ref err all right so we've covered that I just want to make sure we get did cover that and let's see next up let's go into the ID card you're gonna love this feature so let's go ahead and take a look at that and there's
that reminds me there's one more thing I'll add to that so this ability is basically all we're doing is we're using a horizontal scroll column to scroll back And forth so when we go back to the employees all were doing is scrolling let's go ahead and show you how we did that part before we move on to the ID card so let's go ahead and select an employee that actually has some data so we can see that ID card in full view like this there we go so now we've got a good amount of data
here in for this employee all right so into the developers into the VBA I've created a module called employee ID let's go ahead and take a look at that we've got multiple macros in this and if we go ahead and scroll all the way I think I've got it down at the bottom here the employee ID card show and hide so we've got two Macker and putting an aircard to show and hide let's go to the high comp for the hide all we're doing is scrolling to column three all we're doing here it's very very
simple it's just gonna scroll over to column three so clicking to this so if we right-click on this let me click assign macro we will see that employee ID card height has been assigned to this button and of course the icons so when we click there all its gonna do is scroll to column three here's column three see it's gonna scroll that and when we click ID cards it's gonna scroll all the way to this column let's go and take a look at that Mac but again let me show you skip something when we right
click when we right click this ID card button when we look under a sign macro we will see that the employee ID show has been assigned so this is the macro that we're gonna focus on there's a few things with this macro what I want to do is I want to make sure that if we've selected somebody with no picture I want that picture to update here as either zero or no picture or if there's a picture change I want to make sure that picture is displayed so we've added additional for example let's take a
look and I believe this employee has a picture so when we move over the ID cards I want his picture to show up when we change employees I want their picture and their data to show up on that so we've added a little bit of a macro to make sure that the current picture is all showed up and so let's go ahead and take a look at how we did that under the employee ID card show macro if the employee picture has been displayed first I need to make sure it's the user has selected it
to be displayed now let's take a look at that And to the customize basically we have the ability here to show up to 18 different fields of whether they're going to be displayed a picture in fact the picture here is in row 10 and row 10 here if the user selects the back the picture is going to show up on the back of the ID card if they unselect it it's gonna hide if they unselected on the front it's gonna hide if they want a label they can select label in the picture and of course
they can move this label they can change the font they can do whatever they want with this picture I didn't have a label you can also change the text of course on this if you want but there's no need for that but I didn't see any neat but you can do that so it gives users the ability to change and customize these employee ID cards very very simply if we want to we'll go over the barcodes to copy got so much to go over at this alright let's continue on show the ID number if we
want the ID number we could show it on the back of course we can drag that ID number we could show it down anywhere we want so we have the ability to have either the values on the front and the back and we have the ability to show a label too if we Don't want to I bet we can just hide that very very easily just by clicking here it'll hide it I'll show you exactly how we did that we also have incorporated a barcode font here and the barcode font I'll show you how to
do it now I'm gonna include this barcode font in the downloads so make sure it's gonna be in a zipped up file with this so make sure you download this so you can get that barcode font and I'm gonna explain how to install that and just very very shortly what we'll so basically what we've done is in this case I want to show the picture so I need to know has the user requested to show in column B EE how they do they want if this is you you see this you here see this damn
just go ahead and click it here let's click it there you see this you here I need to know this little U of two dots above it whatever the real name but that is if there is that symbol in B e that means they have asked to show the picture on the front so we need to know that if they've selected the picture so that means when I click back I need to make sure that that is shown that it's displayed always when they've selected it so we do just that within the VBA code right
Here so let's see if sheet 1 B 10 B 10 equals with you then that means they want to show the picture then the active column you go we're gonna set that column 257 we need to know that because it's gonna help when we display the pictures then we're gonna run a macro called employee ID card show picture if then value B F 10 that's the back picture B F is the column right that's here bf it's for the picture on the back B a is for the picture on the front so we have those
two columns whatever's in the back so if they've select if there's a u there that means to make sure to display the picture there when we're showing it so we click back to employee and we want to click ID cards we need to know whether display one or two of them were none of them so that's really important so if it's it then the active column it goes 58 then we're gonna run this employee show picture and what we've done here is we've just been created the values now let's show you the values these are
the values and all these are is Li to the values within the actual information for example k10 is the employee picture ID number is j2 so they're all linked to cells right here for example j2 is here the Employee ID or the name so they're all just simply linked so you don't want to change these in fact when we cover our protection episode in a few weeks we've got to make sure that the items like those are cells like those are protected because that's really important we don't want users or even admins changing that because
it could mess things up all right so moving on when we have those so all these values linked in fact this one is also linked to BC BC 11 BC 11 of course is here the employee ID number but in this case it's a barcode font if we click here and we look at the barcode I've installed a barcode called free 3 of 9 or also called 39 and I'll show you how to get that and basically that is a font it's gonna be a download and that enables us to download the fonts and all
I did was download and unzip the fonts let's go ahead and go over that with you real quick I'll go into my downloads folder and we'll take a look at that and it's just here this zip file so when I unzipped it it just gave me this folder of 3 of 9 I think I have it here let's take a look I have a few different barcodes I was testing out so I wanted to show that to you all Right let's go ahead and unzip it so we can show you that and I'll walk you
through right-click and then we'll go ahead and unzip that file and I'll extract 2 right here alright so now we've got a folder with those two drums and all we really need to do is okay here's the folder here's let's go ahead and zoom up okay so here's your two fonts you want to install these two fonts and there's a little text file with information here there's a license and the important thing is it did say here that I'm reading here I don't have a reader here handy but the important thing that I read was
in this particular one it which just looked important here it said here that there are two versions the font called free 3 of 9 is the basic and standard includes letters and symbols the font called free extend covers all the 3m it includes all the ASCII carries so the extend includes more characters that's why there's two fonts this is what I wanted to read you here this is kind of important for us to create a valid three of nine barcode you have to begin an end with a special character scanners look for this character to
know where to start and stop reading this barcode it is represented In this font with the asterisk character so to create a barcode for the text abc123 you have to type out star abc123 star so it it appears that we need that for barcode readers so that i've added that just in case that's important star note that barcode readers will not include the asterisks or the stars in the text that they returned they will just give you the numbers so that's important so the reason I did that so in this you will see I've added
the asterisks here and the and the ID number and then they asked her so I've out of that here so that our barcode is complete it's already contained this shape is all does is equals to BC 12 BC 12 is here the same thing for this shape BC 12 so it equals that so that's a great way to do it so all we did all of these text values all they are is linked to specific cells all they are in fact for example the labels don't have any label they just get created and that's another
feature i'll show you here status okay so here's status so what if we delete that well that would be bad right not necessarily because I've included some features so we click on here again it automatically gets recreated right here So that's a great way to do it and I'll show you how to recreate that automatically so we'll get to that in just a minute let me go ahead and reset I think I was using I like the Arial rounded bolt so that's a nice little font that looks a little bit more clear and I think
I used ten point five alright so now we've got it set up now we can change this text change the size so just wanted to let you know that deleting them won't hurt you it they automatically get recreated in the code itself so it's a really really great feature okay so moving back to where we were so we got the font coast let me show you how to install those barcode fonts I didn't know I didn't want to notate why those asterisks are there so now you know that's an important feature and back into the
folders and all I've already got them installed but all you would need to do is double click on these and then click the install and that's gonna put it in your fonts folder again it's a free and I double click and click the install right here and that will install in your proper fonts folder I believe it works for Windows of course it max may have a little bit different procedure so what's that you Will necessarily probably need to restart Excel so keep in mind the fonts may or may not necessarily show up when you
click the fonts they may not show up here until you restart Excel completely so keep that in mind that you might need to to restart it to have these fonts displayed in your fonts folder restarting all right so now and all we've done is set this cell to the font set this cell and then when we equals when this text equals so for example if we click insert insert of shape insert of text box and then all we need to do is click equals and then whatever cell we want to connect it to and that's
all we need to do and then we just need to set we do the format will set a shape fill of none and then we'll set a shape outline of none and then I'm going to go ahead and probably increase the font here a little bit and then move it to the center and middle and that's how we get our barcode font you can size these up as much as you want in fact I'm going to increase this one a little bit there we go and bring it over because we did reset it so there
we go I think it let's see that one's 32 this one's 32 okay they're both exactly alright Good so you may have to adjust these as you want but a barcode reader should be able to read those those are one of those slider barcode readers what type of barcode reader are we discussing here let's take a look let's go ahead and just show you any type of basic barcode reader that connects to a USB should work just fine so the kind that I'm talking about here let's pull it up we'll call barcode reader USB you
want a USB and that should work nice spelling ready okay so the kind of read I'm looking for would be this kind of right here this type right here you see this one right here that's the one I'm focused on that's the one I want to look at this is this is the kind of barcode reader that I think would work just perfect for our employees so all you need to do is stick this next to computer or stick it up on a wall and have your employees swipe it and it'll read the barcode at
the bottom so it's really really helpful so we can create this all you would need to do is print out that ID card laminate it with you're just getting one of those little laminators and then you're set you've got everything covered with your employee Manager all right so that's kind of the idea I had you could also use different any type of scanner would work that reads barcodes because this is a very common type of barcode so you've got that ability all right so now we've got that covered we've covered how we did it let's
go into the VBA and continue on and see how we created this back into the VBA here we got employee ID cards we have the field to change here's the this is the called the employee ID card field change what happens when we change it now when we go into the employee manager here we run that Macra when we make a change so let's take a look at that we're making a selection change right and the selection change that we're focused on is this range here on selection of i d-- card fields that's gonna cover
BD 7 through bf 25 BD 7 here all the way down to bf actually it's 24 25 gets hidden so I'll have to make that quick adjustment because 25 is hidden in the tabs remember this row is hidden so we'll make it to 24 I'll reset that to 24 and okay so then what's gonna happen when the user selects any cell that I want to run this macro employee ID card field change and that macro can be found An employee ID card module and here it is right here so we're gonna focus primarily on we're
gonna focus primarily on sheet1 so then the text box a shape we might need to create these text boxes if they don't exist so we're gonna dimension the text books as a shape we need to know what column the user is on I need to know what row the users on so we're gonna dimension those now we've dimension these all the way up here because we're gonna use these variables in multiple macros within this module so they are dimensioned above constants for this module above it above this module so that is why we've done that
there all right now if the active row the current row whatever the Roy's like equals 10 I need to know if it's a picture if it's a picture we're gonna do something different and is greater than 56 why is that greater than 56 means here let's look at this equals column this is 56 called 57 58 so that means if it's greater than 56 that means if it's this or this if it's a picture if it's this or this I need to do something very excuse me let's go into the picture here if it's this
or this we need to show or display the picture everything else has Fields associated with it so it's fine but these two I need to distinguish away from all the other fields because these are pictures so when this is clicked I need to show or hide a picture when this is click I need to show or hide a picture so that's really really important so let's go ahead and put that into I like the ID number there so I need to distinguish these two fields and we can do that first we say is it row
10 yes and is the column greater than 56 if those two that means it's either this or this if those two conditions are true then show or hide the picture so we need to differentiate if the active row is 10 and the I call is greater than 56 then the picture file so do nothing in this case we're gonna do nothing because what I want to do is I want to focus on the text box for now so I just need to pull that out to make sure as long as it's not a picture then
do the following cuz this is all for text right so there's nothing we're gonna get for picture at the moment the textbox name we're gonna I want to set a name for the text book but I need to set it as dynamic we're gonna start out with the word box then we're gonna say the cells 6 6 and the active column value why is that well what I want to do is I want to assign in to the textbox let's take a look at this let's take a look at this text box this has called
box label 14 this is called box Front 14 and if we select the back let's see that's the date right so 14 is here right so if we select the back another one's going to show up and this one is gonna be called box back 14 so we have box front 14 of box back so it gives us these specific and unique label names for these text boxes so we can differentiate so we named them that so we know what how to work with them and we know so we use these field IDs and what's
in row 6 well in row 6 is either the word label the word front or the word back so I can use these items here to help me name my text boxes so for example oh they always start with box now they're either gonna be label or it's going to be front or it's gonna be back and then it's gonna of course have the number here whatever number row we've selected so BA is very important because that's gonna sign us number and what that does is in signs is a very unique name for each box
so that we can pull it up if it exists or if It doesn't exist we can give it a name so we give that the specific name so we assign it that name let's go back into there so we know the name and then again it ends in BA in the active row value what's this is the number that number I just showed you in column B 1 through 14 1 through 18 there 1 through 18 is gonna sign that number in BA alright so you have that alright next one on air the reason we
do this is we're gonna set I need to check to see if it exists or not on air resume next this helps check set techspot equal to shape textbook name this is gonna tell me if it's there if the textbox is nothing I know that text box doesn't exist I need to create it maybe they've deleted it maybe they never created it before I don't know but for some reason if the text box is nothing I need to create it so we're gonna run this macro to create it let's take a look at this macro
jump down to the employee ID card create text box down here under employee ID cream tax box again we're gonna say wishy one Royce focused on she won the shapes we're gonna add a text box we're gonna add a horizontal text box we're gonna place that text box two hundred and two thousand Eight hundred ninety two pixels to the right because we're way far to the right and we're gonna place it one hundred and sixty two pixels down from the top we're gonna give it a size of ninety three pixel in width and a twenty
pixel in height so these tells us where we're gonna do it on the right how far from the bottom we're gonna from the top we're gonna place it what did the size of the width and you can adjust these if it's too but they're too big for you just reduce this down to eighty three or whatever you want then we're gonna select it once we've created it and now we can work with it with the selection first I need to know is it a picture if the active column equals 56 or 56 excuse me first
I need to note whether it's the front or the back is it a is it going to be a formula what's gonna be in that text box for example this is a formula right BC 20 but the labels are not formulas the labels are just labels so for example this text box is a label so all we need to do is just add the text what text do we add well we add whatever text is here all right whatever text is here for example let's say I don't think cities been created here's City right sunrise
Vista I'm going to delete that okay it doesn't exist so we unselected it still doesn't exist we click it again now it exists now it exists right here so we're gonna say that the value the value of it it's gonna be whatever's here in the value the name is gonna be the box back nine nine is come from number back comes from here so that how we differentiate that's how we differentiate between and the value is whatever is in column bc bc gives us our value we know the row we know the row we know
the column so we just have to add the value but if it's called fifty-seven or 56 then it's going to be formula formula okay formula formula what is the form of the form is gonna be whatever is in that row here it's going this here okay so that's how we differentiate so we're gonna say the hair the name if here if the outcome is 57 or 58 then the formula equals the active row and column and column 55 we went over that column 55 the row whatever the address is that's going to be the formula
equals write equals and the formula the address again let's take a look at that I don't want to confuse you this date equals we're gonna add the equals and Then of course the address of the cell BC 20 that means right so if we selected the date right 14 here is 14 what is the formula here BC 20 BC 20 this is the address so we just need to equal the address so for example equals BC 20 that's how we do it that's how we get the address we just want it so now whatever we
change in here is going to be automatic automatic so for example if the hire date let's go back and change that hire date if we look at the hire date and we change this date to the seventh right it's automatically now going to change all the way over here all the way down the sevens automatically change automatically updated because this is a formula K 16 and this is a formula B 20 so they're automatically connected date the values are dynamic we don't want it we don't want to hide this we can just hide the hire
date just like this and hide it or show it just like this so that gives us a really really benefit to show that we can change it even though the hire date look this has hired it but this says employer says that's just because you can change the text on these labels as you want as you want so there's nothing wrong with just clicking delete exactly But but if you want to save the font and font style I wouldn't you want you want to unselect I don't select those so for example huns like that and
that keeps us very very all the fonts the same so it's really a handy handy feature so I wanted to make sure to show that to you let's continue on with our macro the name so now else else here so it's not a formula must be a text that's if it's 57 or 58 then it's a else that means it's the label then we just need to assign it the text equals sheet 1 BB and the active row we're going to assign it to BB BB is here right this is the name the label this
is the default name that we give those labels and then we can change them if we want to so that means if it's the show label then show this value that's the text we're going to give it alright next up the name here the name box equals sheet one active column what is this let's go over that we're gonna we just went over that the name the name is this here we can want to give it that name I want to give this text box the specific name box back nine so we went over that
so that is how we do that we give it that name now we say with the shapes I want to do a few things With the check marks I don't want it to give it any any fill so we're gonna make visible false I don't want to give it any border line I don't want to have any border so we're gonna make that false and I also want to give enough I want all lined it in the center now we can do a fonts and we can do other things with this so if you have
a consistent font that you want you can add to this so all we did was aligned it to the center so that means every time we create one it gets automatically aligned in the center just like this its centered if you look here you'll see it's automatically centered it's not off to left it's not off to the right it's been centered so that's how we do that so I want to show you that so that's how we create those text boxes so let's close this and that's how we created now back up so now we
know we know how to create the text box now we know here employee ID card if it's nothing to create it so now let's continue on if the active cell is you that means it's currently selected then we want to do is we want to hide it right so if the active row is 10 and the greater than 50 that means this is a picture if it's a picture right Then the employee then run the macro employee ID card hide the picture else it's not a picture not a picture then shapes the text box name
we know the name we've defined it up here so we know the name and we're gonna make that invisible block hide it hide it so we're either going to hide the picture the picture because it's row 10 and column is greater than 56 I'm gonna hide the picture will run that macro all that that macro does is does this employ just in case it doesn't exist we got on air employment picture sheet one we're going to delete the picture and the reason we delete is because we can create it I don't want to hide in
that hi pictures but we could do that as well but for right now we just recreated each time which is fine alright so now we know how we hidden the the ID picture employee ID show picture right here hi picture right here because the word it's checked already and then of course we're going to make the active cell we're going to give it a space we want to show it unchecked so that means if we're on picture and it's checked and we click it we want to put a space in there we want to uncheck
it and we want to hide the picture Or check it and click and show the picture again so if it's currently unchecked and we check it we want to show the picture and we want to put the check marks so that's what we're focused on next else right here else if it's currently this is if it's currently checked else that means it's currently hidden in that case we need to show it on selection of a hidden field then we want to show it again we need to differentiate is it a picture or not a picture
this defines whether it's this says it's a picture equals 10 degrade if that case run the macro show the picture otherwise it's a text box if it's a text box all we're gonna do is show the text box just show it because it already exists we know we've already tested to make sure it exists here we've run the test and if it didn't exist we would have created it so we know by the time we get down here it already exists so we've created the text box and now all we need to show is visible
and then of course we need to mark the cell with that check box and that check box is you and that's just the wing-dings font and we're gonna select something else another cells so that our selection we can reselect the Same cell we do that by selecting another cell alright so we've gone over show picture we've gone over hide the picture we've gone over create the text box we've gone over employee the show this this will show the ID card we went over that hide we're gonna scroll the scrolls to the column when we're employee
ID card so we're gonna scroll to column 52 that's all the way to the right column 52 let's take a look at that this is column 52 I believe here so we're gonna scroll all the way to this column when we go back to the employees and we click ID cards we're going to scroll to that column equals equals column 52 so we want to scroll to this column it puts it and that's a great way to show something or hide something now we've also have the ability to hide and show this we can right-click
and assign the Macra and we see that the macro that's been assigned there is employee ID card hide custom so let's look at that macro right now under they we have employee ID card hide custom here and all we're gonna do is we're gonna hide this button the custom I want the custom button to to show and I want to hide the done custom right when we're done we don't want To hide it again so when we're done we want when I click here I want to hide this button done I don't want to show
this custom button so we have to show this buttons custom ID button so this one is called done custom bug so this one has to be hidden or showed based on and then basically all I want to do is hide or show these columns here I want to hide or show those columns based on that so that's how we do whether we showing the custom or hiding the custom and again as we add the user rules users only with admin rights are gonna be able to customize it if we set somebody to a user role
they won't be a clicking this button they're gonna say you do not have rights to use this so that's gonna be really important all right so when we hide the custom we're going to be showing the normal custom button and hiding the done button and then of course the columns be a through B F we're gonna hide those columns and of course with be customized we're gonna do the opposite we're going to hide the custom button we're going to show the done we want that visible and of course we don't want be a be calls
be a through B F hidden we don't want those hidden we want those That's gonna show so that is how we do it that's the nutshell and one last macro of course is the preached ID card at the bottom and it's just two lines of code all we're gonna do here is in sheet 1 we're gonna set the print area to be H 5 through BH 22 and and basically that is just this print area right here H 5 all the way to be 822 it's gonna set the print area so once printed it just
gets printed to that area right there and then of course next up the next level boobs act or sheet print out we're gonna print out copies if for some reason you want to print out two copies you'll just change this to two I'm gonna collate those although it's not that important and we're gonna we do want to we do not want to ignore the print areas we want to keep those printers so that's going to be false since we've just set the print area it's important that we maintain that print area and of course the
macro employee ID card print has been assigned to that so when we right-click the individual components of this group of buttons let me click assign macro we see that employee ID card print macro has been assigned to that and this will Print to the default printer automatically so you want to check that your default printer is the one you could theoretically assign a specific printer to that command as well so when you print this out my default printers snag it currently so it's gonna print to that and it'll automatically print to that in a print
ID card so you can see that it's been printed right here and here's the card you may want to adjust the size accordingly if it's not exactly to your specifications you can adjust the size and shapes as you see fit in case you want to print different size so that is it as far as the printing is concerned I think we covered just about everything a little bit quickly probably but you'll go ahead and download this and of course you do have any questions whether you're on Facebook or YouTube please of course include your questions
and comments and of course I'm going to make sure to include the bar code 3 of 9 in the zip package so make sure you download those and of course if you haven't or not please check that out as well so let's go back over to the employee information and let's take a look we've gotten over the employee ID cards I did Fix a small issue with the reoccurring frequency if you had a prior version you will notice that Ian's events here there was some issue here this wasn't correct so I fixed that issue it
was just a formula in a 27 so I did fix that and so it properly displays that so we've got that covered we fixed that and you may have noticed that a play manager sort employees on click all I did is the sign of Macra to this sometimes I'll in case they case we change a name here we may want to sort them it's just done click and right-click when we assign the macker to that actually I need to click inside because there are two different is from two different when we right-click the inside I
kind of click assign macro we can then see that there's a macro employees sort by name this is a macro that can be found in the employee miscellaneous here under employee sort by a name and all I've done is stopped the calculations and reset them here and then I've decided just to sort we're gonna determine the last employee of the employee list sheet two is aren't playlists I just know the last row of that if there's currently any sort fields we're gonna clear those out then we're gonna sort It based on be four of sheet
two before and we're gonna sort on the values ascending that's the last name before is the first we're gonna sort normal then we're gonna run all starting at a four all the way to a B and the last employee row he'd be in a lesson plate row so that's important to make sure that's accurate so we just double click that under the employee list sliding all the way along yep that'll cover it I need we need to cover all the way to AG I thought that I had a feeling we increased that Alright AG it
should be AG's the last make sure those get sorted right okay so that's going to cover our sort properly now we've covered that and we'll apply that sort and that will cover our sort button so that AG is the last column so that's good if we do add to them make sure we do increase that sort this is doesn't need to be sorted because this is already house of formulas just based on a formula so we're good to go there alright next up let's take a look at our list I think we've got most of
it covered this is a super since I missed last week I want to make to give you a full training of a powerpack training with lots of amazing features alright Great we are done I'm so glad you joined us vet if you have not please check out the dashboard course there's an amazing dashboard course I'll include of course the links into that for the dashboard course if you want to create amazing dashboards with features like one-click sorting features such as pop-up dynamic picture I've got an amazing course for you 15 hours it's really popular so
do take a look at that I'll make sure to include the links down below thank you very much for joining and this employee manager part 11 we're gonna get this finished up within a few weeks but we still got a lot to cover including payroll and reports which are gonna love so again thank you for your shares your likes appreciate it and have a great day thank you
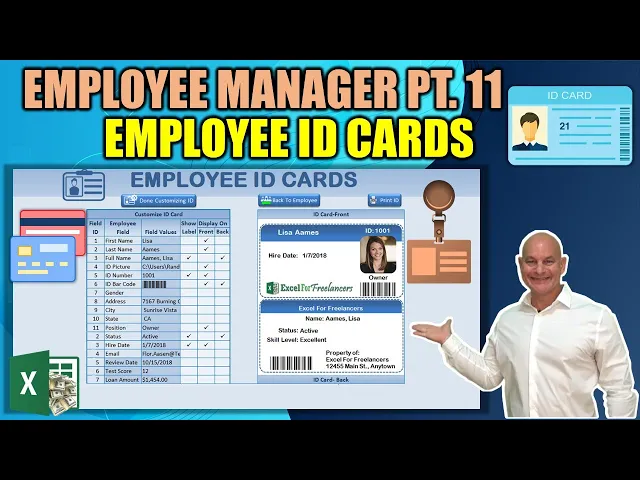
![How To Automatically Sync Mobile Form Data Into Excel [Employee Manager 12]](https://img.youtube.com/vi/RC5UBP_Shw4/mqdefault.jpg)
![Create Horizontal AND Vertical Tabs in this Excel Employee Manager [Part 1]](https://img.youtube.com/vi/iyr9WIyxlJc/mqdefault.jpg)