hello and welcome to my first tutorial about prepomex this time i will show you how to perform a backlink analysis in this software boxing is usually presented for actually compressed columns but let's consider another scenario a cantilever beam with another rectangular cross-section subjected to lateral torsional backlink let's create a new model first and select the unit system i'll choose the one with meters again and i have to import the geometry now i will use the step file format like in previous videos so we have the geometry imported and i could create a mesh now but
before i will do it let's focus on a small but important detail here you can notice that the top surface of the beam is divided into two parts the bigger one and the smaller one and that serves a particular purpose i modeled this in three cad and here you can notice the same thing that the top surface is divided into two regions and that's because the analytical solution assumes that load is applied just to this edge here but it would be hard to apply the load onto this edge using available types of loads and constraints
in calculus so i decided to create a small surface here and apply the law apply a load directly to it let's go back to prepalmex and now i have to create a mesh i will specify a maximum element size of 10 millimeters and generate the mesh now the mesh is already created so i can proceed to the analysis setup i will define the material and let's use the same elastic properties like in previous videos so i have to specify the young's modulus and poisson's ratio now i will create a section applied to the whole beam
and now before i proceed to the step setup i will create a rigid body constraint and you can remember this one from one of the previous videos we defined this already and so let's create a reference point first instead of providing coordinates i will just choose the point right here this will become a reference point and now i can create a rigid body constraint this point reference point will be selected automatically i just have to pick a phase to which the constraint will be applied so let's select the small surface right here and the ridge
body constraint is already defined i can create a new step i will use the buckle step type and leave the default settings here i will just tell you that i could specify the number of buckling factors but in this particular case we are interested in the first buckling mode and that's usually the case so obviously the first buckling factor request here let's create a boundary condition first as you can remember the beam is supposed to be cantilever beam so i'll apply a fixed constraint to this back face and now i just have to create a
load and this will be in concentrated force applied to the reference point that we created and so i'll choose the reference point and i will define the load in y direction acting downwards now you may wonder why the load is just one newton why its unit load and that's because as output you will get a critical backing factor and this factor applied multiplied by the load that we applied here is equal to the actual buckling load and since we use cell unit load then just the the critical buckling factor that we get will be equal
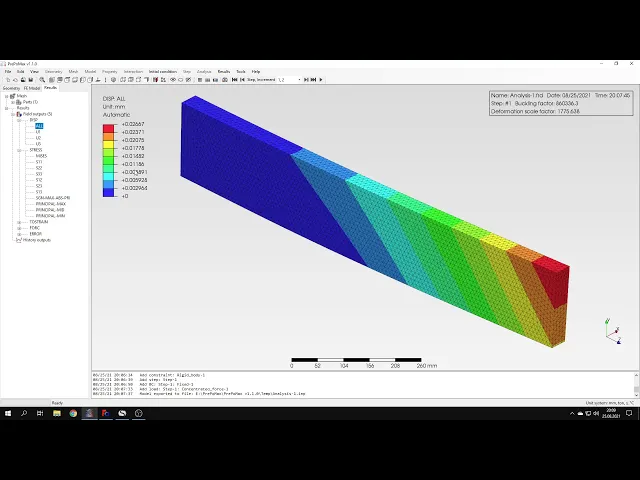
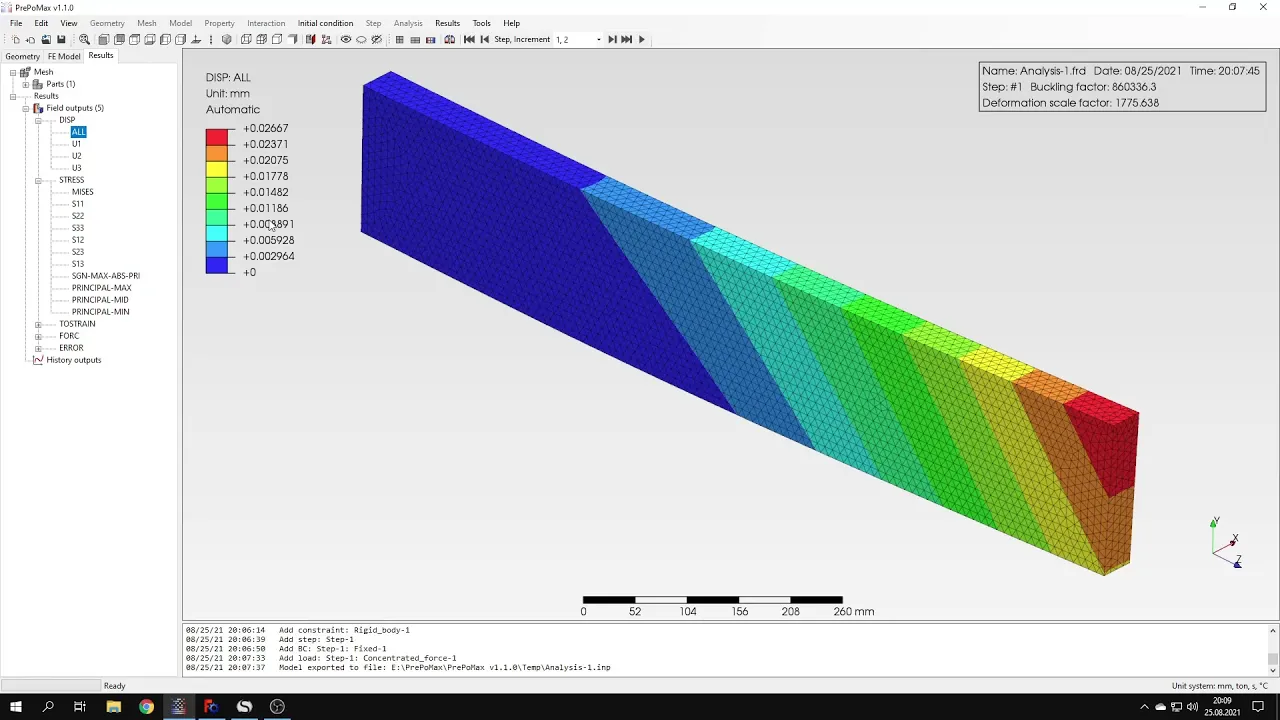
to the critical backlink load itself so it's a matter of convenience and i will confirm this now and i can submit the analysis um and to adjust we'll just have to wait for the results and this time it might take a while because the mesh is quite dense the results are already available so let's open them and let's see what we got from this analysis here you can notice that we have a buckling factor that's the critical backing factor i told you about before and we can compare this with analytical solution here i have the
analytical value uh if you compare this this value right here and with the one that we got here you will notice that they are quite similar they are not very close to each other and there is some some difference between them and but that's actually typical for backlink analysis when you compare the analytical values with those obtained from the analysis might expect some differences and still the the results are quite are in quite good agreement uh so we shouldn't complain in this case uh about the accuracy of course we could try with different mesh density
but in this case this this one should be sufficient what i should also tell you is that here you can see the deformed shape of the beam it's a first buckling mode shape but i should also tell you that the displacements that can be seen right here just like in the case of model analysis aren't real and if you want to get the actual values of displacements then you would have to carry out a non-linear backlink analysis and that's it for for the fourth repo max tutorial thank you very much for your attention again feel
free to ask any questions and suggest topics for future tutorials in the comments have a nice day and see you in the next video