all right guys what's going on this is Ryan and in this video we're going to start getting into Market profile so this is going to be an introduction to Market profile or specifically TPO charts now a lot of what we cover in our order flow roadmap already is drawn from Concepts that are used within Market profile as well so there's a lot of parallels so we're not going to specifically get into something that you would learn if you were learning Market profile for the first time which is you know you'd be introduced to auction Market
Theory you'd be introduced to the concepts of you know the value area or fair value okay things like points of control value area highs and lows you know rotations balance markets imbalance markets Symmetry non-symmetry and so forth so we've covered all that already and I drew most of that from what I was using when trading with Market profile now Market profile is not a trading strategy okay it is not a system all it is is a way of basically compressing or organizing data so what you're doing is you're taking if you're just talking about a
day session or day rotation for example you're taking all that and you're compressing it in a way that is um easier visually to understand okay to put in context you'll be able to see things like balance and imbalance and really it's just a data it's a a data compression tool so it's a way of organizing the data that can help you be more actionable in your trading okay and it's it's great for short-term Traders scalpers any lower time frame Traders intermediate Traders swing Traders and higher time frame Traders depending on what type of Market profile
you're looking at you can look at a weekly Market profile you can look at a daily profile a yearly profile in traditional markets often the higher time frames are are used and are referred to so again going over some of the core tenants that are things that we talked about in the beginning of the order flow roadmap because I'm basically bridging these two that was what my intention was the entire time is to sort of bridge the gap between all of these to help you become more actionable Trader and investor so core tenants right price
is an advertising mechanism okay this goes back to the auction market theory price is simply an advertising mechanism within a two-way auction okay in a normal auction in a one-way auction you know if we're just auctioning for cattle for example um there's buyers right so there's buyers there's maybe a seller um one side of the market basically gearing up to try to participate in the auction to buy something okay the market that we're talking about when we're talking about trading and investing we're talking about a two-way auction so we're talking about sellers and buyers that
are acting in their own interest in the same way but there's two sides right so price is the advertising mechanism all right and it's rotating within this two-way auction okay time regulates all opportunities now this is one that um doesn't make sense right away to some people but I'll just put it to you this way um basically think about how a sale works okay when you drop the price of a really popular item okay something that's well known say for example you drop the price of let's say an Apple Watch okay if you were to
drop the price of an Apple Watch from six hundred dollars to one hundred dollars okay how fast do you think that the market would respond to that limited opportunity and more or less gobble it up right how many Apple watches do you think would be left over let's say if there was only a few and they're being offered at a tremendous discount okay time regulates this opportunity there's only a little bit of time and the level of responsiveness that we see is going to show either the you know interest in this case we're talking about
a buyer or you know the interest to sell for talking about the case of a seller okay price auctions above value and we see that immediately the market responds a big seller comes in the market and rejects it we see just how interested that area rather how interested certain parties are in in selling when price approaches a certain area Okay so time regulates all opportunities if the market spends a lot of time in a particular area let's say it spends a lot of time below a value area low okay clearly you would get the impression
that this is an area where maybe buyers aren't very interested okay if price is hovering around lows and we're not seeing any real type of responsiveness in the short term or rather on shorter time frames by buyers stepping in clearly this opportunity is not necessarily an opportunity that they're looking for okay so you know when we're spending time at a low for example for a prolonged period of time we'll typically see the price has to auction lower to find buyers okay so price is really just moving up and down to find buyers and sellers that's
all it's doing okay and then volume measures how successful an auction is so when we see that price moves up and it's moving up on low volume well what do we normally expect we normally expect that price is probably an auction lower okay and if again we talked about this within the um the earlier roadmap all right in order flow uh the same way that volume Works within just a regular auction okay when the auction house or the participants are interested what do they do they get really loud okay they try to one-up each other
to essentially buy whatever they're all competing for okay so when there's no volume what happens no one is stepping up to buy they're not getting a lot of responses okay what happens they have to walk price down to find buyers all right so this is the same concept of volume all right within a market and this is how Floor Traders were able to basically just go off of volume in the pit all right how the market was responding based on just the level of ambient noise all right which is very interesting because and mind you
if I'm saying all right a lot it's just one thing that I do to parse sentences um one thing that Floor Traders talked about was when they switched from being in the pit on the floor to using screens they were missing that feedback that they got from being around other buyers and sellers or being around other Traders rather whether it's market makers all right whether in this case it was just anyone who is uh on the floor on the trading floor because they were missing that that Visual and acoustic rather um that noise component okay
the energy in the room is what they're missing by switching to screens all right so volume measures how successful an auction is so when we see that say for example price comes into above value all right we're talking about the idea of acceptance above value well volume is one of those things that confirms or rather confirms it being accepted or confirms that it's rejected okay the lack thereof or the either the um either being there or either there being an absence of it okay now questions we need to ask as Market participants where is the
market trying to go okay is it doing a job good job of getting there and how does the market react to advertisements okay so again we talked about the order book being advertisements as well but for in this case what we're talking about is price moving through certain levels okay and it's advertising at certain price points okay so where is the market trying to go and is it doing a good job of getting there well one of the things about using volume profile is that we're seeing where buyers and sellers are transacting a large amount
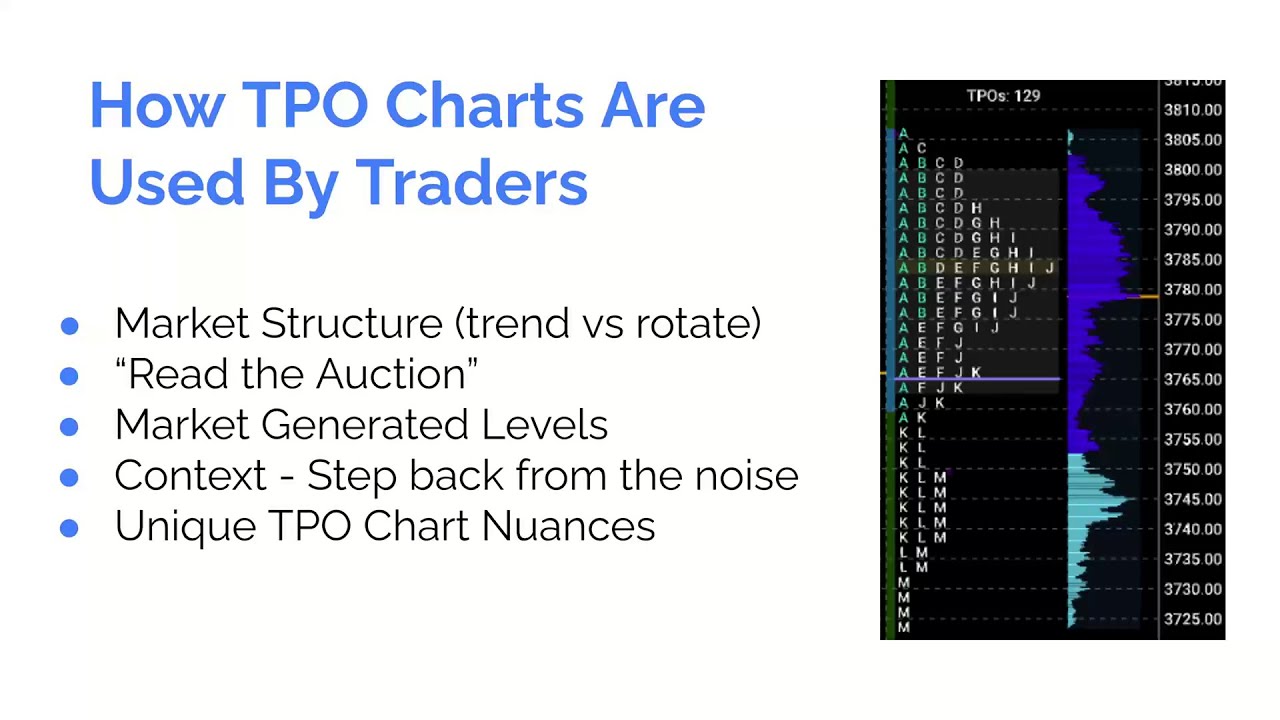
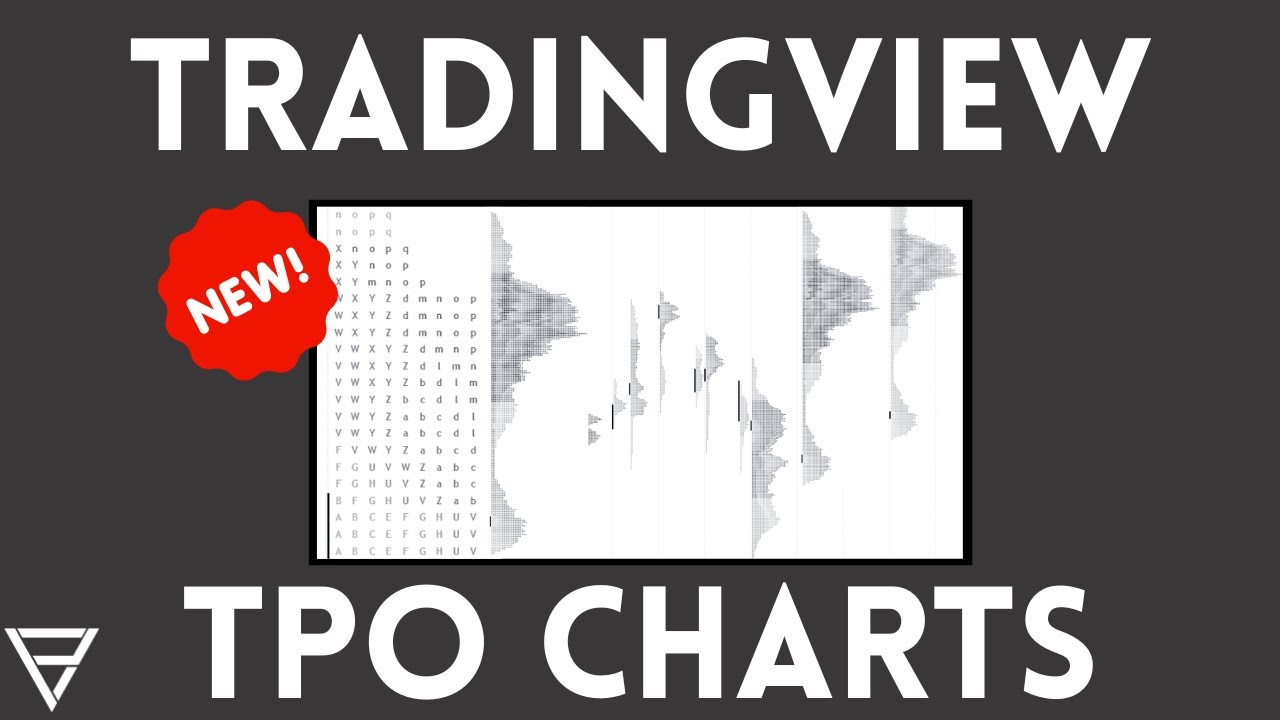
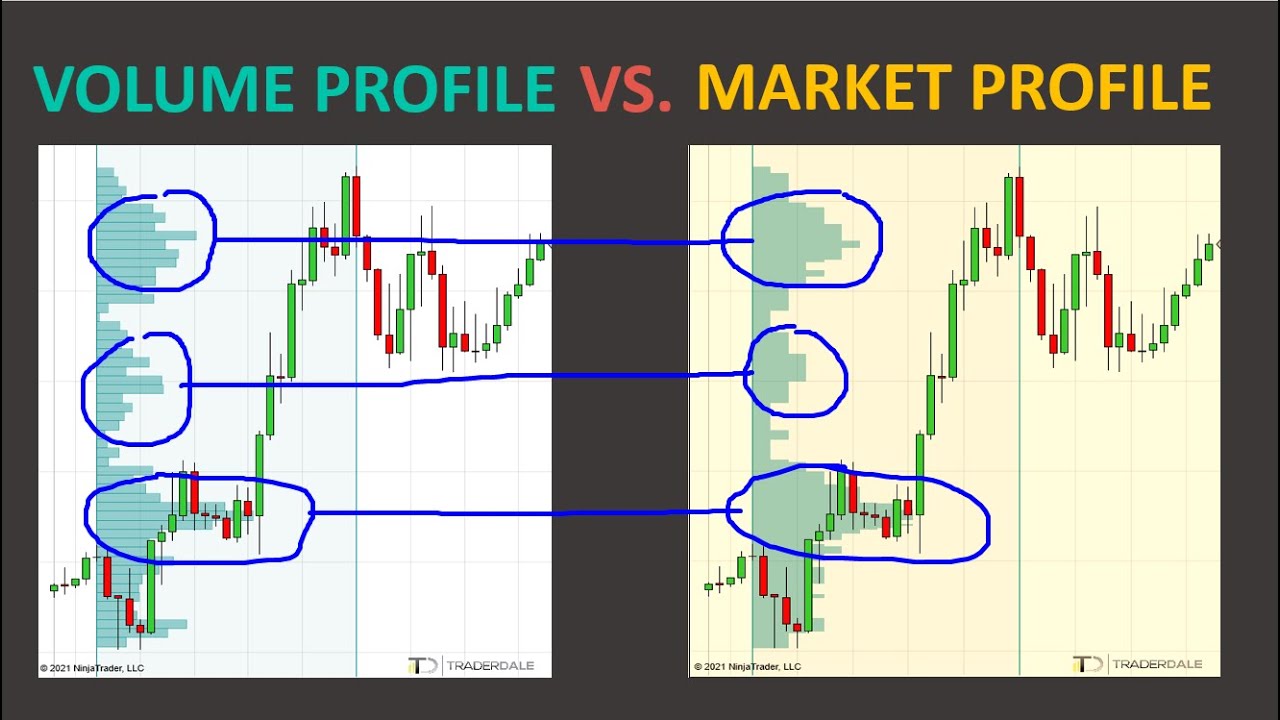
of volume TPO charts as we're going to get into are time price opportunity charts okay they're based on where the market spend a lot of time so it's very similar to a volume profile all right if we're looking at a a basic composite chart if we're looking at a basic candle chart rather on a 30 minute time frame we look at a volume profile for that the TPO chart and the volume profile chart are going to look almost identical so fear not if you don't have access to a Sierra chart platform yet I believe there
are going to be plenty of other Market profile platforms coming out or rather market profiles softwares the software that has Market profile excuse me as an option or TBO charts as an option and basically what we want to identify is are the TPO charts and the volume profile charts confirming each other so when we're looking at this TPO chart for example so these letters right here all right the volume profile is this white outline that I have laid over the top of that so we want to see that these are confirming each other so clearly
if the market auctions into a certain area but volume doesn't follow okay we would say that the market is likely not doing a good job in that area rather it's not doing a good job of if anything still attracting buyers and at this point maybe we'll see that it'll it'll be attracting sellers okay if it probes higher further up right so and then how does the market react to advertisements all right so advertisements when prices are very low are we seeing buyers try to scoop it up when prices are high or sellers taking advantage of
this and selling at high prices or at the you know at the first opportunity they can at high prices or are we seeing that when prices auctioned even higher that buyers are chasing it up bringing other buyers into the market so when the market trends it'll bring if it's trending up it'll bring new buyers into the market it'll bring more time frames into the market again there's multiple time frames in action at any given point within the market sometimes we have all them at once so sometimes we're just watching shorter term Traders play sometimes we're
watching longer term Traders play and at the extremes of higher time frame charts we'll likely see both okay so how does a market react to advertisements when the price is dropped again how does the market respond does it gobble up the opportunity okay what we are always trying to identify and what is really useful to identify is balance okay either balance or imbalance or symmetry versus asymmetry and you could basically just pick up on this through the shape alone so that's one of the benefits of using something like Market profile very similar again to volume
profile is that since we're looking at all of the information compressed and we're getting this you know it looks like a bell curve and that's it it looks like a bell curve if it is balanced right so what does a bell curve look like normal distribution it looks something like this right so you have one standard deviation okay and it's about I think it's 34.4 percent 34.4 percent here all right so the area within the average 68 what we're looking at for the value area with TPO charge is actually 70 but a balanced Market profile
is going to look sort of like a balanced distribution all right or basically your normal distribution it's pretty even looking right pretty even looking Tails most of the mass in the center right around the average and this is going to be clearly something that looks like balance right so is it balanced is it imbalanced is there symmetry is there asymmetry is there oddly shapes okay that we are that we are picking up on these are all going to be important because these could represent certain anomalies that will be actionable moving forward do we have acceptance
or rejection okay something we could identify when what we say is that um one of the things rather we can look for is that not only the volume is confirming an area but that price is being accepted to it rather being accepted through time so when price is accepted over time and with volume this is something that we're going to be looking for versus rejection right if price spent just a little bit amount of time in an area I'm quickly returned back to the mean again a lot of this is going to be really useful
for mean reversion trading because essentially when we're talking about a balanced distribution if we're talking about the the Tails and we we approach an extreme and we are completely you know we're quickly rejected we have the rejection and what what do we typically see we revert back to the mean right we revert back to the center okay we could identify whether we are in a period of continuation or we are experiencing change and again picking up on certain anomalous Behavior okay so moving forward all right Market profile uses TPO charts all right so you've probably
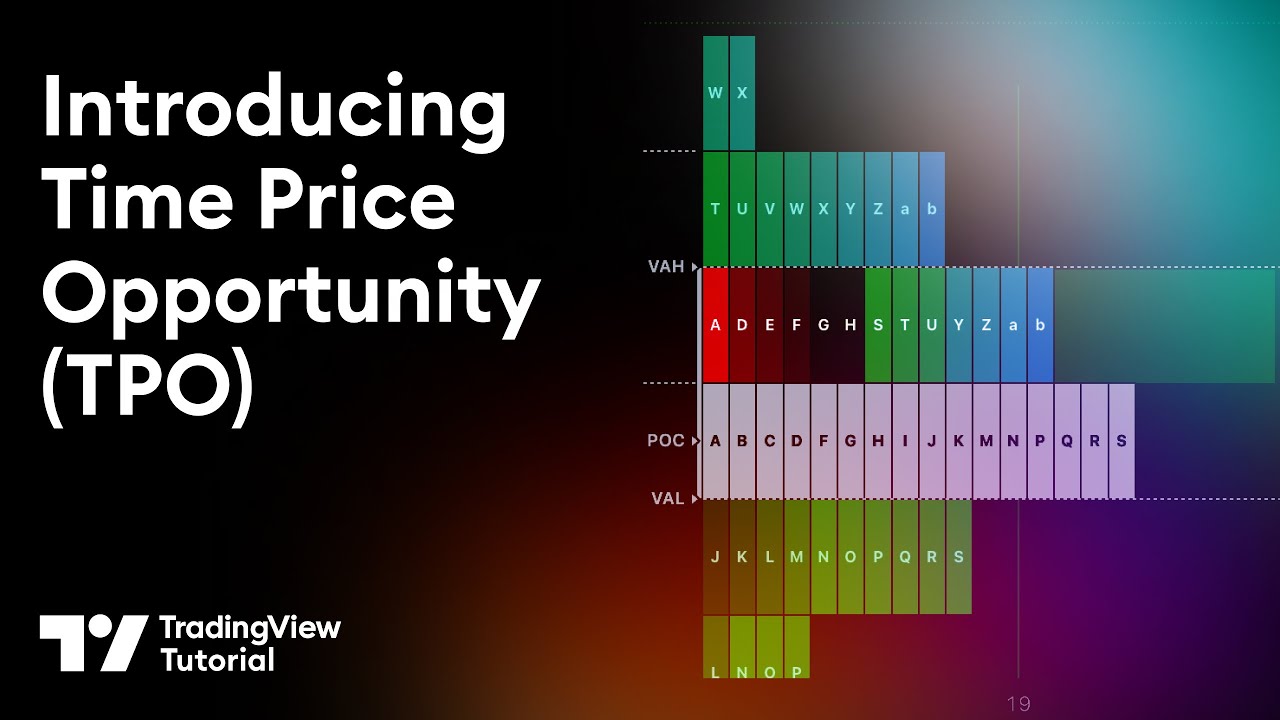
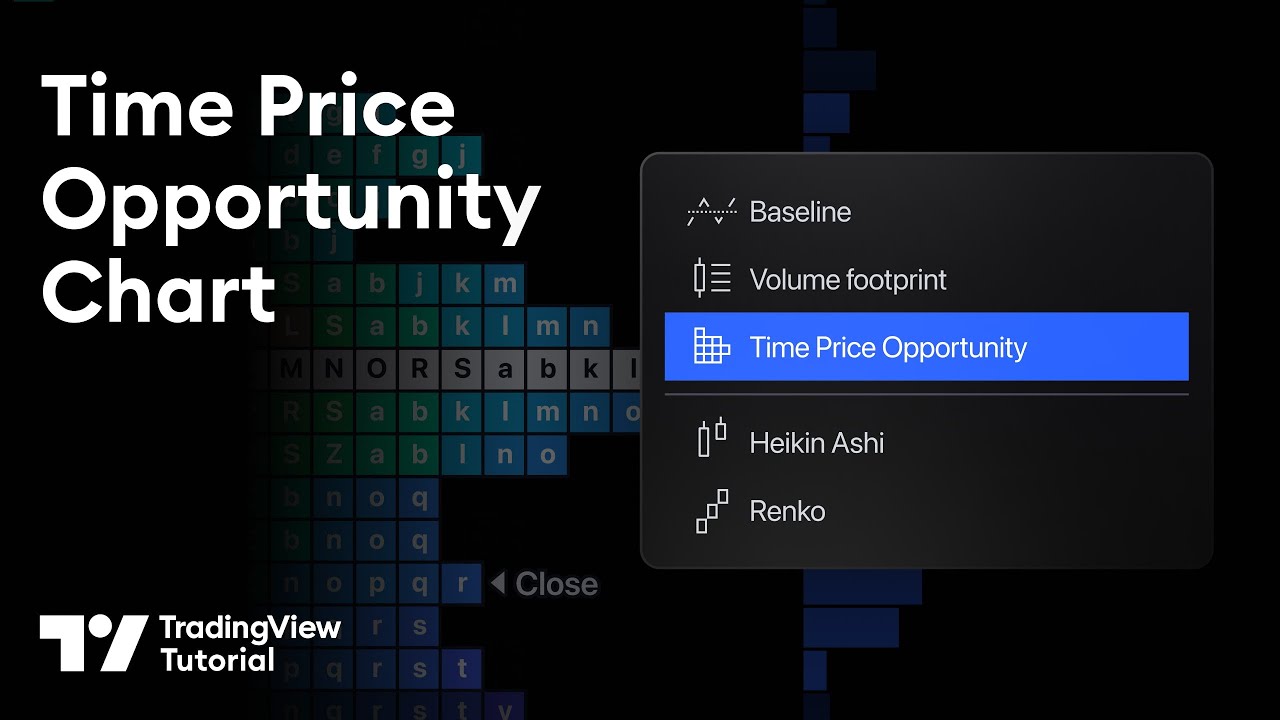
seen the previous chart or if you're looking at a lot of traditional Market Traders Futures Traders for example they'll be using these Market profile charts that have these letters right so essentially what we're looking at is each period represents a half an hour during the day so a is going to be the first half out half hour B is going to be the second half hour okay and then and then so forth right so what we'll see after the profile is completed okay and we have essentially the compressed profile is we'll have a lot of
this overlap right we'll have periods that you know doesn't go from a b c d all the way to Z right you'll have skipping okay you'll have in this case n o v w x all right under here you'll have jkopq R V all right so what this is because you could see that these these periods are where we spent a half hour during the during the day okay and essentially it's just for that half hour period much like a candle would be so the market in this case case has been rotating in this fashion
right so it's been rotating in this fashion and when we compress it all we're going to see where we spent the most amount of time okay where we spend very little time all right and so forth so that's why you're going to get these um these letters out of order all right now a lot of Traders and myself will actually just use standard squares or bars all right just to pick up the distribution okay rather than pay attention to where we were try to figure out where we were specifically based on letters within because what
we can do is just expand the chart we'll just look at a standard candle chart okay so time price opportunity right so what we talked about again was the amount of time okay time is governs everything price is what we are essentially the advertisement okay and in this case opportunities right so Market profile again is not a trading system or strategy it's a way of organizing data okay so all this stuff we just went over and TPO charts were used originally because originally they didn't count calculate volume and give it to you right away during
the day okay so 1980s or early 1980s when charts started coming out okay before that volume was calculated or assumed uh before the end of the day as the amount of time we spent in a certain area Okay so time multiplied by frequency so basically what they were looking at is if we spent the most amount of time in a certain area that was where the most volume occurred but now we know that those two all don't always line up but again if you use trading view you can see how this is the same exact
day right here so this is the TPO chart this is the TPO chart expanded which is essentially this period right here you can see how these are identical all right but it's not going to show you Wix it's not going to show you bodies it's just going to show you where we spent during that 30 minute period where the market was okay so the volume profile on this chart is going to look almost identical to this okay with slight differentiation all right so you see where there is an indent right here on this volume profile
on this volume profile or at the TPO chart doesn't have that same indentation okay because the market was there but maybe not a lot of volume was transacted there all right and you know you could pick up on that from looking at these areas and seeing that there are Wicks okay because that does register as us being there at some point but there wasn't a lot of volume registered there so this is why it's actually useful to have a combination of both all right which is exactly what I have okay because on this chart what
I have essentially is I have the TPO chart and then I have the volume profile added to it okay so a few things about Market profile and in the next road maps we're going to go over all the daily types and you're going to have to be you you're going to be referring to what I'm going to go over right here to differentiate them okay or these are going to be things you're going to be paying most attention to so the open all right so obviously where did the market open okay so the market opened
and we're looking at a so in my case I customize it I have the green box indicating the open okay the initial balance is this red line right here outside of the profile okay Red Line right here this is where the market spent its first two periods okay so this is right where the market opened where it's been its first two periods all right and we're going to determine or give a lot of weight to who is in control based on what direction we extend to okay so the initial balance all right when we extend
it's when we move out of the initial balance all right so right after that first hour period you know you're likely going to find the last little initial balance was very large that we're going to extend out of that initial balance okay so extension in this case below the initial balance so to the downside all right so let's say we open right here and we extend right away to the downside this indicates control by other time frame sellers okay so indicates controlled by other time frame sellers all right extension above indicates controlled by other time
frame buyers so what we're looking at is range extension all right indicated by C so from the top of the initial balance upward okay in the bottom of the initial balance downward so however far we extend from the initial balance okay now the Tails be right around the highs and the lows okay now not everything is necessarily a tail quote quote okay so a tail should be greater than two time price opportunities okay must be greater than two time price opportunities so what we're looking at is these individual boxes all right so essentially when we
just have one of these rows this is referred to as a single print okay and this is not necessarily the same single print that we'll refer to if we're talking about a single print within a structure all right so when we have a single print within a structure that's when you're normally going to be referring to single prints right when you just have them at the extremes this is normally how you're going to refer to Tails okay and when you have long tails okay long single print tails in this case it represents a strong buyer
or a strong seller okay so think this is a TPO or a Time based chart so when we spend just a little amount of time in an area we come into an area we quickly reverse back out of that area whether it's a high or low this represents either strong buying demand or strong selling okay because if we had initiative buying Above This High okay above the value area high for example and we moved into the high located where D is all right if we had any strength by buyers we would have spent more time
here but instead we were quickly rejected now these are not Tails okay if they are how the day finished so if this was the last period of the day right at the tip right over here then it's not necessarily a tail all right so a tail represents there is a level of impulsiveness at each one of these extremes so buyers stepped in seller stepped in all right and they defined the extremes of this structure all right so the tpoc that's the time price opportunity point of control all right so time point of control so where
we spent the most amount of time and I have mine indicated by red but it's going to be the largest node within this distribution the largest Point within this distribution and this is going to be important because this is going to be the same as it would be with the volume profile this is a good opportunity to take profits into which represents a good area for support and resistance and if this is extended outward let's say that we're looking at this Market profile structure right here for one day and then we have another day that
opens well above and there's nothing interacting with this point of control we would call that naked so if this extended moving forward and the next day hadn't interacted within let's say the next day I hadn't interacted with it if this hadn't been interacted with again we would call this a naked point of control all right and this would be an area that we would list as an area of potential interaction or interest moving forward at that point okay so again this represents the area where we spent the most amount of time okay same thing as
volume profile all right I have the volume profile right here and in this case they do line up right but it's not the same conversion so this is where we spent the most amount of time now sometimes they do line up often you will see that they do line up the volume profile point of control and the TPO chart pointing control as well okay and then the value area so the value area in this case is where we spent 70 percent of the time and think about this as a standard deviation right so that normal
distribution where we spend 70 percent of our time okay so between value area high and value area low so when the market is moving between this area it's essentially within fair value okay the most fair value being at the point of control okay where buyers and sellers spend the most most amount of time if this is where the most volume is transacted as well then this is where we are going to say they agreed upon most okay so this is the extreme fair value and this is more or less the rest right so when the
market is moving within here okay we'll typically see the same thing I talked about in the earlier road maps when the market auctions above and it's considered above value what we typically see is it'll auction lower buyers have become less interested okay again sellers might step in we'll see it revert back to the mean okay and this would be in a more balanced profile this is not exactly a balance profile in the same fashion that you know this would be okay so this is not necessarily A you know a very balanced profile but it's more
balanced than this one that we're looking at right here this actually might be a more balanced profile if anything so what we'll see is that when the price approaches the value area low okay that it will typically show that buyers will step in rather this will be as if something went on sale right just consider it that way it's below value we'll typically see buyers step in okay sellers become less interested in selling at this point and this is if we're moving within a balanced range right so remember this example is if we're moving within
a balanced range all right there's a lot of times when you don't do that at all you auction above value auction below value okay you're accepted below you're accepted above and you move on to create a new value area and in a trend we're going to see that this is just a period of value area is constantly auctioning higher or auctioning lower okay you're chasing value up or chasing value down okay and then the close is G all right so G right here and I have mine indicated by this red triangle and as again you
could see that this TPO chart when it's opened up it resembles what you would see on the 30 minute bar chart Okay so remember what we're trying to do is identify certain patterns okay we're going to be trying to identify patterns because we're not going to see this until it's over so we want to start to identify how this gets painted so that when we start a day okay we could begin to based on maybe the initial balance who we're seeing step in if we're seeing range extension to the downside or to the upside if
we're seeing volume not confirming upside movement and auctioning lower what we're going to try to do based on our Rolodex and our memory okay of certain day types is discerned based on even the previous trading environment something like previous day or the current week for example how this day might play out okay and if let's say for example we have a few previous days that have lined up okay they've been within each other more or less inside days for example are a good example or we just have value areas that are more or less overlapping
when we are accepted out of let's say one of the highs or the lows of all of those air inner or overlapping rather periods this might be an opportunity to enter into a breakout trade if anything these typically do represent opportunities to take advantage of short-term directional trades okay moving along because we're going to get into that in the following road maps so another thing that we go over are anomalies okay these are areas within Market profile that lack symmetry are smoothness so typically we'll see that these get corrected over a period of time okay
so there's plenty of different anomalies and basically what we're looking at is imbalance or lack of symmetry or smoothness so just to draw a crude example you know this is a smooth profile right if we had a profile that say for example looked like this okay we would obviously be able to tell that that is something that has some type of anomalous Behavior okay the market kind of dropped off at one point maybe that was a long liquidation all right so poor highs poor lows okay these are as in up here areas where there's blunt
profile extremes okay there's no real tail so you have this one single print then you have just a pretty much a blunt extreme all right this is a sign that buyers or sellers were not provoked okay in a manner that resulted in any meaningful response so typically we'll see that this is something that's likely unfinished and because of that you know imagine what it would look like if we had you know think about for example when we're looking at a profile you know range for example we're looking at highs okay we're looking at this High
say for example and you know maybe if we're looking for lower price movement what do we often talk about we often talk about the highs being swept now what does a high swept look like it looks like a move up and then we're immediately rejected now if you take this into consideration on how this would look on a bar chart you can imagine what we're waiting for on this TPO chart so we're waiting for the end of this auction to finish and then this is a closeout period so clearly this was left as a poor
high but you'll typically see that the market will return to this area to correct them okay either in a later time period at a later date and so forth there was no meaningful response in this case the market auctioned upward and was not rejected I'm just drawing you a picture of how this might look on a candle chart so we moved upward let's say we moved up here and we constantly spent time up here and we closed up here there was no real rejection up here okay the market was able to hover up here and
was not rejected now in this case we ended up closing up here though so it would be a little bit different story if if price ended up closing back within value and this was not maybe necessarily the beginning of a directional move but this again is a poor High okay a poor low would be the same thing but at the bottom okay so we often revisit these areas and if you see this building up during the day you know it might be the same day again might not be the same day it might be the
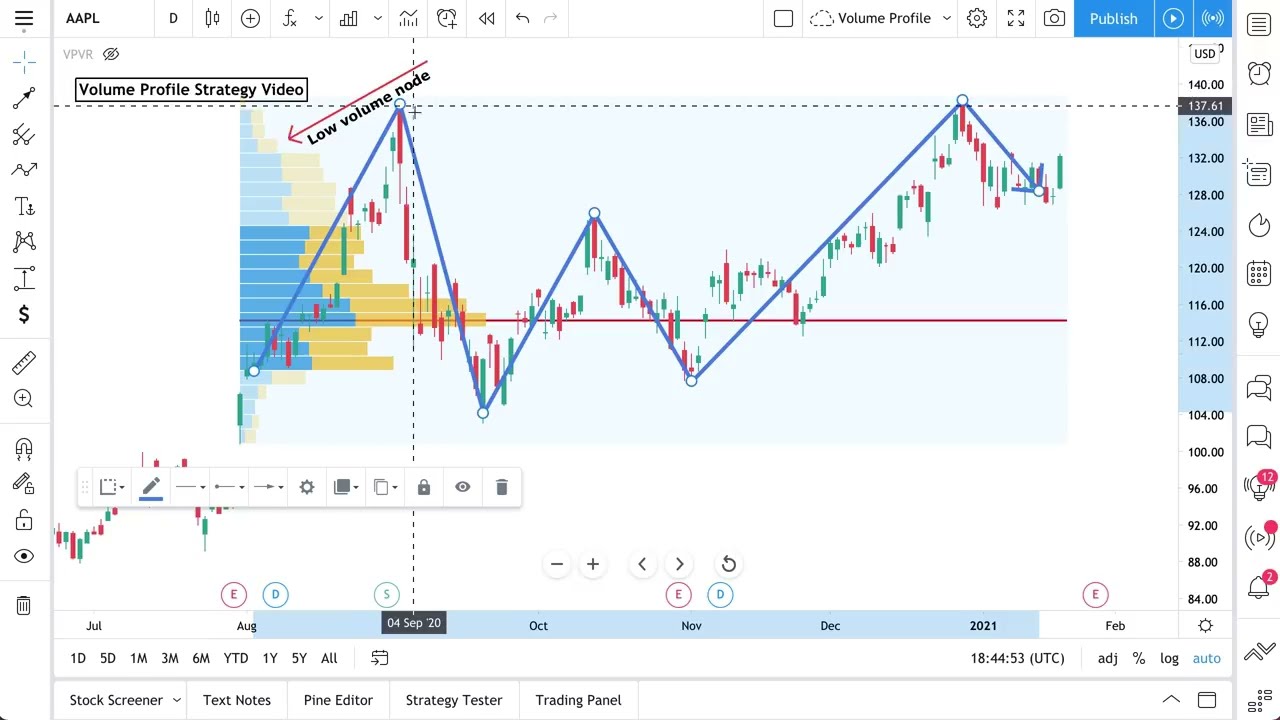
next week it might not be at all but this is just some type of anomaly that we're going to be paying attention paying attention to or keeping an eye out for okay again what we talk about in TPO charts the same thing we talk about volume profile low volume and high volume notes so high volume okay high volume low volume right here okay very low volume right here obviously as well and a little bit of low volume right here okay so when it's within a session so when we have Yvonne profile that looks like this
such as a double distribution all right and this is a single print often you'll see that the extremes will act as areas that we will rebound off of so if we're above here we're coming down to an area where a single print area begins and that means that it looks something like this okay within a structure we'll typically see the price might weaken to here and then quickly reject out of there okay so single prints within a structure are good areas for reversals especially if we're approaching them on diminishing volume so again and this is
more so in the future so if we have a profile that let's say on a weekly profile looks something like this all right and you know we have a current daily profile that that's a horrible daily profile that is developing all right now and this is our previous week's profile okay weekly profile is just developing right now beginning of a new week if we auction into this area where there's a single print we would expect that since buyers and sellers were not interested right here previously and there wasn't much interaction that occurred we'd likely see
a very meaningful response out of this area or we would like to okay another thing that can happen is as price approaches this area if we do see that there is acceptance all right and volume is picking up this might be an area that we can move pretty rapidly through okay so low volume nodes the same way they work in volume profiles they can work as Ledges okay so right here or right here you might see price move to this area in the future and quickly move out of it okay same thing as over here
or if you see there's acceptance this would be an area we'd move through pretty quickly so a lot of this comes down to volume all right and then the types of buying and selling we see within a profile okay this is going to be in comparison to the previous day so think about this as the previous day and let's say that this is we're right over here now so this is the current day okay so buying Within all right the previous day's value area so buying within or above so if we the market come above
here moves upward Market moving here with any period This is called initiative buying these are buyers stepping in in an initiative fashion this is them basically being aggressive rather think this a lot of the times you're seeing that this is an aggressive response okay so initiative buying is buying within or above the previous day's value area now think about this if price auctions above the previous day value area and we see that there's a new area that's being accepted buyers will initiatively start buying into this okay if sellers don't responsibly auction this blower right so
initiative selling is selling within or below a previous day's value area so similar to the last example but selling that we see within here is initiative selling selling that we see below the previous days value areas initiative selling as well now responsive buying is the type of buying that we talk about in auction Market Theory when we come below value okay and bonds of selling when we come above value so value Area High okay for example value area high horrible horrible letters horrible writing rather value area high value area low when we see the price
response rather price comes below the previous day's value the buying that we see down there is responsive buying buyers are stepping and buying something on sale okay they're buying something that's below value right so it's below its normal value they're taking advantage of that opportunity of buying it all right we see that price is sold above the previous day's value area okay we say that that's responsive selling so price is above the value area and we'll typically see that this is an area where we will see sellers step in okay so sellers are responding to
price above value buyers responding to price below value now think about this so responsive sellers up here meet up with initiative buyers okay responsive buyers down here meet up with initiative sellers okay so we're just basically seeing a battle constantly battle and opposing forces right and in this case we have an idea of who we're talking about when we're talking about initiative buying versus initiative selling versus responsive buying versus responsive selling okay so just to have this terminology in mind moving forward Okay so just closing up all right market profiles can help us identify balancer
imbalance so again very simply put balance profile we see the profiles look more balanced when they are pretty symmetrical right so sometimes we'll see a very wide initial balance or a very small initial balance but we'll see that the markets spend most of its time within a pretty evenly distributed value area all right markets look like they're in balance or rather in Balance not imbalance okay imbalance is the opposite right so imbalances as you can imagine we have large skew right so these two for example you know here's a p and a b these are
popular day types or popular Market profile structures that we will be talking about all right sometimes they mean that there is a trend beginning sometimes it's short covering or long cover okay so these are actually can be referred to as anomalies as well as an entire structure okay but again they're they're essentially imbalanced right so again something like this we have balance down here but the entire structure is a structure that's not necessarily balanced all right so we could identify which side of the market to control we could see clear Trends and ranges so when
we get into day types you'll see what trends look like the market profile for a trend might look something like this it might be thin have multiple areas where essentially imagine if we were looking at the candles look like this right so Trends okay ranges are going to be the opposite so when you are moving within a balanced distribution all right when price is accepted within Norms within fair value how do you think that the auctioning will look all right it might look something like this okay more balanced distribution okay this can also be distributions
as a whole so when we talk about distribution so distribution period versus accumulation period so at the bottom this might look like an accumulation period at the tops this might be a distribution period but again when we see multiple periods like this line up this is a good setup for potential breakout trade again we have a more clear idea of where our upper and lower bounds are we can better Define market structure so that we can either mean reverse trade at the extremes these rotation to highs and lows or take advantage of acceptance above or
below so this helps us see those Trends and ranges more clearly and we're talking about bracketing markets again when we're talking about ranges we referred to that earlier on in the in the order flow roadmap as well so sort and organized data efficient effectively so rather than looking at you know something like this where we have a chart that's you know completely open something like this we can press all this down and now we could see was the day balanced okay where do we spend the most amount of time where the most amount of volume
take place where was the value area high where's the value area low versus looking at this right so Market profile is great because you can have a current daily setup open on your candle chart okay and you could be looking at your previous days in the format of Market profile so that you don't necessarily have to have as much noise you have data that's again compressed in a much more organized manner all right another thing sees more Market structure in a more contextualized picture so again we're able to see who stepped in okay after the
initial balance was formed all right did other time for him seller step in or buyer step in okay um how how are our day types okay do we have multiple periods we were in Balance all right um where is this in relation to previous Market structure so it puts things in in context right which is so important especially if you're a price action Trader and all of this is going to be something that's extremely valuable for or the all the other things that we learned in order flow okay so now when we have an idea
of where our balanced areas are where our Valley area Highs are where our Valley area lows are where the naked points of control are which again remember if this isn't interacted with and we see that this is you know pretty clean for the next periods when we approach this area what do we want to pay attention when we approach this area pay attention to the order flow all right pay attention to how buyers and sellers are responding this area at that on an atomized level right we want to see that if this is going to
hold a support that this is being sold heavily but prices are maintaining right so again what would we see we'd see price come into this area heavily sold below but price maintain the structure put in some type of Micro Range close above to give you the idea that we're creating Market structure even that's a microstructure rather even microstructure and leaving those aggressive sellers down here but again looking at something like this puts it in better context right so we have an idea of where the market spend the most amount of time okay now the next
roadmap we're going to go over day types okay so there's plenty of different day types now the main ones are going to be normal normal variation neutral neutral extreme and double distribution lastly a trending date type okay so these are also going to be grouped based on the directional implication right so rather they're going to be rated based on how strong these are directionally okay so a trending day is obviously the strongest okay and then you have neutral and then normal days being the weakest all right so the next road maps we're going to be
getting to specifically these day types how we can start spotting these day types okay what they look like and then how we could start to look for you know or rather the signs of rather look for and learn the signs that will be evident when they're starting to be painted right because we're not going to have these completed structures when we're looking at a new day we're going to try to have we're going to have to rather we're going to have to rely on our memory all right of these days forming previously to try to
in our best way identify how the current day is going to unfold okay so that's that guys hopefully that has been helpful as always it's a pleasure this is Ryan exercise proper risk management and trade effect