Now our spring is off. Put that also to the side. And you can see, oh, look who's down there.
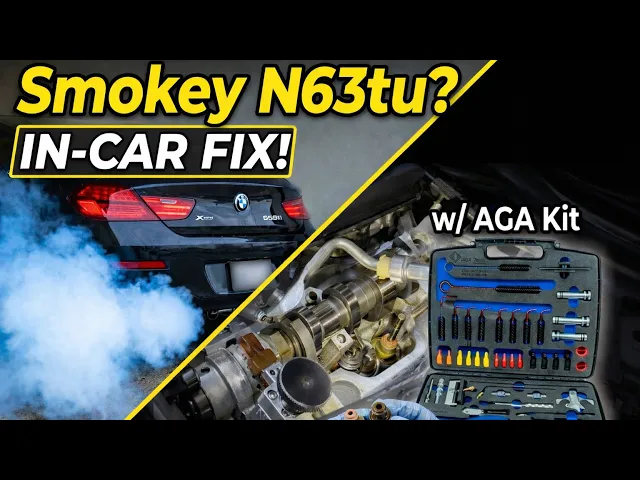
It is the valve seal. Hello. This is my 2014 BMW 650i X drive that I've been modifying for the past few years now.
I've been very happy with the car and I've been pretty much able to make it my own except for one issue that I've had since day one. Since 94,000 km, I've already noticed that this car has a smoking issue. I've tried to remedy it with certain things, but it's never been the correct fix.
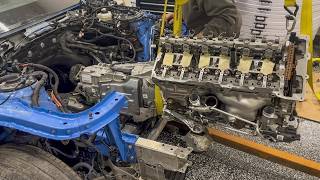
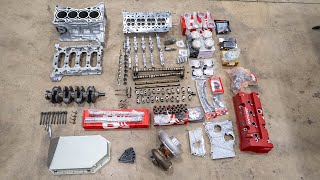
And today, we're finally getting to the bottom of that. In case you missed it in the last episode, we tore this thing apart completely. And we are now at the stage where we can finally get to the root cause of the issue, and that is the valve stem seals.
However, it's not just a matter of getting to these seals. First, we actually need to obtain a tool kit specifically designed to allow us to do this job in the car because otherwise, you can't do this. And BMW says that you need to take the engine out of the car.
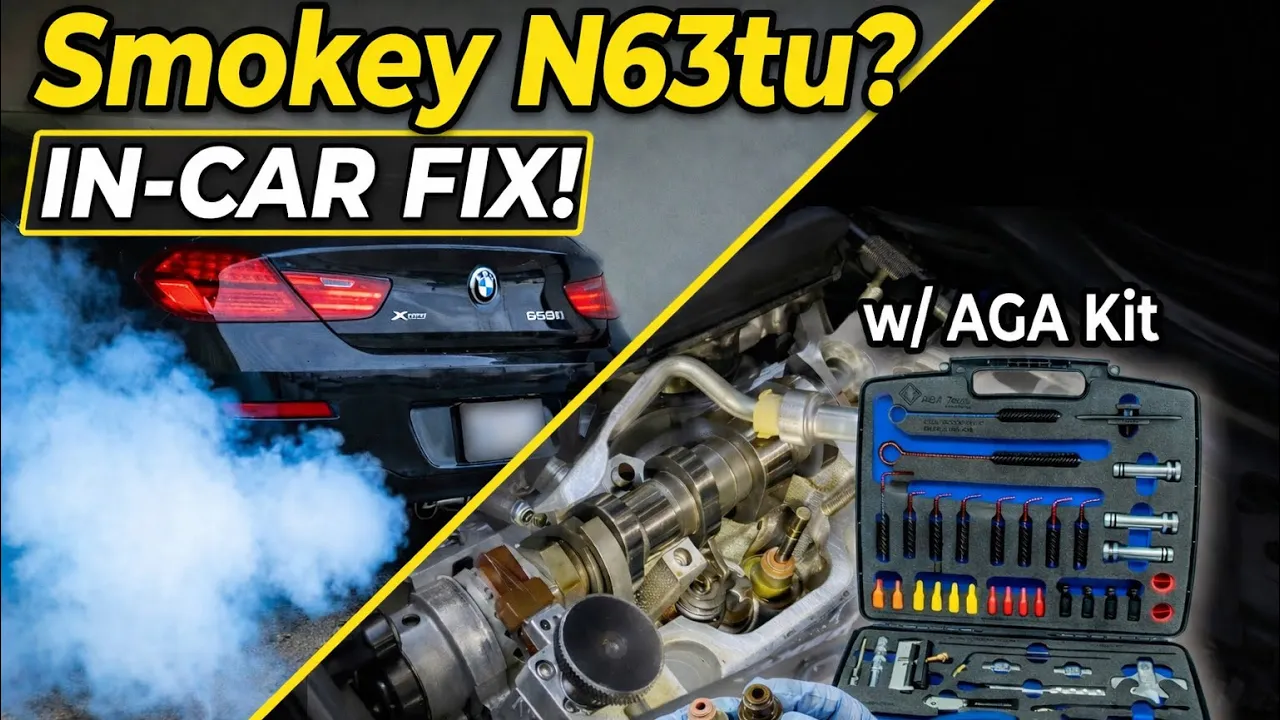
>> [screaming] >> Oh, hell no. >> This kit is made by a company called AGA, AllGerman Auto. And rather creatively, the kit for this service is called the AGA N63 TU valve stem seal kit.
So, in today's video, I'm going to be showing you how to change the valve stem seals, and I'm also going to be talking about my thoughts on this kit and if you should or should not tackle this job. Definitely uh thought that this was a bit of a disappointment. If this tickles your fancy, grab yourself a sandwich and a coffee cuz it's a long one.
So, step one in this process will be to remove your spark plugs. So, you will need a spark plug tool. So, here's a spark plug tool.
It is a multi-point thin wall 14. And you need to remove your spark plugs. [music] The And the other thing is when removing these spark plugs, be very sure to blow out the spark plug hole.
Um because you really don't want any dust and dirt getting into [music] your combustion chamber. Now would also be a great time to change [music] out your plugs if you got a new set. Okay, so now that the plugs are out, uh, we got to put in the spark plug inserts into at least one of them.
Okay. And now we're going to take this guy here and we're going to determine which one is at TDC. This one went down pretty far.
This one went down even further. So, this one's kind of closer in my opinion. We are going to now turn over the engine by hand uh with a 27 mm socket.
That's one of these suckers on the crank bolt at the bottom. It's a pretty strange crank bolt. is pretty recessed in there.
And we're just going to pay attention to our little TDC flag over here. Something that I learned when doing this job is just because the cylinders at top dead center does not mean that you can work on the valve. You also need to look at the cam lobe.
Um the cam lobe has to be in the upward position [music] or away from the valve that you're doing. Um there's two positions that it can be in. It can be basically right in your way or it can be totally out of your way.
Of course, you want it totally out of your way to make your life easy. So, now we're at top dead center for that cylinder. And why we want to do this gives us the least amount of chance for a valve to drop in and then get stuck inside the combustion chamber, requiring us to take the head off, which would be a terrible day.
So, now that we're at TDC on that cylinder, we're going to pull this guy out. This is our indicator for later. We will need that.
We're going to pull out the spark plug adapter. Okay. Put this back in the box.
And we are going to thread in leak down tester tool. We need a way to block off the injector port and seal it somewhat at least. So, you take this guy in this one and it doesn't exactly bottom out all the way.
That's okay. That's how it's supposed to be. And then you got to get this guy in there and thread it in where you would thread in the injector.
screw. So the screw that is right here in the middle. So that's not going to go anywhere.
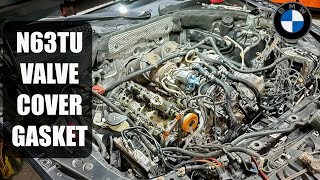
There's going to be some leakage from that, but it's more than ample uh for our purposes here. The next thing that we need to do is we need to remove this cam cover. So on [music] each of these you have a cam cover.
Um this is technically two cam covers in one and you got to remove the whole thing. >> [music] >> uh to achieve this. So you need a T30 socket on each one.
Carefully put it to the side and also mark [music] the direction that this goes in. For the injector cap, you have this sort of cutout here at the bottom, not at the top. So, that's a good thing to keep in mind.
[music] You can also mark them with arrows. Um, I've marked the further back ones with arrows as well. Um, and I think this [music] one I did as well.
That could have been a bad day. [snorts] So, for this kind of stuff, if uh something falls in, magnets, great help. The other thing is with the AGA tool kit, what is great about it is that they give you those sort of brushes and they go in inside the oil drain ports and then it [snorts] prevents stuff from falling down into the uh oil sump.
And now we're going to pick [music] this guy off. And some of the stuff may want to fall out of this contents inside may be excited. So we have a sort of roller bearing over here.
So make [music] sure you don't lose that. These are also marked. So you've got an up.
And the reason for that is you got a cutout for that dowel. So you don't want to put it the wrong way around cuz [music] that will genuinely screw it up. So, put this guy with the up sticking up and then you get this exhaust doohickey.
Be careful with the cross thread. Just thread it in. Okay, this one's almost bottomed out.
Yep. And these are all done the same regardless of it being back here with the single uh cam cap or [music] the big uh cam cap for the high-pressure fuel pump. Don't go too crazy.
That's less than 10 Newton meters for sure, which is by the way the factory spec. And you just put this guy under And then we thread it in like so. So now this guy is less [music] likely to spin when we apply pressure to the cylinder.
The next thing we're going to do, we're going to take down our leak down tester. Plug it in. And now all you got to do is just spin that and you're going to start putting pressure into the cylinder.
Now we don't want this just yet. This is just a demonstration. See, now we got that sort of working.
So we're ready. And the next thing is we got to take our spring compressor tool. Now, I like to do these one at a time.
I think that one at a time is easier to manage and keep track of, and you lose less parts. So, let's go with this one since it's easier for you guys to see. So, we're going to take this guy, snake it under.
And ironically, this with this setup, righty is actually loosey and lefty is tighty. That starts to push on the valve. Make sure everything is straight and not interfering with things that it shouldn't.
The second light here helps cuz the upper light is kind of being blocked at this moment. Everything looks okay. This is pretty tight.
And now they want you to use a 17 mil that's included with the kit and start to compress this guy. I don't mind using this guy, but uh wait, I do have a better tool for this, so we're going to use that in a second. And now we're going to take this guy.
It comes right off the roller. Just take it out of the way. And now you don't want to mix and match these.
And now we're just going to put this guy in a safe space off to the side. And now we can release this guy. So we start applying pressure to the cylinder.
Okay. So we're loose. And now we take this And you want to start doing the leak down.
So once you're about 20%, that's decent. So now we have the keepers exposed. I take a magnet which wants to stick to literally everything but the keepers and we pull them.
So this one went the other side is still on there. So now the keepers are off. They're stowed away.
We're going to change the direction of this. So, we're going to go right and we're going to see as the valve comes up. If at any time your leak down goes nuts and you start getting a lot of leak down, you're kind of borderline dropping a valve.
So, be cautious of that, you can also hear sometimes things leaking and doing weird stuff. So, just pay attention, be mindful of it cuz this is now you're playing with a bit of fire. So, we pull this guy out.
And now that it's pulled out, all we do, we got to pull out the spring. Now, our spring is off. Put that also to the side.
And you can see, oh, look who's down there. It is the valve seal. Grab and pull.
And there we go. Now it's in our hands and we put it in the pile of discarded valve stem seals. So the AGA kit, you get this uh sort of metal sort of slide tool.
Um, you just lubricate it and then you push it up through the valve seal and then you take your pliers, grab them and go down there. Be very careful when you do this. Trying to be as straight as possible.
And you'll feel a distinct sort of click when you go up and down. So, I felt that click. We take off these pliers.
Now take our slider device off with the magnet and out. One thing of note when installing these springs. So there's only one side for this retainer guide to go and that is the smaller side.
Uh there's two sort of sizes here. There's a small size and a big size. If you put in the big one, you can have a ton of play.
put in the small one. There's a little bit of play and you can tell that which side's top and bottom. This these stripes here on mine, they go to the bottom.
So, we're going to install those now in the car, straight [music] as possible. Now we can put the retainers on. And this part is particularly fun.
You see here it [music] it's wider at the bottom and thinner at the top. So, the wide part goes down. And we're going to first [music] take this pin.
See this pin that comes up? We're going to make sure that that's pushed up. Stretch this guy out.
And we need to push in this thing here. Now, I'm going to have to take off my glove to show you guys what I'm [music] doing. But take this guy, stretch it, and you make sure it's pushed [music] down as far as possible.
And it looks something like that when it's ready. Okay. And they're kind of at the very edge here.
Now we go back to the car. So, now back at the car, we take our little valve keeper tool. And I'm just going to this guy as straight as I possibly can.
This takes a bit of skill again. And then I'm just going to push it down. You'll feel it.
It goes down pretty easy. Give it a little wiggle and then gently release. And then you can see that the keepers are now on there pretty good.
This takes a skill. It took me about three valves to do to realize how to do this properly. But once you get it, it's actually kind of intuitive and less stressful than just trying to put it on with your fingers and just mess around in that tight cramped spot.
And now we back this off. and ensure that everything is seating correctly. And it seems like it is.
We're going to now remove the air. So, I'm going to take the leak down tester and we take our roller. We put our roller back on.
I feel lonely. Yeah. Feel lonely.
I feel lonely late at night. Late night. [music] Late night.
And that is one of your 32 valves done. So 16 exhaust valves. So now we're going to do the adjacent one.
Na [music] a [music] hey. Hey [music] Baby down. [music] Let me ah [music] N [music] hey baby hey baby hey baby hey baby hey baby hey baby hey baby hey baby hey baby hey baby hey Papa da [music] da.
D love. Another thing that you might have not considered uh when taking this job on is that you will need access to the underside of the car. Even though technically you don't need to, inevitably you will drop something and you will need to find it on the underside of your car.
So, you better have a plan for that. Once the exhaust valve stem seals were taken care of, it was then time to move to the intake valve stem seals, which on the N63TU are located lower down in the engine, where it's much more difficult to reach them. And to make matters more fun, you have to deal with the valvetronic system, which is even lower than that.
And the motor is the lowest point. Unlike other BMW V8 engines where this motor was on top, this motor is located underneath the engine practically. And you can't really get to it from the bottom.
You need to get to it from the top down. And you use this special tool provided by AGA to hold the tool in place and spin this massive wheel. And that gives you sort of leverage over that tiny little screw and all the resistance of that motor.
There's one of these Valvetronic motors and shafts per bank. You can spin this two ways. And you need to spin this in the way that the teeth of the eccentric shaft look like this.
Just like the exhaust cams, when you're setting the TDC for the cylinder that you're working on, make sure that the intake cam that you're working on is facing in the direction where it's not going to bother your work. Once the valvetronic motor is properly retracted and in the correct orientation so that it's not applying any tension on the springs, you can start to remove your first spring. A top tip for anyone doing this job, I would break the Valvetronic spring set screw first before installing that uh spring compressor tool.
Um it just basically gets too tight in there to really break that screw free confidently. So it just don't do it all the way out, right? Just do it part way.
Make sure that these are resting properly. >> [music] [music] [music] >> Just go until it bottoms out right there. Get the light so I can see the screw.
I spin it. can make this a little bit easier is if you take these off. So, I'm going to take those off now.
Okay. There's a few nuances between the intake and the exhaust [music] valve train in the N63 head. It's very similar to that of the N55 and [music] N20 engines.
Um, just a little bit differently configured. >> You cannot mix and match these. These have to stay in the same position.
>> Just like those engines, the exhaust cam only has one rocker and the intake has two because of the valvronic system. And the N63TU is [music] no different. So, you have two sets of rockers to deal with uh with the intake valves just to add that little bit of extra spice [music] in your already complicated life.
I didn't get a really good B-roll shot of the guts of the head without the valve train in [music] it. So, here is a bit of footage from a different cylinder. These are spring loaded, so you got to twist them and then they come off.
Goes here. The front cylinders one and five are a little bit different to the rest of cylinders because you have to do a little bit more work in order to get the first valve spring compressor in there. It cannot be removed with the bracket in place.
So, every time you have to remove the compressor tool to get the spring out of the way or to put the spring back in, you also need to remove the bracket and then reinstall it afterwards. That locks us into place. Air system.
All right. And now I'm going to do the other one because this one I actually have to remove this to get this out and the other part out. In this footage here, you can see me kind of struggling to [music] get the proper tool on the spring compressor because there's some stuff on the side.
You're going to need to learn how to remove the hoses on the side. Uh the piece here actually just clips in. You can just pull it up and out and that little uh thermostat or whatever that is can be wiggled around freely.
And at the back you have a triple clamp that also needs to be removed. There's a special trick to that which I don't show because I broke mine. Good luck with that.
They're not too expensive though if you do break them. Oh, I think I got it. And look at that.
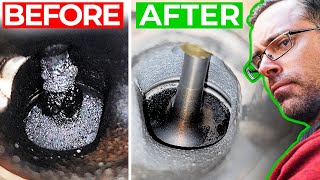
Old versus new. And here you can really see the difference between the old and the new ones. I'm actually surprised because I thought that the exhaust ones would be much worse, but it turns out actually it looks like the intake valve stem seals were worse than the exhaust.
Yes, great success. Yes. At first, I didn't really like the intake valve retainer tool because I didn't exactly understand how to use it.
The trick is keep it straight. Don't try and bend it too much like the exhaust one uh that you used previously. This is what happens when you use an exhaust tool on the intake tool.
It doesn't work. everything falls apart. So, make sure you use the intake tool specifically for the intakes and it makes your life a lot easier.
Um, you just got to know how to use it. It's spring-loaded and uh you need to keep it extremely straight. You can't have it at any sort of angle really.
Um, otherwise it will just fall apart. Oh, maybe looks like I got it. Okay, so now we got to reassemble pull everything so we can disconnect [music] the air and everything has to go back in the order that it came out of.
There's two ways in which you can assemble or um disassemble the intake valve train out of the head. Um and [music] the way that you're going to want to do this kind of varies between each cylinder. Um, the space around it kind of varies.
And sometimes you have to put in the spring first and then the rocker, the top rockers on afterwards. And sometimes you want to do the top rockers first, the little bracket there, and then slide that spring underneath it. Um, this will vary from cylinder to cylinder.
Either way is correct. It's just [music] which way can actually work in that particular cylinder. On this particular cylinder, you actually have to put in the spring first and then the rocker arms on top of the spring and then you can put that little bracket in there.
Um, you can't do the bracket first and then slide the spring underneath it. So those two screws right there, those ones are 10 Newton meters. the screw at the bottom.
So that screw right there is 8 Nm. [music] The process is basically identical for the rest of the cylinders. So you're just going to have to move this guy over at some [music] point to those cylinders just so you can keep the pressure in.
Uh make sure you're top dead center. Heat. Heat.
Hey, hey, hey. And just like that, we are finally complete with the valve stem seal replacement. Is this a job that anyone can do?
Absolutely not. I think very critical to this, you need to have the facilities and the means [music] to store a vehicle that is in parts for an extended period [music] of time. Do you have the tooling to um get it done?
It's not just a matter of do I have a 13 mil and a 10 mil socket. [music] It's do I have the right length of socket? Do I have the right thickness of the drive that I'm using?
having multiple different sizes and different [music] shapes and different configurations and and having different pliers and [music] and you know having more than just what the kit includes is super [music] critical. I think extremely crucial to getting this job done correctly is to have the mechanical skills in order to complete this. It is so imperative that you that you have this because if you don't have any mechanical knowledge, any mechanical background, the second that you start messing with this stuff, you are going to get yourself in a big pickle and it's going to cost you a lot more money than it would be to just pay someone to get it done and that's it.
Uh if you screw up, it's not just going to burn oil again. It's going to not run and it's going to cost you a pretty penny. These engines aren't cheap.
I'm not saying it's impossible, [music] but I wouldn't want to be taking this on before I even know how to do a [music] oil filter housing gasket on my, you know, N52 [music] or N54. It is very physically taxing. It's taxing on your back, taxing [music] on your muscles, on your mental state.
You are going to be very tired after this job. I can assure you. Furthermore, if you don't have the means to rent out this kit, if you don't have the funds to buy this kit, you cannot do this job.
This kit is so critical to doing the job. I wouldn't attempt this if you don't have this kit. Um, does that mean that this kit is going to make this job easy?
No. It is only a tool to make this job possible. That is the key word.
You are the final deciding factor on if this job is going to be easy or difficult. It is not in not the most intuitive thing to use. Once you get the hang of it, it's pretty easy.
Um, the exhaust valves in particular are pretty easy. The intake valves take some skill and messing around with. Almost everything in this kit was used at some point.
It is a very complete kit. And honestly, I wouldn't just go and purchase one component of it and think that I'm going to be ready to do a valve sim seal job. A generic Amazon tool will not do this uh job the same way that this does.
It won't do this job period. In terms of what to expect when doing this job uh with this kit to take the car apart to get it to the position where you can start using this kit, I took a full day. A fullblown mechanic will take this car apart in probably 4 hours or so.
It took me probably eight. the valve cover. That is a component that's kind of difficult to remove if it's never been removed before.
It gets really baked on there. The time it took me to do the valve stems themselves, not including the disassembly, was 20 hours. It took me 15 hours to do the intake valves.
That is 15 hours of just pure work. No like breaks in between. That's just me working.
The exhaust valves took me a lot less time. They're a lot simpler, a lot easier to access. Uh, and those took me about 5 hours to get done uh, for all 16.
So, it comes to about 15 20 minutes per exhaust valve. And it took me about 45 minutes to an hour for each intake valve stem seal. So, you can just assume it's going to take you, say if you're working two hours an evening on this in your own garage, it's going to take you about 10 days straight to get this done.
Um, and as for why people do this job in the car and not out of the car, well, in some cars, my car wasn't too bad from what I read, uh, but the like the smaller cars, uh, like the X5s or the 5 series, the 550s, uh, they can be really tight and really difficult to, um, work with, and some of the seals are just not accessible. But, uh, the sixes tend to be one of the better ones to work with. And even that was pretty tight.
This kit is not perfect. Uh, it could use a little bit of improvement. I'm surprised that they didn't include a magnet for this.
You need a pretty strong magnet for stuff such as this little uh, sleeve so you don't rip the seals upon installation. If you're not 100% straight with this tool, with this one or the other tool, uh you can actually start to uh graze up against the head casting with this tool. And this thing, if you push it, it won't say no.
And what's the first thing to give is actually this aluminum bracket. Um it does not take well to force being applied to it. It's only meant to compress a valve spring.
If you get it crooked, you will bend this and then you'll have a very hard time with the following valves or the continuing on that valve. This thing will pop out and um be pretty scary when it does that. Uh it can uh be quite violent.
This thing, at first I didn't understand how it works. It's a skill set as well. You need to learn how to use this.
It is totally different than this one here. This one you kind of swing in from the top and this one you're actually not really supposed to bend it this much. It's only like maybe 5 10 degree bend and you just kind of go straight in.
Um, it's a skill that you need to learn. Very valuable tool and it's way easier than manually putting it in with a flathead screwdriver. This thing really locks the engine up.
You cannot spin it. I've tried many times by accident. This is a very ingenious tool.
Uh kind of complex looking and intimidating, but makes those um makes those springs very easy to compress. Uh I do find that the the screw at the bottom is kind of difficult to reach. While this tool was included and it is a pretty good tool for the job, it isn't always the perfect tool for the job.
Um torquing down the bolts, it's not straight 100% of the time. It's a little too long sometimes. This guy here I found useless.
I didn't really understand it. Maybe I just didn't have enough time with this. The fact that you have the straight pliers and the bent pliers, that definitely helps.
I wish the pliers would be shorter. It would make it easier to grab at things uh that are around the intake ports. Um cuz you kind of have to guide these in and maneuver it and then it kind of gets on there and you just barely grab onto the valve stem seal and then you can kind of pull it out and then you get the magnets.
I would maybe suggest getting yourself an alternate set of valve stem seal pliers uh when you're doing this job. My final gripe with this kit was actually this guy here. Um I found that it was very difficult to use this tool and very difficult to retract the eccentric shaft motor.
It just kind of baffles me that they made all of this here and they couldn't get something that would just be like a ratchet action kind of tool and that would make life a lot easier because there is room for it to just move and then it'd be so much easier on your hands to not get it all cut up by putting your hands down in that crevice over there. TDC tool. That is a good one there.
These brushes were fantastic. They saved me from losing the keepers a couple times. Um, and furthermore, I would also use towels just around the area that you're working.
It is much easier to get the keeper off of a towel if it does spring out than from the bottom of the car or if it falls into the frame or if it were to fall past these brushes. Uh, that would be terrible, too. Um, but finding it in the engine, it's still doable.
It's just much easier if it's on a towel. I find that the kit was really useful. I wouldn't recommend doing this job without it.
Not even in the slightest. Don't think about it. It's you're going way over your head here.
Uh unless you've got the engine out of the car, and that's a different story. But in the car, you must have this tool. You cannot do it without it.
And furthermore, on reviewing this kit, while I think that this kit could be improved, does it really matter? There's no other kit available to do so. So, congrats on AGA.
Good job. You have a excellent kit. You thought of a lot of things.
not everything and your kit could still be improved. Uh, but I mean this in the best way. Thank you so much for making this kit and it has uh it's saved my my car and u it's been quite the experience using it.
So, thank you so much for that. Getting off that tangent now. Thank you so much for tuning into this video.
Thank you so much for watching. If you made it this far, good on you. It's a long, long, long video, I'm sure.
Uh, it's been a long job. So, go figure. And, uh, lots of thoughts on this.
Please ask any questions down below. I'm here for you guys. And we'll catch you in the next video.
Hopefully, that's part three of this thing where we're going to be assembling it. So, stay tuned for that. >> Bye for now.
What you want?