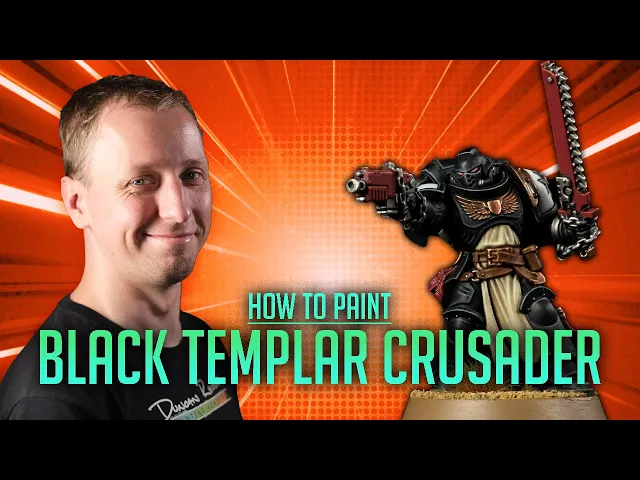
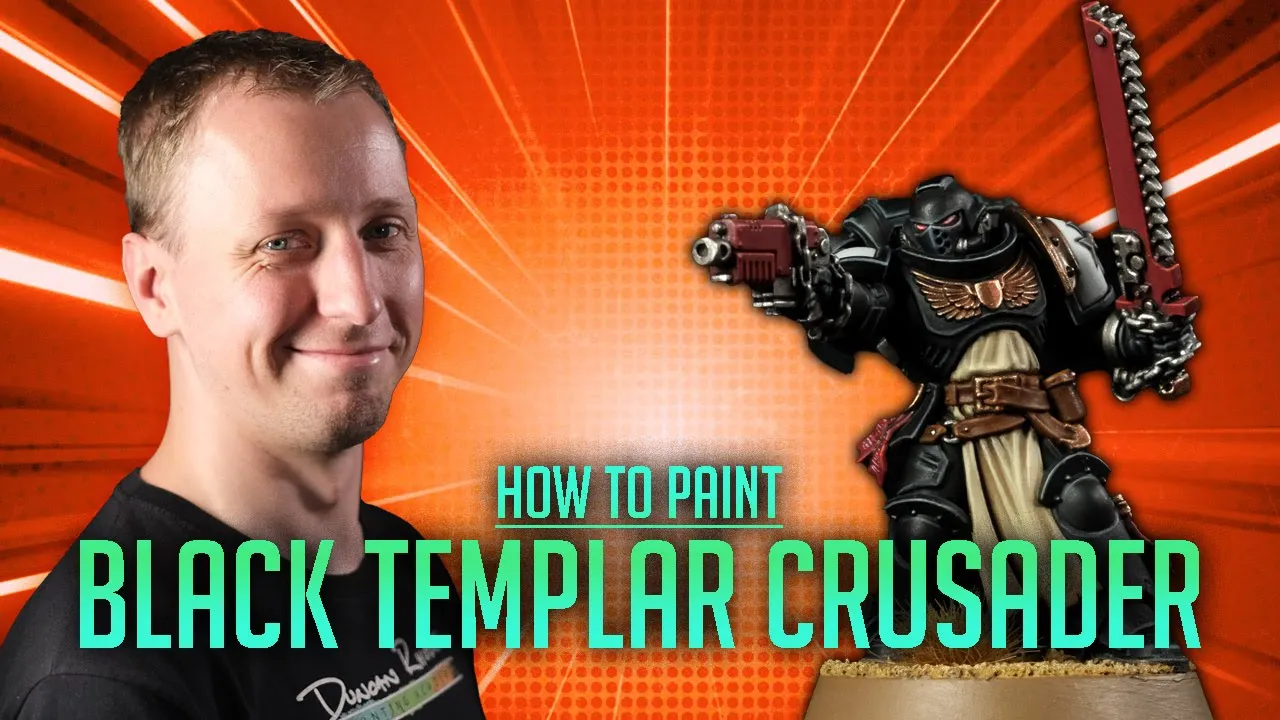
hey everybody in this video we're going to be showing you a great method of painting black templar crusaders for warhammer 40 000 by games workshop and to do so we're going to be using one of the new primary crusader miniatures for our example but it's worth noting that the black templars have a very similar colour scheme throughout their whole army so the methods and techniques we're going to be using in this video can be used to paint a huge variety of troops including things such as sword brethren neophytes and more so we hope you enjoy
it and we'll see you at the desk [Music] [Music] so [Music] to paint your black templars the first thing that you need to do is to undercut your miniatures and in this case what i recommend you go for is a medium gray undercoat so here i've used mechanicas standard gray spray from citadel now you might be wondering why i've gone for gray here because black templars are mostly black so it's a very good argument for going for a blackened coat but the reason is because gray is a better starting point for all the other colours
we're going to be using on the miniature for things like the tabards the weapons all the metallics everything like that now you could of course go for a black undercoat if you want to and if you choose to do so it just takes a little bit longer with some of those other colors so i find in the long run this saves a little bit of time but the choice is entirely yours now whatever you do decide to do the first thing that we need to do is paint all that power on with black and this
is true even if you undercut your miniature black the reason is because the painted on version of black is going to have a different finish to what the undercoat's going to have so later on when we're highlighting the power armor should you need to meet up any mistakes you'll notice this difference so it's important to do this now to avoid that happening so all you need to do is to pick a black that you want to use and in this case i'm going to go for doom death black which is one of our paints but
you can also go for matte black from the army painter or a bad and black from citadel the choice really is yours whatever you go for as ever make sure to give all your paints a good shake before you use each one and all we need to do is to get some of this onto the palette so there we go got a little dollop there like that and then let's pick a brush that you're comfortable with the size that we're doing here in this case i've got a monster brush and the army painter so a
nice large brush and with this all i'm going to do is base coat all the power armor on the miniature so as ever just need a little bit of water there just to mix it in to thin that paint down slightly and then once that's done all i got to do is start applying this to the armor of the miniature now don't worry about being too neat at this stage just concentrate on making sure you get all that power armor so the leg around here but wherever possible avoid catching it onto other details so for
example the tabard doesn't matter if you happen to get a little bit there like that because we can easily paint over that but the less of that the quicker it's going to be later on now if you can see some of that undercoat showing through don't worry about it just let the paint completely dry and apply a second thin coat in the exact same way [Music] once you have that even black on all the armor panels the next thing to do is to mark in the white details that appear on the shoulder plate so the
main field of the design on there and for this what i recommend you go for is corax white and there's two main reasons for this first of all this paint's got very good coverage so it's nice and easy to apply here but also it's not actually a pure white it's a very very very light gray now the reason for this is it'll look like it's white on its own especially when put directly next to the black here so don't worry about it not looking like white it certainly will do but it means that if you're
painting a miniature in your black 10 plus army that requires you to put highlights on those areas so for example if you're doing the shoulder of a dental dreadnought for example it means that you can use a pure white to highlight this and get a nicer finish whereas if you use a pure white here you'll have nowhere to go in that situation so that's why i recommend you go for this color now to apply it go for a smaller brush now i'm using a medium layer brush from citadel for this and all you've got to
do is as ever get some onto your palette and thin it down now this paint can be a little bit thick straight out the pot so definitely make sure you shake it you might need to stir it but really what we're looking to do is to bring it down to a nice smooth consistency so just test it on the palette until you bring it down to around about this kind of point here so it's nice and smooth it's flying off from the brush quite happy with that and with this what we need to do is
to block in that main field on the shoulder plate so for example this one just here looking to avoid the templar symbol there so we're looking at this sort of area and you can see it's got nice coverage and this is why i went for that gray undercoat because it goes over really nicely here even though there's a few little splashes of black it covers them really nicely in small situations like this now if you do happen to catch that cross symbol don't worry about it just knead it with a black before you continue but
here i do recommend once again you apply two thin coats [Music] i've finished applying the corex white to the shoulder plate and you can see how next that black it does look like a pure white so with that done we can now move on to the next detail to base coating which is going to be the tabard and for this what we need is a sort of deep bone color so in this case what i'm going to be using is one of ours i've got here dragon fang but the closest equivalent would be something like
xander does from citadel so either of these paint is just fine here and with this all we're going to do is block this detail in and some of it can be a little bit tricky to get to so i recommend a medium sized brush here and i'm actually using a medium layer brush from citadel now as ever we just need to make sure the paint's nicely thinned down and then once you've got that ready it's just a matter of loading up and blocking this detail in what we're looking at here is a tabard that comes
down the middle so we're looking at this area here including the folded back part but also a little bit of it that's visible just up here just above the belt [Music] with that tabard base coated we can now move on to a few more base coats on the miniature before i apply our first wash on to it and for this what we need first is a warm brown for all the leather belts so here i'm going to use some more fang brown then we need to base coat the red details in the miniature such as
the weapons and here we need a deep red so for this we'll use some corn red finally we can base coat the bronze details and here i'm going to use some spartan bronze which again is one of ours but you could also use some baths i got from citadel which is a very close equivalent but first of all what we need is more fang brown for the base coat for all the leather and here i'm again going to use that medium layer brush for the base coat here what we're going to do is as before
just get that paint nicely thinned down the palette so it's under control make sure the brush isn't overloaded because with this what we need to do is start moving around the miniature looking for these belts and it tends to be quite a few around the waist see them all the way around here all you got to do is just neatly start blocking them in just being very careful poking the paint in there just avoid the tabard and also the black armor as you encounter it [Music] next up we're ready for some red for the weapons
and in this case i've got corn red and this is for the main casing of them so for example down the side of the sword here and also the body of the pistol now in addition keep an eye out for any crusader seals on your black templar 2 and if you've got any for example i've got one down here in the leg base coat in the parchment of these as well [Music] and then finally ready to base coat any details that you want to be bronze in this case i'm using spartan bronze which is one
of ours but a good equivalent would be bathsar gold from citadel and for this i switched to a smaller brush i'm actually using one of citadel's small layer brushes for this because some of these details can be quite intricate so just take your time being as neat as possible picking these areas out [Music] and with that bronze applied we've now finished applying a number of base coats that can all share the same color wash which is going to be a dark brown wash and the exception here is that black power armor don't worry about shading
that but everything else what you need is just to choose a dark wash of your choice here so in this case i've gone for some acrax her shade and there's two different stages of applying this first of all what we want to do is focus on the white detail on those shoulder plates because here we need to keep them as bright and clean as possible and then everything else is going to use a slightly different technique but start out with that white what you want to do is go for a finer brush because here what
we're going to be doing is applying this wash into the recesses so recess shading essentially is what i'm doing here so i've got a small airbrush from citadel and with this what i'm going to do is just use the powder just to control how much is on here so there's not loads at once because with this what we need to do is use the fine tip of the brush to run it directly into the recessed corner so for example if we look at this shoulder plate just here what we need to do is paint it
directly into this corner as neatly as possible so just following that fine line down to get that little hint of brown and the rest of that detail to cleanly finish off that white where it meets the black so again the same just along here as neatly as possible run into that area there same around the chapter badge so we're looking in the recess just going around there like that now for the other colors it's slightly different in this case what we want to do is apply entirely over those areas so to do this go for
a slightly larger brush now in this case it's a medium layer from citadel and with this we want to paint it directly over these details letting it settle as it will so for example if we take a look at the tabard and fair amount and load it on there we're looking at this kind of area around here all you want to do is paint it directly over just avoiding that black armor but coating everything else just letting it settle smoothly to get some nice shading on this detail [Music] the wash is now completely dry giving
some nice definition on those details on the white you can see it's not made it murky or anything but it has again given that definition especially around the outer edge and with that done we can now move on to the next set of base coats that are again all going to share the same wash and in this case it's going to be a black wash and here first of all we need to pick out all the joints in the armor so for this i'm going to use some ash and gray we want to kind of
slightly dirty gray like that but then after that we need to base coat in all the silver details and here i'm going to use some serco silver which is one of the tooth and coats paints but any sort of deep silver like this will do so something like lead belcher for example is a great choice so what we need first of all though is eschen grey and to apply it i'm going to be using my small layer brush from citadel because these details can be quite small and tricky to get to so for all of
them remember to make sure you use that palette to help control the paint just making sure it's nicely thinned down with that little bit of water and it's checking to make sure your brush hasn't got too much on there and with this what we're looking for is the kind of soft parts of the joint so on the back of the legs you can see there's these sort of ridged areas just here all we've got to do is block them in as neatly as possible being careful of that black armor on either side [Music] and then
finally we're ready to move on to base coating the silver details and here i'm using circo silver but as i mentioned a great alternative would be lead belcher at this stage and these details are all kinds of shapes and sizes so for this i recommend going for a smaller brush here i'm using a small airbrush to carefully pick out the chains but all you've got to do is just work your way around the miniature looking for any details like the chains the mechanical parts and the weapons for example the back of the pistol just here
and events little details like that and carefully block them out [Music] with those colors blocked in we're now ready to apply that black wash onto those two and in this case i'm going to be using some noin oil and to apply it i'd recommend going for a small brush because it's very easy to lose control of this so we only want to keep it on the joints the arm that we just base coated and the silver as well so to do this as well i'd recommend that you use a palette to draw from to make
sure that the brush isn't going to be overloaded and once you've got that ready it's just a matter of looking for these new areas and blocking it over so anything that we painted with eschen grey earlier on such as the joint round here just want to block all the way over that so it runs mostly into the recessed detail and gives it nice definition but also we're looking for all the silver as well so for example the teeth and the chainsaw around here just run it all the way over it so it settles nicely in
the recesses [Music] the black wash is now completely dry as well and so we can now move on to the next phase of paint in the miniature which is going to be to do a little bit of layering to brighten some details up and what i mean by layering is that essentially what we're going to do is revisit some of our original base coats but this time applying the color in a much more precise manner to avoid the recesses to retain the definition from the wash we had whilst also brightening the area up i'm going
to start out by doing this on the red details and so to do it we need to return to the original base color which was corn red in this case and to apply it i'm now going to use a small airbrush from citadel because i need that precision you see because what we're looking to do here is to paint it onto the flap of the panels that we've originally faced coated red so to help out with that just make sure the paint's nicely thin does that but just bring it a little bit thinner than we
had it for the base coat so about this kind of consistency here and just make sure you don't have loads in your brush because as we're applying this for example on the bolt pistol just here we're aiming for is these flat parts of the panels so what we can do is very lightly start running across them like this but only very gently because as the brush reaches those recesses it doesn't fall into the little vents which is just there same here where we've got this kind of grip if we just very lightly skim across like
this using the side of the brush the color only catches that raised area and you can see it makes it cleaner and a little bit brighter too just need to be careful of things such as rivets that we've got at the area under the gun just here and just carefully maneuver around those leaving it darker in the recessed parts now the same is true for all the red detail we've got here even on the chain sword so for this again we just want to paint the flat side of it with this colour so smoothly on
this flat area just here when you get to recesses such as this part here you can see the black wash just around the little silver detail what we want to do is not go quite into the corner so about that kind of distance there to retain that definition now also we have that red parchment and for this we want to be doing the same sort of thing and you can see the texture is quite different on these areas so instead approach from the side so you're kind of painting along those lines of the creases and
just run a few lines along it like this just to emphasize that texture [Music] with that layering done on the red now you can see we've got a cleaner finish to those details and so now what we need to do is move on to doing this on one of the detail in the miniature which is the tabard but in this case we're actually going to be doing it on a different texture so it's fabric now in case of this then what we need to do is start to build it up a little bit more add
a bit more volume and start to make it a little bit lighter so first of all we're going to return to the original color we used here which in this case is dragon fang if you stuck with citadel here what you'll need is some zandry dust but after that we need to take a little bit lighter so we're going to lay it over the top of that using some of shabti bone but first of all we need dragon fang and to apply it i'm sticking to that small layer brush and i've still got some wire
wet palette here which i'm going to use just bringing it to a little open space just here to thin it down because what we want to do is like with that red thin it down a little bit more than we had for the original base coat color so really kind of like this a little bit translucent this is the right sort of things that we need for it and with this what we need to do in the case of fabric is look carefully where the creases are and look to the recesses so in the case
here you can see this kind of part that's folded back and it's very dark in the deepest recess there what we need to do is leave that really dark skip past a little bit past it so we've got the kind of shader down version of this color and then go a little bit past that so then we apply this fresh color like this so by doing this you see what we do is create a gradient where the further into the recess we go the darker it gets and it's just a matter of doing that across
all the fabric and to do this really helps to paint the direction that the creases are going so in this downwards kind of sweeping motion like this but wherever it gets a little bit darker such as that very small part just there just get past it to leave that definition from the shading in that area same is true up here you can see we get these little creases just here we want to stick to the raised up areas leaving it dark in the recessed areas and this way we're really building up the effect of that
fabric moving down the front of the marine just there [Music] once you've finished with that you're then ready to move on to a shabti bone and with this we're looking for a very similar technique only more focused just the very tops of the creases so for example just here we want to bring the color down that area just there a short distance down either side but not all the way into the recess still leaving some of that dragon fang showing so by doing this you see what we're doing is making it light towards the top
and keeping all the definition from the shading and the deeper colours as well [Music] and with that the layering is now complete and we can move on to highlighting the miniature and to do this we're going to start out with the main part of the black templar which is of course the black details of the power armor and because it's such a main feature of the miniature we're going to spend a bit of time here really building it up now to do this we're going to be doing some edge highlighting to get a nice sharp
finish to it and we're going to start out with a kind of bluish-gray color and what this is going to do is lend a subtle cleanness to the armor so a very nice neat appearance for them and so the color to use here is dark reaper and to apply it i'm going to be using my small airbrush from citadel once again and with this for this first highlight bear reminder is just a first highlight so what we want to do here is introduce it thinly towards the edge of each armor panel and we're going to
do is build on top of this to make it look sharper after it so this is going to be quite a broad edge highlight but don't worry about it we are going to focus it later on now the trick to doing this right is to make sure you get the paint thinned down to the correct amount and often when people struggle with this kind of thing it's because they're not having the ease of the paint properly flowing from the brush onto the miniature so to get it right just check what you're doing on the palette
and just play around with the paint to bring it to about this kind of consistency now you can always test on the palette by having a go at painting some fine lines with it using the tip of your brush and if it flows quite well from the brush like it's doing here that's okay but you see it's starting to go a little bit too a little bit too rough so what i want to do is add a touch more water to this to thin it down a tiny bit more and then we'll try again so
once again we're just going to have a painting some lines and you can see now it's just generally running better from the brush and it's going on longer as well so i'm much happier with that as a consistency for the paint so with that prepared we're ready then to start applying it to the miniature and with this wherever possible look to angle the model so that you're actually approaching using the side of your brush so for example this edge just here on the leg what i'm doing is approaching at about 45 degrees from the flat
and using the side close the tip i'm just going to skim along this edge fairly heavily to get a fairly broad edge hard along the area there like that and really as simple as that going around all these edges wherever possible using the side of your brush like this and following around those edges just moving the model as you need to slightly comfortable so you can approach those parts and well get that highlight in those areas and sometimes this does mean turning the model in some quite strange ways for example like this you can see
this way i can get the edge fairly easily now sometimes you won't quite be able to do that using the side of your brush in which case you need to use the tip of it and when doing this i find a great way to get the hang of it ready to brace your hands as steady as possible on the table and approach the area that you're going to do so this panel here kind of getting it so it's vertically going down here and painting this downward motion towards yourself because it's nice and easy to get
that sweeping motion so it's very easy to line up and just work that line across the area to get that highlight following that edge there like that so now it's just a matter of going around all the edges and the black details in the marine doing this and as you can tell this is going to be one of the longer stages of paint in the miniature but definitely take your time here because the neater you are at this stage the better the marine is going to look once you're done [Music] with that edge highlight applied
you can see it really helps to distinguish the shape of the black power armor and helps that detail stand out and if you want to you can just leave the black power armor there and it'll look great on the table top but if you want to make it really pop then what you need to do is a second edge highlight and this is something you might just want to keep your characters and squad leaders it's really up to you how much of this you do but if you do want to do it what you now
need is a lighter gray so in this case i've got some dawn stone and to apply it you need as finer brush as you've got so in this case i've got a detail brush here from the army painter because what we're essentially looking to do is another edge highlight kind of retracing our steps from the previous color only looking to make this edge a little bit finer so final line so the idea is some of that kind of bluish gray we used in the previous step is visible just beyond this and what this will do
is then give a sort of like from the pitch black then go into a bluish color and then gray on the very edges and it'll give a very rich ornate appearance to the black armor so perfect for black templars now remember the real trick to doing the edge highlighting is to make sure you've got the paint prepared correctly on the palette and you can just play around with it and test it to see how it feels still a little bit too dry there so i'm going to add a touch more water to it just testing
it to see how it feels on there this is looking pretty good so let's try a few lines this seems pretty good to me so i'm going to go along with that and with this then what we're looking to do is again that edge highlight all the way around only now just be gentle with it so for example that line that we did initially on there i'm going to retrace that but this time just lightly skim along it with this color so very gently like that so i get that lighter gray just appearing just gradually
building it up on the very edge so there you can see what i mean we've got that bright green on the very edge they've got the slight bluishness just beyond it going into the black which gives that really rich deep black so now it's just a matter of working way around the miniature doing this always looking for those sharp edges and just very very gently skimming along remember sometimes what you'll need to do is turn the model start using the tip of the brush and it's often easier to do it by just turning the model
like this so that you're approaching painting this downward motion but again just look for that edge and just focus the color very gently just in the sharpest corner to get that nice highlight along [Music] and there we are i've finished applying that gray highlight and you can see just what a difference it makes helping all those details really pop out and as i mentioned it does take a bit of time doing that but you can see the results are absolutely worth it and if you want to what you can then do is take it even
further so this might be against when you when you reserve for your characters maybe even just your army general this is a third edge highlight to make some details just pop out a little bit more now we're no longer going to be doing everything we're just going to emphasize certain details and so for this what you now need is a light gray so here i'm going to use some administrative gray still applied using that detail brush and for this what we need to do is set up the paint just like we did in that previous
stage just making sure it's nicely thinned down and just testing on the palette to make sure it flows well and then of course just make sure the brush is loaded correctly so without loads and loads of paint on there that looks pretty good so with this what we need to do now is take a look at the miniature for the parts that stand out the most and only apply to those bits so for example if we look around his head in this case what we'll be looking at is the kind of edge that we've got
on this little vent on top of the helmet and it's just a light little skim across there to make it a little bit lighter same on the front of the faceplate so this point right here is a definite place to do this on so just a very small amount just there just bring it up very lightly very gently just emphasizing the front of that and then also going around the eye so just a little bit just there and also on the front of this color this really stands out here so we want to get that
as well so you can see it's always just very gentle almost little flicks the brush only over using the side of it to get those areas but you can see it just helps emphasize those parts a little bit more [Music] and with that the black of the power armor is now complete and we can move on to highlighting those other remaining details on the miniature and to do this we're going to start out with that tabard and here what we need is some screaming skull so a nice light bone colour to finish that off and
once that's done we can then move on to highlighting all those leather belts and here i'm going to use some scrag brown next up is going to be all the red details here i've got some evilson scarlet and then finally what we need to do is highlight those joints in the armor and for this i'm going to be using some dawn stone once more but first of all what we need is some screaming skull and to apply to switch to a small airbrush from citadel for this and what we're looking to do when we were
layering the fabric on the tablet earlier on we kind of want to follow the same sort of motion sweeping down the fabric but this time we're just looking for the very tops of the creases of the fabric so to help out with that remember to prepare your paint making sure it's nicely thinned down so around about this kind of consistency here make sure you got a fine tip on your brush and then what we're looking for is the tops of those creases so you can see a whole bunch of them around there what i'm looking
to do is to do that sweeping motion going down the length of it so it's just a matter of getting comfortable like this find the top of them and just following them all the way down very gently using this motion [Music] without the tabard's now fully highlighted and so we can move on to those leather belts and here what we need is some scrag brown and using this we need to gently pick out the edges of them and they stand out quite nicely so here you can approach it like edge highlighting just remember to make
sure you're comfortable so your hands are nice and steady so you can approach just using the side of the brush to catch that edge [Music] next up we're ready to highlight all that red using some evilson scarlet and here i'm still using that small layer brush and for the weapons what we need to do is approach this just like we did when we're highlighting that armor earlier on so an edge highlight looking for those sharp edges and gently skimming along each one of them so along here for example as neatly as possible now when it
comes to the crusader seals on the other hand these being more like fabric we want to highlight a bit more like we did with the tabard so look for increases such as this one just here and just follow on the top of each one to get a highlight on those areas [Music] and then finally we need to move on to dawn stone and with this all we need to do is pick out a few of these raised ridges on the joint so for example along here just very gently just a few of them to help
the texture stand out [Music] with all those areas now highlighted we can move on to highlighting the metallics as well and here we're going to need two colors first of all some psychorex bronze and this is going to be for all that brass and then after that we need to highlight all the silver now here i'm going to be using mithral blade which is again one of the tooth and coats paints but you need any bright silver here and it all will do so in this case i recommend going for stormhouse silver for example if
you want to use citadel whatever you choose though first of all what you're going to need is psi corex bronze and here i'm going to be applying it using that small airbrush once again and this is going to be an edge highlight and all that brass details so as i would just make sure you test the paint to get it nice and thin down so it's under control and remember to make sure your brush isn't overloaded and then it's just a matter of working around the miniature looking for all those brass details and picking them
out so for example on the chest just here we've got a little shield design so i'm going to apply this as an edge highlight going all the way around the outer edge of this detail and also for these wings that we've got here what you need to do is just make sure you don't have much paint in your brush just very carefully work your way across the top just very very gently just working all the way down to get a heart on that area there then when you get to the kind of feathers that are
coming out from it just have the brush fairly flat against the miniature and just skim along so the bristles just pick out the very edge of those designs [Music] and with that done we can then move on to highlighting the silver detail and for this i'm using mithril blade but as i mentioned any bright silver will do the job just nicely here and like before what we're looking for is the raised sharp edges and we just need to gently pick them out with a small brush here i'm once again using my small layer brush from
citadel [Music] and with that all the metallics are highlighted too and so now we can move on to the final details of the miniature and for this we're going to be looking at the eyes but also we can add a little bit of script onto the crusader seals so for this what we need first of all is a pure white so for this i need some matte white from the army painter then for the eyes what we need to do is add a red glow onto it and here what we need is a red wash
or a contrast paint i'm going to be using one of the contrast paints so i've got blood angels red for this once that's dry we're going to return to that pure white so matte white once again just to re-establish the effect that we're going to do on the eye and then finally we're just going to add a little bit of dirt at the very bottom of the tabard and for this we need some steel lesion trap but first of all i need that pure white so i'm using some matte white here and i've switched to
my detail brush that one i was using earlier for highlighting the black armor because this is going to be some quite fine work and the real key to it is as ever to make sure you thin your paint down correctly to make sure it's under control but also to make sure that it's not overloaded on your brush and not too runny so kind of this sort of point here is good and with this for the eyes what we want to do for this glow effect that we're going to make is to keep the model really
steady in your hands and approach from the length of the eye kind of down the side like this and just paint a line very carefully along the middle of it so we want to go just into that area there just building it up to around about that point there like that now in addition with this white remember we can add some text onto the parchment here for these crusader seals and for these all you've got to do is just line it up so your brushes aren't going to go across them like this but rather than
doing straight lines just let your hand shake ever slightly so you get some little random wiggles this will create the impression of text along the paper [Music] with that white established and completely dry on the eyes what we can now do is add that red glow to them and for this i've just got a little bit of blurry angels red using that detail brush once again and all you got to do is just wash it into the entire recess of the eye so it stains all of it and looks brighter in the middle [Music] once
the contrast paint is also completely dry we can then return to matte white and with this what we're looking to do is just re-establish the glow a little bit in the middle so all we're going to do is approach just like we did with the base coat and just paint a slightly finer line right in the middle of the eye [Music] and finally as an optional extra detail you can add a little bit of dust and dirt on the bottom of the tabard kicked up when the marine was moving and for this you just need
some steel lesion drab and a smaller dry brush i've got a small one here from citadel all you do is just gently start stippling it towards the very bottom just slowly building up that color to get into that brown starting to appear at the very bottom now once done this your miniature is ready to be based and as ever it's entirely up to you how you base it but in this case i'm going to go for a desert base [Music] and here we have the completed black templar ready to take his place in the internal
crusade in the name of the emperor so as you've seen the most difficult part about painting black templars is highlighting that black power armor because to get a clean finish on it it's actually a little bit unforgiving but don't worry remember you can always neaten up any mistakes you happen to make and it's just a matter of making sure that highlight is thinned down to the correct point to allow you to apply it correctly aside from that black power armor as you've seen everything else is very quick and very easy so have fun painting your
black templars and we'll see you all again very soon [Music]