[Music] all right so welcome to episode 6 in this episode we're going to talk about power on reset and the basic premise here is that when you have sequential devices such as lashes and flip-flops in your circuit given that those devices have two stable states when they're powered on they could be in either state in the circuit may not operate correctly unless these sequential devices are forced into a known state that's the purpose of the power on reset signal it is typically fed to an asynchronous reset input on these sequential devices and essentially forces them
into a known state when power is applied okay so if you don't want to watch any further just use the Mac 708 it's a very nice power on reset chip that's the one that I like but I will in the video talk about different options that you have which include building an RC circuit with a diode and seven for HC fourteen Schmitt trigger inverter chip you could also just use a debounce to push button and in order to generate a manual reset signal and that's somewhat similar and again uses the 7 4 HC 14 and
probably the best approach is to use the dedicated power on reset chip such as the mac 708 or the t l7 7:05 a but the important thing to understand is that when you have stateful devices like latches and flip-flops and especially you know CPUs in your circuit the circuit is not going to work correctly unless you have a good reset signal alright so here is our first power on reset circuit the RC power on reset circuit and the real advantage of this particular approach to generating power on reset is that it requires only very basic
components that you need a capacitor a resistor a diode and two Schmitt trigger inverters which are going to be gates of a 7 4 HC 14 device ok so here's how the circuit works initially the positive side of this capacitor is going to be at a low potential with respect to ground you know essentially it'll be at the same potential as ground meaning that the capacitor is not charged so when the circuit is powered on because there's a low voltage here we'll get a high voltage here and a low voltage here and that corresponds to
asserting an active low reset signal here at the output of this inverter and an active high output here at the active high reset signal okay but when power is applied meaning that you know there's a positive voltage here at VCC the positive supply rail what happens is that current will flow through this resistor and charge up this capacitor so essentially we will see a slowly relatively slowly rising voltage here at this node in the circuit on the rate at which the capacitor charges it meaning the rate at which this voltage increases is a function of
the RC time constant which is the product of this resistor value and this capacitor value and but eventually as once the capacitor charges up to a sufficient degree to to meet the high input threshold you know the positive you know sort of true input threshold for this Schmitt trigger inverter then the output of this inverter changes to low meaning the positive you know active high reset signal is D asserted and similarly a low output is going to be asserted here on the active low reset in other words that is the point at which the these
two reset signals say reset is done and that's when the normal operation of the the circuit can proceed okay so that's sort of the basic idea and we'll show that on the oscilloscope to see how the voltages change and how how the reset signals are generated so one important thing we have to think about though is that you know if this capacitor stays charged up when the power is off that's actually really bad because the next time we power the circuit on we would be producing a high voltage here meaning reset would immediately be D
asserted essentially there wouldn't be any power on reset signal generated so we need to make sure that when power is off that this capacitor gets discharged that is the purpose of diode here so the idea is that when the you know when power is turned off meaning we no longer have a positive supply voltage being asserted here you know provided here at VCC what happens is that this positive potential that exists because of the capacitor being charged up it's going to flow through this diode and but it needs in order to flow and discharge the
capacitor the current needs somewhere to go where it goes is that it is actually discharged through the load meaning the other devices in the circuit so in some sense when the power rail it goes away this capacitor is now trying to power the circuit and of course it only a small amount of charge exists here in this capacitor and so it will you know it won't be able to actually power the circuit but that should be sufficient to ensure that the capacitor gets discharged and that's indicated here you know in my little schematic as the
load you know that essentially acts sort of like a resistance you know current is going to flow through through here okay so here is my demo circuit that I built on the breadboard and my load is just sort of simulated by this LED and this 1k resistor so that that provides a little bit of a load to allow a path to discharge the the the charge built up in the capacitor okay so let's go ahead and see how this works by tracing the voltages on the oscilloscope and the the two points that we are going
to be interested in and that will see on as traces on the scope are this node in the circuit meaning the the voltage at the positive terminal of the of the capacitor and then we will also see a trace for the for this signal the active low reset so essentially what we should see is this output is is low for some amount of time after power is applied but then eventually goes high alright so let's take a look alright so let's go ahead and look at the behavior of this RC power on reset circuit on
the oscilloscope here and we're going to be looking at two traces the top trace is going to be the voltage on the positive terminal of the capacitor and essentially when I've switched the power on we should see that we should see that voltage sort of rise as the capacitor charges up the second trace is the output of that second Schmitt trigger inverter and that is generating the active low reset signal and essentially what we should see is that voltage at that inverter output sort of stays low until the capacitor charges up to a significant degree
at which point it's going to go high and that's the point where a reset is no longer asserted meaning that it's time for the system to come out of reset you know the purpose of the reset signal is of course to allow the stateful devices in the circuit to initialize themselves to an appropriate initial state so that operation of the circuit begins with all the all of the devices in a appropriate initial State okay and I'm going to press a push button I've added to the circuit that will apply power okay so here are the
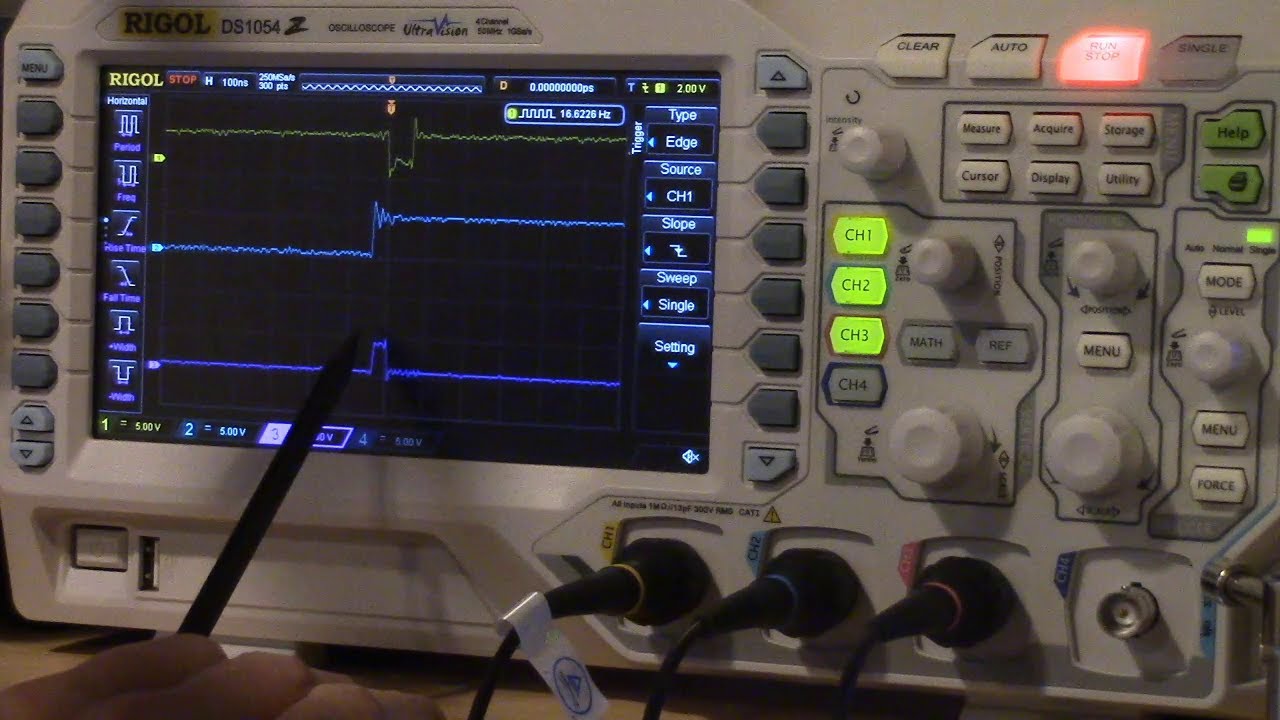
traces that we've captured and you can see at this point this is where I applied power and of course the the voltage is slowly rising is the capacitor charges this is the point where the oscilloscope triggered on that the voltage became high enough for the oscilloscope to consider that to be meeting the trigger threshold so what's significant here is that you can see at the at the point when power was applied the active low reset output stays low and these grid squares are 20 milliseconds so for about 50 milliseconds that second Schmitt trigger inverter stayed
low and then when the capacitor charged up enough it went high and at this point the system is out of recent reset so basically this is the period of time at power on where that reset signal is being generated and that's the opportunity for all of those devices in the circuit to use the reset signal to get themselves into an appropriate initial statement all right so let's take a moment to address an important question which is is this a good way of generating power on reset so I have two answers for you the first answer
is that yes this is perfectly fine if your goal is to experiment and just build circuits and test them this is going to be perfectly fine I don't think you'll have any problems with it the however the second answer is that if you are building an actual product there is one important failure mode here that this circuit doesn't really address which is what happens if there is a brownout condition meaning that you get fluctuations in the positive supply rail and for you know some short periods of time it may fall below the the voltage needed
to ensure the correct operation of the circuit the the risk you run when you use this approach to power on reset is that if the brownout is short enough to not allow this capacitor to discharge sufficiently to actually generate you know new reset signals then the circuit may malfunction because the brownout you know affected the correct operation of the circuit but was not long enough to discharge the capacitor to actually generate a new reset signal so if you were do you know engineer an actual product you would probably want to do something more sophisticated than
this circuit but again like I said I think for experimenting and just you know building circuits for fun no problems at all all right so let's talk about another approach to generating a reset signal this time generating a manual reset signal using ad bounce to push button and manual reset is actually kind of a nice feature because it means you can just press a button and the circuit will reset itself so this is a this is actually kind of not kind of a nice idea so we've sort of alluded to the need to debounce push
buttons when we use them to generate digital inputs in earlier videos but we haven't really ever talked about what exactly that means so let's talk about that a little bit now so mechanical switches you know like this push button here can exhibit a phenomenon called contact bounce and essentially what happens is in the switch as the conductor is you know basically pressed against the terminals of the switch you don't necessarily get a clean and instantaneous sort of transition from an open circuit to a closed circuit it kind of Wiggles back and forth between closed and
open and essentially if you're you know generating a positive you know voltage when the when contact is made it will maybe kind of wiggle and not generate a single high to low transition and you can observe this on the scope if you you know built a little circuit and so this is a problem because it means that you may essentially be providing a sort of glitchy input to wherever you're feeding the signal that is being produced by the switch so a debouncing circuit essentially tries to smooth out the voltage that is being produced by the
the switch being you know closed or opened and so here's an example of a debouncing circuit using a capacitor and a resistor so here is where you will definitely be able to see that I am NOT an electrical engineer so I will try to explain the intuition here so here is my intuition for how this debounce circuit works so when the power is applied so VCC is at a positive voltage essentially what's going to happen and remember the button is not pressed so so this is this is open but what's going to happen is that
this capacitor is going to charge up through this resistor meaning we'll have a you know positive voltage on this plate of the capacitor and you know a lower voltage on the on the other plate of the capacitor and essentially because this node of the circuit is tied to ground through this resistor we're essentially going to get a low potential here on this plate of the capacitor and so essentially this is going to be a low voltage and so if you think about a low signal being fed into this inverter that means they have to get
a high signal here meaning that the active low reset is not asserted and a high potential here is going to produce a low potential here meaning that we are not asserting the active high reset so essentially as unless the switches pressed we're not generating the reset signal all right so now let's imagine that we press the switch here and essentially when this switch is push-button switches pressed we're creating a path from VCC through this resistor into this node in the circuit and in general current always wants to flow from a higher potential to a lower
potential and given that this plate of the capacitor is at a low potential and this you know VCC is is that a higher potential essentially current will want to flow you know this through this path through the switch into this plate of the capacitor and it will take you know a little bit of time to you know essentially bring this plate of the capacitor up to the same potential as VCC meaning that we're going to get relatively a slow rise time here at this node in the circuit in a slow rise time is good because
it means it will essentially kind of dampen any sort of oscillations that are caused by contact bounce if there is some and the reason that we use Schmitt trigger in inverters is that Schmitt trigger devices have inputs that implement a feature called hysteresis that essentially means that once we reach a for example if we're at a low voltage and then we eventually rise to the high input threshold the corresponding low input threshold becomes sort of correspondingly lower so that there's a tendency not to flip back to a low state at the input even if there's
maybe a little bit of noise or or sort of wiggle at the point where we reach the high input threshold and there's also hysteresis at the the low input threshold so if we have a falling voltage even if it's sort of you know maybe wiggling a little bit by the time it triggers the low threshold the corresponding high input threshold it sort of come becomes correspondingly higher and this means that Schmitt trigger inputs are effectively tolerant of you know slower rise times and slower fall times which is exactly what we want because we are intentionally
trying to make sure we don't get rapidly changing voltages at this node in the circuit okay so I did a little bit of experimentation with resistor values for this particular resistor so if you have no resistor here at all so if you have zero ohms you know direct connection to VCC what I measured on the scope was a rise time of about 300 microseconds which is you know significantly more than the period of time when I observed contact bounce and when I did some experiments to capture contact bounce you know so that's probably fine but
if you want to even if you want to slow down the rise time even more you can increase the resistor value here so I tried to point seven K and found that I got a rise time of about four milliseconds you know so that's quite you know quite quite good you know that that's gonna you know I think definitely handle any contact mass okay so when you release the switch essentially what's going to happen is that this capacitor is going to charge up again and essentially a low voltage is going to be created here essentially
the you know the higher potential that accumulated on this plate of the resistor is going to kind of bleed through this you know through this resistor and eventually we'll get a low potential here at this at this node and you know that fall time was you know relatively slow you know on the order of you know milliseconds so again that's going to be perfectly fine to compensate for any contact bounce all right so here is a very nice power on reset solution which is the max 708 power on reset I see you can also use
the max 707 it's more or less exactly the same they differ slightly in the brownout voltage threshold and nice thing about these dedicated power on reset chips is that they essentially do everything for you so when the positive supply rail appears a reset pulse of a certain duration specifically 200 milliseconds is going to be generated on the both the active low reset output and the active high reset output and then after that period of time the signals are D asserted and then the circuit begins its normal operation and another really nice feature of these chips
is that they have a manual reset input which you can simply wire to a push-button such that if the push button pulls that input low a reset pulse will be generated and this is a very simple way you can add a manual reset to your circuit which is quite useful for debugging ok so let's look at the operation of this circuit on the oscilloscope and we're gonna probe both the positive power rail here on channel 1 and also the active low reset output on channel 2 and essentially when the power rail goes high 200 milliseconds
later we should see this active low reset go high so in other words for 200 milliseconds the active low reset will remain low essentially forcing the circuit in to reset okay so let's take a look at that on the scope alright so here we have the oscilloscope set up to capture these signals signal 1 is going to be the positive supply voltage signal 2 will be the active low reset output and I've got it in single-shot mode and we're going to trigger on a positive edge on the on channel 1 which is the positive power
bail okay so I'm going to power on the the circuit okay and what you see is here is the point obviously where the power rail appeared so it goes from 0 to 5 volts and is that steady 5 volts and then this is the output of the active low reset signal and each of these grid grid squares is 50 milliseconds so exactly 50 100 150 200 milliseconds later the active low reset goes from low asserted to high not asserted and so at this point our circuit is now out of resets so works exactly like the
datasheet says that it does alright so here is one last power on reset circuit this time using the TL seven seven zero five a power on reset chip and I built and tested this circuit not so much because I'm a big fan of this chip but more because I noticed that it is you know fairly widely available and widely used for this type of application and I thought I'd give it a try to see how it works one disadvantage of this chip compared to the Mac 708 is that it does require some external components and
in particular there are three resistors and two capacitors this particular capacitor connected to pin 3 does choose the time constant that determines the length of the power on reset Paulson so it's you know potentially useful to have little flexibility in determining that duration okay so as before we will test the circuit on the breadboard and look at the traces on the scope and once again channel 1 is going to monitor the positive supply rail and channel 2 is going to monitor the active low reset output of the chip okay so let's look at this on
the scope all right so here we are looking at the oscilloscope trace for the t l7 7:05 power on reset chip once again the first channel is going to capture the positive supply voltage rail the second channel will capture the output of the active low reset output on the chip and I've got it set up to two single-shot on the rising edge on channel 1 which is the positive voltage rail all right so I'm gonna power on the circuit alright and so here are our captured traces and here's the positive supply rail going high and
what you can see is that the active low reset output does indeed stay low for some period of time in this case the grid squares are 5 milliseconds so it looks like we're getting a pulse of fifteen milliseconds that's choosing a one microfarad capacitor to essentially set the timing constant that determines the length of this reset pulse and then after fifteen milliseconds or so the reset is DS D asserted it goes high and at that point our system is out of reset so once again you know looks looks perfectly reasonable alright that's it for this
video please do see the video description and there's a link to the series website and you will find their schematics for each of the circuits presented here and also a little bit of information on how you can actually buy the Mac 708 and TL 77058 chips which are really useful and I would definitely recommend you using one of these for generating reset for your circuit alright so in the next video I am actually going to start doing stuff with the 6809 CPU so I will see you then