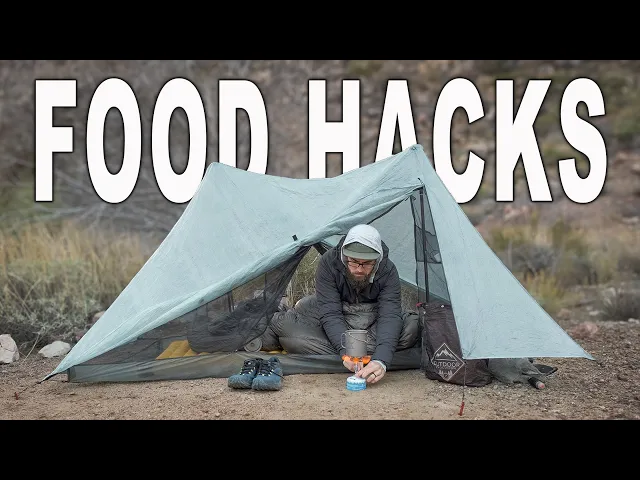
well hey guys it's Darwin and today I want to share some more of my top backpacking tips and tricks that I've learned over the last 9 years and 14,000 Mi of hiking all the little things that I do every single time I head out into the back country to make my time on trail more efficient today's video is going to be specifically centered around food and cooking all the little things that I've done over and over and over again to make getting calories easier more efficient and more enjoyable when I'm out doing my hikes and
a lot of these things are kind of no-brainers and and honestly kind of goofy but I get questions about them all the time in my trail videos because I guess it's just stuff that people see me do all the time so today I figured I would share some of these little uh secrets with you so to jump right into it the first tip or trick or hack that I have for you really comes down to calories and how many calories that I aim for when I'm out on a hike for years people have asked me
how many calories I try to get every single day I'm on trail whether that's a smaller backpacking trip or a through hike where I'm hiking 20 to 30 m a day and the truth is I've never been a calorie counter I've never tried to find the exact amount of calories that I need on trail a day because that would just be maddening but I do follow one simple rule when I'm picking out food for my backpacking trips and that is the 100 to one rule now I've talked about this in other videos but I always
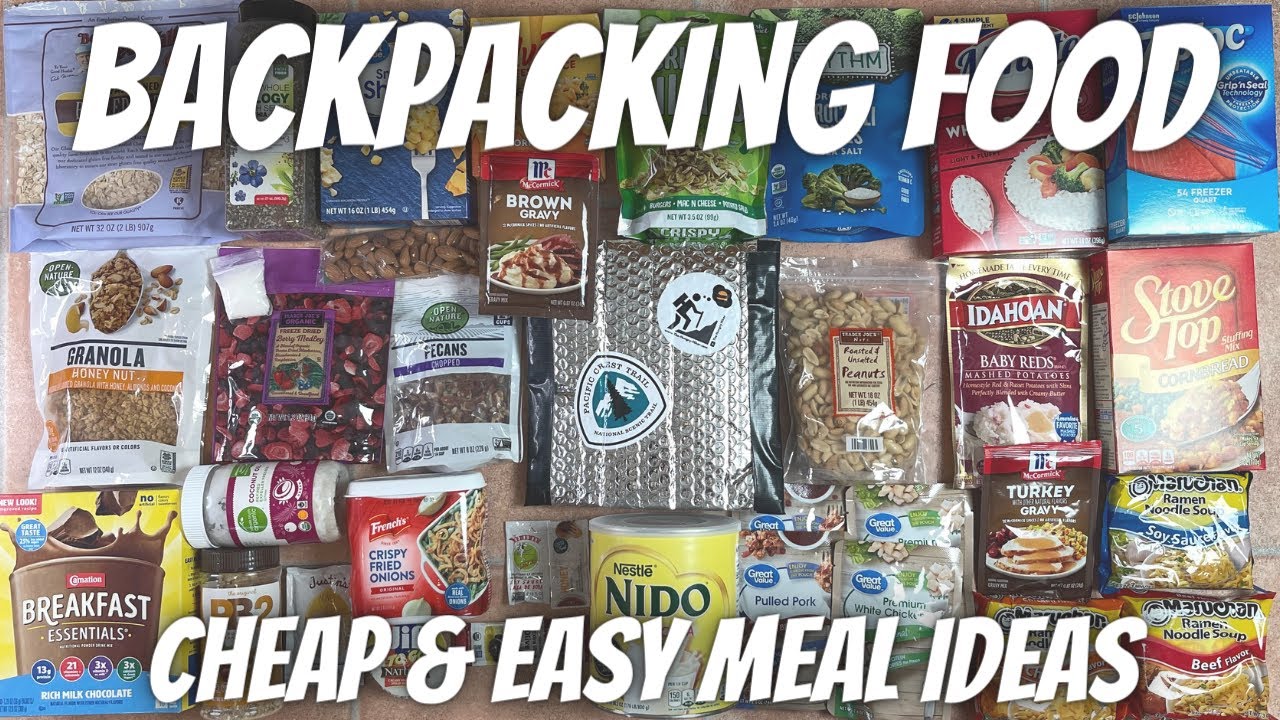
try to get at least 100 calories per ounce of food I mean hell I try to get more than 100 calories per ounce but by following the 100 to1 rule I know that for every pound of food or 16 o that I'm going to get at least 1,600 calories so for an example uh this is actually a day of food for me uh this is left over from a trip I went out for a 3-day trip we ended up only doing two nights so I had some food left over so What in this bag is
some coffee obviously uh a breakfast three snack bars and a dinner now I don't really carry a lunch on Trails anymore I used to carry tortillas and cheese and stuff like that now basically all I do for lunch is I will save one of my snack bars usually the one with the most calories and I supplement in a bag of chips uh which tend to have quite a bit of calories in them but just for this without the chips I have let's see 1 lb 4 oz of food here so 1 lb 4 oz in
this bag and the calories that are in this bag come out to 2,310 calories so uh it's quite a bit of calories for this small footprint in my bag so for me I try to eat what I want I try to look for things that look good but with that 100 to1 rule it typically makes sure that I get enough calories every day when I'm on the trail all right so the next tip or trick or hack that I have for you actually pertains to this for years I've been doing this I've probably talked about
it in another video but I always separate my food out per day so as you can see I have this gallon Ziploc bag and I have on here day three I always do this and I do it for a handful of reasons number one uh it makes it easy every single day on the trail when I wake up I pull out the day of food that I need for for that entire day so it's easy it's organized in my Food Bag number two that really helps when I go to resupply or set up my food
I know that if I'm doing a resupply on day one because I'm going out of a town I've probably already eaten breakfast maybe even lunch so I'm only going to need snacks and dinner for the rest of that day and then we'll say day two and day three I'm going to need breakfast snacks and dinner and then the last day because I'm going into a town or I'm finishing my hike and I'm probably going to go get pizza or a burger or something after I get off the trail I'm only going to need breakfast and
snacks so it really helps me figure out what I need especially if I'm getting into a town on a resupply I'm not over buying food I can grab these bags and easily figure out what I'm going to need for the next stretch of the trail the other thing that this really helps me do and probably the main reason I do this is manage my food throughout the day I am known to be a bit of an overeater on the trail I have a high metabolism and in the past I've done things like just gotten extra
hungry on the trail whether it was a hard day or not and overeating my food so I'll eat a lot of food on day two and then I still have two more days on trail and by day four I've already run out of food and then I'm hungry all day until I get into a town or get to my car so this really helps me manage and make sure that I'm not overeating my food I KN I know that on day three I have everything in this bag and then the last thing is it really
helps me manage the space in my pack for years people ask me how do you get all of your your gear and like three or four days of food into something like a 35 or 40 L pack and this is one of the ways that I do that so as you can see uh like I said this is a full day of food so this is a dinner this is a breakfast this is three snacks and it fits into a pretty small package because I'm able to kind of stack everything and put it together in
one of these I'm able to put these in we'll say this is day four put that at the bottom in my Food Bag then day three then day two and I'll say we'll put day one kind of slotted on the side I'm able to manage that space within my Food Bag not leaving any gaps or anything so it's a good way to save on space and then speaking of that the other thing that I make sure that I do before I put my food into these bags or into my food bag is by getting rid
of extra packaging and letting out air so one of the big culprits of uh space wasting in a backpack is just air uh it's things like you know I always make sure that I carry a bag of chips I'm a big chip eater on the trail but you know you have this big bag of chips here and the chips kind of stop there you have all this packaging and all this air uh a lot of the backpacking meals same thing you might have a fullon meal like this where the meal stops there but you have
all of this packaging so what I like to do a lot of the times is I will actually open up certain packaging and I'll let the air out other times I'll simply just transfer food to other smaller Ziploc bags a good example is for years I used to resupply on this a lot on trail this near East couscous whether I was cold soaking or cooking but as you can see it comes in this big box so I would buy this I would buy some ziplock bags and then I would just easily open this up take
out that package open up the Ziploc bag dump it in there A lot of times I will dump the seasoning straight into here and then boom I have a meal in a small package versus this so it's really breaking down a lot of that packaging um and then speaking of chips my next tip and trick that I have uh really comes down to chips and nuts and cereals every sing single time that I take chips out onto the trail I will actually let the air out of the bag to pack it down smaller in my
pack so as you can see like this stacked in here it's not taking a lot of space I will go one step further and I actually crunch up all of my chips into crumbs now you're probably like why the hell would you do that gross crumbs well I do this for a handful of reasons the biggest reason is because I eat all of my chips and nuts and anything else that's small like that with a spoon and the reason I do this is number one I have no clue what's on my hands some days when
you're out on the trail or some trips you can go days without being able to properly wash your hands so you have no clue what's actually on your fingers and your hands so I don't want to put my hand down into a bag of chips and then put that into my mouth it's kind of nasty so number one it helps me not have to touch my chips also if I'm eating something like Cheetos or Doritos I don't want to get orange gross Cheeto fingers so it keeps my hand out of the bag the other reason
is because what I found with eating something like chips eating chip crumbs with the spoon is it actually makes my chips last longer have you ever noticed when you open a bag of chips you open it up just to eat a few chips and in about 20 minutes you've eaten almost the entire bag I do that a lot as well so when I'm out on trail if I pick up a single bag of chips this is supposed to last me for 3 to 4 days but but I know me and I know that if I
open this bag of chips on day one and I start eating a couple I'll end up eating 75% of the bag and then by day two I'll eat the rest of them and then for the next couple days I won't have any well what I've noticed is by doing this it helps me manage how much I'm actually eating and I've been able to get food to last longer so for anyone that's kind of asked that when they see it in my videos and they see me just eating like spoonfuls of chips out of a bag
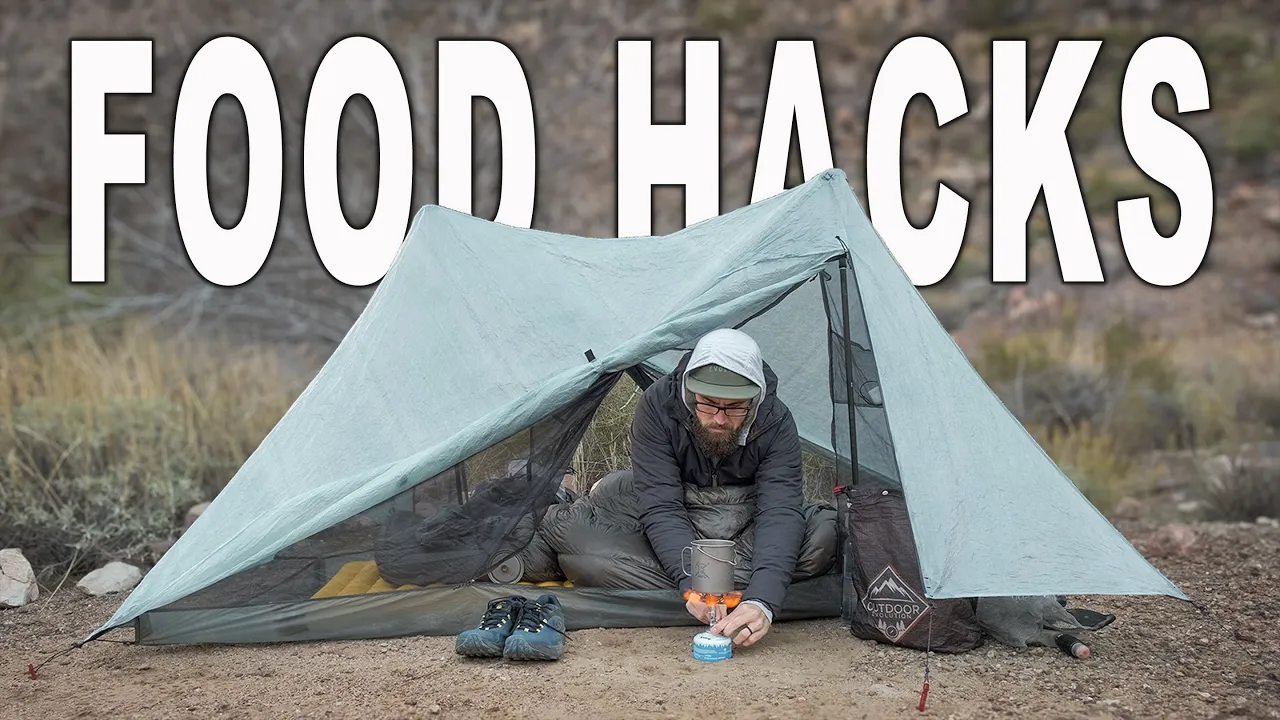
uh that would b y all right so for the next couple of food hacks uh I guess they're kind of more centered around specifically cooking and or cold soaking depending on what you like to do so the first tip or trick or hack that I have for you when it comes to cooking is something that I talked about years ago in a video did a video and I bet most people have seen that and that is all about one of these cook Koozies one of these rehydration Koozies so when I was on the appal asan
trail in 2015 we were eating a lot of these nor rice sides mainly because these are cheap so I guess this is a hack within itself these are pretty expensive right anywhere from $8 to $12 a piece when you're talking about a backpack maill well when you're doing something like a longdistance hike obviously having this every single day for 4 months is going to get super expensive and you're not going to find these at a lot of resupply points so through hikers tend to eat a lot of things like nor rice sides instant mashed potatoes
like I said couscous so we were eating a lot of these nor rice sides well what we found out was the inside of these packets are actually foil lined which means that you can tear the top off of it pour your hot water right into here fold it over and seal it up put this in here set that let it set for about 10 to 20 minutes then when you come back it's rehydrated it's ready to eat I usually just pour that in my cook cup I'll put some tuna or maybe spam or something something
like that in there to add calories and more protein and then boom I have a meal and maybe I only paid like $3 for that meal versus $8 or $9 for this meal so it's a really efficient hack uh to get a good meal out on the trail and like I said you can make one of these pretty easy with something like uh this reflectex material so I picked this up at like Home Depot I think um and some duct tape or Gorilla tape and a little bit of velcro and you can pretty much pick
that up anywhere and I've done that a lot over the years but I don't really use this as much anymore I ended up actually picking up a pre-made one just because it's lighter it's smaller it takes up less room this is a uh rehydration pouch by a company called Big Sky International I picked this up mainly because not only can I put something like a nor rice side in it uh to be cheaper but a full size uh dehydrated meal also fits in here so I've been using this a lot in my winter hiking and
some of my mountaineering trips to keep my food hot and let it rehydrate a lot faster so you can make one of these uh you can go out buy all the material to make it or you can pick one of these up but regardless a good hack is using a rehydration pouch to keep everything insulated and let it rehydrate faster next up is less of a hack and again another way to save a couple bucks uh make cheap gear at home and be more efficient when you're cooking and that is when it comes to conserving
fuel on the trail everybody knows that when you go to boil water or cook uh using something like a lid is going to make it boil faster and just be more efficient on fuel well a lot of new cook pots jet boils bigger pots even the pot that I use these days has a nice lightweight titanium lid with it but a lot of the pots back in the day and well the pot that I used for years didn't have a lid well it came with a lid but it was a super heavy clunky stainless steel
lid for some reason ultra light titanium mug but a stainless steel lid I got rid of that years ago but instead of trying to find a lid or buy a lid I just would make my own out of tin foil you guys have probably seen that in a lot of my videos a lot of my trail videos but I would just take a piece of aluminum foil I would fold it over a bunch of times fold it into a square or shape it into a circle and then I have a makeshift lid that didn't cost
me anything that is super compact when I fold it up and very ultra light when I'm done with it I'm ready to pack it up I just fold it back up into like a little square I throw it down in there I put my fuel on top I put my stove on top of that and then boom I have my whole cook kit in my pot uh when it wears out I just find some aluminum foil and I make a new one so a good way to just make a free piece of gear and be
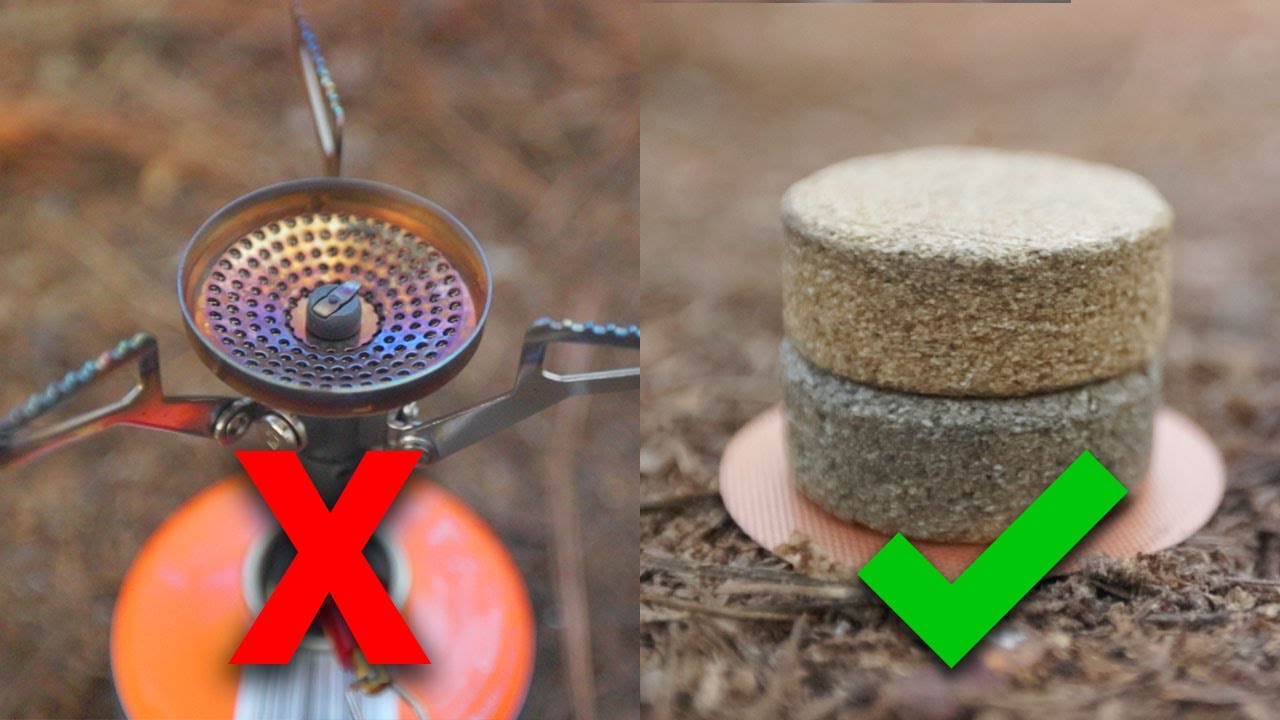
more efficient when you go to cook and then the last thing that I have for you is again less of a hack and more of just a cool piece of gear and that comes down to being efficient with fuel now again I cannot tell you how many of these 3.9 o cans that I've bought over the last 9ine years but as you can see I got a bunch of them sitting up here and most of these cans have just a little bit of fuel left in them so if you're like me you either have them
on a shelf or you throw them in a box and then every time you go out on a backpacking trip you buy a new one well these things were about $6 or $7 a piece and typically most people will not take a can that barely has any fuel left out uh onto the trail because you might run out fast so you get a new can well I've stopped buying these and instead I've started buying these big 450 G cans so where one of these 100 G cost $6 or $7 one of these 450 G cans
cost about $10 or $11 so I keep this at home and then I picked up one of these little fuel transfer devices so there's the flip fuel which is actually made here in Arizona pretty cool or there's these little knockoffs on Amazon and basically all it is is you take this you attach it to the top of your can of fuel your smaller can or your empty can or somewhat empty can and then you take your bigger can you thread it on the top you open this up and it transfers the fuel from the big
can into the small one I've started doing this because well number one it saves on money buying four of these smaller cans at6 or $7 a piece what is that $24 for 400 G or I can get 450 G for $10 to $11 and buy one of these little fuel transfer devices so it it it's less money it saves on space I'm more efficient and I know that I'm going to have a fuel a full can of fuel every time I head out onto the trail all right guys uh that's it that's kind of all
of my little tips and tricks for this video when it comes to food and cooking out on the trail speaking of that what are some of your tips or tricks or hacks that you've been doing over the years when it comes to food and cooking leave us something down below and let us know your thought and tell everybody cuz it's always fun to learn what other people are doing guys I hope you're doing well I hope you're taking care of yourselves I hope you're taking care of each other I love you and as always thanks
for watching [Music]