hey everyone welcome back to a new episode in my minimum tutorial series this one will be a bit different compared to other episodes because i want to shine some light on a very special feature whose existence you might not be even aware of interactivity before i'll actually explain what i mean and talk about interactivity in monument here is an important disclaimer for this episode we won't use the default renderer it does not support the features we'll be talking about today but the opengl renderer instead i'll talk a little bit about the opengl renderer but this will not be a deep dive explaining each and every detail also please note there is once again a link to a jupyter notebook which contains all of the codes we'll discuss in this episode but this time you will have to copy the code and run it locally in order to actually use the interactivity features interactivity in mining relies on the render preview window and this is unfortunately simply not available in the online environment and the final disclaimer the way how the community version currently supports both opengl and cairo rendering is to put it very friendly rather messy regardless of eventual refactors i i'm pretty confident that the features that we'll be discussing today will also be available in more or less the same way in future versions as well be sure to take a look in the video description i'll update it in case there are significant changes that you should be aware of and of course as usual i'll also leave all sorts of relevant links down in the description below alright so let's get into it there are three topics i want to cover in this episode one a very high level overview of the opengl renderer two the so-called interactive embed method and three keyboard and mouse interaction so what do you need to know about the opengl renderer for one it's a different rendering backhand which means that the procedure used to actually draw the frames and piece together the video is a completely different one than the one that we usually use the cairo renderer the opengl renderer has the capability to utilize gpu rendering [Music] i should also mention throughout this i will refer to the cairo renderer as the default renderer and the opengl renderer is the opengl renderer in fact this might change at some point and at some point the opengl renderer might become the default renderer so in case that has already happened well greetings into the future and don't get confused if i if i if i use default renderer and then that's the opengl renderer might be the case in the future if that happens i'll update the video description as well you activate the opengl renderer either by passing another flag to the commander interface namely minus minus renderer equals opengl or by setting within your python file within your scene file by setting config. renderer equals the string opengl a fair word of warning the user experience can be pretty rough in particular also because there's almost no documentation of the opengl capabilities of manum and this is probably one of the few resources where you can find at least some information another resource that i do want to point out is one of our core developers and discord moderators aquabeam has put together a pretty good user guide for the opengl renderer i'll leave a link to it in the description below as i said i don't want to go into details into how exactly all of the things work with myname's opengl rendering capabilities but there's one thing that you should be aware of things are pretty different objects are still called objects but in fact the base class which is well object in the case of the default renderer is not used for the opengl renderer there it's called opengl object and you will actually discover that if you instantiate any object with the opengl renderer active that things will not inherit from object anymore but from opengl object instead we have some magic in place which allows you to use most of the objects that you know and have worked with already in the same way for the open gel renderer and there are only a few differences in particular when it comes to free beam objects because the opengl renderer is better at rendering these the camera control which is also more advanced with the opengl renderer and some of the command line interface flags are also slightly different to give you a taste let's discuss a simple example where we use some of the functionalities that you can't directly use in the default renderer world alright um we'll start with importing monum as usual but the second step already is slightly different let me uh from monument import star the second one will import more stuff namely from a sub module that is not imported by default because it well only is related to opengl render namely manum dot opengl so you import money dot opengl import star in this opengl module there are some well special objects that are not available for usage with the default renderer let's create a new scene i'll call it the opengl intro scene so class opengl intro scene so we'll have a construct method [Music] and we will create hello world equals a text string hello world which we will then pull right maybe let's scale it up a little scale factor three play write hello world all right we could render this and we will we would see it would render exactly the same as we well as we're used to but to make it a little more fancy before we render let's actually also add another animation that does something with the camera by default in with the opengl renderer our scenes are 3d scenes which means that we have we are free to rotate our camera in the three-dimensional space and the method how we're going to do it is with so-called uh euler angles so we can set the euler angles which can be used to fix the orientation of an object of an object in three-dimensional space we will set the we will animate the change of the euler angles of the camera by treating the camera as any other object because in the end it is just another object the camera also for the for the default render actually the camera is an object that you can manipulate just as any other object we write software play self. camera animate set euler angle the default view is we're looking with the camera straight down onto the xy lane what i want to do is i want to rotate the camera down so that we look in a in a tilted line down the down the x y plane and we can do that by setting theta to minus 10 degrees theta is the angle that basically controls how if you look straight down whether whether the the plane is rotated left or right and so we rotate it by minus 10 degrees and then the second angle i want to change is the angle phi which we will set to actually fixed indentation here a little bit five which will actually set to 50 degrees so this will this will change the camera from the top down view to something where we look in a filtered line down the x y plane see that the hello world that lies flat on the plane gets slightly distorted before we go and render let's fade out the hello world again so that we have a clean canvas afterwards self play fade out of hello world alright i'm saving this and just looking at the preview of the scene as it currently is this time i will add the flag for the renderer renderer equals opengl go show me all right hello world is written i heard of the typo should be set out angles okay there we go hello world it the orientation has changed and we fade out again exactly like we wanted to have let's add some more stuff to the scene uh i want to showcase one of the things that that is pretty cool with opengl renderer we can model surfaces which the default renderer does by basically sticking little deformed squares together the opengl renderer can actually render surfaces in a nice way i'll just create a parametric surface and then i'll actually not render the surface itself but the mesh that's underneath the surface first i'll define a surface which is an opengl surface we have a few of these objects that are prefixed with opengl and that's a pretty clear sign that these are only available in combination with the opengl renderer and they cannot be processed correctly with the cairo renderer there is a function so a function taking two input arguments and outputting a numpy vector so it's the parametrization of the of the plane i'll just edit the lambda function lambda u and v uh it should get mapped to let's put u v and the third coordinates is the actual function so the graph i want to plot to save this two-dimensional function i'll put u times the sine i use the numpy sine function because why not of v plus v times n p dot cosine of u should be a nice hilly surface then we will set the ranges for the parameters u and v like minus three to 3 same for v let's create our surface mesh which should be opengl surface mesh of our surface all right there it is and now let's create the mesh and then transform the mesh into the surface with a fade animation so that we can see something all right let's go we play create surface mesh play fade transform the surface mesh into the surface so we can see how the open gel surface actually looks like and then maybe let's wait in the end so that we can see something wait [Music] alright here we go show us hello world orientation of the camera fade out that's the mesh of our functions we're plotting and it should transform to the surface that's it great there are maybe one or two more things i i want to show in this in this basic example one thing that i find particularly nice is with the opengl camera you can also modify the the direction from which the light is coming so what we can do is we can access the the light source and move it around and see how the the the surface changes when the when the lighting moves the lighting is actually just an attribute of the camera so we can do the following we can uh place it in a variable light so that we have to type a little less which we can get from self.
camera. light source and then we can play transformations light animate so the light is also is is again an object it's just a invisible one it's just a point um gl point uh which we can move around and then the renderer does the correct thing shift usually the the light source is very far up so i want to shift it down by like say 20 units or something like that so that it travels from above the surface to below the surface then let's also move it up again a little bit so maybe we see something when it travels down and then maybe halfway back up all right and then maybe let's do just to illustrate setting the euler angles uh one more um the angle theta which controls the smallest rotation of the of the xy plane if we look straight uh down we've set it to minus 10 degrees let's set it to 60 degrees so that we basically rotate everything um so that we basically travel travel around the surface a little bit self. camera animate set euler angles theta to 60 degrees and then maybe let's wait in the end again let's see what happens if we render this world camera orientation without the mesh transformation to the surface this is the light it's subtle but it's there and the camera rotation and that's a simple example of what the opengl renderer what we can do with it i will also discuss one of the examples that we uh that are in our example scenes um folder so one of the scenes that ships basically with the with the library so now this is this is a different example is one of the examples that we have in our example scenes folder and it's very impressive one that people usually uh like quite a lot and i don't want to discuss it in detail there's one particular object that's illustrated in there it's the so-called opengl textured surface object which is pretty sweet in the sense that it basically is an object where you can put textures as an image for both the side that is directed towards the light and the side that is well facing away from the light source um there are different textures that will be rendered and in this case we have a map of the earth at night and day and you will see how well monument can deal with something like this so there we go with the surface example there we have the world you saw the creation of the mesh of the sphere we have a rotation of the of the globe followed by a transformation of the globe into a torus and then the transformation of the smaller torus into the larger one while keeping the texture and now we rotate the torus a little bit and you can see while moving the light source the texture actually changes from well dark version to the light version these are the sort of things that you can do with the opengl renderer if you're into that sort of stuff we go back to the presentation because there are actually some things i've not been telling you while we've been writing this and maybe you've actually already noticed so when we just went through these examples for the opengl renderer you might have noticed that some of the command line flags behaved slightly differently in fact the window that opened and played our animation was not the usual window that opens after the video is finished rendering in fact it was a live preview of the rendering process with this window we will be able to also interact with the scene in some sense which is well the topic of today's episode mainly two important differences with the command line flex on the one hand the minus p flag which you know from the default renderer usually just opens up the video file after rendering in this case opens up the live preview for the rendering and there's a second flag by default the opengl renderer does not write a video file of course this is again subject to to change at the time of recording the write to movie flag has to be passed in addition if you really want the opengl renderer to produce a file but now let's let's talk a little bit more about the interactive stuff there is a method which is the interactive embed method which we can append to the end of our construct method and what happens then is that the preview for the scene rendering is halted or at least it looks like the scene just waits for something and at the same time in the terminal where you ran your your monument command there will be an interactive python actually an ipython terminal in which you can add further commands we'll look at an example or actually we'll go back to the example that we discussed earlier and and see what what it actually does there's one thing that you should know though so usually we would issue further further play calls and wait calls and whatever uh using self.
weight self. play at the time of recording again this is currently broken in the sense that you can't use the the methods that that have self. using play is the same as using self.
play in that in that particular world actually it's not the same it's a version that actually works i'll leave the link to the issue tracking this bug also in the description down below and you can check maybe it's resolved at the time that you're watching this video that you can already use the usual self. play and self. weight methods again all right and with that let's go back and look at the example play around with interactivity i'll remove the self.
wait or before i do that actually something else um because i didn't mention that in the presentation whenever you combine the minus p and the right to movie flag the behavior will be the same as for the default renderers of the cairo renderer there will be no live rendering preview and the movie file will be written and then afterwards it will be opened but now to the point i actually want to show you to make capturing my screen a little bit easier um instead of of using the the terminal right at the bottom of vs code um i'll actually use a separate terminal just so that i can well write more have you see the code i have more more changes and and have you see the the preview the live preview at the same time here's my terminal that i want to use and we render the same thing again so monument open gl intro there we go it's rendering there's the preview now the progress bar is down there it's also nice and there we go now down here i have this interactive ipython window in which i can issue further commands so basically the the scene has been processed until the very end of the of the construct method and now it's waiting there for me to input more stuff so we could play we don't we can't use self dot at least the moment maybe you can already play self dot camera dot animate dot set eu euler [Music] angles theta equals let's say reset it to zero degrees ready and if i hit enter the preview should move hit the enter and it moved we can do more to make the surface disappear by playing a fade out animation so let's play i want to shift it down which is the third axis so zero zero minus two plate and goodbye surf is gone we can also create a new shape that we that we can modify for example we can create a red sphere should be a sphere which is red and then we will create a sphere [Music] there it is it's there there's the fear we can make the sphere larger scale a factor of let's say three [Music] and again we can also create a mesh for the sphere and show that instead sphere mesh equals opengl mesh of the red sphere it's creating the mesh and then we can transform the the solid sphere into its mesh there you can see sometimes funky things appear when using this what we should have done is not use the direct transform i'll actually work this now we should have used the fade transformation because well transformation between something a solid surface and well this apparently doesn't work that's part of the experience sometimes things with the opengl vendor are not as moved as well you might hope they are let's head back to the slides and i'll give you some more input regarding interactivity let me talk a little bit more about this preview window actually just played around with a little bit because i have not told you all of its secrets yet the preview window is a so-called piglet window it supports interaction and some defaults are actually already implemented to more precise there is mouse interaction so maybe you have already tried it whenever you have the mouse cursor over the window and hold down shift then move the mouse then you move the camera in the same plane of the camera frame if you click the right mouse button and drag the pointer then the camera is moved uh more or less in the xy plane if you click the left mouse button and drag the the the pointer then the camera angle changes and if you use the scroll wheel on your mouse then you can zoom in and out of the scene just as there is mouse interaction there's also keyboard interaction there are two actions that are already implemented there's the r key which resets the camera to the default position and there's the q key which quits the interactive mode so nothing too exciting we return to our simple scene one more time this time we'll actually show you all of the hidden tricks as well that the preview window already knows i'll render it again in this separate terminal we are the interactive ipython shell again let's actually interact with this window here because we can do that as i've just mentioned if i hold down the shift button then move the mouse the camera moves in the in the uh in the plane of the of the camera frame if i click and left click and rotate uh the mouse then actually i can rotate the camera which is pretty sweet and i don't have to think about what the appropriate euler angles actually might be to look at the the surface from the direction i want to i can just rotate it and rotate it so that it looks like the way i want it to look if i use the the right mouse button you might see okay the object looks like it's shifted across the x y axis and this is actually true but not for the object the camera is moved in that direction if i want to reset the camera to the initial state i simply use the the keybind r so i hit r on the keyboard and there we are that's the top down camera again and well the last the last key point that i or the last two keyboards actually i should mention scrolling as you've as you've seen on the slide zooms so i can move closer to the surface or further away from it pressing q and the preview you might be asking yourself well we have r and q what comes next well you can do your custom interactions at least the keyboard ones are more or less straightforward to code i'll give you some abstract information on that and then afterwards we'll go into two examples together there are some methods that you may want to take a look at i won't discuss them in detail because in particular the mouse interaction is kind of complex there's a lot of stuff with rotation matrices and translations going on that you need to sit down and work through slowly but what we will do in this episode together is we will work through two examples that implement some form of keyboard interactivity even if the actions for for the mouse so scene dot on mouse motion the on mouse scroll and the on mouse drag method even if those are somewhat complicated there are still two objects actually that are not present in the scene uh so not added to the scene as children of the scene but they are they can be accessed and they they hold information namely the one object is the scene. mousepoint and scene. mouse drag point which can concrete scenes then be accessed to self.
mousepoint and self. mousetrackpoint and these hold coordinates of the mouse on the preview window by default the center top of the preview window is at coordinate zero four zero and you can imagine this as basically the the coordinate of the of the scene if the camera has not been rotated or altered in any way the relevant keyword methods and we'll get into that in in detail actually and i'll show you examples for for how to implement those on your own are the the scene. on keypress and the scene.
on key release methods we will mainly deal with the seed not on keypress method and here is an abstract example for how you would actually implement this for readability we will use the key constants defined in piglet itself this is different to what the library actually does internally and how would you do it basically you add the self. interactive embed at the end of your construct method so that the scene stops at some point and allows sort of preview window allows keyboard input and mouse input and then it's actually quite easy you just override the on keypress method which has two um positional arguments the so-called symbol and the so-called modifiers to check whether some sort a certain key has been pressed we simply compare the symbol argument against the corresponding constant for letters this is simply the this piglet key which i've imported from piglet. window dot capital version of that letter so x i'll actually also leave a link to piglet's um documentation so you can take a look yourself which options are available the other option if you want to play around with modifier so if you want to check that say the control key is held down you would do it like this you would use the bitwise operations and check whether the modifiers argument in in combination with bitwise and the the control modifier constant from piglet uh whether those whether that evaluates to true i'll include the super call to the to the default implementation as well simply because well you still want in most cases probably the resetting camera and and quitting the the scene so q and r those should still work that's a very short and abstract example of how you would implement uh interactivity keyboard interactivity yourself let's now head into well actual code and and and come up with two uh nice examples that illustrate this functionality the first of the two examples with custom interactions that i want to work on with you is a simple one where we take a circle and the point on the circle and whenever we press the button the radius of the circle should become larger or smaller depending on how far the mouse pointer is away from the from the origin of the scene that's it so what we'll do is i'll create a new class we'll set some stuff up namely i want to have a number plane a dot which will mark the last chosen position of the of the cursor and then of course the circle the plane which is simply a number plane i'll use a dot let's call it cursor dot and we move maybe three times right plus two times up then i'll add a circle red circle which has a radius i'll simply take the distance of the center of the dot to the to the origin numpy lin norm which is like the length of a vector should be color equals red as well okay comma here fixed indentation and there we go to make the to make the radius of the circle actually uh update i'll add an updater function to that so let's add updater object dot become just copy the code because it's the same the very same thing all right we have that self.
play create uh plain fade in the cursor dot create the circle let's actually create the circle first so that the order of the object is is correct on the scene okay so we have some sort of initial state to have my keystrokes modify the position of the of the dot i'll actually add the dot as an attribute to the scene so that i can access it from another method so what i'll do is i'll add self dot cursor dot equals cursor dot so that's accessible from some other method implement on key press with the three arguments that the method has so self it's a method after all the symbol and modifiers we import the the key constants from piglet so from dot window import key as piglet key and actually it's important that i do it here and not not before um it has something to do with the with the context that is opened when import when using piglet if i do it too soon and the preview window is not yet created you will get an error so i'll do it in the very last moment um when it's actually needed and then we just check if the symbol that we get is the piglet key let's say g then we play an animation we play the animation for the cursor dot so left. cursor. animate move to the position of the of the mouse cursor so let's put self dot mouse point right remember it's the object that stores the coordinates of the cursor of the pointer on the preview window so self.
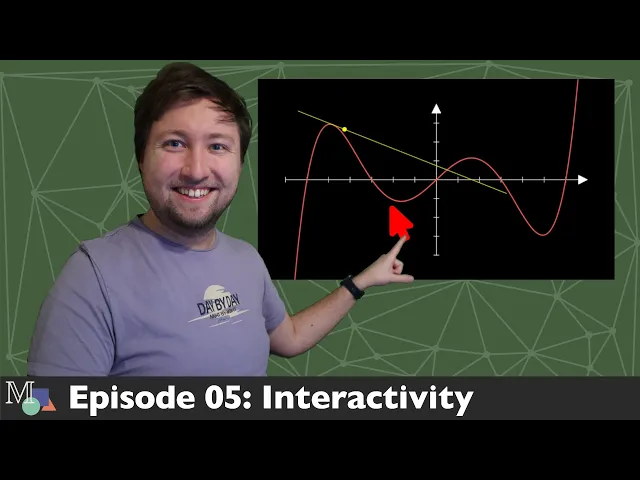
mousepoint. getcenter just to make sure that q and r are still working we call the super method so super the method of the parent on key press self self past symbol and modifiers all right and there we go let's render and see what happens all right rendering it immediately closed again because i forgot the interactive embed there was no there was nothing no reason for the for the window to stay open so let's set that as well interactive embed okay the scene is created as we wanted to and now it's waiting and listening for input i just i just move my my cursor my pointer somewhere on the on the preview frame and then i press g on my keyboard and there we go manum knows to do whenever i press g it's jumping to the location of my mouse now you might ask yourself what happens if i if i like rotate the camera and then do some stuff like that so if i if i just twist this a little bit and then maybe scroll out a little and i'll move my pointer to the bottom of the of the preview window and then press g again you will see the cursor dot moves to the to the bottom of the of the number plane the coordinates of the mouse is still in this in this reference frame that we that we had initially without modification of the camera works pretty well right q4x i think the last example that we've seen was already pretty nice but still had very much the character of a toy example i do want to present one more example which is a little bit more advanced and more well more mathematical in a sense but also more real the example i want to implement is mutant iteration which basically is a procedure that allows you to find roots of a real valued function one step in a newton iteration can be described like this you start with some x value you construct a corresponding tangent at the graph you intersect the tangent with the x-axis and the intersection point is the next x-value that you will take and if you repeat this procedure you will in most cases converge to a root if there is one so i want an interactive scene that allows me to select the initial starting point and then show whenever i want to the iteration steps that's what we're going to implement now so i'll implement a new class the construct method will be rather simple there's not a lot that we need to set up we need a set of axes i don't need to set any any measurements i'll just take a function that works well with the default axis but what i do need to do is a lot of these things i will need to access in the second part so in the in the on keypress method which means that i will assign a lot of of these objects which i usually wouldn't do i will assign them as attributes of the scene so in this case i would be self. xs equals the xsm object then i'll take a function for this demonstration i'll choose something that mainly looks nice you can definitely change the function and implement something on your own here the rest of the of the implementation is completely independent so you can if you change this this one line here uh the the function will change and the interactive scene will change accordingly i'll call itself.
f is a lambda function which maps x to the polynomial so i'll have roots at minus six minus three at zero at plus three and at uh plus six and because these polynomials the the values the numerical values of the in this in this interval range from -66 are pretty high i'll multiply with an appropriate scaling factor i have experimented with this before and what seems appropriate seems to be a value of just one over three hundred that take then we need the curve uh i actually don't need to access this later so i'll just take curve equals plot our function f and i'll make it red because that's what i usually do with my plots color equals red i need just as before i'll need a dot that sort of represents the position of the cursor or that that represents the current current position of the point in our algorithm so i'll call it cursor dot again there's a dot equals a dot this time i'll collide yellow then let's play the animation that sets the scene up so self. play creates the axis we create curve and we fade in the cursor dot and then in the end important so that we can interact with the scene we need to um call the interactive embed method all right so far there's no no custom interaction but we can still look at it and see whether we like the setup of the scene there we go looks great in my opinion and now let's take care of the custom interaction part i need the on key press so i'll import two things that i'll need on the one hand i'll need the key constants from piglet just like in the previous example and on the other hand i will need something that helps me to compute the derivative of my function and i can use psi pi for that because my name already has that as a dependency so i can just use it if i press one button p i want the point to move to the point on the curve that is located either below or or above the mouse cursor at the moment so if symbol equals piglet key dot p then we get the current position of the mouse point which we can do with the self. mousepoint object so we get x and y so this here means i get the center of the mouse point which is the location of the well the house pointer and i'll convert this into the local coordinate system spanned by the axis all right so i'll have that we move the cursor dot to the corresponding position on the graph so just self.
play the cursor dot animate move to self. axis dot coordinates to point so now i give the axis two coordinates and i the coordinates will be the x value of the of the mouse pointer that we got from the mouse pointer and the y value will be well f x so x and self dot f of x and that's it quickly render it and if we did it correctly i move my mouse pointer somewhere and press p then the point should move to the corresponding position on the graph looks good and maybe now that i think of it just chord super key press symbol modifiers q and r for camera reset works also symbol equals piglet key dot i in this we will do the following we need the current x position again so i can actually copy the first line we get x and y and then we do one step of the newton iteration and if you've never heard of it before no worries it's not complicated actually there's a formula for that the new x value can be constructed from the old one minus f of x over f prime of x so we just compute these values and then we we have the new x value and i can simply do that because i have all the quantities that i need here xnew equals x minus self. f of x over [Music] into a derivative which i imported from psi pi of self.
f um at point x and dx is like the um well width of the difference quotient that it takes so we take dx equals something small well let's actually point take 0. 01 that should be fine all right so i'll first construct the point that would be the point on the curve would be the self dot cursor dot get center because that's the point that's currently sitting on the on the plot on the graph and the second one should be the axis plot uh point and that one will be we know the coordinates of those in the in the axis world the x coordinate is the uh x nu that we already determined and the y coordinate is zero because it's the point that we get from intersecting the tangent line with the with the x-axis so this is just c to p coordinates to point of x new and zero all right and then we are ready we can define the tangent line and the tangent will be a line spanning from the easiest version would be just from the curve point to the axis point curve point to axis point and the color will be yellow as well and i'll also make it a little bit thinner to give it like more of an auxiliary line look uh stroke with equals two but instead of using the actual endpoints of the of the on the graph and on the axis i want to extend the line a little bit and i can do that by well using some some vector calculus i'll add a vector namely the curve the one spanning from the axis point to the curve point and then i'll scale that a little bit so that it doesn't reach as far 0. 25 and then the second second one should be the same thing just in just the other way around so this is just extending the line uh between the curve point and the next point in both directions a little bit so that it looks nicer and with that we can actually play the animation so this is all of the auxiliary objects that we need and now we can play the things we self.
play creation of the tangent after the tangent has been played i want to move the point along the tangent so self. play self cursor dot animate move to self dot x is dot coordinates to point so that should be the the new point again so that's that's that's uh x new zero in the coordinates of the of the axis x mu zero uh we are now sitting with the point on the axis and actually the point doesn't belong on the x the point belongs well to wherever the the graph is so i'll actually move the point some more [Music] self cursor dot animate move 2 self access coordinates to point again the x coordinate remains the x but the y coordinate is determined by our function so it should be self.

![The Manim Cast #4 - (3D) Graphing, Camera, Parametric Functions/Surfaces [feat. @vcubingx ]](https://img.youtube.com/vi/XIPIUyx9L7U/maxresdefault.jpg)