This is the introduction for nomenclature of specific polygons. Um for presentation one there's a note um this is presentation one general terms. These are covered in the parts of a polygon lesson and likely this is a revisitation or a review before you get into more detail about um parts of specific polygons.
That lesson and the following lesson could be possibly separated by some amount of time. So parts of a polygon and this lesson, there could be some time that has passed. If the children do not need this review, skip it.
But it's here for your convenience. If this next part feels good for you, you feel confident that you know these names, you are welcome to simply write reference parts of a polygon under this heading and not rewrite it or cut and paste what you have um for parts of a polygon here um if you don't want to just reference it. Whatever works best for your learning.
This has several points where that you can do with one shape and move on which allows you to doublech checkck for the information and if the children have retained it or if they need a review. There are lots of points for pausing and doing follow-up work. So, as a review of the materials, you're going to need the box of sticks, slips of paper, and a pencil to write little labels for your children.
You're going to need the triangular box of constructive triangles, a stand or a piece of plasticine. Um, I'm going to use a piece of plasticine because that's what I have here. Uh, the whole pentagon from the insets.
I suggest using the wooden insets from the geometry cabinet, but if you don't have that, the metal inset will work just fine. The reason I want you to say um insetss from the cabinet in your materials list is because then the children can explore beyond just the pentagon. You will need a compass, a centimeter ruler, paper, and a pencil.
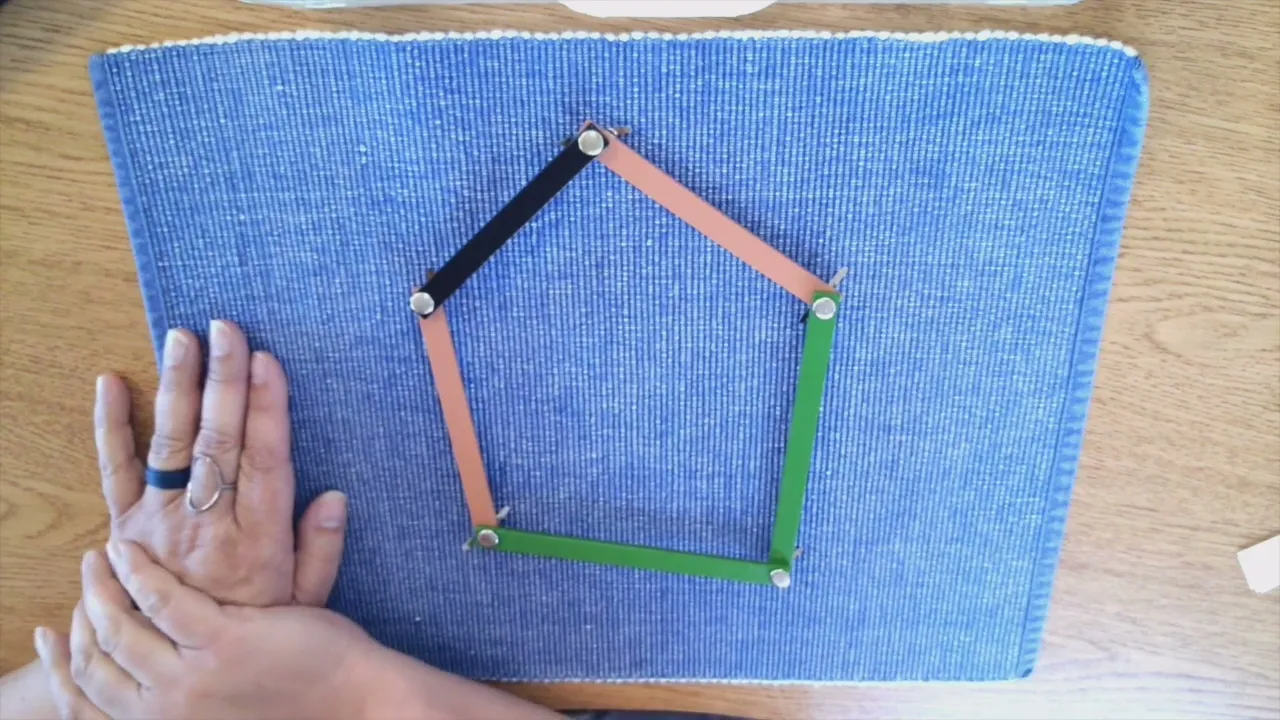
Okay, so let's get started. So you're going to gather the children and you'll start with this. I've made this P polygon here.
How do we know that it's a polygon? Yep, there are straight sides and an enclosed space. Those are the two keys for a polygon.
Enclosed space, straight sides. All right, let's talk about this polygon here. This space in the middle that is enclosed.
We talk about the enclosed space but it also has a special name. This is called the surface of the polygon. The surface.
Our polygon has angles. Right? Here's an angle.
Here's an angle. Here's an angle. Here's an angle.
Here's an angle. Right? Our polygon has sides.
This is a side. This is a side. This is a side.
This is a side. This is a side. And when two sides come together, they make an angle.
This is a vertex, right? When two sides come together, they create a vertex. Can you find another vertex?
Yep. Here is a vertex. Here is a vertex.
Here is a vertex. Here is a vertex. When we start at one vertex and go all around our pentagon like this, we start here and go all the way around.
We call that the perimeter of our polygon. The perimeter. Let's see what we have here.
Hm. The space in the middle. What do we call that?
Yes, we call that the surface. All this space is called the surface. Here we had a side.
Yes, we have a side. And you can make a label for every single side if you want to. When our two sides meet together, we call that the vertex.
And who can find I'll put it right here. Who can find another vertex? Yep.
That's another vertex. And another. Uh-huh.
And another. Uhhuh. And another.
Uhhuh. Again, you can label every single one if you want to. What was created here?
Yes, it is an angle. It is an angle. Let me move surface down and I'll put angle here.
And again, you could label all of the angles if you wanted to. When we add up all the sides together, we go all the way around. Do you remember what we call that?
Yes. It is the perimeter. It is the perimeter.
All of it together is the perimeter. There is one thing that I would like to show you. And I'm going to need a stick for this.
Okay. When I have I'm going to use the yellow the two yellow sticks. Okay.
When I make a line from one vertex to another vertex, it is called a diagonal. I could make a diagonal here and I could make a diagonal here. I've placed my diagonals and when I draw this I can do the same thing.
I'm going to actually let's see that's a diagonal but I want my diagonals to have the same vertex. So, I'm going to place them here like this so that they have the same vertex. Although, my brads are making it a little hard to do that.
Let's try it like that. There we go. Okay, I've placed my diagonals and I can draw them right.
I'm gonna draw a straight line to a different vertex that is not its neighbor. That is not its neighbor. And that's how I draw my diagonals.
Okay? And I can label a diagonal like this. Now, if you want to get a piece of white paper and if you want to get the um if you want to get the um colored pencils and a regular pencil, you could draw this and you could label you could label all the sides.
You could label all the vertices um which is plural for vertex. You could name all the angles if you want to or you could lay it out like this. Um, it's up to you.
Okay, great. Here are some notes for you. You want to use your slips of paper.
You want to do some second period repetition. You can build other polygons and do a little repetition there um to see if you can find all the parts of a polygon. You really want to encourage follow-up work.
Make those second and third periods feel like a game so the children will play uh together. Um you also want to encourage children to make their own polygons on a piece of paper and label it the way that we did for parts of a circle. They can make a beautiful poster and really come to know the terms not just of five-sided polygons um but with other polygons as well.






![Upbeat Lofi - Deep Focus & Energy for Work [R&B, Neo Soul, Lofi Hiphop]](https://img.youtube.com/vi/THh4fT0O7IY/maxresdefault.jpg)