One of the coolest parts of this hobby is getting some brand new miniatures on the tabletop, especially a brand new army. But starting an army can be a bit intimidating when you've got a lot of figures to paint. And this is true for just about every force you could want to make.
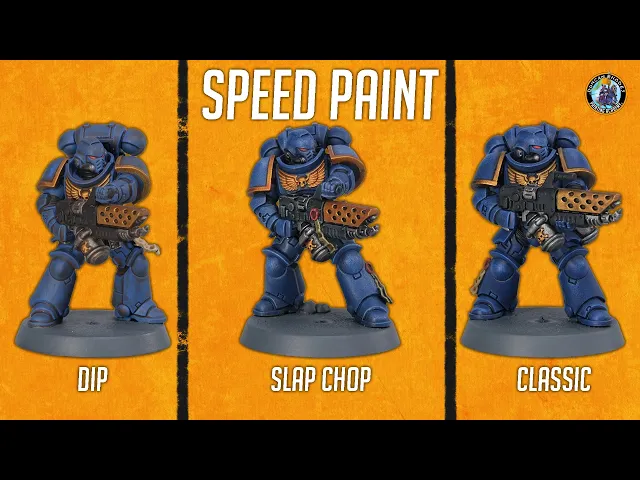
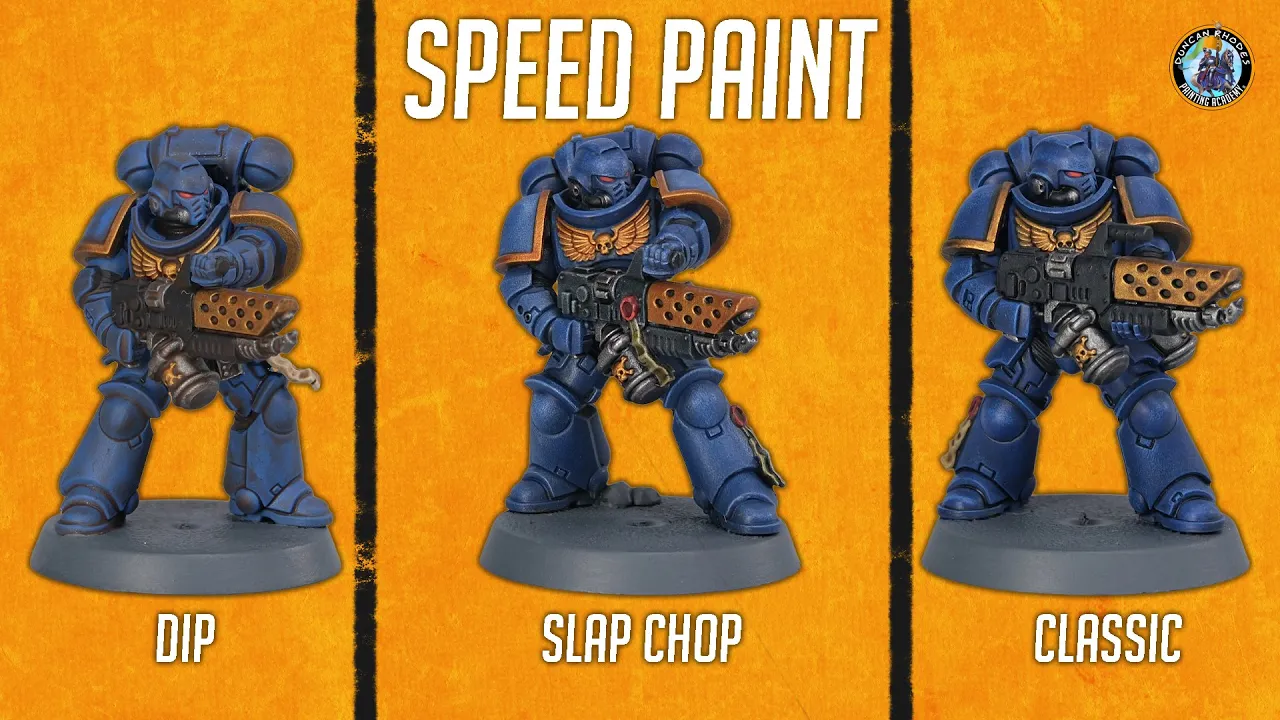
Now, in this video, what we're going to do is take a look at how you can address this by speed painting your miniatures. And here we're going to be looking at painting ultramarines here. So, we're going to be showing you three different methods of speed painting your ultramarines and getting them look great on the tabletop in no time.
So, as I mentioned in the intro, we're going to look at three different methods of speed painting your ultramarines here. And all of these are actually great if you just want to get your army on the tabletop quickly. But if you're new to the hobby, too, they're fantastic because all of them teach some really great foundational skills and none of them require very many paints to do as well.
The first method we're going to take a look at is called the dip method and it revolves around using some of this. So this is from the Army Painter. Essentially what it is is like really thick shade paint in a way.
Basically what you do is paint your miniature with base coats and then literally dip it into that and then shake off the excess and then just let it dry. And this provides all the shading and depth on your miniature. So to do it really what we're looking at is lots of base coats first of all.
So for our space marine going to start out with the armor. Now the undercoat I've chosen for this particular marine is a gray undercoat. This is standard gray from the color forge, which is a great starting point for all the colors we're going to be using here.
If you're not sure, I usually recommend a gray undercoat, but you could go for a blue instead if you prefer. The choice really is yours. But something to note here is that the dip method does tend to darken miniatures down quite a bit.
So, generally, I find it's a good idea to paint on base coats that are a little bit lighter than what you'd normally use for the color scheme you intend. Now, in the case of ultramarines, we can show that here because the color I'm going to be using is outdoor offg guard blue. But what I'd normally use is something like marine blue, which you can see I've already got my palette just here.
And you can see the sort of tone color that is. It's a fairly deep blue that one. But outdoor guard blue by comparison is quite a bit lighter.
So we just grab some of this, put it onto the palette. You can see exactly what I mean. So what we need to do is start out by base coating all the power armor with this blue.
And to do this, we just need to thin it down with a touch of water. Don't need loads and loads. And then it's just a matter of painting this all across the armor.
And as we're doing so, want to make sure we work into all the nooks and crannies. But don't worry about any of the surrounding details that are going to be different colors because we'll clean up as we add further base coats onto the miniature. Once you've established that even finish there on the blue, we can move on to the next step.
And as you can see, it is a little bit lighter than the blue we'd normally go for, but it will get toned down once we put that dip on there. But now what we need to do is carry on applying base coats onto the miniature. And the next one can be an off black for things like the casing of the weaponry and the joints, the armor, all that sort of thing.
And it's a good idea to go for an off black here so the dip can shade it down for a bit of depth in there. So I'm going to be using some Death Reaper for this. And to apply it, I'm going for a medium layer brush from Citadel.
And what we want to do is just get some of this thin down and under control on the palette there. Just adding a touch of water so it's nice and smooth. And then we need to make sure that we haven't overloaded the brush either.
So just to take the excess there like that, bringing the bristles to a nice point. Then we can start looking around for these features on the miniature. And to begin with, we're going to be going for the joints in the armor, such as this one here on the back of the leg.
And it's just a matter of just neatly blocking that in, being careful of the blue plating around it. Also, we should keep an eye out for any leather details such as the holster for his pistol right here. And then finally, there's going to be the casing of the weaponry.
So on his weapon just here, what we're looking for is areas like this that we just want to block in at this stage, too. Once you found all those details out of black, we can then move on to picking out the metallics in the miniature. And we'll start out with the silver here.
You want a nice good strong silver. So I'm going to use some cir. Then for the gold, we should go for a nice rich gold.
So here I'm going to use some dragon's gold. We'll start out with cir. And to apply it, I am going to stay with the same brush here.
So it's the medium layer brush once again. And now it's just a matter of neatly working around the miniature, picking out all the details that you want to be silver. So for example, the vents and things are going to be this color.
And so we want to go in and just start neatly picking these out. Again, being careful of the surrounding blue and black as well. Once you finish base coating all the silver, we can then move on to the gold.
And here I'm going for some dragon's gold. And first of all, this is going to be for the rim of the shoulder plates. Now, I'm still using the medium layer brush to apply this.
And the trick for this sort of thing is just to make sure you don't have loads of paint in the brush and just gently skim along like this. the bristles just catch that raised trim. Just gradually work your way around, change the angle of the model as you need to to make sure you're comfortable.
There's also going to be the design on the chest. And here, you just want to take your time just working the paint into this area just around here to make sure you get the wings and the skull. And then finally, we've got the cowl here and the py blaster where we just want to block this out as well.
With the metallics blocked in, there's just two more base coats that we need to add to the miniature. Starting out with a red, which is going to be for the eye lenses, but also the wax of any purity seals on the model too. For this, I'm going to be using some demon red.
So, again, a nice bright red that's going to show through when we put that dip on it. Once that's done, we can then pick out the parchment. And again, we're going for quite a light color here and use some vampire fang, a kind of light bone color for that.
But we'll start out a demon red. And to apply this one, I do recommend you go for a smaller brush now. And I've switched down to a small airbrush from Citadel.
This is mainly just to paint in the eye lenses because it does do require a degree of control with this. And a smaller brush just really helps out with that. But what you need to do is again get the paint thinned down on your palette and just make sure you don't overload your brush because you just want to get that nice point to it.
So just twist the bristles as you draw the brush along to get that point. And then brace your hands to be as steady as possible. Then approach from this sort of direction on each eye lens.
So just like this just making sure just to touch it with the tip of the brush just to pick out the area there like that. Now as I mentioned we also want to look for wax appear seals too. And there is one on this miniature.
It is just around here. So we want to make sure we get this at this stage as well. And then finally, we can move on to some vampire fang.
And this is to pick out any parchment on the miniature, such as this purity seal down here. And with that, we've now finished applying all the base coats onto this ultramarine. So, it's time to put him into the dip.
Now, when it comes to this, what you need to do is get set up first of all, and that means putting down something to protect your work surface because this can be a little bit messy. So, you want some newspaper or some kitchen towel, something like that. So, what you then need to do is open up the tin and once you've done so, give it a really good stir to make sure it's mixed thoroughly.
Then, it's time to dip the miniature into the dip. And for this, use some pliers or some tweezers like I've got here. And then, allow the excess just to drain off.
Once that's done, we can then give the miniature a few quick shakes over some kitchen towel or something like that to remove the excess dip. And then it's just a matter of giving it at least 24 hours to dry. And whilst that dip is drying, if you're looking to learn some new techniques and improve your skills, then you should check out our website, duncanroads.
com. This is our site dedicated to teaching painting skills and techniques to really help you on your hobby journey to achieve the results you've always dreamed of. We cover all sorts of different things, including various techniques, but also specific miniatures, too, from all of your favorite games.
In addition to this, we have a fantastic beginner's [music] course dedicated to anyone who's new to the hobby to teach you all the fundamentals. And we have a passionate community for the hobbyist learning, too. [music] We have monthly competitions and giveaways and much more.
So, be sure to go and check it out because you get access to all of this for just the price of a fancy cup of coffee every month. And here he is many hours later with that dip now completely dry. And as you can see, he's very, very shiny.
Now, a word of caution when you're doing this is that the gorge on the armor here for a primary space marine is a really good point for trapping a lot of the dip and a lot of it tends to collect in there and forms a big puddle or so. It's a good idea to have an old brush on hand just so you can scoop out the excess there so it doesn't dry that way. But, as I mentioned, he is very shiny.
So, what we now need to do is matt him down. And you can paint on a matte varnish if you want to. With this example here, I'm going to use a spray.
I'm going to use this here from Tama, which is flat clear. This I find to be very reliable and very good for this sort of thing. So, what I'm going to do is go outside, spray with this now, and when we come back, we'll see the final result.
And here's the space ring with that varnish now completely dry. And you can see the result of the dip is that it really does provide shading on the miniature. And it does it very quickly, too.
At this point, it's just a matter of applying your transfers and then basing the miniature however you'd like. Now, it is worth noting that in some areas it does go blotchy on flat panels, which you can see, such as on the shoulder plate just there. But there is no denying that this is a really, really fast way of painting your ultramarine.
So if you just want your arm in the tabletop quickly, this is definitely a method to consider. However, I do recommend that when you take the model out of the dip, just keep an eye on how it settles because it will tend to collect in certain areas, especially around the gorgeet on the power armor of Primra Space Marines. So definitely have an old brush on hand that you can use just to scoop out that excess dip before you leave it to dry.
The next method we're going to take a look at is one that's commonly known as slap chop. And this is essentially a staining method using things like Citadel contrast paints or Army Painter Speed Paints. Basically quite strong inky kind of paints.
But the interesting thing about it is that you set up before applying those paints by doing some dry brushing on your miniature starting from a black working way up through grays up towards a white. So what this does is provides a nice surface to apply the contrast paints on top of. gives a bit more depth and contrast to them as well.
So, this means we need to start out from a black undercoat. And the one I've chosen for this example for our ultramarine is some matte black from the color forge. And what we need to do is start out straight away by dry brushing some grays, working our way to a white.
I'm going to begin with a dark gray. So, I'm going to use some dungeon stone gray for this. And to apply it, I'm using a slightly different dry brush from what I normally use.
This is actually one of these soft round ones. This one's from Army Painter, but there's various different manufacturers available. This is their mediumsiz one.
And the reason I'm using this is because it's going to give a nice soft application to the miniature, which we're really going to build upon with those contrast paints later on. Now, to set this up, I've got my dark gray just here. I'm just going to get some of the paint onto the bristles there, like that.
And then to get this prepared, rather than using tissue or anything, what I've got is some laminated cardboard here. So, it's just some white card so you can clearly see what's going on. The reason is because this won't absorb away too much moisture from the paint.
Meaning that even though it's going to be a dry brush, it's not going to be a bone dry brush essentially. So, it's going to be nice and smooth when we apply it. And what you do is just use this card to work that paint into the bristles whilst also removing the excess paint.
And you just want to carry on until it's starting to get fairly weak. So around about that sort of point, just there. And with that prepared, we can then start applying it to the miniature.
And all you need to do is just start softly applying it in a back and forth motion like this. So you catch most of it with that gray, leaving the black still showing in only the deepest recesses. I finished dry brushing that gray now and you can see the sort of strength I went for and that it is dominant but that black is still visible in the recesses.
I did switch to a slightly smaller dry brush just to access the underside of the miniature just there. So I made sure that was all consistent and with that done we can now move on to some lighter dry brushes. So the next one's going to be a light gray.
And here I'm going to use some cararodon gray and then we can move up to the white. And for this I'm going to use some white star. We'll start out with cararod and gray.
And to apply this I'm going for the same dry brush again. So it's that sort of medium sized one. And the application for this one's going to be largely the same, just a little bit lighter than before.
So again, to get a bit of that paint on the brush and got that laminated card once again, I'm just going to use this to work that paint into the bristles and remove the excess. And this time I'm going down to around about that sort of strength just there before applying it. And then it's going to be that same motion.
So again, just lightly flicking it back and forth across the miniature, just gradually building this up, letting some of that darker gray show in those recesses. once again. And now that's done, we can move on to a white.
So now I've got some white star and this is being dry brushed on once again, but now switch to a slightly smaller dry brush. So this is the miniature dry brush and it's quite a light motion this time just to slowly build up that white on the most raised up areas. Now, at the end of the dry brushing, you're aiming to have something that looks a bit like this.
And so, with that done, we can now start applying the contrast paints over the top. And for the ultramarine, we'll start out with that main blue. So, here I'm going to be using the appropriately named ultramarine's blue.
Now, to apply this, I'm going for a medium layer brush. And that's because for best results with things like contrast paints, it's best applied in a more controlled fashion rather than just slapping it on. That's because it's best to think of these pens almost like felt tip pens, and that you want to start coloring in an area and then let it settle and dry.
If you go back to it too earlier, what you do is disturb the surface that you've created and you get a rough finish to it and it looks a bit unpleasant. So basically applying it in a neat fashion will just give you a better result in the end. So to do this, what you should do is get the paint onto a palette and I usually like to thin it down with just a touch of water.
Just take the edge off it, but you don't need very much. And then just make sure you don't have tons and tons on your brush so that you keep a fairly good point on the bristles. And then we can start coloring in these panels.
And so as I mentioned, the best way to do this is to pick one at a time and basically fill it in. So for example, on the helmet, what we can do is start in this vent on the back. What you do is just paint straight over the top like this, allowing that white and gray to show through.
Basically, just work your way around just coloring it in, just smoothly applying it, and then letting that paint just settle as it settles. So, just there like that. And just moving away from it, and then leave it be.
So, it's just a matter of taking your time doing this, just gradually working your way across all the blue panels on the miniature. And once you've done so, give it around about half an hour to dry. And here we have the result of applying that blue over the top of the dry brushes.
And you can see by doing that it just gives it some really nice volume there on the color. But also I've been very neat and tidy avoiding details that are going to be using other contrast paint colors because we want the same sort of effect on those. And we can pick out some of those now.
Starting out with details that need to be black. Here I'm going to use some black templar. And then we can move on to picking out the red wax and the purity seals.
Here I'm going to use some blood angels red. And then finally for the parchment and those seals, I'm going to use a little bit of skeleton horde. But we'll start out with the black.
So I'm using black templar here. And to apply this, I've switched to a small layer brush now for a bit more control because we do need to be careful in applying this one. This is a very strong contrast paint which can overwhelm surrounding colors if you splash it onto them.
So you just want to make sure you don't put on too much at once. So use your palette to control it. And I do like to thin it down with that touch of water and remove the excess off the brush to get it under control.
And then we can start looking for all the parts that need to be black, such as the joints in the armor. Like there's one just down here. Again, just block this in as neatly as possible.
We can also pick out the leather such as the holster up or his pistol just here. Again, just picking one panel at a time and blocking it in there like that. But also, we can use this on the weaponry, too.
So, around here, for example, the casing of his flamer, want to go for areas such as around here. Once you're finished with the black, the next thing to do is move on to a red. So, here I've got some blood angels red, and this is going to be for the wax on the purity seals.
And just take a special care on these not to catch the parchment because we do rely upon them still being fairly light for the next color that we've got coming up. And once that's done, we can then move on to one more contrast paint. This one's going to be skeleton horde, and this is for the parchment on the purity seals.
And once that's dry, we can then move on to the next step, which is to address the metallics. Because when it comes to the metallics, what I find for this style of painting, it's actually best to use a proper metallic paint and then paint a contrast paint over the top to give it some shading. So with that in mind, what we'll do is start with the gold.
Here I'm going to use some dragon's gold for a nice rich color. And then over the top, I'm going to use some gullivan flesh for some warm shading on it. Then we'll do the same sort of process with the silver.
For the base coat, I'm using cir. Then over the top, we'll use some basilicum gray for the shading. But we'll start out with dragon's gold.
And to apply this, I'm going to go for the small layer brush again for lots of control because we just need to be as neat as possible as we block this in. So, as usual, make sure the paint's thinned down and controlling your brush. And then we can start looking for all the golden trim and details such as the trim on the shoulder plate just around here.
And it's just a matter of just very carefully just following it all the way along. So, just really take your time on this one, being as neat as possible. Once you finish blocking out all the gold, we can then jump back to a contrast paint.
And here I've got some gullin flesh still being applied using that small layer brush. What we want to do is just neatly paint this directly over the top of all the gold. Now that's dry.
You can see the contrast paint gives it some really nice shading there on the gold. So we'll now do the same procedure on the silver details. To begin with, I'm using some Cir Silver as the base coat, and I'm applying it once again using the small layer brush.
Again, just really take your time. Be as neat as you can whenever you're getting close to other parts that you've painted so far. And then finally, it's back to a contrast paint once more.
And here I've got some basilicum gray still being applied with a small layer brush. What we need to do is paint it straight over the top of all the silver. And once that's dry, there's just one more thing that we need to do, and that is to paint the eye lenses of the space marine in.
And here, we can't rely on a contrast paint cuz it just won't show up enough against the darker color we've got there already. So instead, it's a good idea just to jump to a regular acrylic paint of a bright red. So here, I'm going to use some demon red.
And to apply it, I am going to stay with a small layer brush. And all we need to do is just neatly paint a line of this color in the middle of each eye lens. So just get that paint thinned down so it's nice and smooth on the palette.
a doubt about that sort of consistency there. Twist away the excess paint off your brush that you get that good point on the bristles. And then it's back to bracing your hands to be as steady as possible and just gently moving in just to pick out a line in the middle of each eye.
So, for example, on this one, we're looking to paint it just in here. And once the eyes are painted in, the miniature is then ready to be based. And if you want to, you can put the transfers on as well.
But there you go. That's how you can paint an ultramarine using the slap chop method. And as you seen, this is very straightforward, but there are two key things to bear in mind.
The first thing is when you're doing that dry brushing to set things up, you want to make sure that you dry brush your troops consistently because the colors you paint over the top will vary based upon how heavy you are with those dry brushes. So, just take care there, especially with the white. The next thing is when you're blocking your contrast paints, they do rely upon that color beneath them showing through.
So, you got to make sure that you're very neat and tidy and don't splash the colors onto areas where you don't want that color because again, it can affect the overall result. So, just take your time, be as neat as you can. But aside from that, it's very straightforward.
The third method we're going to take a look at is a much more traditional way of speed painting your miniatures and just makes use of acrylic paints and washes. And the method for a space print here is to really concentrate on the power armor first of all by blocking that in, doing some shading on it, then driver some highlights, and then move on to the surrounding details after that. Now, once again, of course, we're showing you a great way of painting an ultramarine for this example just here.
And I am going to be starting out from a gray undercoat. This is standard gray from the color forge, but you can start from a blue undercoat if you prefer. The choice really is yours.
Whatever you choose though, you should begin by really blocking that main blue that you want for your ultramarines here. So, my example, I'm going to be using some marine blue for this. And to apply it, all you need is a rough base coat brush to get things going.
So, I'm going for a medium base coat brush here from Citadel. And with this, all we need to do is thin the paint down with just that touch of water. Just being careful not to overdo it.
And then all we need to do is just block in all the power armor, not worrying about any of the details as we go. Once you got of an even finish that base coat, the next thing to do is apply a wash all over your power armor. And in this case, a black wash is going to be perfect.
So, I'm going to use some Oblivion black wash. And because we're going to apply quite a lot, you should go with quite a big brush here. So, I'm using a medium shade brush from Citadel.
And with this, you just need to load up a good generous amount of your black wash. and then start painting it all across the power armor of your miniature. So, for example, if I start here, just start putting it on like this, pushing it into all the recesses as you go, just making sure you get a nice coating on the armor.
Now, even though we're putting on quite a lot, you do need to take care to make sure that you don't put on too much because if you do put on too much, it will start pooling and it dries with quite an unpleasant finish. And this is especially troublesome if we're going to be dry brushing after this. So, you do need to keep an eye out for that.
So, when you paint on like this, just watch to see how it settles. And sometimes, such as on this little plate here, you might get a bit of a puddle forming. In which case, just use your brush like a sponge to soak away the excess from that flat panel.
Then just redistribute it elsewhere around the miniature. And once you have got it painted all over, give it about 45 minutes to dry. Once the wash is completely dry, the next thing that we're going to do is the dry brushing.
And the reason why we set a painted miniature like this is so that as we do that dry brushing, as we catch surrounding details, it doesn't matter at all because we've not yet blocked those in. And what we should do is first of all reestablish the original color that we used. So in our case, that's going to be marine blue.
Then after that, we'll do a lighter dry brush using a lighter shade of blue. So here I'm going to use some alisium blue, but we'll start out with marine blue. And to do this, I'm going to be using a small dry brush from Citadel.
So one of the more regular chisel shaped ones here. And with this, you just need a bit of paint on the tip of the brush. Get some tissue and use it to work the paint into the bristles there.
Like that. And then just gradually move your way along removing the excess paint from the brush. Need to carry on until we're at about this sort of point here.
And then we can start applying it to the miniature. And this is going to be a fairly soft dry brush. So what we want to do is approach like this and apply the paint in a rounded motion which if I go quite slowly you can see it's kind of like that.
So you're being quite heavy with the bristles. And the idea is that so the paint catches the flat areas. But because we're moving quite quickly, it doesn't fall into the recess detail.
So by doing this we reestablish that original blue but we keep the shading from the black wash. Once you've reestablished that initial blue, we can then move on to a lighter shade of blue. So here I'm using some alisium blue, which is again set up as a dry brush, but I've made sure to remove just a bit more paint.
And this time it's more of a light flicking motion for the application. So if I go slowly on the head just here, you can see I'm being very gentle just touching the miniature, which the tip of the bristles essentially just flicking back and forth because this way instead the paint's going to be catching the sharper edges and corners. And with that done, you can see now we got some nice highlights there on the blue power armor.
So, it's time to move on to that second phase, which is to paint in all the surrounding details. And what we'll do is start out with all the ones that can share a black wash for the shading. So, the first of these will be a black.
And again, we can use an off black here that we can shade down with the black wash. So, here I'm going to use some death reaper. Then, once that's done, we can move on to the silver.
And here, I'm going to be using cir once again. But we'll start out with the black. So, here I'm using death reaper.
And to apply it, I'm going for that medium layer brush from Citadel. And with this, we just need to get some thin down and under control on the brush. And then it's time to start picking out all the joints in the armor to begin with.
So, for example, on the back of the miniature, we've got these joints just here on the backs of the legs. Just want to block these in entirely, but also keep an eye off any leather, such as the holster for his pistol and the casing on his weaponry as well. And once you got all the black details, we can then move to pick out all the silver details, too.
And for this, I'm using circuit silver still being applied using the medium layer brush. Once you finish base coating those two colors, we're now at a point where we can apply a black wash once again. But this time, rather than just painting it all over the blue armor, instead we need to apply in a much more controlled fashion over the two new colors.
So, the off black and the silver. Now, again, I'm going to use some Oblivion black wash. And this time to apply it, I'm going to use the medium layer brush for that control.
You don't need loads and loads this time. Want to load up your brush, keeping it fairly controlled with a loose point on it. And then it's just a matter of painting it directly over the top of both these colors.
So, for example, around here, just going to wash it straight over that silver and the black up here. Now the wash is dry, we can move on to the next selection of base coats that are all again going to share the same color wash. And we'll start out with the gold.
And here again, I'm going to use some dragon's gold. Now with that done, we can then move on to the purity seals. So for the wax, this time we'll use some sanguin scarlet.
So a nice deep red to get a good base coat there. And then for the parchment, I'm going to use some skeleton legion. Now for the wash for all of these, what we want to do is try and keep it efficient.
So I'm going to wash all three at the same time with the same color. And the one that's going to work best over all of them is going to be a brown wash. So here I'm going to be using some battle mud wash, but we'll start out with the gold.
And to apply it, I'm going for my small brush. So as I mentioned, it's dragon's gold here, and I'm going for the small brush for lots of control. So it is the small way from Citadel.
And what you need to do is just get this thin down and under control on your brush. And then it's a matter of picking out all those decorations. So first of all, there's going to be the shoulder pad rims.
So just around here, and then also the design on the chest. Just really take your time on this one, especially as you go behind the gun. With the gold base coated, the next thing to do is base coat the wax of any purity seals with a good strong red.
So here I'm using some sanguin scarlet applied again using the small layer brush. And with the wax done, we can then pick out the parchment. So here I'm using some skeleton legion again being applied using the small layer brush.
And then finally, it's time to apply a wash over all three of these new colors. And here we want a brown wash. So I'm using some battlewood wash.
And to keep it under control, I'm sticking to the small layer brush because we just need to keep this on these new colors. So the gold, the red, and the bone color for the parchment. And with the wash now completely dry, you can see we've got shading on the gold and on the purity seal down there as well.
So there's just one more thing that we need to paint the miniature and that is those red eye lenses. And once again, all we're going to do is use a touch of some demon red here. So nice bright red.
Again, go back to your small brush for this. So I'm back to the small layer and all we need to do is just get some of this thin down and under control. So down to around about that sort of consistency just there.
Then remove the excess off the brush, bringing the bristles to a nice point. And then brace your hands to be as steady as possible and just introduce a small amount of this color into the middle of the recess for the eyelids. So just in here as a line across the center.
And with that done, this miniature is now ready to be based. And once again, if you want to apply any transfers, now's the time to do it. And so, as you seen, doing this method is actually very straightforward.
It's really satisfying as well. And even though we used an ultramarine as our example for the color scheme here, you can adapt it to just about any chapter that you want to paint. The trick is just to start out with that main power armor color and then do your shading on there and then dry brush it to really bring it up to adding some highlights.
And once that's done, it's just a matter of working around all those smaller details and just being as neat as you can as you block them in and apply some wash over the top. So there you have it. three different methods of speed painting your Ultramarines for Games Workshops Warhammer 40,000.
Now, all three are really good and interesting, but lead slightly different results, but at the end, they definitely all look like Ultramarines, but they do have strengths and weaknesses. For example, with the first one using DIP, this one's definitely the fastest to paint. But also, you do need to be careful when you're actually using the dip because it's very easy for it to pull too much and clog up details in particular on a primary space marine around the gorge because it really can trap a lot there.
So, watch out for that. Now, for the second one with the slapshot method, this requires a bit of practice to get that initial dry brushing consistent across your force because the other colors really build upon that. And when you're applying the contrast paint, you do need to be careful.
But the result is very nice and vibrant. It looks really good on the tabletop. But it's for these reasons that the third one is my favorite because it's very easy to get it nice and consistent.
And whilst it is a little bit duller than the other two, it's very easy to highlight on top of that if you want to. So, I hope you've enjoyed this and you found it interesting. And remember, even though we've shown you three different methods, you can definitely cross them over a little bit to get some interesting results.
So have fun and we'll see you again very soon.