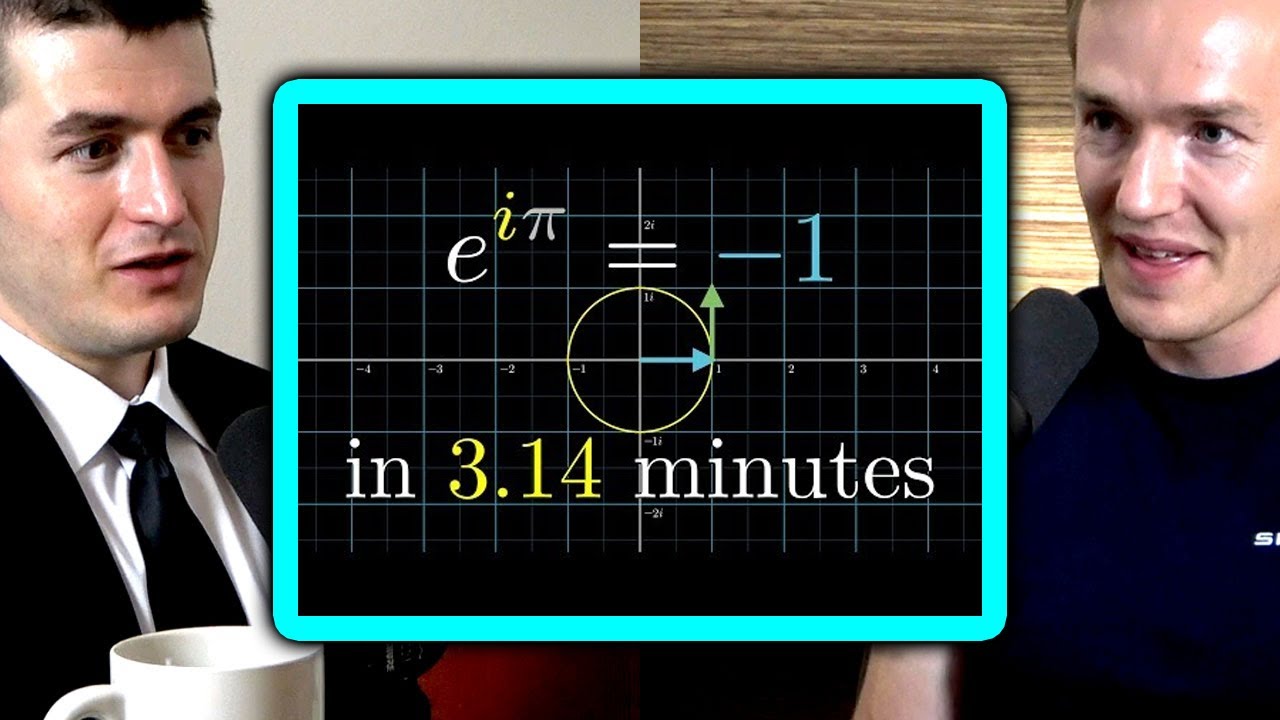
Hey! Did you ever wonder how hard it would be to create your very own animated videos for illustrating mathematical concepts? Just like, for example, Grant "3blue1brown" Sanderson in his videos?
Do you maybe even have a little bit of knowledge in Python? In this case the Python animation library Manim might be what you are looking for. Let me give you a very quick example of what Manim can do in just a very few lines of code.
You might be aware of the fact that the unit circle in the complex plane can be parameterized using the complex exponential function. Lifting the corresponding curve into three dimensions, so that it becomes a spiral, then allows us to see the exponential functions real and imaginary part, given by cosine and sine, respectively, simply by changing our perspective. In my opinion, animations like this make all sorts of mathematical objects or results much more approachable and easier to grasp.
This is why I want to help you learn how to use the library to create insightful *manimations* like that yourself! You might wonder, "Who is that guy even, why should I listen to him? ".
You are right, I have not introduced myself yet, and I should tell you about my background. My name is Benjamin, when it comes to mathematics I really like counting; do combinatorics and I actually did a PhD in that. But, more importantly, I am currently one of Manim's maintainers.
In other words, I've been working with Manim for a reasonably long time. As a hobby I help out when it comes to fixing bugs, developing new features, reviewing the contributions of other volunteers, and making sure that we push out new releases from time to time. Now, with that out of the way, let's get to business!
The first part is about, well, important things you should know before you start. So probably the most important thing to know when you're getting started with Manim is that there is not one single version, but there are multiple, **incompatible** versions of Manim floating around. And it's quite easy to get lost in, well, some outdated tutorial or something that uses the old version instead of the one you should be using, namely, the community maintained version.
This is what I mean when I say "Manim", and this is also how the package on the Python Packaging Index is called. It's just "manim": no manimCE, no manimgl, these are different versions. So when I speak of Manim, I, in most cases, refer to the community maintained version.
The other version that usually pops up quite frequently is the original version, 3b1b/manim, or manimgl. When you see code, you usually see a reference to manimlib -- this is not the community maintained version. That's the version that Grant has written originally and which he maintains himself, more or less.
For all practical purposes however, it's recommended to start working with the community maintained version. Simply because it is much better documented. The original version, there is some sort of documentation, it is pretty bare-bones.
But the community maintained version has proper documentation. And yeah, needless to say, this video also is about the community maintained version. Which brings us basically already to the next question: namely, how do you actually install Manim?
I won't go into details, and this is not a step-by-step installation guide for Manim. There are two ingredients basically that you need: on the one hand, you need a reasonably recent version of Python; everything from 3. 7 and up is sufficient.
And on the other hand, you need FFmpeg, which is a command line tool for working with videos. Manim uses that to stitch together several renderings to one big video. Optional, but very useful is a LaTeX distribution.
For Windows, that's usually MiKTeX that is recommended, and for other platforms TeXLive is the way to go. There is also MacTeX on MacOS, but yeah. Details for all of that can be found in the documentation, and it is most important that if you say, well, I don't really want to read, I'd rather watch a video to guide me through the process -- I'd recommend against that.
Because most installation videos are simply outdated at this point. The community maintained version has moved pretty fast at some stages and most videos were created before that, and nowadays the process is not that complicated. So my recommendation is: go to the documentation of Manim, we can go there right now and have a look.
You see there is this installation section right here, head over there, select the correct operating system and then just follow the steps. In most cases this should work as expected. So that is regarding installation; as I have said I won't really go into details here much more.
But something else that is very important is: you should know where to find further resources. Pretty much all resources that the community surrounding Manim has are listed in some way on our website, which is just manim. community.
We can visit, it looks like this currently, which is pretty nice! We even have some examples that you can view right on the page, but we'll get into code in a little bit. If you are specifically looking for places to get help with problems, for example installation issues which tend to appear from time to time, the number 1 resource in that regard I would consider is our Discord server, which you can find at manim.
community/discord. Reddit is also sometimes quite useful for asking for help: there is a Manim subreddit which you can ask your questions in, all of our development happens on GitHub, and there is the GitHub discussions thing where you can also post questions and will get answers usually by developers or other people who are interested, which is also helpful from time to time. The most important thing when looking for help definitely is: make sure to post your entire code that you are trying to run, and then all of the output that it produces.
If there is an installation issue, exactly describe which steps you've been taking, post the input, post the output: we need to see these things in order to help efficiently. Don't worry about if it's a long post then, we usually look at the details that are interesting for us to figure out the problem, and then help you as efficiently as we can. Which brings us slowly a bit closer to the coding part of this video.
Specifically for this video you don't need to have a Manim installed locally on your PC because what I'll provide in the description of the video is a link to an interactive worksheet where you can run the examples that we'll go through in the rest of this video online in your browser, you don't need anything else set up, you can just use your browser and do everything from there. Link for that is in the description. Okay!
It's time to actually look at code now. I want to start with a first rather simple example. Before I open up a code editor and, well, just go ahead, I do want to sort of do this still in this presentation style.
We'll cover this line by line, and in the end I'll show you two ways how to turn this code into the actual video in the end. So let's get into it. The first line, it's the line where we import the library.
Then, the next relevant line is the line where we define a class. Now, Manim's design basically works like: you write your animations in classes. Every class will have a particular method, the so-called construct method, and within this construct method, your animations will play.
Or you're going to write your animations in this particular construct method. You don't need to know too much about object-oriented programming in order to understand all of this, conceptually just think of the class as basically the object representing your canvas and the construct method is more or less a step-by-step guide how your animation should be constructed. Looking at this again, and in case you do understand something of object-oriented programming, then you will see that we define a class of the name FirstExample here, and this class inherits from Scene, and Scene is a class that Manim provides.
So Scenes are these special sort of canvas-like structures where our animations will be created on. And well, I've already mentioned the special construct method, which has one argument, self, and you can think of this "self", if you're not familiar with object-oriented programming, as the scene. So if we then use some command self.
something, it usually means the scene should now do something – which makes sense and is actually quite readable in the way that it is written here. Okay! Let's now see what the next two lines do, five and six.
I define two variables, one is called blue_circle, and the other one is the green_square, and well, it would be pretty disappointing if those were not a blue circle and a green square. Indeed, we create some Manim objects, or Mobjects for short, one is a Circle for which I pass the color blue, and a property that is the fill opacity of 0. 5.
You can see that these capital letter constants, BLUE, GREEN, you'll also see RIGHT in a moment, these are also provided by Manim. Just as the classes Circle and Square are. Those are Mobjects, those are the things that you put on your screen.
At this point we have created two variables containing, well, a blue circle and a green square. What has not happened yet is: those are not added yet to our canvas. You are basically holding them in your hand right now, and they are available for adding onto the canvas, but this has not happened yet.
This is very important! Just instantiating these Mobjects does not automatically add them to the scene. And this is actually quite useful, because you want to decide when exactly the objects should appear on the screen.
This line is about positioning. It tells the green square that it should be placed next to the blue circle. Something you have to know in this context, whenever you create a Mobject, it's center will be placed in the center of the scene.
We'll see how that looks in a moment; in your imagination you can see that the green square should now be right of the blue circle. Blue circle in the middle, and the green square right of it. And now in the very last line of our construct method, we finally add the Mobjects to the screen.
This is the step that actually takes the things that you've been holding in your hand, and puts them onto the canvas. Asking Manim to render this scene now will produce an image which looks exactly like this. How exactly can we ask Manim to render this scene for us?
Well, there are two main ways that you should know about. You could either do it the "normal" way, I'll show you an example right up there; where we take this code that we just discussed, we write it in a Python file, and then run the Manim command line utility from the terminal. In this case it would be manim -qm -p, then the file name, and then the name of the scene you want to run.
And it will render the file in "medium" quality, that's what the -qm stands for, and then preview the output which is why we have this little -p. The other way how to generate output is if you are using Manim from a Jupyter environment, like the interactive notebook that accompanies this video also; link in the description. There we – again, example above – we import manim in one cell, put the code for our scene in a different cell, and then in the same cell where we have the code for the scene, we add on top an instance of this manim IPython magic command, which in this case reads as %%manim -qm, and then the name of the scene we want to render; -qm in this case again: medium quality.
We don't need the -p flag because the output is automatically displayed, so we don't need to take care of that separately. To make sure we are not moving too fast, here's a short recap of the things we have already seen, and the concepts we have encountered: First, we have met the Scene; the Scene is basically the animation canvas where all of the things that you want to display are placed upon, and then arranged somehow, and then eventually also animated. We have encountered Mobjects; Manim objects: in this case we have seen Circle and Square.
There are many many others, there are like Axes for plotting functions, you can have a number plane with grid lines, you can have a Table, you can have a Graph – and many other things. We have also seen already that when we create Mobjects that we can give them some sort of properties; in particular we have seen color and fill_opacity, but you can imagine there are lots more. Especially if you're looking at more specialised Mobjects.
We have also seen some global constants; in this case we have seen colors BLUE and GREEN, and some directions. In the last example there was only RIGHT, but you can imagine there is UP and DOWN, LEFT as well, actually also IN and OUT, but those are not as important right now. You might wonder, well, now I know that there are these constants and mobjects and I know these now, but where are all the others, and how do I know what exists?
That's very important, we have in our documentation there is one section called the reference manual, and the reference manual contains all the content, all the functions, all the classes that Manim ships with. If you are looking for something, then go to the documentation and use the search function, it will bring you to the corresponding section in the reference manual – where, hopefully, there is some documentation for whatever you are looking at. Now, let's do a slightly more advanced example next.
I have opened a file, first_tutorial. py, and I've added the import line already. So we have seen Circle and Square, two rather simple Mobjects, already.
Let's try and look at something a little bit more exciting maybe. So I'll create a new class, SecondExample. Again, this should inherit from Scene.
We write the construct method, and now I want to actually plot a function. Meaning that I'll need some sort of axes. And actually, the corresponding mobject in Manim is called Axes.
We can specify, if you have set up Visual Studio Code correctly it actually lets you know the signature of the class, which sort of parameters you can specify, and in this case I do want to specify an x_range and a y_range, so the range of x-values and y-values that the axes will contain. So we have x_range, let's maybe go from -3 to 3, and y_range, also -3 to 3; not very creative. Let's see.
And let's add it to the scene and look what happens. So self. add the axes.
I save the file, and next I render the thing. So, I call Manim, medium quality, with the preview, my file is called first_tutorial. py, and the scene is called SecondExample.
And what happens is: yay! We generate a Mobject which looks like a set of axes, an x-axis and a y-axis. Alright.
Now to these axes I want to add some sort of plot, which I can do by saying well, now I want a variable called curve, this should have my plot of some function. And to plot it I can use the plot method of the Axes actually, so I can say my axes. plot, ax.
plot. And for specifying a function I could either write a function outside somewhere, define an extra thing, and then pass this here, or I could write an inline function; and in Python inline functions are specified using the keyword lambda. So I say lambda x, x should be mapped to, I don't know, something funny, let's put (x+2)*x*(x-2) and maybe that over 2 so that it fits the screen.
Maybe, let's see. And I can also specify the color, let's do that. The color should be, let's put RED.
Alright, now I have a variable containing the curve and I need to add it to the scene for it to be visible. So, I say, I add it to this add-statement here, and I find that after rendering it again, what do we see? Excellent!
We have the plot here. Great! So, now what could we do next; let's get even a little bit more fancy, I want to, let's open it again.
I want to plot the area that we see here under the curve. How could we do that? Well, there is fortunately, we could look it up in the documentation and search for area and we will find that our Axes also have an area method, or a get_area method actually.
So I can define a new variable, area, which should be ax. get_area. We want to get the area, so the axes should get the area under the specified curve, so we need to pass that again, and then we should specify in which range we want to have it.
That's the x-range in this case, and I want to have the area in the interval from x = -2 to 0. And, let's see what happens if we add the area now also to the scene. Save and render – and there it is!
So now we have created a cute little scene where we have an axis plotting a function, and for this function we have even visualized the area under the curve in some specified interval. Cool! So, there is one pretty substantial topic which we have not touched yet at all -- which is animations, actually.
And that's what we are going to do now. I do want to say a few words in theory again, before we start actually coding. One, what is the general mechanism?
We have seen that we can add our mobjects to our canvas, to our scene, by using the add method of the scene class, which adds the mobjects immediately to the screen. But what other mechanisms are there to well, play animations for example? One thing that exists is Scene.
wait, so we would add in our class a call to self. wait, and then maybe specify some amount of seconds. This creates a pause in the video, in the animation, where nothing happens.
So if you go back and do that in the example that we've seen before, in our static image, you would see that you would suddenly create a video, but nothing would happen in that video. It would just be the image you've created anyways. And now the more interesting thing is probably Scene.
play, so the play method, which plays animations. Now what are animations? Animations in Manim are, just like Mobjects, or the Scene, a special type of object.
For example, there are a few animations that can add mobjects to a scene; two of those are the Create animation and the FadeIn animation. There are animations that can change mobjects, so transform one mobject into another mobject; this is the Transform animation. There are animations that emphasize certain mobjects, for example the Indicate or the Circumscribe animation.
And of course, if there are animations that add mobjects, there are also some that can remove them again; in this case it is Uncreate and FadeOut. Okay, now I have thrown a bunch of names at you, let's go back at our example and do some coding. Now we want to animate things here, so we could start for example by making the axes create themselves on the screen, so we want to have a nice Creation animation for the axes.
Let me delete that, and let me add self. play. We want to play the Create animation for the axes.
And just look at what happens if we do that. So let's go ahead, I render with the same command as before, so manim -qm -p so that we have the preview of the file, which is first_tutorial. py, SecondExample.
And go! Something happens, a video opens, let's play it. Nice, we have a one-second video now where the axes are created!
Okay, we want to see more. And sometimes it is also good to add a little pause at the end of the video so you can look at things before the video player closes itself, for example if you use vlc I think it does that. So what I usually like to do is I add self.
wait for like 2 seconds in the end so that the video stands still for like 2 seconds in the end. We have the creation of the axes, let's now also add self. play, maybe the curve, so Create(curve) and see how that looks like.
Fancy. So, first the axes are drawn and then their curve. What should we do if we wanted to draw axes and curve at the same time?
Well, fortunately you can pass multiple arguments to the play call that you have right there, so we can just take the thing from the second play call and add it to the first play call. We will find, when we run that again, something is rendered and you see that the curve, let's play that again, that the curve and the axes are animated at the same time. Both appear at the same time.
Nice! Let's use a second animation for making the area appear, so I play; this time let's FadeIn the area. Alright, let's go and render that.
Okay, so first the axes appear and then the area fades in. Very nice! I would like to make the creation of the axes and the curve a bit slower, because right now this happens very fast, and there is a simple keyword that you can pass to either the play call or the animations themselves, however you choose.
You can add the keyword run_time equals, let's put 3 seconds; if you put it to the play call then it will be passed to all of the animations in the play call. You could also specify different run times for the animations in one play call. So, let's try to render this.
Okay now, exactly, the axes and the curve take 3 seconds now to create. So you see it's substantially slower than before. Let's try also what happens if we try and pass different run times to the Create arguments; let's put run_time = 2 seconds for the axes, and 5 seconds for the curve.
Now the curve should be really, really, really slow. Yeah, that it is. So that is how you can control the play time of animations in one of these Scene.
play calls. Okay, we have the FadeIn thing and what else. .
. that's all that I wanted to show for this particular example. Let's do another one where we animate some things.
Let's go ahead and create a new class, this time let's call it SquareToCircle, because we want to have a look at what happens if we transform one mobject into another. So let's do that; again, it has to inherit from Scene, we need the construct method, and we create, just as before, a green square, which is a Square, and the color of the square should be green, otherwise the green_square name wouldn't really be fitting. We have a fill opacity that we can set or not, doesn't really matter.
I put 0. 5, because I like that. And, first step, I want to create the square; self.
play – maybe we use a different animation yet again, this time I want to use the DrwBorderThenFill animation for the green square. We'll see it's slightly different to the Create animation that we've used before. Then we look at that, that's already enough work for something to look at.
SquareToCircle is the new thing I want to render, let's go. It's rendering, and here is the animation. So it does exactly what the name of the method suggests, it first draws the border of the Mobject just like the Create method, but then instead of sort of bringing the fill with it, it fades in the fill afterwards.
Okay, so we have that, and now I want to create a second mobject, let's make it a blue circle again, because why not. blue_circle equals a Circle, the color should be blue, and again fill opacity doesn't really matter. Let's again put 0.
5. And now we play the transformation. We transform the green square into the blue circle.
And then we maybe wait at the end of the scene a little bit. So, self. wait, let's put 2 seconds.
Okay, let's render and see what happens. There it is, and first the square is drawn, and then it morphs into a circle. Pretty neat!
One thing that we haven't looked at yet from all the animations that we have mentioned previously is the Indicate animation, so we should see what that does. And then also the destruction animation, so the FadeOut etc. , that we should also briefly investigate.
And while doing that we already, we will actually encounter one issue that Transform has; let's see what happens if we try to FadeOut the blue circle now. Because our green square has morphed into the blue circle, right? So self.
play, FadeOut of blue_circle. What we would expect is that the scene would be empty now, right? So let's try it.
Here is our animation. Square, into circle – and then you could see the thing light up somehow, and then become dark again. But the circle is still here, why does that happen?
That's actually a weird thing that Manim does, unfortunately, the default behavior of the Transform animation is that the first argument becomes the second argument. Which means that now after this line here, after the Transform for the green square has been played, the variable named green_square contains the blue circle. So, if we want to keep this as-is, we would have to fade out actually the green square, which is a bit ridiculous, but let's do it and see what happens.
Green square fades in, morphs into the circle, and then the circle properly fades out. You could work around that by using a different transform, the so-called ReplacementTransform, so this is a different transformation that actually replaces the original mobject with the target mobject, meaning that after this the blue_circle will remain. So if we try now to fade out the blue circle, just like we did earlier, then we'll see first the square, morphing into the blue circle, and then the circle fades out properly.
So this is the difference between the Transform and the ReplacementTransform animations. We might fix this at some point. Okay, one last thing.
Let's try and see what the Indication animation does, so let's self. play, one of them is actually just called Indicate, the blue circle. Could have also just looked into the documentation, but well, trying things out yourself is much more fun I suppose.
First the square, then it morphed into the circle, and then you saw this little flash, this little increase of size of the circle before it faded out, that's exactly what Indicate does. It colors some mobject yellow and makes it a little bit larger for a while, it zooms in and thus makes it pop out of the screen. Which is pretty useful to draw the attention of the viewer to some particular part of the screen.
Okay, I'll leave it at that for the moment. We'll continue our exploration of Manim in the next video. Until then, I want to know from you: do you think this was helpful?
Should some of the content you have seen in this video maybe even go into Manim's official documentation? If so, which part? Let me know in the comments below!
Don't forget to leave a like if you enjoyed this, and subscribe for more content like this to come. Thanks for watching, and see you again soon!